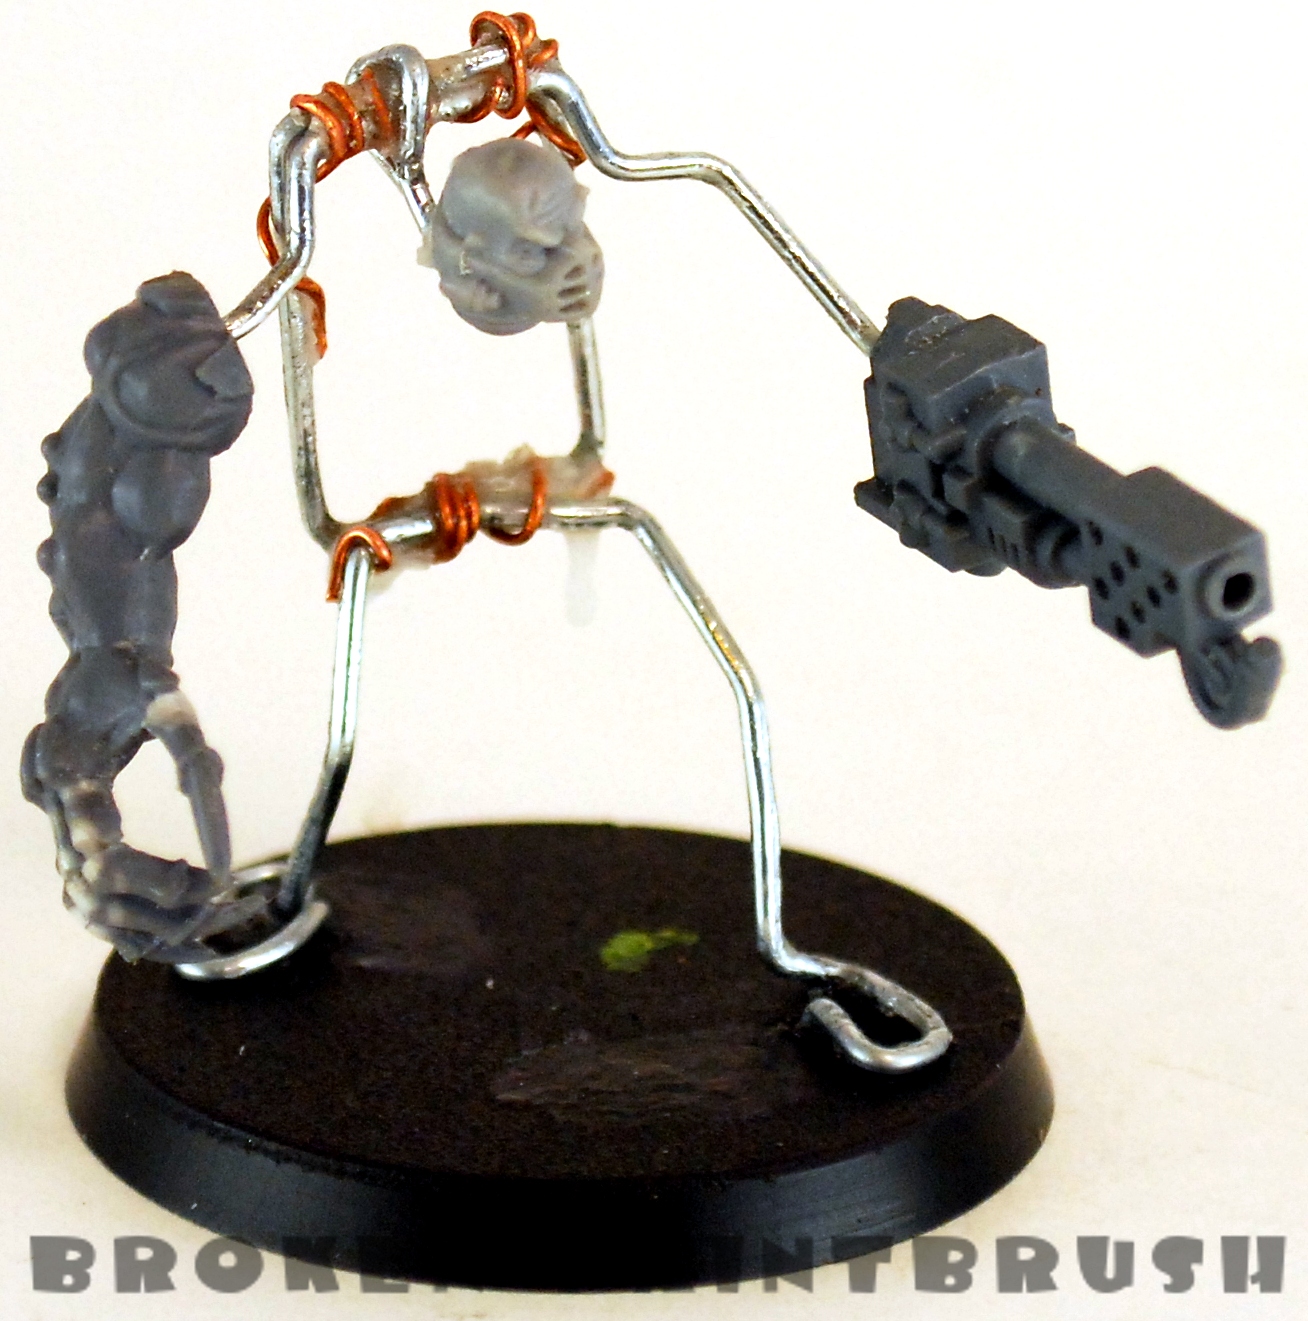
As promised, here is some build up shots of my second obliterator. One of the things I wanted to change on the second guy was adding more bulk to the body. I wanted it to look closer to a full terminator suit rather than a scarecrow with a robe. I started with bending a couple paper clips to create the wire-frame with proportions of a terminator, including the width and hight of the square body section. I added the arm bits and the head. The coper wire was used to hold different paper clips sections together.

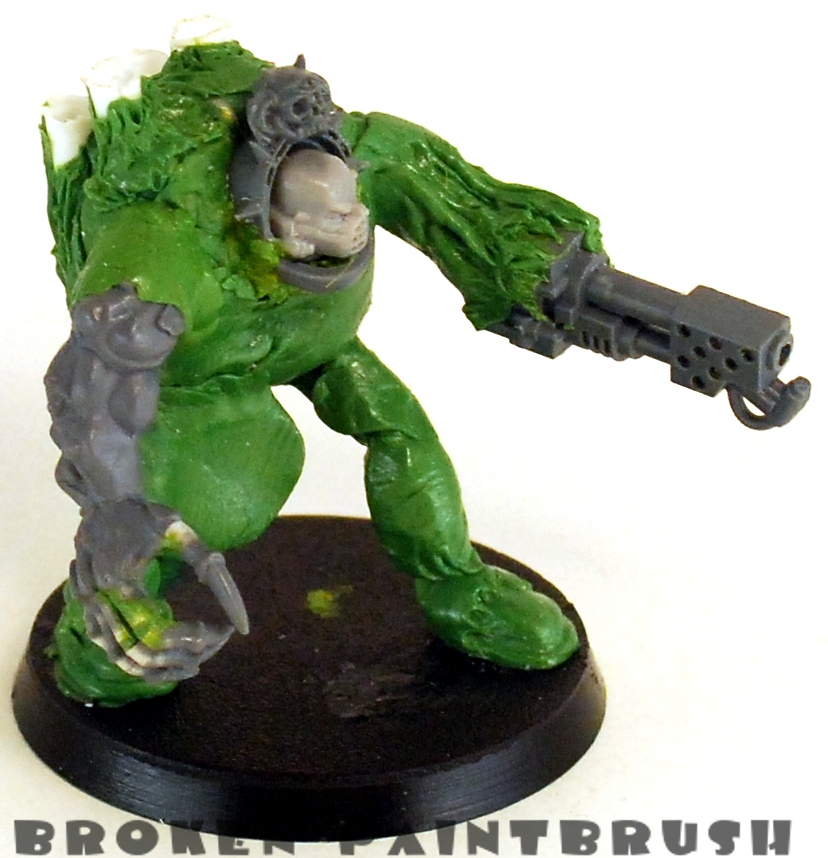
I then started to bulk up the wire with blobs of green stuff. I added in some bitz around the head from an extra terminator front (from the lord box I think). I also added some exhaust pipes to the back using some plastic tubes. The daemon claw hand was cut and bent to close it up a bit, gs was added to fill the gaps.

After letting the first layer of green stuff dry more was added to the legs to create a bulkier area for the robe to rest against including a small flap to help shape the robe. Daemonic flesh was also added to the flamer and the back.

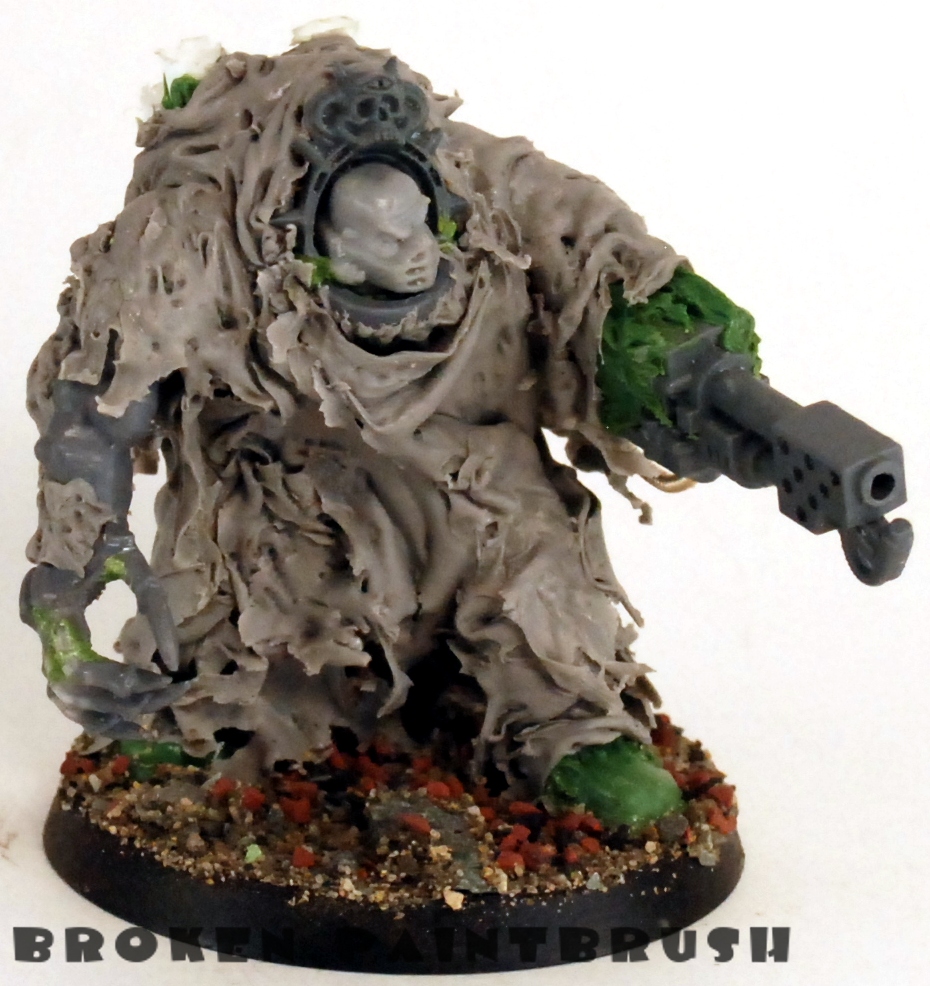
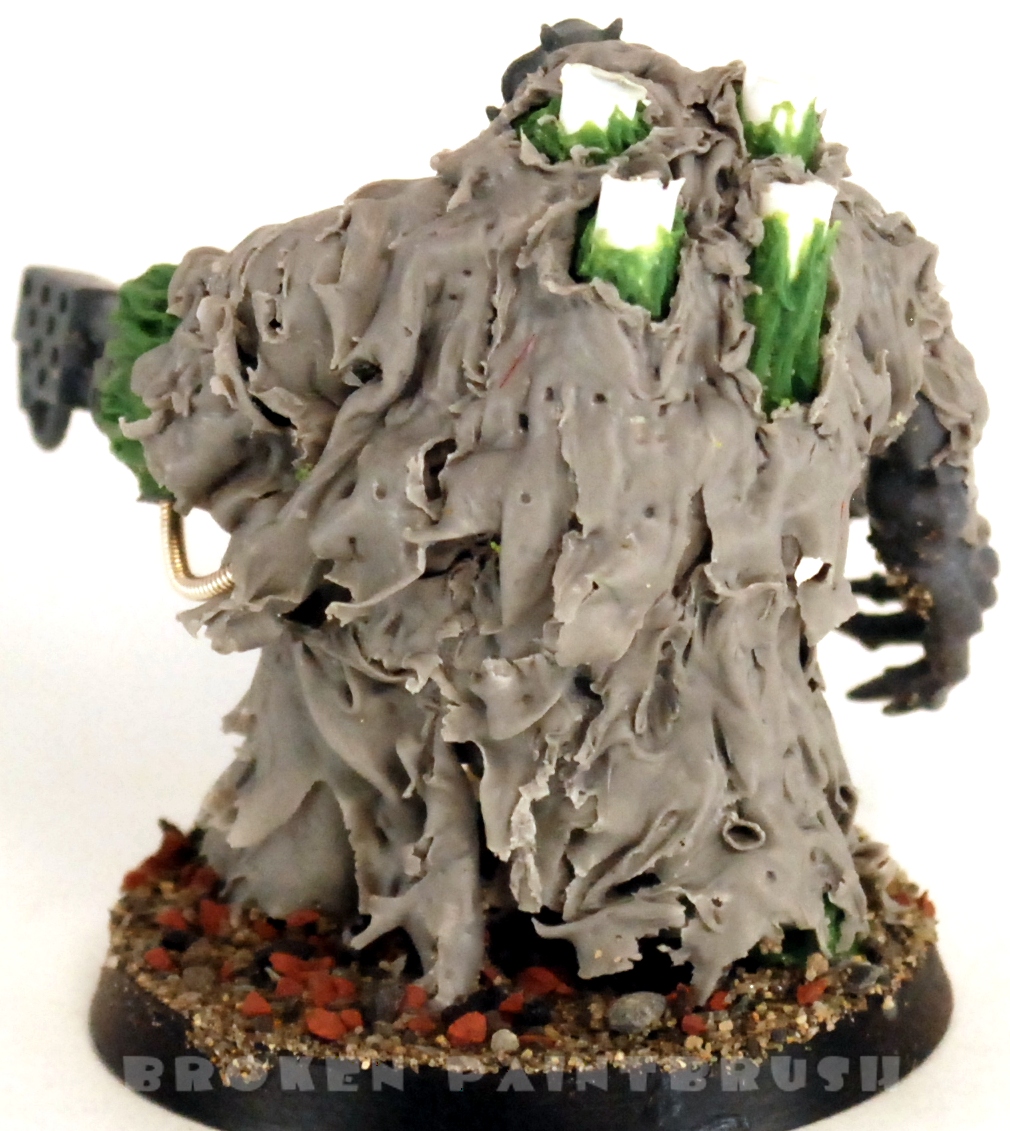
Finally, layers of Procreate Putty was used to create the worn and tattered robe. To create the robe a rolled out a chunk of putty until it was fairly thin. This was then super glued onto the model where I wanted it to connect. I then used a pick to pull out strips and create folds. The next section of robe was then added and blended into the first. This was done over a few separate drying stages, keeping the extra procreate in the freezer to help it keep longer. Some extra flesh was added to the claw arm to tie in the other daemonic flesh.

I wanted to the robe to look almost alive and flowing with the movements of the obliterator itself. I attempted to do this by pulling the tatters in the direction of movement and letting them dry. This is a great advantage of the Procreate over green stuff as it can be moved into place and actually stay there without sagging down.
As you can see in this shot I added a lot of bulk to this obliterator over the previous one and it has nearly the same outline as a terminator.

Next up is primming and painting! Hopefully I can get this finished over the new years weekend!
Comments and criticisms are always welcome
