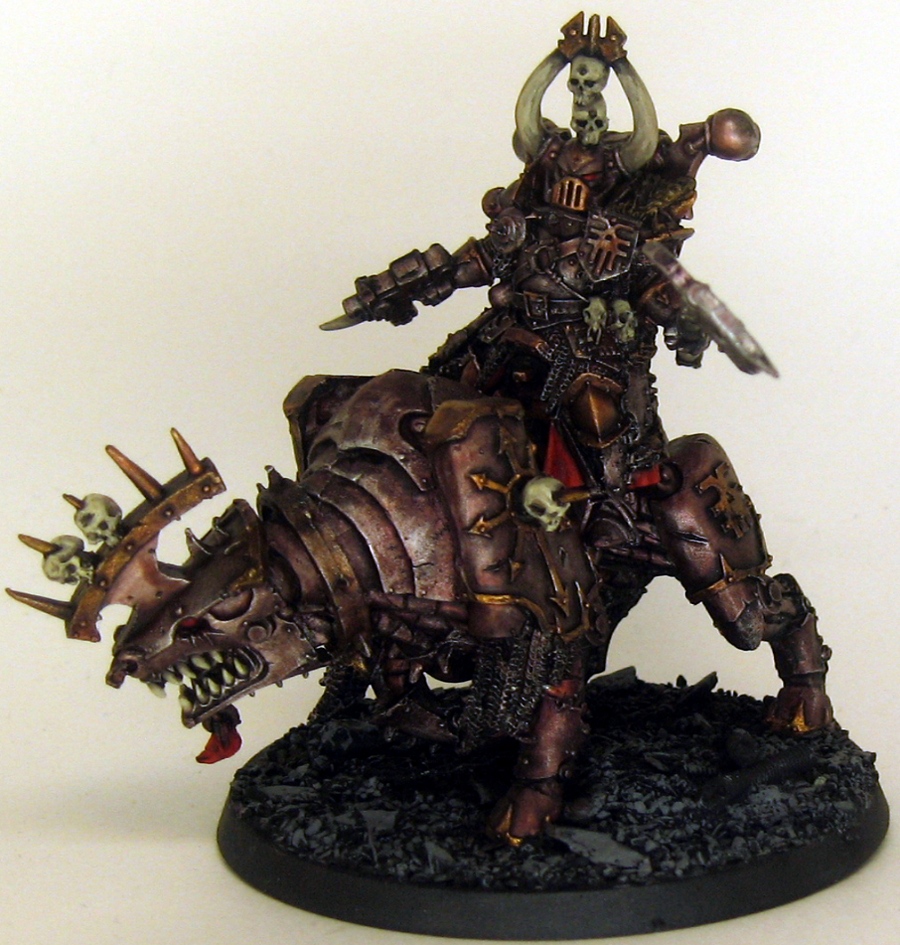
Warsmith on Juggernaut Nearly Done
WIP shots of my Iron Warrior Warsmith on a Juggernaut of Khorne. I have nearly finished the painting and all that is left is some details. See full post for pictures.
WIP shots of my Iron Warrior Warsmith on a Juggernaut of Khorne. I have nearly finished the painting and all that is left is some details. See full post for pictures.
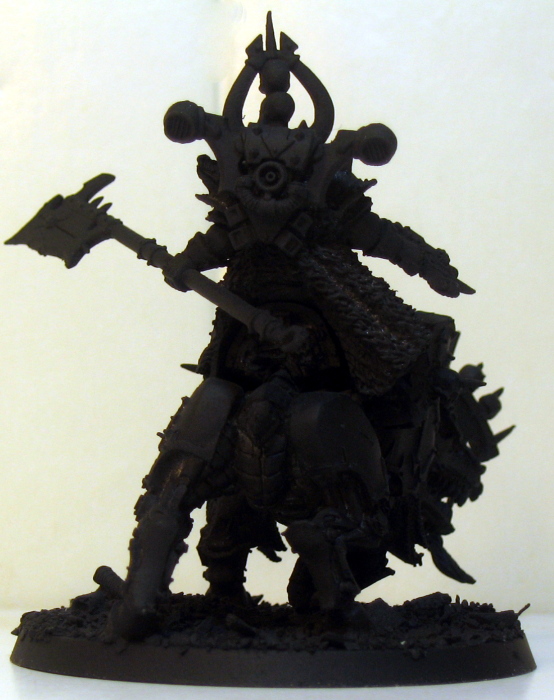
I’ve had this model since Christmas and have been trying to figure out how to turn the WFB Khorne Lord on Juggernaut into a mighty Warsmith of the Iron Warriors. The model as sculpted is a terrific looking model but the challenge was to make it look like it could fit into the 41st millennium. In the end I replaced the arms with CSM arms, added a CSM head and backpack and re-sculpted the cloak to fit the backpack. The power weapon is a combination of a CSM banner pole and a giant axe from the WFB Chaos Knights. The pictures are a bit hard to make out the detail due to the black primer but I am excited to start painting. Work on this will be interleaved with painting my hoard of Traitor Guard but I will continue to post pictures of the progress.
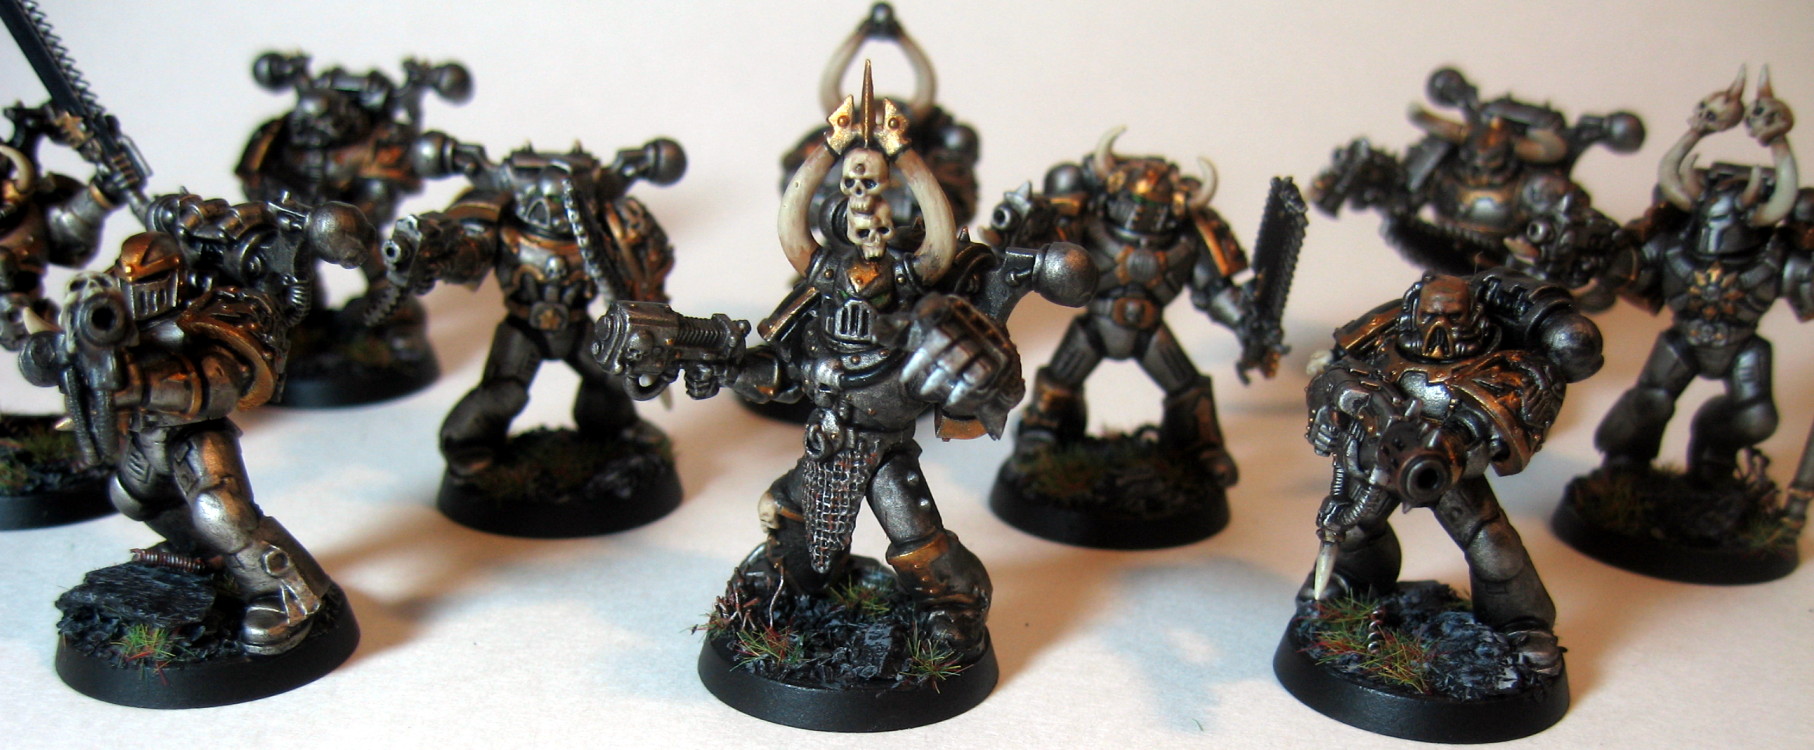
Finished up another troop squad of Chaos Space Marines for my Iron Warriors. This squad is wielding two melta-guns and led by a crazy, plasma gun and power fist loaded champion. Although this makes the champion a bit on the expensive side, he is invaluable when it comes to taking out armored dudes, armored tanks, or monstered fools. Unlike my other troop squad, these guys are fully finished. The icon needs no extra painting and the XIVs are all done. ~created this post a few weeks back but forgot to publish it!
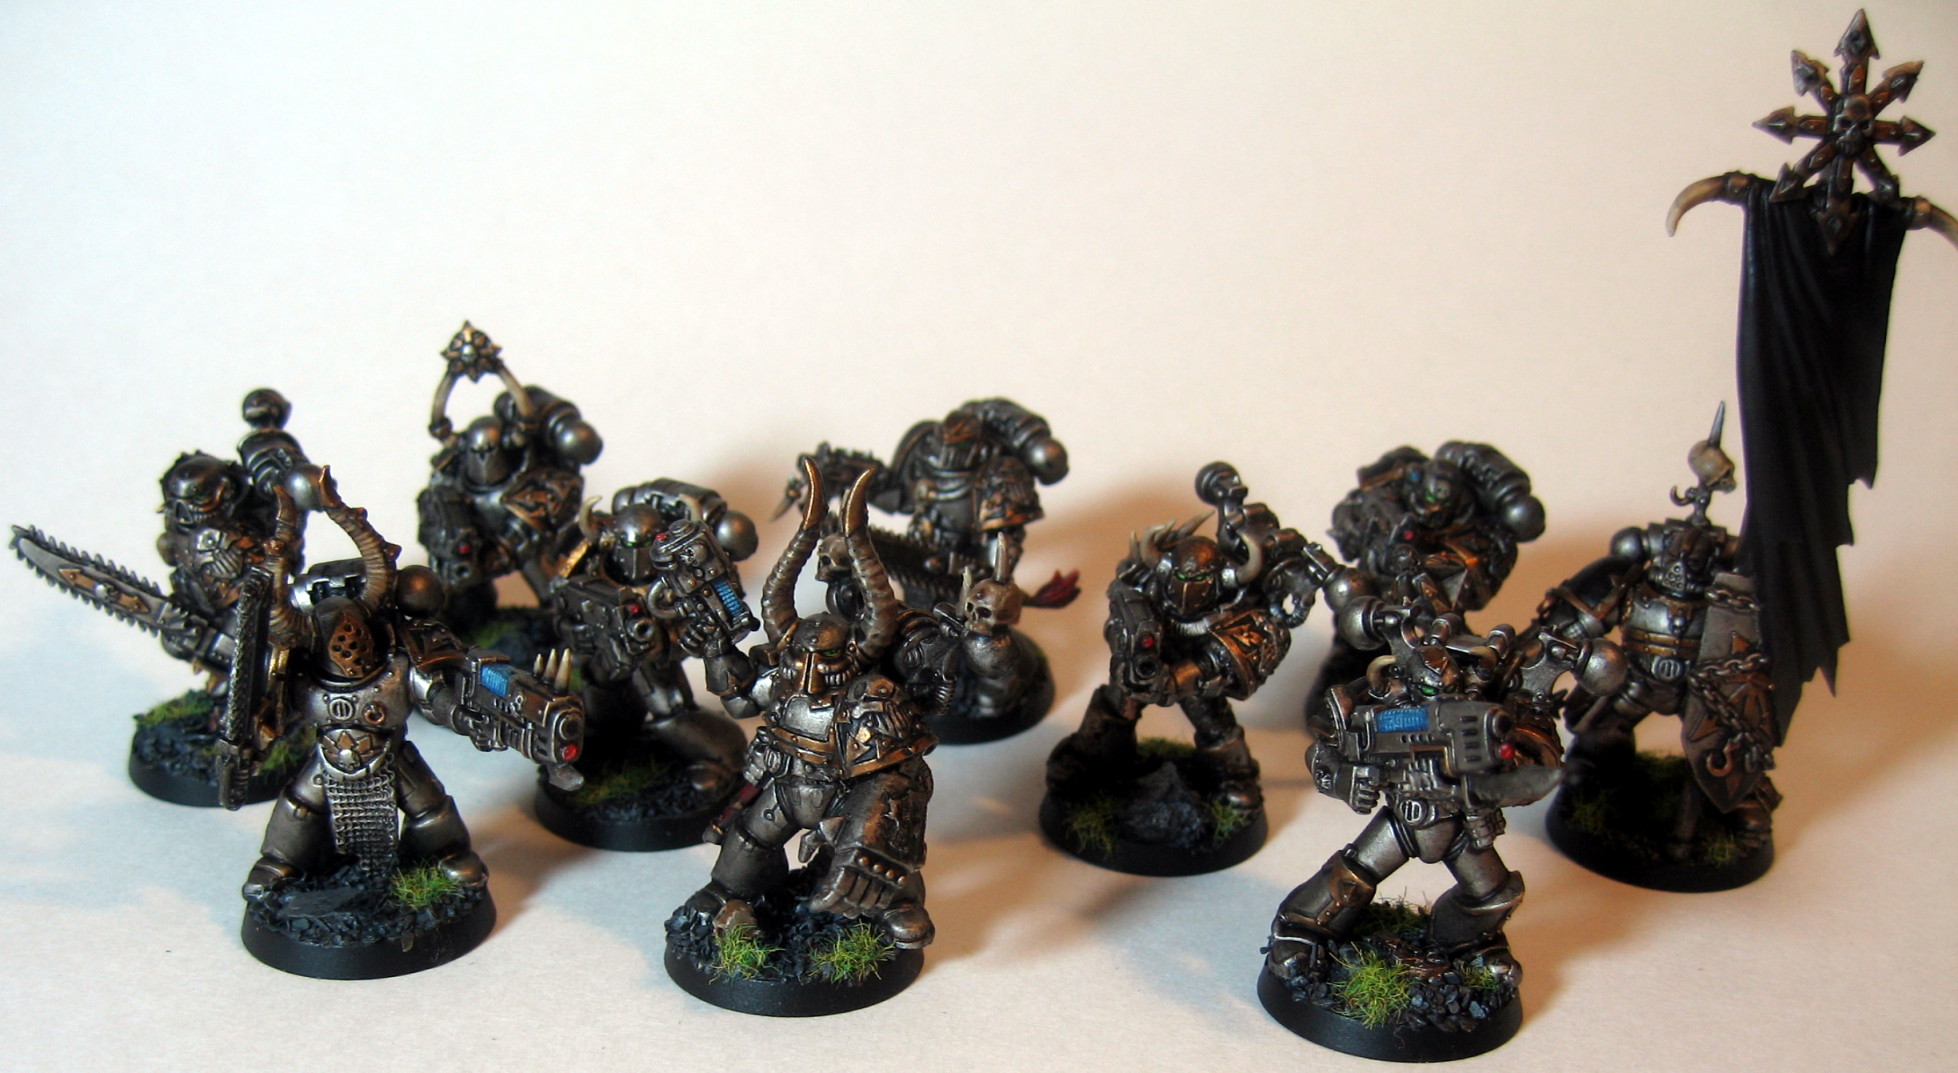
So this squad has been done for a while now, but like some of my other projects, it hasn’t had much love on the picture side. The banner, a few heads and the mace arm all come from the Chaos Knights kit for fantasy, but work well from my marines. This squad is plasma heavy with a plasma pistol and power fist bearing champion and two plasma gun luggin’ fools. Although these guys do a great deal of damage throughout my games, they usually don’t survive. Inevitably I roll a one when trying to blow up the tank to win the game, and fail my armour save. Oh well, they look cool and pack a punch! Although this squad is “done” I still need to figure out what to paint on the banner and add in the XIVs to the shoulder pads. I often field this squad in a Rhino as one of the attacking squads for any capture objectives missions. This allows me to move the tank 12″ up and still fire both plasma …
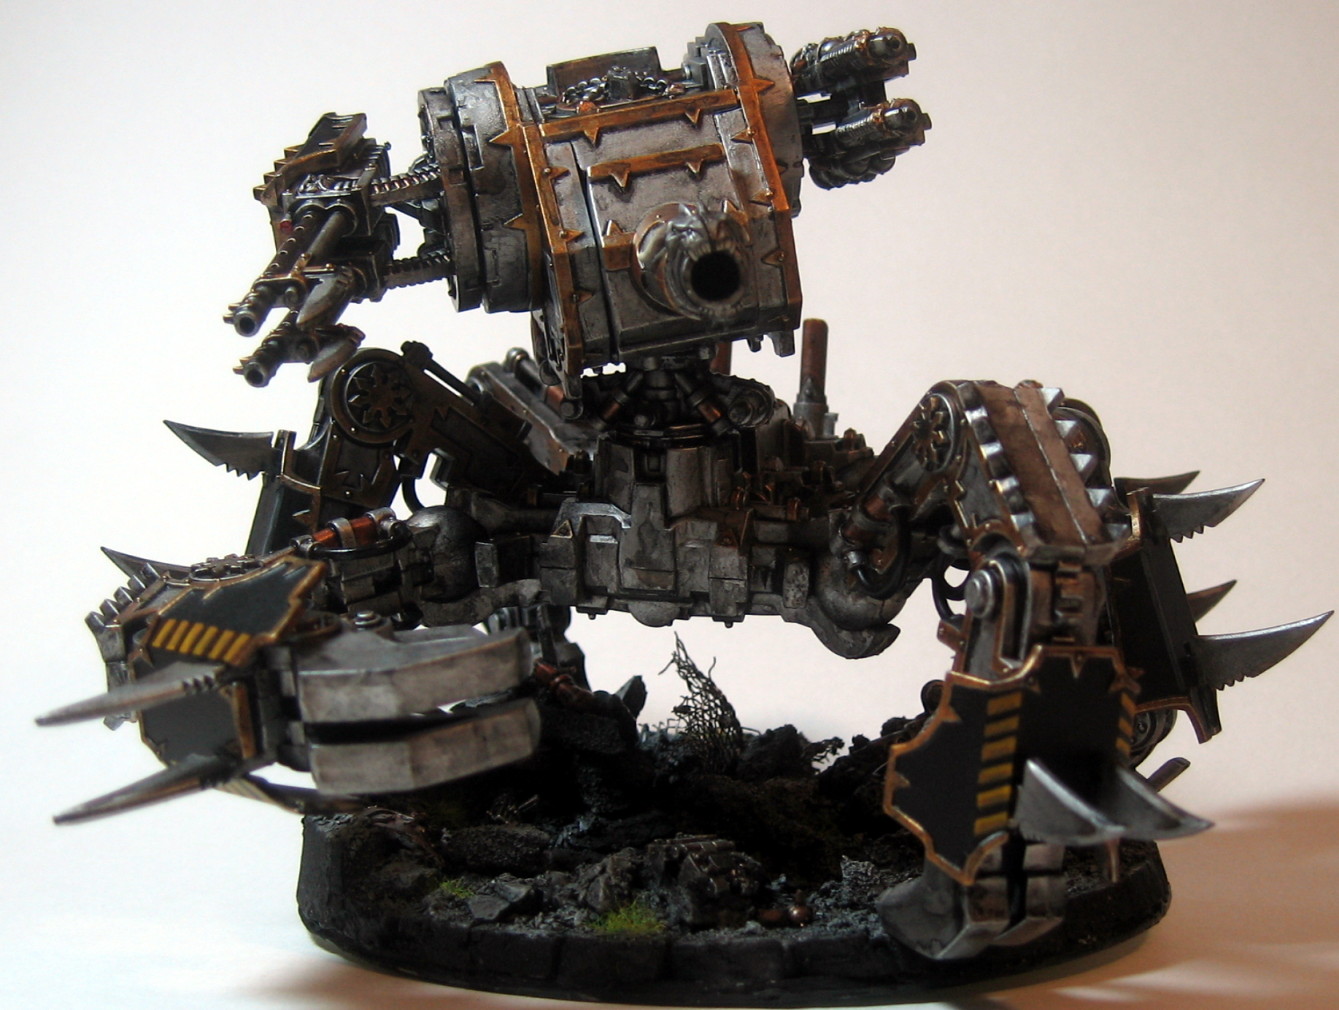
So here are the promised pictures of my WIP Chaos Warhound Titan. The plans were from the bwc-archive Yahoo Group. I’ve been using various thicknesses of plastic card, foam board and plastic strips. I’ve done some sketching on the model with a Sharpie to get an idea of markings and adjustments to the model. So far it is really sturdy (and heavy…) so I’m not too worried about it getting knocked around in a game (unlike a paper version). The back took some work as the paper templates had nothing on the back side. I liked the look of the pipes on the Forge World model and imitated that. Also the vents were built one fin at a time because I couldn’t find anything that fit correctly. The engine top is from the Manufactorium set cut down to fit inside. This idea was from a project being done on dakka dakka. The wire grid is wielded metal fencing. The top is simply set into place so I can easily access the engine when I start …
Finally, here are the pictures of my Iron Warrior Defiler. I entered this two weeks ago in a painting competition at my local GW store. This didn’t place, but I had a great time painting it (and the competition gave me a good excuse to finish it!). I didn’t do much conversion to the model, but I did build up a base for it from an old CD. Now that this model is finally built and painted I need to get him into a game and blow away all those silly loyalists! The guns are magnetized so if I later decide to go dual close combat arms or replace the flamer with a havoc, it will be a snap I also tried to magnetize the torso to the legs but it was too heavy for my little magnets so I had to pin it. The top still comes off for storage and transportation, but it can’t rotate during a game. The base is an old CD that I glued a layer of pink Styrofoam onto. …
Obviously these are not based off of GW Raptor models for Chaos. I’m not a big fan of how those look and metal models are much harder to work with. I built my Raptors from a Space Marine assult squad with additional bitz from a CSM box, Iron Warrior upgrade bitz and Chaos Knights (fantasy range). I have decided to use the GW Iron Warrior shoulder pads for my entire army both because I like the looks of them and I don’t like using decals.
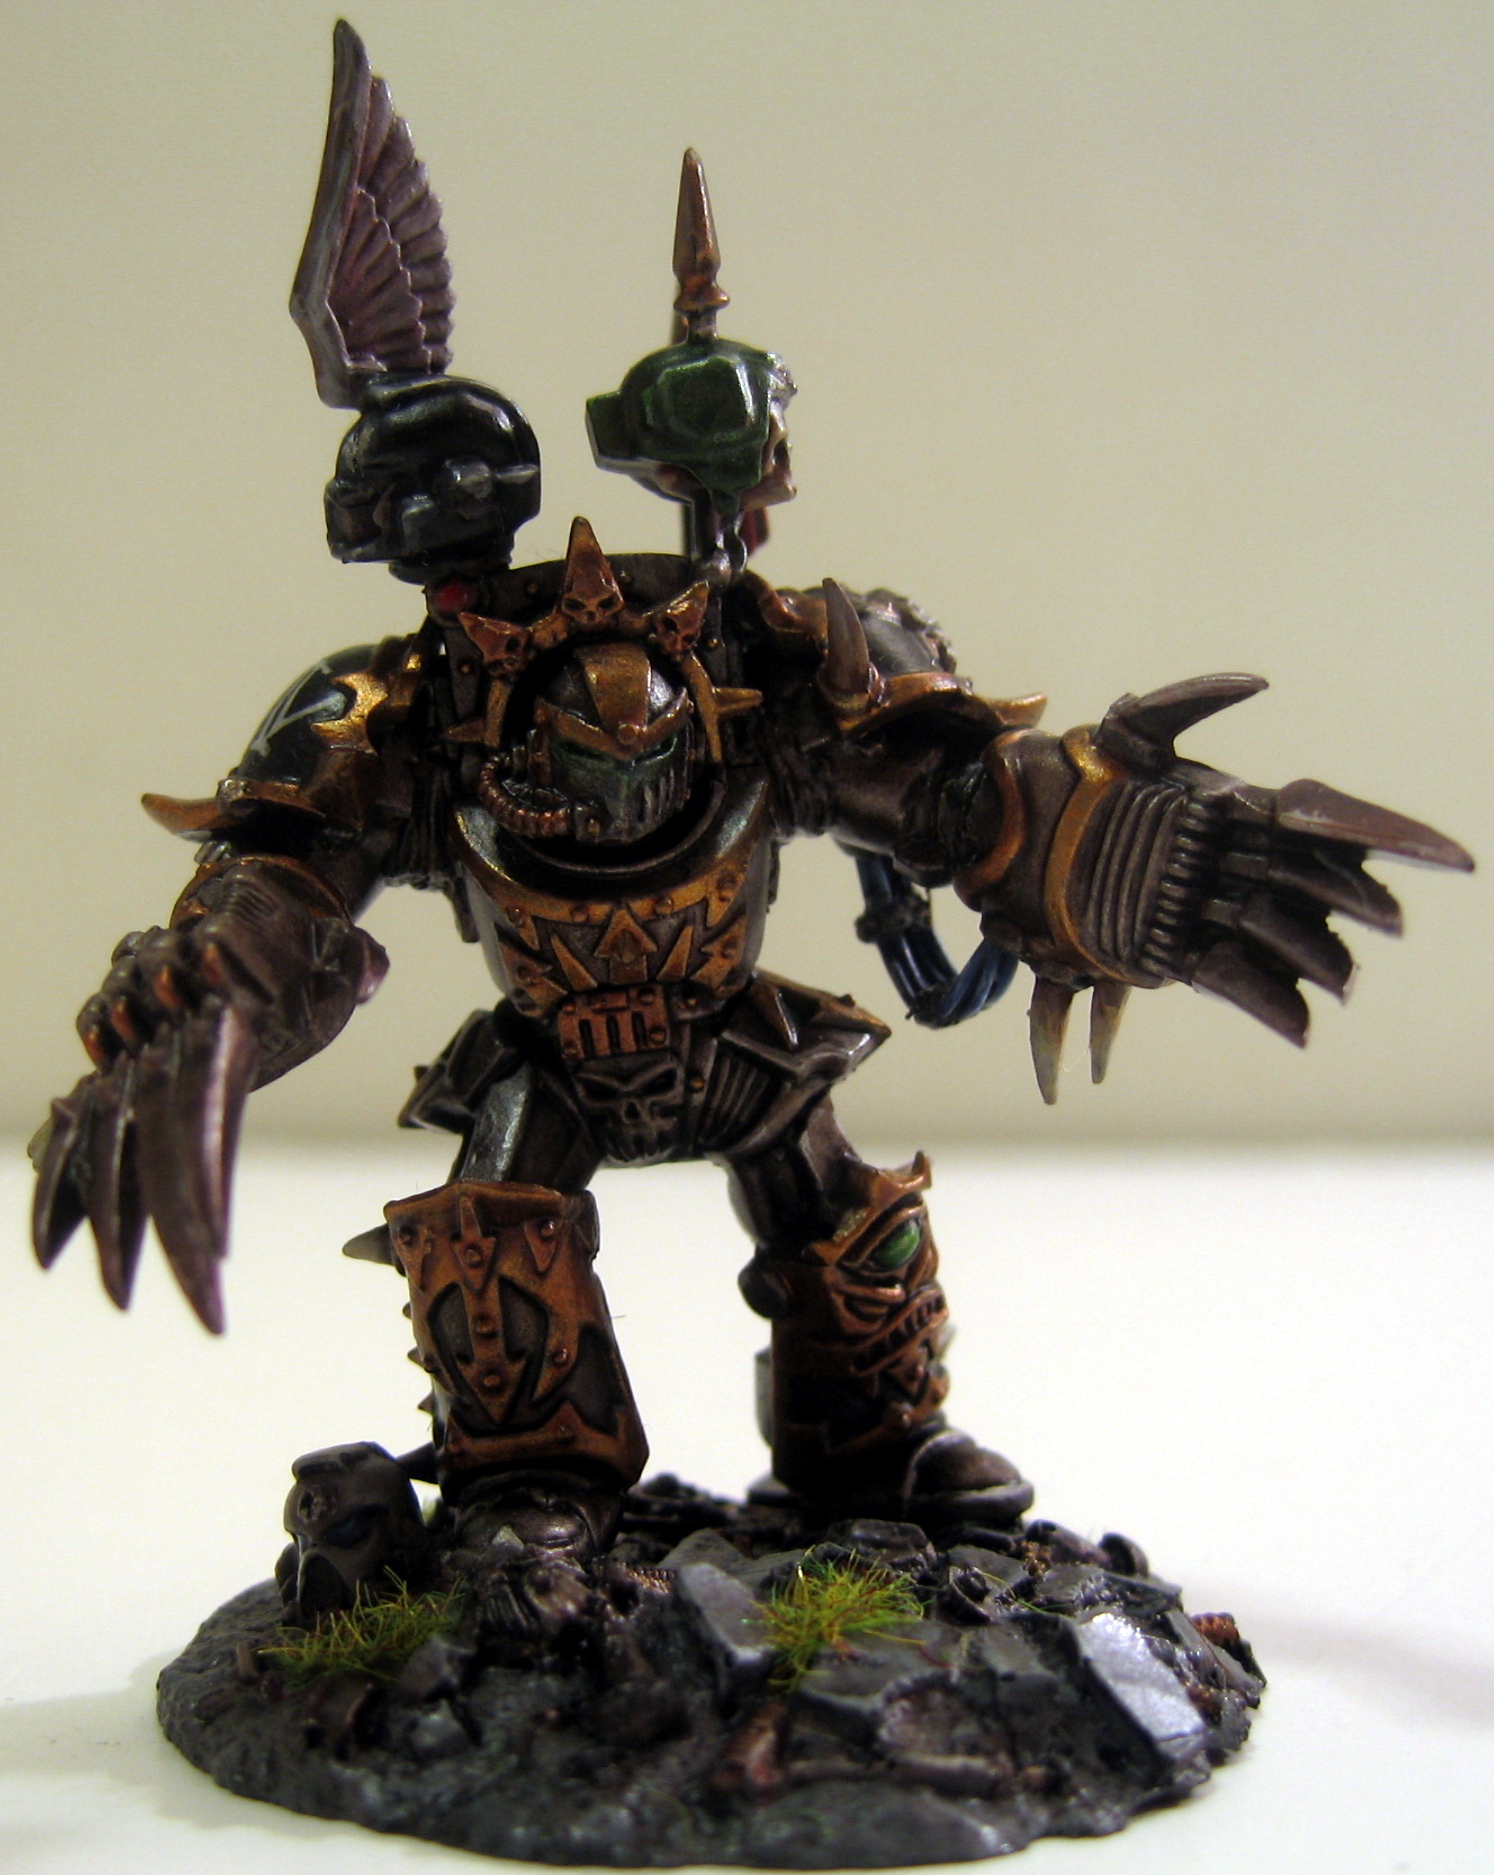
This is Captian Nestryx, commander of the assult forces of the 14th Grand Company. He marches to war in his Terminator Armour and dual lightning claws. As for conversion work on this model I used the Chaos Lord in Terminator Armour kit and used the two lightning claws in the box. I didn’t like the position of the claws so I cut each hand at the wrist, turned is slightly and re-glued. To make this work I had to redo the power cables running to each hand. I made the new cables out of 5 pieces of plastic rod and wrapped with a thin strip of green stuff. I also used a head from the Iron Warriors upgrade bitz set. This required some sanding of the head and armour opening to allow it to fit, but it has a great result. The base is one of the ones included in GW’s basing kit. It is the same size as the normal base for Terminators so I just used it instead.
The Land Raider was a blast to put together and paint, it has so many great details inside and out. The lascannon sponsons are magnetized to the hull so I could take them off. I painted the inside of the vehicle before gluing the top section on: The side access doors were also magnetized to show off the inside. There was very little modifications to the actual model other than adding some Chaos spiky bits and replacing the lascannon tips with the dragon heads.

This dreadnought was originally from the Assault on Black Reach box set from GW but with some modifications. The most obvious is the head. I cut out the front plate and modified one of the masks from the Defilier kit. The wires hanging below are an assortment of guitar strings and small gauge wire. The another modification made is the added trim and stars. This was made with thin plasti-card strips cut to length and glued down.
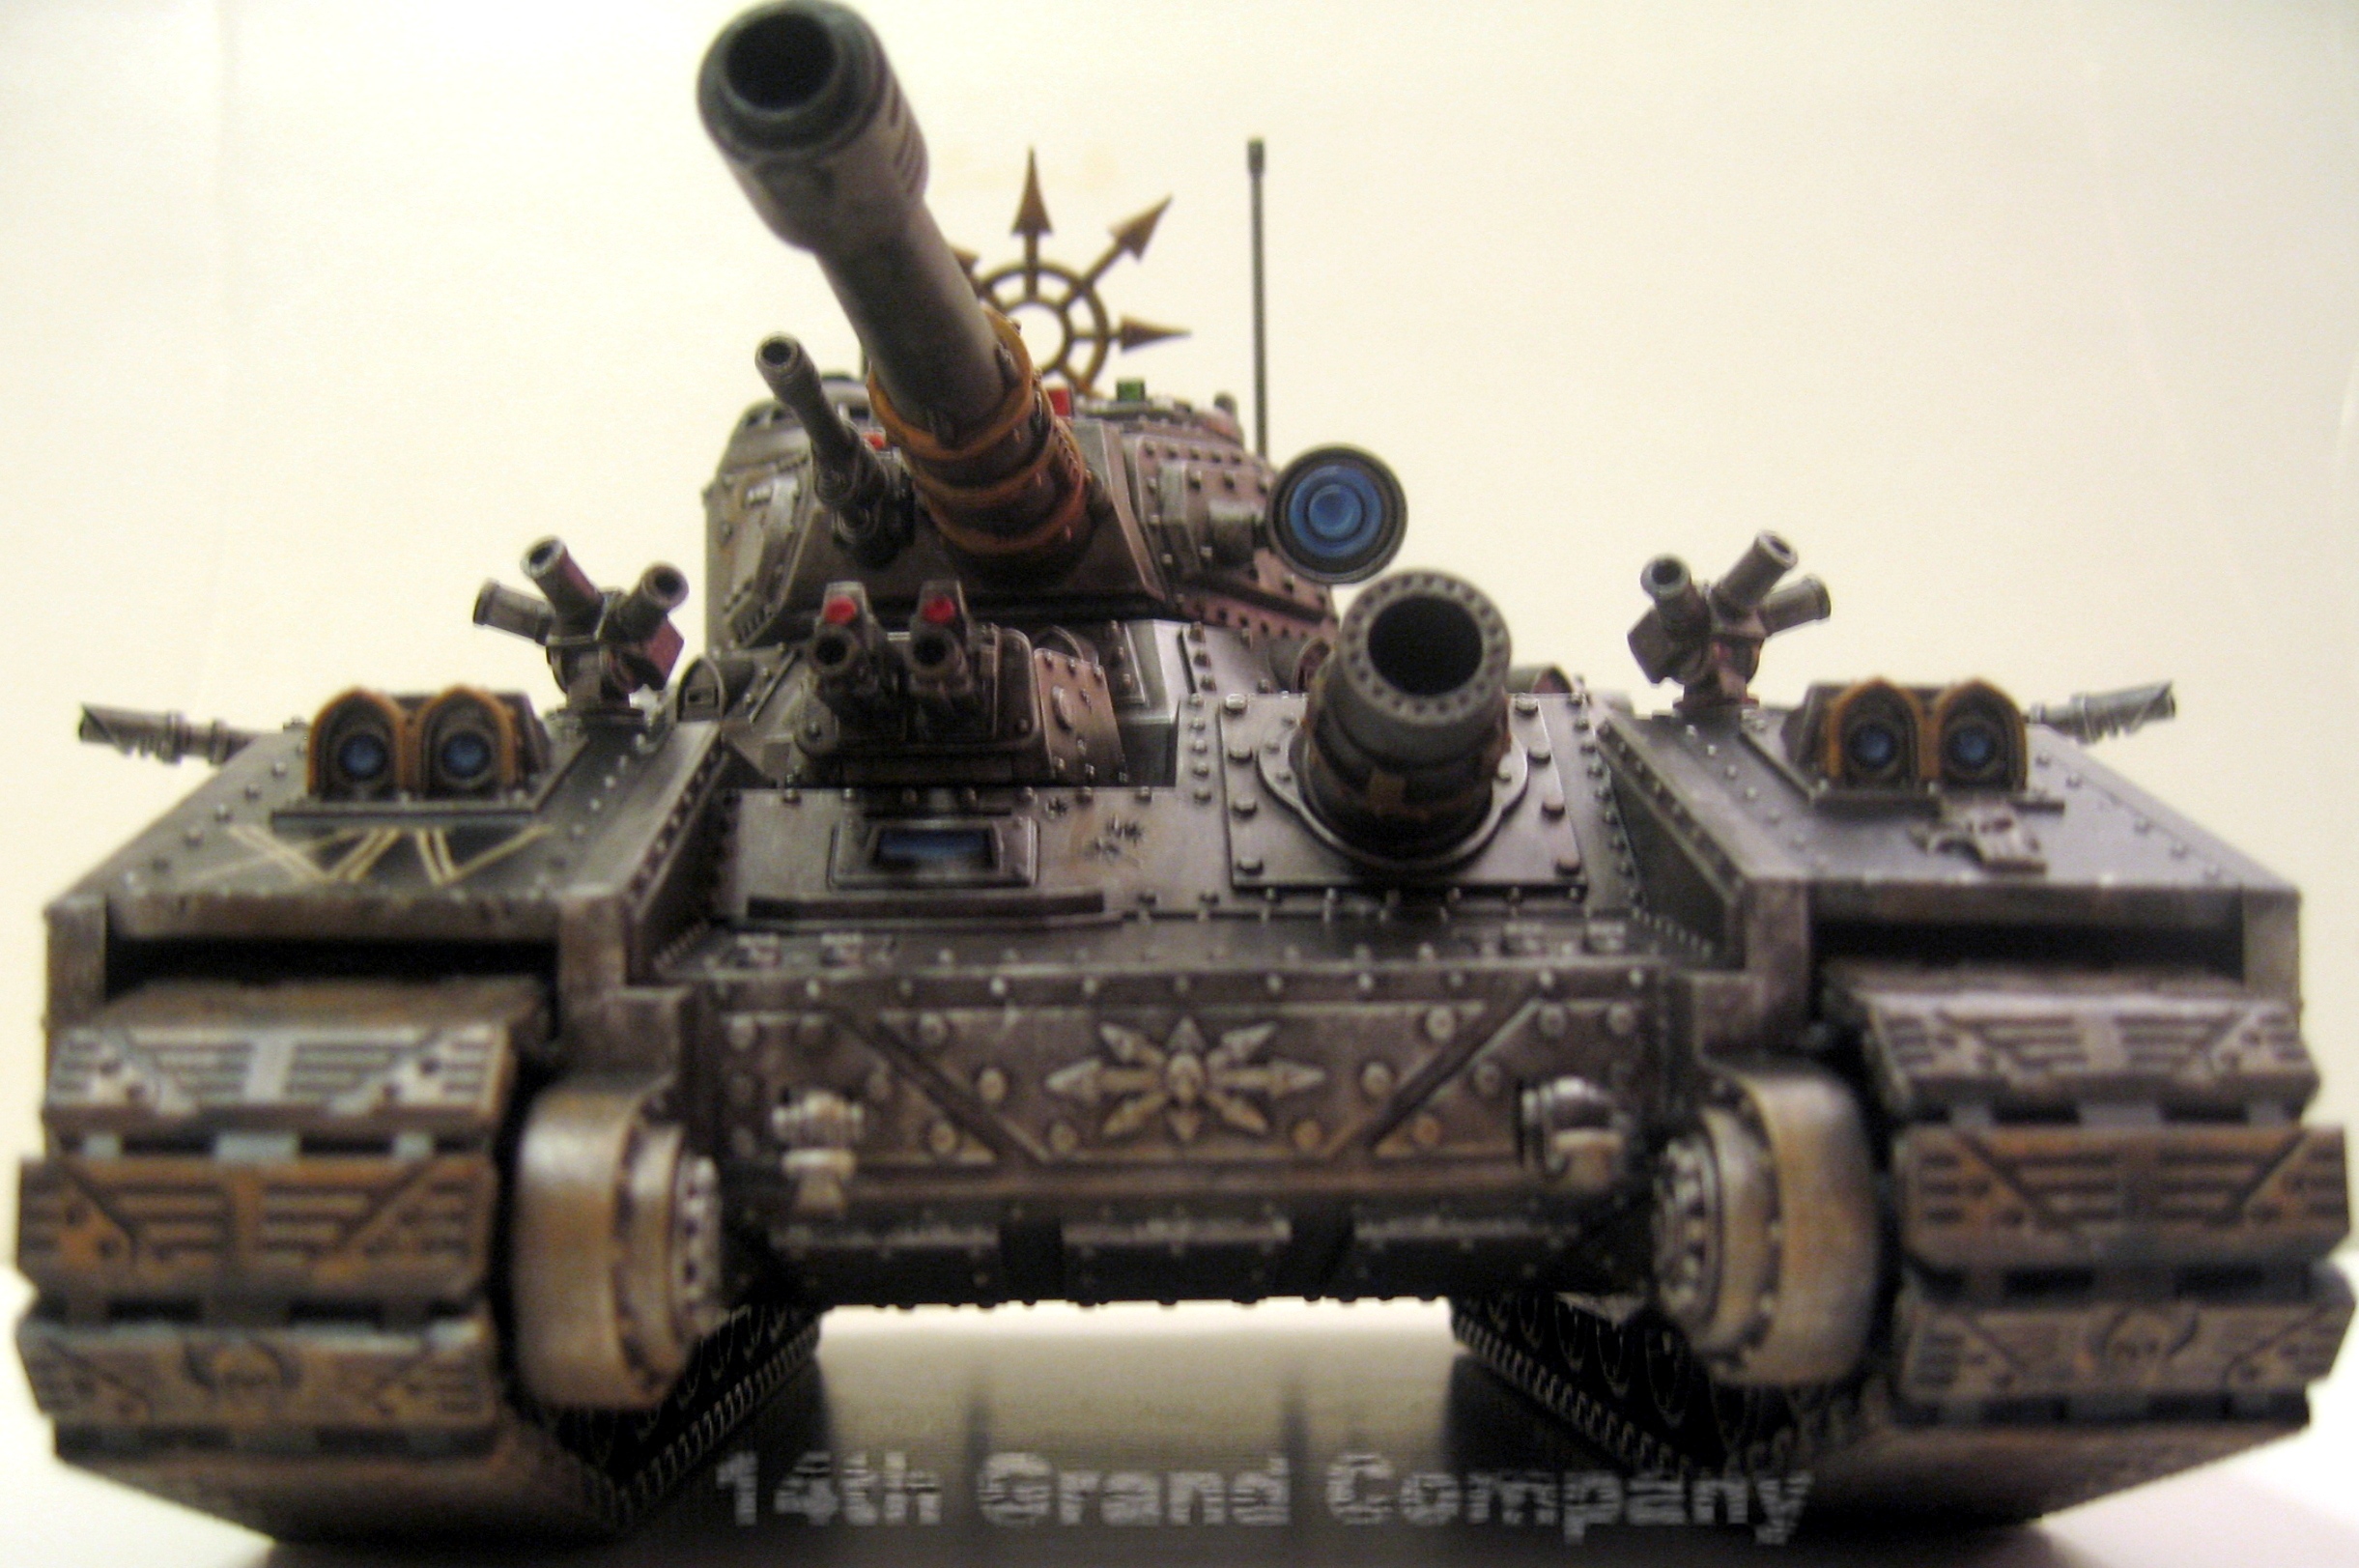
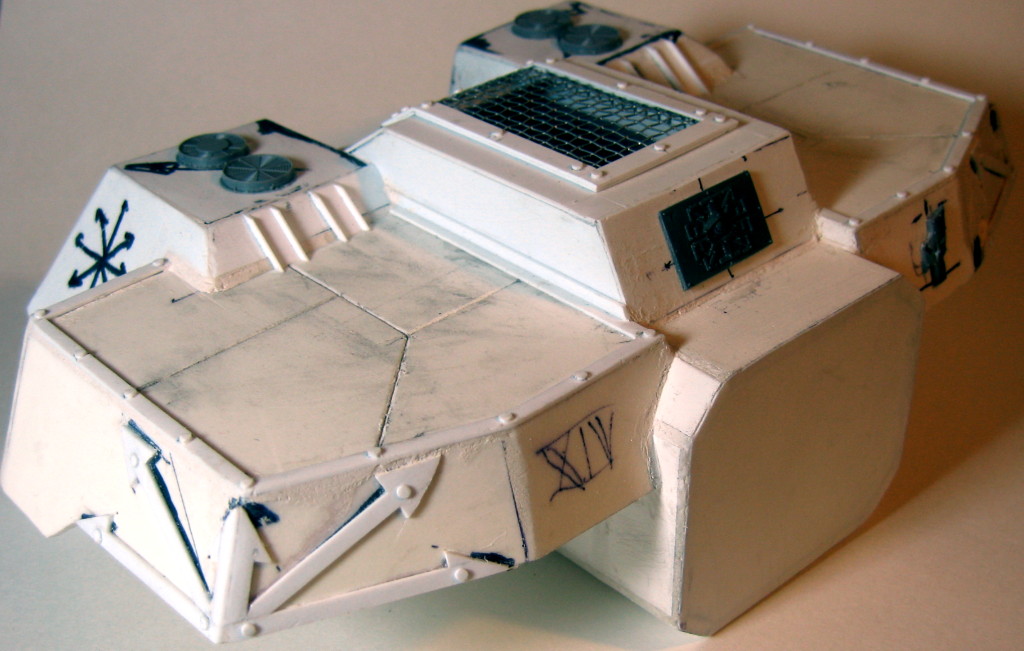
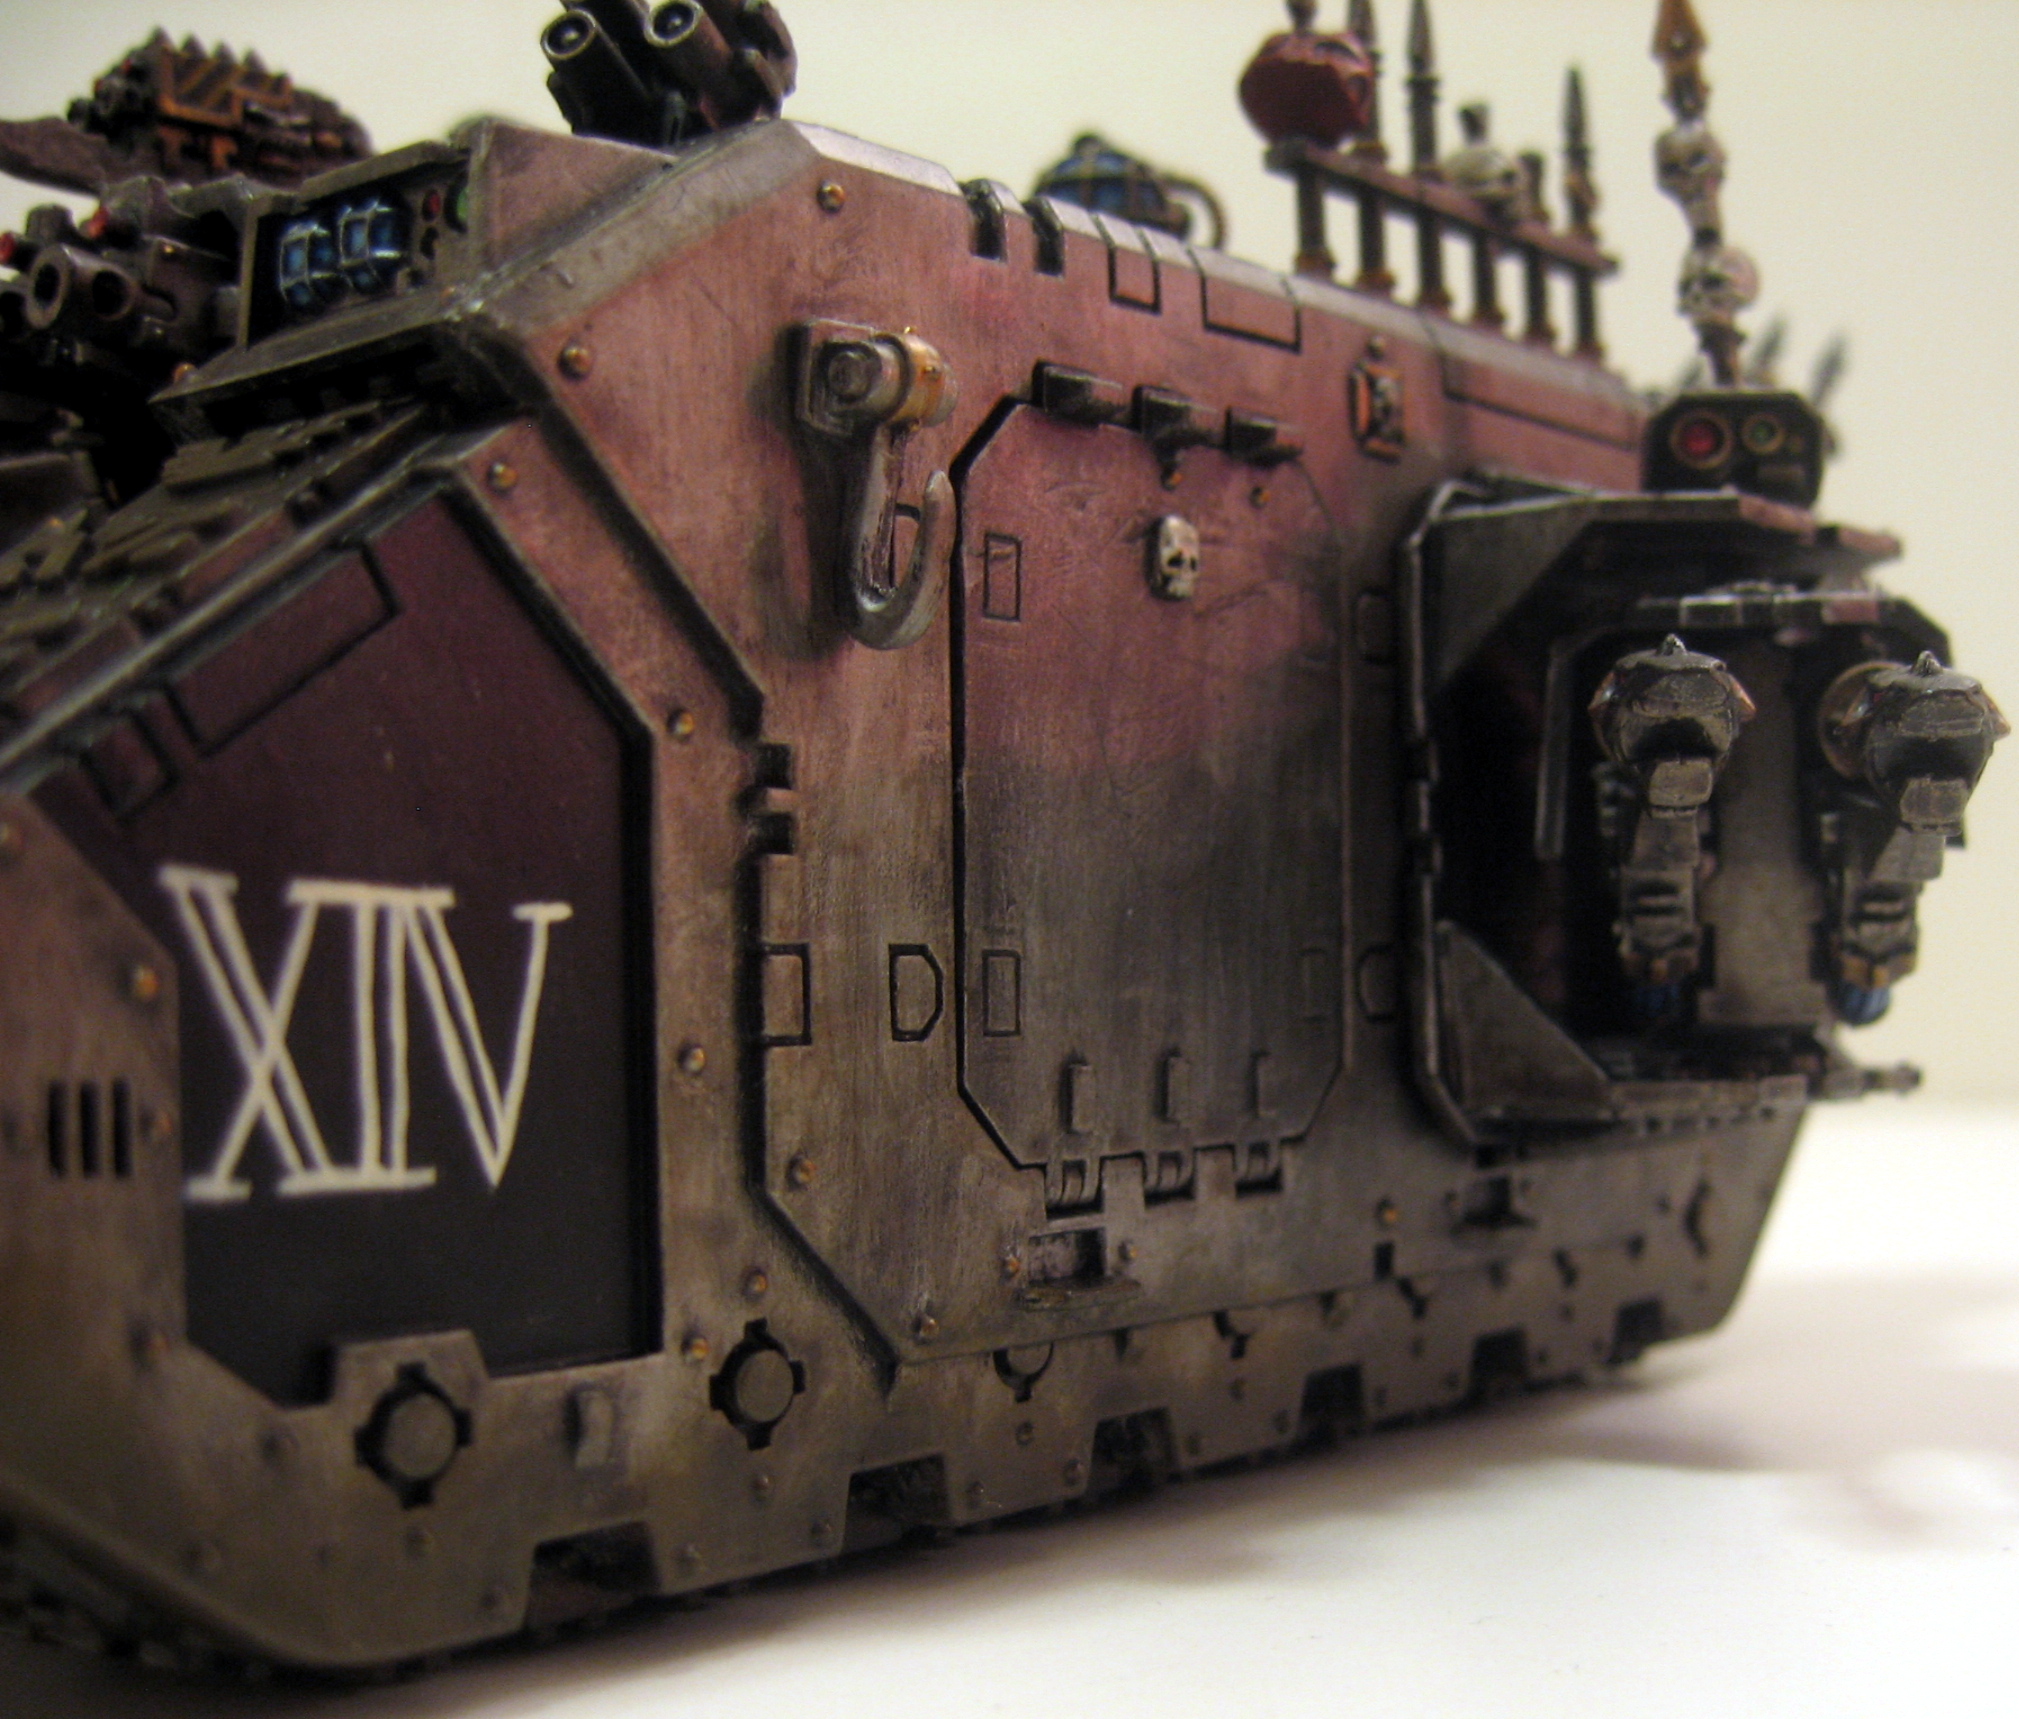
So I finally got around to taking pictures of my finished models to post up here. So without further ado, my 14th Grand Company’s Baneblade: The skull icon on the tank’s front left is from the Dark Elf warrior sprue. I have been using this as my army icon badge.
Even though I had plenty of other units to build and paint to even field a full 1750pt game I was too excited for the Baneblade. I spent many a hour putting this massive and amazing kit together. It was the little details that really made this model shine, the gun barrels are already hollow (no drilling out needed), each panel is covered in rivets, hatch access points and unfortunately Aquillas. I spent about half my time scraping of this symbols of the corpse fool and replacing them with Chaos stars and army markings. I did run into one issue, the right side of the main turret was missing from the box. I went back the GW store and they generously opened a new box and gave me the missing piece (I think they are going to build a Skull Hamma’ from the rest of it). Once I get some more details and Chaos add-ons I will post some pictures!