Latest Posts

Be a Guest Writer on Broken Paintbrush

Looking for You – Write for Broken Paintbrush!

With Dreadtober coming towards the end, I am starting to plan for November’s posts, and I need you! I’m looking for guest writers, contributors who want to write for Broken Paintbrush. Become famous(ish) but more importantly, add something to the community that your fellow hobbyists will enjoy.

Be a Guest Writer on Broken Paintbrush

I’ll get into the hows and whys below, and I even have a list of potential post ideas if you want to write but need a muse.

Post Ideas

Below are the general topics I like to cover on Broken Paintbrush with some specific ideas to give you some inspiration. Don’t let it limit you however, if you have an awesome topic you want to add it, just let me know as well!

Tutorials

By far my favorite articles are those that share how you go from A to Done. Anything from assembly to painting to photography. If it helps a fellow hobbyists, let’s talk.

  1. How to paint a certain army/faction/tribe
  2. How to paint a color/effect/technique
  3. Painting tips for Beginners/Mid Level/Advanced
  4. How to Convert X into Y
  5. How to photography battle reports/montages/display figures

Hobby Blogging Advice

For those who are already hobby bloggers, I am looking for your posts on how to help other hobby bloggers create, grow, and succeed at their own blogs. NOTE: If you are some random internet marketer marketing to bloggers who what to write about marketing to internet marketers, BE GONE! I’m looking for advice aimed directly for our hobby community.

  1. Tips on using social media to share your WIP shots and get advice
  2. Twitter, Facebook, Instagram, Pinterest, how do you use them for your hobby
  3. How to share and repost content ethically and nicely, both posts and pictures done by others.
  4. Creating ideas to write about and creating a schedule
  5. Why do you blog, what are your aims, goals, aspirations and how have you worked towards achieving them.

Hobby Tool Reviews

Have a Cool Tool that you want to share? Write up a review about it and how you use it to improve your hobby skills.

  1. Paint racks, project boxes, and hobby storage
  2. Lighting (lamps or bulbs) and magnifying lenses
  3. Miniature holders and brush grips
  4. New brushes, paints, tools, or other cool things

Editorials

Have an opinion on something that you want to share or something other topic of discussion? I am open though this is another area that I tread carefully. I am open to differing viewpoints, but I want any editorial to build the community rather than a beat down.

  1. If End Times style game and story changes happen to 40k, what changes could Games Workshop make to improve the game/story/factions
  2. Share with us your favorite board game, how it’s played, and what makes it cool
  3. Where do beginner hobbyists get stuck and what can the community do to help them

Why and How

So the list above got you thinking about post ideas yeah? Something awesome you want to write up and share?

questions-on-tress

But why would you bother writing for Broken Paintbrush (especially if you have your own blog)? Well, my hope is that we can help each other.

If you have your own blog, some of the reasons to guest post (here or on other blogs) is:

  1. The topic doesn’t fit the normal posts you do but would fit here
  2. You want to reach new readers and point them back to your site
  3. Build the community as a whole

If you don’t have a blog (or it’s collecting cobwebs), guest writing is a great way to try it out or just get that random article out of your head without dealing with the effort of managing a site.

I have a bit more in depth benefits and win-wins on the main guest post page if you are still on the fence.

Those are some good whys, but now for the how.

For first time writers, the how can be a bit intimidating. But fear not! I will help you through the whole process.

It all begins by either filling in the form below or sending me an email: joe@brokenpaintbrush.com with “Write for BP” as the subject. Let me know the idea you have and how it will be awesome for the readers.

Most likely I’ll say “awesome, let’s do this!” at which point I can get you set up as a writer on the WordPress platform, have you login and write away. If that scares you, you can write up your post in Word and email me the document instead!

Either way, when it’s ready to go, I’ll do a quick edit and review. Sometimes I’ll flag a couple areas that would be great to expand or clarify and have you update it, but usually I stamp my approval and schedule it! Boom! You are now a writer for Broken Paintbrush!

In the wise words of my three year old: “Let’s Do this!”

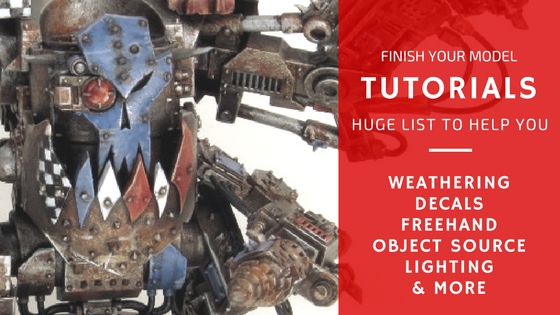
Finishing Touches for your model

Comprehensive Tutorials for Finishing Touches on your Model

Life doesn’t always go as planned, so instead of finishing my Mentor Legion Dreadnought, and writing up another epic tutorial I’ve been reveling in the blessings of Papa Nurgle.

But all is not lost!

Instead I have pulled together a collection of links to help you providing the finishing touches on your models. I reached out to the Dreadtober members for their favorites and scoured my bookmarks.

Finishing Touches for your model

So enjoy the list, learn some new tricks, and finish your models! – Oh, and if you have a tutorial you want added, just drop it in the comments below and I’ll check it out!

Weathering

Some love it, others hate it, but adding wear and tear to a model can add a level of realism. Adding weathering is also a great way to cover up mistakes in the painting, or even the physical model.

  1. Weapon Damage Special Effects | WIP
  2. Watch This: Weathering a Tank | Broken Paintbrush
  3. Weathered Iron Metal | Weeman
  4. Weathered Penny | Musings of a Metal Mind
  5. Weathering with Oils | Falconator Painting
  6. Rusted Metal | Drazhar Urien Rakarth
  7. Weathering a Tank With Powders | Secret Weapon Miniatures
  8. Easy Chipping and Scratching | Corvus Miniatures

Heat Staining

This is a specific weathering technique for adding wear to metal that heats up – including gun barrels. I put Tibb’s article at top as he has a good review of the ‘realism’ of coloring the metals vs the trend in the hobby.

  1. Heat Staining the Right Way | Tibbs Forge
  2. Heat Staining Engines | Pirate Viking King
  3. Heat Stained Effect |Weeman

Lighting/Object Source Lighting

Adding object source lighting can add a cool glow effect to models and on some display pieces be put to use to set the ambiance. While it can be hard to make look good, the tutorials below can give you a big boost in trying it on your models.

  1. Blue Energy Glow Without an Airbrush | Weeman
  2. Tips for Object Source Lighting | Coloured Dust
  3. OSL Basics | Massive Voodoo
  4. OSL Testing | Vanus Temple
  5. Advanced Object Source Lighting | Hand Cannon

Decals

Using decals, or transfers, is an easy way to add squad markings and other complex symbols to your miniature. They are fairly easy to add, but to make them look good takes a few extra steps. Check out the tutorials below for some tips and tricks to make the most of the decals.

  1. Decal Basics | Brush and Miniature Torture
  2. Apply Decals with MicroSet & MicroSol | Modelmaking Guru
  3. Using Decals for Custom Markings | Broken Paintbrush
  4. Applying Transfers | Four Dads of the Apocalypse

Freehand

When decals won’t get it done, or to add that extra special  touch to your model, you will need to step into the realm of freehand work. This can be as simple as rough script on purity seals or painting the whole model in a complex mural. Either way, it takes a bit of planning and different techniques shared below.

  1. Freehand Writing on Vehicles | Valknut Painting 
  2. Planning Freehand | From the Warp
  3. Advanced Freehand | Massive Voodoo

Base

If you are one of those who leave the base for last or looking for some extra touches to it, I’ve got you covered here as well. Below are a collection of tutorials to add those final touches to the base as well.

  1. Label Your Base | Coloured Dust
  2. Spent Shell Casings | Coloured Dust
  3. DIY Flock | Scotty’s Workshop
  4. Water Effects | Chestnut Ink
  5. Icy Base | Chestnut Ink
  6. Muddy Bases | Wappellious
  7. Creating a Custom Base | Broken Paintbrush

Misc. Details

And I’ve got a few more that don’t fill into a new section yet but are still great resources for your reference. As I fill in more tutorial links, I may move some of these around and expand upon the sections.

  1. Slime Effects | Coloured Dust
  2. Blood and Gore | Tale of Painters
  3. Painting a Power Sword | Broken Paintbrush
  4. Painting Vials | Eternal Hunt
  5. Blood and Acid Effects | The Fantasy Hammer

Over to You

Let me know what other tutorials you have for finishing touches for your models – especially if there are whole sections that I missed above. I plan to keep building this up as a handy resource page, so make sure you bookmark it and check back now and then when you are looking for tutorials.

Finish the Model Challenge

Dreadtober Challenge: Paint the Details

Let’s finish this! This is it my friends, the final week to paint your models for Dreadtober. Welcome to Challenge #5: Finish Your Model.

Finish the Model Challenge

We are now in the last week of October with the deadline of Saturday, October 29th and the very much, hard stop, never go past it (just kidding) deadline. Up to this point, each of you has been challenged to plan, build, start painting and finish the base.

Now it’s time to finish it.

Challenge: Finish Your Model

This week’s challenge is relatively straightforward: finish painting your dreadnought. Perhaps you need to add weathering, decals, and final highlights. Maybe you need to catch up. Some of you might even be starting just now.

Whatever needs to be finished, your challenge is to finish it this week.

Result: Your Completed Dreadtober Modeled

By Saturday I will be posting the Finished Model Showcase where I hope each of your will have completed your Dreadtober Pledge. We can all rejoice in completing this epic journey together and enjoy the fruits of our tears.

If Saturday does come and go and you just can’t get it completed, do not fear! We still have on more challenge left. Next week I will challenge you to improve your photography skills and take the best picture possible of your model. This means you could sneak in a few extra hours before the final showcase 🙂

Helpful Tutorials

To help you finish your models, I found a selection of tutorials. Hopefully, these can help you get past hurdles, inspire you to try something new, or just interesting to read.

Weathering Vehicles

Adding some weathering? I’ve got a Watch This with OrcPainterNerd with a three-part series on weathering a tank.

Greg does some fantastically weathered Orks but requires chipping fluid early on, so instead, I point you to how he weathered one of his bases.

Or check out this thread on Wamp that shows how to apply weathering powders (on a dreadnought fitting enough!).

And finally, Garfy shares his method for weathering his Ultramarines.

Heat Staining the Right Way

When the big guns are working overtime to blast away the enemy, they get hot. And hot metal starts to change colors. Tibbs saw how many painters were painting these colors all wrong and decided to help us all paint heat staining the right way – which looks awesome by the way.

Applying Decals and Freehand

Freehand is something I still struggle with, which is why I often cheat and use decals to create a starting point. I wrote up two different articles on this, one for Space Marine Banners and another for my Knight Titan heraldry.

Sealing Your Model

After all that hard work to paint all those details, it’s important to seal it in and protect the paint from chipping. This is where clear varnish comes into play. Dave has yet another great article on how to use spray varnish and avoid the horror stories whispered about with this (should be) clear paint.

Not Seeing What You Need?

Remember that Dreadtober is meant to be a social, community challenge. So if you are getting stuck, need some input, or an inject of motivation, hit up the #dreadtober hashtag and let us chime in!
We are in this together and are a global community of hobbyists.

Let’s Get It Done

So my Dreadtober friends, let’s finish our models and celebrate our accomplishments this week. I look forward to seeing your models.

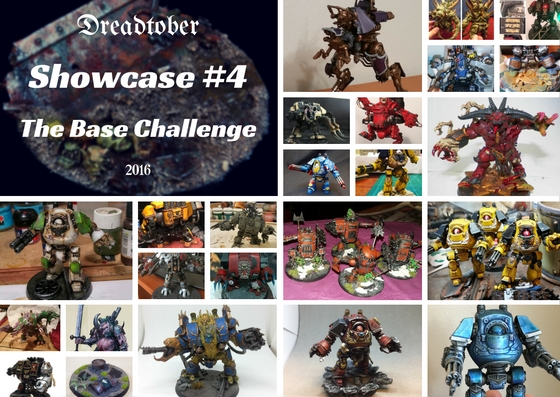
Dreadtober Showcase: The Base

All your base belongs to Dreadtober! This week our participants were challenged to build and paint a base for their dreadnought-sized model. Below is the Base Showcase, highlighting each of their progress and how they are doing.

dreadtober-showcase-4-base-challenge

Basecoat Painting Showcase

Note: Some are copied from last week as they weren’t able to make progress (life ya know!) or have already finished. But I still want to highlight the awesome work everyone is doing.

Albie

albie-base-wip

So the base for my dreadnought is designed after the red rocky terrain of Mars. I started with a blank base and a piece of 1/4″ thick cork. This way the dreadnought will stand over most other models. I broke away pieces until I liked the shape fitting on the base and so the dreadnought could stand nicely on it.

Then I painted the whole base brown to start. Then layered on the cracked earth technical paint Martian Ironearth. After letting that dry I touched up any spots I missed with Tuskgor Fur, then I drenched the base in Argax Earthshade. After that dried, a bit of dry brushing with Squig Orange brought out some highlights.

Instagram: albatron

Daniel Givens

Daniel Givens Dreadnought

I decided to break from how I did my first two dreadnoughts, and went with how I’m starting to go with the rest of my vehicles. I do the normal highlighting, then using a sponge, dab some Ironbreaker to some high points and then follow with some Typhus Corrosion sponged on over top. I think it gives a nice weathering effect. I also painted over the decals by sponging on some of the Macragge Blue I used for the base and painted over it with (I think) Ulthuan Grey to give them a bit of texture.

Instagram: daniel_givens

AJ

aj-dread-wip

So playing some catch up this week and next. I was able to get the base coat down and I am working on some other base colors now. My style of modeling usually leaves the base to the end so I can work it after I see how my mini looks all finished up, so it will be the last thing I do haha.

Link to my latest progress : https://www.facebook.com/vigilanteminiatures/

Facebook: vigilanteminiatures

Ashley

ashley-wip-murderclaw

Nurgle bestowed his blessings on me the last two weeks, so I got a bit behind. But Murderfang is base coated and has his first wash. I’ll be catching up this weekend with his base and starting his details.

Twitter: chickhammer  | Blog: chickhammer.com

Glenn

img_20161022_180009742-1

Catching up on #dreadtober project. Painting done, washes and highlights done. Transfers are next, which I’m looking forward to. I’ve got a test base that I did a while back, but need some more bits for the “ruined industrial” bases I have themed my Iron Hands with. Waiting to connect with a buddy who has some Hirst Arts molds that fit the bill perfectly.

https://www.facebook.com/NarrativeGuys/posts/2130255247198952

Facebook: NarrativeGuys

Grenn Dal

2016-10-20-07-07-26

This week I worked on my basing for my Dragoon. I kept with the theme of my other Skitarii vehicles. I also added a second Dread to my challenge. you can find out more Here.

Twitter: grenndal  | Blog: xenoftw.blogspot.com

Skyfyre

skyfye-killa-kan

Killa Kan progress. Most the base coats are on, still a few more to go. Then on to touch ups.

Twitter: Nayr00 

Joe B.

custom-base-done-and-model-placed

Last week I made some great progress and not only finished the base, but also wrote up a giant tutorial on basing techniques. Next up is the decals and weathering to finish him off.

Twitter: brknpaintbrush  | Facebook: brokenpaintbrush | Instagram: brknpaintbrush

 Kyle Haydon

Kyle Contemptor Dreadtober

Progress this week went smooth aside from snipping off a thumb claw, which still needs patching. The claws are my principle addition to this already spectacular model – but the studded pturges help fill in its shape and movement I think!r

Instagram: kyle.haydon – primary spot for the WIP work!

Twitter: KyleHaydon  | Instagram: kyle.haydon | Blog: hobbyvices.com

Marc

dreadbase-finished1

I have played around with iron corrosion, the new GW texture paints and my favourite basing material: laser-cut ferns.

Link: http://oldschoolg4m1ng.blogspot.com.au/2016/10/dreadtober-base-completed.html

Blog: oldschoolg4m1ng.blogspot.com.au

Norm

norm-skreema-killa-wip

Da Skreema Killa is almost done, just a few highlights and then the base. My bases are typically very plain as I prefer the focus to be on the model, but this one obviously had the Raven Guard on it. Trying to arrange a time before the end of the challenge where my friend can paint the Raven Guard while I paint the ork casualty on the base of his dreadnought.

Twitter: normnondo

The Mad Mek


mad-mek-wip

Sooooooooooooo far behind!  Highlights, a few details and the base.  Crunch Time!

Blog: madmekworkshop.blogspot.com

Mihalis “Cadaver” Skalkos

14677164_1276746009036704_6577717378459631616_n1

I have been working on the weathering of my model, no actual work on the base yet, just some basic colors. Hope that this is ok with this weeks challenge. Truth is that I didn’t have much to do with the base since it was a resin one. Hopefully I will finish it off when I reach my brushes again. You can read more about my progress on http://homeofcadaver.blogspot.gr/2016/10/death-guard-contemptor-dreadnought-wip_21.html

Blog: homeofcadaver.blogspot.com

Lonely Kitbasher

d-powers-sratch-dreadnought

I’ve finished my dreadnought! Seeing as we’re not quite halfway into the month yet, I’ve had a go at starting another, just for a bit of a laugh. I’ll have to source another land raider power plant from somewhere now.

Blog: imalonewithadream.blogspot.co.nz | G+: D Powers

Eric

devoured_pic

I drilled down into the Devoured and took him to about 80%. I’m going to bring the other two up to the same level hopefully this week, then do decaling and final details. You can check out the blog post for more pictures

Blog: plasticresinmetal.com | Instagram: eleive1

Anthony aka MasakiSayz

anthony-killa-kan-wip

Progress has slowed down a bit, this has been a busy week. Still trying to nail down the freehand checkers, but they’re off to a good start.

G+: AnthonyPaoliMasakiSays

Rory


thousand-sons-hellbrute-2

Not only is Rory building the awesome dread above, but is hosting a few of his friends’ projects as well. Make sure you check them out in his Dreadtober Part 4 post. There are some amazing projects he his hosting so make sure to check them out!

Twitter: macantsagart  | Blog: gamestepping.blogspot.ie

Doug Kus

trapjaw-week4

I finished my base, opting for a lava flow of sorts. I still have some detail work to iron out on the model, and then Trapjaw will be ready to rock the gaming tables.

Dreadtober – Week 4 update | Bare Hand Fishing

Blog: barehandfishing.com

TheRhino

rgvendreadwip007

I’ve made good progress on painting my Venerable Dreadnought, and have the base built and primed. y Raven Guard models is always a treat, as the scheme is simple but allows for plenty of little details to be added.

The link to my blog post about the topic:
https://thinyourpaint.blogspot.com/2016/10/dreadtober-progress-reports-2-and-3.html

Blog: thinyourpaint.blogspot.com

Black Shield

black-shield-lameters-dread-wip

Progress has been slow lately, but still finding time . Currently focussing on the body, and banner. Banner is lacing something, not sure what to add to it . Still lots to be done.

Twitter: squizzato_eric

Arkhanist

arkhanist-base-2

I wanted to go for a naturalistic scheme compared to the red dread. Spent far too much time trying to get a concrete colour I liked! White balance is slightly off, so looking forward to photo tip week 🙂

Blog: theguildhouse.net | Twitter: arkhanist

Dan D.

img_2955

lots of progress pics. Bottom of model is coming together. Not sure I like the teeth, I bought some different metallic to try and mute the shine a bit. Next up is dry-brushing the wings. Base is pretty much done, so I can get more painting done during base challenge week 😉

Niklas D.

niklas-d-wip

No real progress this weekend, school and activities got in the way.

Dave S

image1

Progressed well this week, base coats and weathering are down for the Domitar. Hairspray chipping on the shoulder pads went really well.I also re-designed her staff and am currently resculpting the tabard.

image2

In a move I am bound to regret when I run out of time at the end, I decided to add a stretch goal in the form of a Deathwatch dread, truescaled to match the marines I’m working on.

Blog: plasticresinmetal.com | Instagram: thepolysmith

BruceT

bruce-t-wip

Most of the detail done, base and minor detail to finish.

Facebook: Forged in the Warp | Twitter: thefleshtearer

Culial

dread-in-progress

So, my week has taken a few unexpected turns and the build has not progressed as anticipated. I have, however, also made a start on the base – so ahead on one part, behind on another…

I’ll be doing my best to reclaim ground on the project in the coming days!

Blog: Dakka Dakka

Darren Bogus

img_4276

Base colors blocked in and washed. Highlighting started. The base is glued with sand. I’ll add grass when it’s painted.

Twitter: darrenbogus

Warhammer39999

image1

I’m happy to say that I’ve finished ahead of schedule. I still need to work up a base for him, but I’ll postpone that for another day when I have time to work on all of the other derelict bases in need of love.

Blog: warhammer39999.com

Mike

mike-dread-helbrute-wip

Week 3 was busy, but I was able to make some good progress! Most of the trim is done, some detail work is completed, and almost everything has been washed. Next week I’ll be focusing on highlights, additional detail work, and if I’m lucky my first attempt at battle damage. Nothings glued together, hence the rather large gaps in the pictures while it is still dry fit.

Twitter: Mike_Schreiner_  | Blog: mikeschreiner.com

NafNaf

NafNaf Space Wolf Contemptor

Running a bit behind but here is my progress so far. Finished the build now. Trickiest bit was the posing with the left leg and sculpting the bit Inhad carved out. Happy with the final result though, and all the space wolves bling really makes him part of the Vlka Fenryka!

http://objectivesecured.blogspot.co.uk/2016/10/spave-wolves-betrayal-at-calth.html

Twitter: NafNaff81  | Blog: objectivesecured.blogspot.co.uk

WestRider

westrider-dread-trio

I’ve kicked things up a notch by adding in a half-painted SW Contemptor I need to finish for a Tournament this month. Pretty well on pace, since I don’t really need to worry about basing.

http://cascadiangrimdark.blogspot.com/2016/10/dreadtober-3-new-challenger-approaches.html

Blog: cascadiangrimdark.blogspot.com

Dean Kelly

20161019_070839

As per the brief, this week’s efforts focused on basing. I have a basing scheme I apply to all my models (ash waste with snow and scrubby grass) but I felt I needed something more for the Kans – they are basically a heavy block of red & metals and I needed something else to contrast. That said, I don’t want to go mental adding other colours to the Kans themselves so I’ve taken a step toward the solution by adding some snotlings to the bases.

Blog URL for this weeks’ work: http://wargames-wasteland.blogspot.co.uk/2016/10/orks-killa-kans-part-4-dreadtober-2016.html

Blog: wargames-wasteland.blogspot.co.uk

Robert

So here are my WIP photos for the build week. As you can see I added did a little repositioning of the legs to help the contemptor look like he was moving forward and look a bit more aggressive.

thumb_img_0587_1024

Additionally, I added the World Eaters iconography from the Forgeworld etched brass set. The skulls on the left shoulder are from the GW skulls bitz blister and the chain is just jewelry chain I picked up from the hobby shop. Finally, I sculpted the ablative armor nodes on the left leg using greenstuff. All in all, a few simple modifications that I think give the model a lot more character. I’m stoked to start painting!

Blog: 30khobbyblog

Mordian7th

brothernihilusptd-4

Crossed the finish line with Brother Nihilus, as I had an October 15th deadline to get him finished for the Armies on Parade event going on at the local GW shop. Continuing experiments with the marbling effect turned out pretty neat, definitely going to be trying it out on future projects in different colors!

Blog: mordian7th.blogspot.com

Jamie Searle

img_4104

Brother-Thanatos Deathwatch Dreadnought, previously of the Red Hunters is now complete. I’m very pleased with how it’s turned out. Some of the details could have been a little cleaner, but big success. With three of my four Dreadnoughts complete I’ve started on a fifth to fill out the month. A heavily weathered World Eaters Contemptor.

Twitter: DrakePoldragon  | Blog: timandjayplay.blogspot.no

Wudugast

dreadtober-1-convertordie

It isn’t pretty but the first layers of paint are down. Now to start building up those colours and getting the details in. More WIP picts in the blog post.

Blog: convertordie.wordpress.com

Thomas

Thomas Khrone Chaos Dreadnougt

Progression is pretty good, I got the most of the main base colours down, including the first rough wash and weathering. I’m currently relayering the orange and will start going of the details soon. I will try and experiment a bit the plasma glow once I get there. The paint scheme is of my Chaos Space Marine warband the Lords of Ascension. Here’s a link to the latest WIP post: https://hightimesontheeasternfringe.wordpress.com/2016/10/12/wip-chaos-contemptor-conversion-part-4/

Blog: hightimesontheeasternfringe.wordpress.com

Andrew

img_1236

Armies on Parade slowed my progress this week (got bronze!). Attached are my base layers painted: bone white spray, 50-50 Agrax Earthshade and Lahmian Medium mix in recesses and rivets, with Lamenters Yellow glaze slathered on top.  Next step is details and cleanup!

Blog: Hobbyvices.com | Instagram: hobbyvices

CJ

CJ Catellax

I took my Castellax apart this week so that I can clean it up and give it a bit less static pose.  https://grimdarkvoid.blogspot.com/2016/10/dreadtober-002-building.html

Blog: grimdarkvoid.blogspot.com

Harry Wagstaff

img_20161019_223148

Reasonably happy with how the bases have come out but I’m quite far behind with painting the actual models!

Link: https://awesomeclaw.wordpress.com/2016/10/19/dreadtober-the-base/

G+: HarryWagstaff

Wolfsherz

wolfsherz-wip

I’m almost finished the major parts of the model. “Only” some smaller parts like spikes, tongues and and eyes are left. Still suppose that I’ll need the rest of next week to get them done.

Twitter: Wolfsherz  | Blog: wolfsherz.wordpress.com | Instagram: wolfsherz._

Dan from The Narrative Guys

dreadtober-week-3

Travel schedules have played havoc with progress. Attaching the dread to the bases turned out to be very difficult. It was very hard to get them to stand the way I wanted them to and get the pins lined up with something that I could drip into. Lesson learned, think more about where the model will stand on big models while building the base.

Project Link: https://www.facebook.com/NarrativeGuys/photos/?tab=album&album_id=2119539511603859

Facebook: NarrativeGuys 

Paul

I have had 3 dreads at various stages of finished-ness so I’m using #Dreadtober as motivation to complete these models.

Paul Graddon Dreads

So far I have been working on laying down a basecoat on the least completed pieces, and little shading work and chipping the paint work.

Facebook: paul.graddon.5

Andrzej Mezynski

andrzej-dreadknight-wip

Well, my model is fully done to the best of my abilities. I won’t compare it to other painters, but it irks best model I painted, even though it was hard both to assemble and to paint. I’m quite glad of the outcome. Base of model is nothing fancy. Just one of the new texture paints range – Astrogranite Debris.

Twitter: AndrzejMezynski

PopCultureCube

img_2240

Things are going well – focusing on the details now, and adding shades. Likely will start looking into the base next week.

Twitter: popculturecube | Instagram: popculture_cube

#2501

dwdreadsnothiding

Along the lines of the last Basing update, here’s the terrified grot about to be punted into the next life.

Initially I thought of some kind of alien invasion hybrid base, but then it would’ve made the dread look out of place with the rest of my Deathwatch army. Rummaging around in my bits box turned up this scared grot who just wanted to be somewhere else and a bit of rubble from the Assassinorum set for him to hide behind. It adds a nice little bit of character without being distracting.

Final build and blog post at http://musingsofametalmind.blogspot.com/2016/10/dreadtober-finale.html

Blog: musingsofametalmind.blogspot.com

Makkeru

makkeru-wip-dreads

This week has been slow, I just managed to squeeze in one good evening of painting. Got the main colors and metal parts done but not much more.

Twitter: makkeru | Blog: wip-piw.blogspot.com

Rob @ iToysoldiers

itoysoldiers-base-wip

And here’s the base. It’s the first Sector Imperialis base I’ve painted up and I have to say I’m pretty happy with it. It matches my table. Woo hoo!

More on the modelling project page:
http://itoysoldiers.com/munitions/modeling-projects/contemptor-dreadnaught

Twitter: iToysoldiers  | Blog: itoysoldiers.com | Instagram: iToysoldiers

Dave Mary

deathwatch-venerable-dreadnought-05

Completed remaining weapon options, cleaned up some issues and worked more on the highlights. Next week I’ll have to call this project done, but it’s still another week to stare at the project and consider heat effects, additional highlights, etc…

Blog post with update: http://262krieg.blogspot.com/2016/10/dreadtober-2016-update-3.html

Blog: 262krieg.blogspot.com

Greg

greg-c-helbrute-wip

Progress with model and base.

Twitter: wolf86sven

Sav

sav-base

Hi, base is done. Quite happy with it. Some debris added then some sand and washes and a bit of dust. Just fine details to do now

Twitter: sav10g 

Matt

matt-b-wip-dread

Been working away this week so only just managed to get some colour on it!

Instagram: ultramarine__blue

Eric

eric-dark-angels-wip

Progress: Overall I’m pretty much done with painting my dreadnought. I tried to use brighter colors to contrast against the abbadon black and Caliban green.

Siph

siph-wip-dread

Progressing slowly but surely with this B@C Contemptor Dread, the torso is now done and his Assault Cannon arm is in progress. His base has been finished of with some dead Necron pieces and my usual flock patches to give a tiny bit of colour, matching my existing army bases.

 I placed the torso at a slight angle to convey movement with the rear leg alteration, he looks like he is turning. The motto is the first half of the Relictor battle cry “Strength of will, Courage of will!” and will do nicely for his name.

Jason

jason-dread-wip

Getting into the colours now and the model is starting to look more interesting. Unsure which way to go with the right shoulder (gold or black) weekend comming up so looking forward to more hobby time. 🙂

Twitter: jtuvminis

Mark

mark-dread-wip

The base is a combination of metallics as a base coat, followed by a coating strickland mud. While the paint was still wet I threw burnt cinders on top of the mud and whisked it with a brush. The cinders started clumping together to give some depth to the base and I added some of that texture to the feet of the dread.

I’ll put the finishing touches on it soon, I’ve been busy building and priming a death company ally detachment as well as some kill team models which you can check out on my Twitter.

Twitter: ultima_ant

Jimmy

2016-10-09-22-38-05

48 hours late, but Bob’s up and walking, sorry about the delay https://jamesworkshop.net/2016/10/09/dreadtober-building-brother-bob/

Twitter: sonofultramar | Blog: jamesworkshop.net

Adam Abramowicz

adam-abramowicz-dread

Between unpacking and setting back up my studio, I was able to build up this dreadnought.

Blog: beyondthebrushstudios.com | Facebook: beyondthebrushstudios | Instagram: beyondthebrushstudios

Chris

chris-dread-wipFinished major highlights trying to do these with airbrush. And I started blocking in some of the major colors on the arms

Instagram: Relic_Knights_Studio

Rob J

20161011_203234

I was gifted the models of the Dark Vengeance set by my Sister and Brother-in-law. Since I have a wife and three young children, I hobby on a budget and nothing can be wasted. I am attempting to convert this Hellbrute into an acceptable proxy for a Venerable Dreadnaught for my Dark Angels.

Blaž

blaz-deathwatch-dread

Since I am a chaotic painter I’m glad I was finally in the mood to add edge highlights to my dreadnought. Still a long way to go, though.

Twitter: blazoncek  | Blog: blaz.at/home

Tibbs

tibbs-dragoon-wip

I’ve got one Dragoon pretty close to done. I need to finish up some decals and add weathering, then finish the base. I have a full base coat down on the next, and I’m working on the third before I wash them down and start adding highlights. This Skitarii and Cult Mechanicus army is still pretty new for me so there’s still a lot of experimentation going on. Check out the lightning arcs on the taser lance, though!

Blog: tibbsforge.com | Twitter: linguartisan

Patrick H

patrick-h-dread1

Dread painting meet nothing but setbacks all week. Dread one got 4 coats of paint just to get a base coat, and dread two didn’t get based at all. The paint I chose came out like water from the airbrush. I’m hoping it was a bad batch and I have more on the way for try number two on dread number two.

I’m behind across the board but I think I can get caught up.

Blog: legioxviii.blogspot.com/

Matt

matt-base-wip

There hasn’t been much progress this week as I’ve been swamped. I’m hoping to get some hobby time this weekend.

G+: MattFussell

ComradeQuiche

img_0958

At this stage after, I was happy with the pose I started working on the base. I ended up making 6 different base designs, and casting them in plastic. This makes it very easy to pin the model to the base, which allows for some more dynamic poses. Base style seems a little too flat though…

Instagram: ComradeQuiche

The Drill Abbot

drillabbot-dread-wip

As for my heresy-era Alpha Legion Contemptor for #dreadtober, things hit a bit of a delay the past week or so. I had worked ahead on basecoating and some highlights, so I’m not too far behind, though. I am not doing anything super detailed with the base itself.

Just threw some Astrogranite and Agrax Earthshade on it so far to get a dirty rubble look. I want the focus to be on the model, though, so I doubt I’ll do more than a little tuft or two of static grass to break it up. Next step is some major weathering and details like eye lenses.

Twitter: DrillAbbot

Jack Shrapnel

jack-wip

Basically once I finished the Khorgorath I just really hated the head of the thing, wasn’t stoked about the oval base it was on, or the fact he was somehow made to stand on a rock with a tree on it. I thought I’d be okay with it once it was done, but in my mind the face of the thing is a really bad design that is hard to read.

Off to the bits box I went, and found some stuff to make the base cooler (a khorne symbol a friend had given me) and figured the bloodthirster head fit the model a lot better.

It may not be a Khorgorath anymore exactly, but I actually might field it now

Blog: creativetwilight.com

Did I miss yours?

At the time of writing this, there are 116 people signed up Dreadtober. Which is both awesome and a bit overwhelming! So if I didn’t get your pledge posted above (or got it messed up), sorry and just let me know! Look for an email like “Dreadtober Challenge #4: Call for Showcase” and hit reply, or leave a comment below.

Next Up: Painting the Details

As this has gone up late, the next challenge is released where we paint the details and finish the models. By October 31st the idea is to have a fully finished dreadnought (or similar) that each of us is happy with.

Good Reads 38

Good Reads 38 – Awesome Hobby Posts from this Week

Boom! Another collection of amazing posts from fellow Hobby Bloggers hits your news feed. Take a moment (or more) and check out what these guys are doing, be inspired, and learn a few tips along the way.Good Reads 38

Origin of the Deathwatch

Original Brother Artemis Mini from Games Workshop

Original Brother Artemis Mini from Games Workshop

Having been involved with Games Workshop for many years, Gav Thorpe recently shared his story on the genesis of Deathwatch and why Space Marines were included in the Inquisitor 54mm scale range.

Sylvaneth Treelord Ancient

Sylvaneth Treelord Ancient with flowers

Treelord Ancient by Turkadactyl

I’m claiming it now, if GW puts out one of the Christmas box sets for the Sylvaneth, I am finally giving in. In the meantime, I’ve really enjoyed Turkadactyl’s tree army grow, this week with his finished Treelord Ancient.

Getting Muddy

How to Make Muddy Bases

Mud Bases by James Wappel

I’m not the only one making muddy bases this week as James Wappel shows how he makes realistic mud bases using MIG powders. It’s great to see the different colors and approach he takes to hint at mud and splatter, without going overboard.

Painting a Golden Deamon Winner

Dark Eldar Wych Dual

Wych Receiving the bad end of a blow by Kirsten

In part II of the series, Rory shares Kirsten’s thoughts and steps on painting the Wych half of her dual. It’s awesome to see why she chose certain colors. Awesome tip from her post: use a soft, 4B pencil for marking freehand.

Update: Rory has added part III where she paints up the Seraphim.

Creepiest Army on Parade Ever

Creepy Army on Display

A small part of Wilhelm’s super creepy board

I’m pretty sure I’ve covered a few of Wilhelm’s creepy-awesome army build, but here he has outdone himself with his Army on Display board. Not only are there a few odd heads into the display, but it has three levels of monsters in the dark.

Mongo the Beast

Dave Taylor's Mongo from Dark Age

Mongo by Dave Taylor

Dave Taylor is a fantastic artist and this model, Mongo from Dark Age is a testament to his skills. Between the fantastic warm skin tones and the cool concrete blocks, it’s a great composition and great weathering.

Until Next Time: More in Your Inbox

Well, that’s it for this week’s Good Reads. I hope you enjoyed the collection and left a comment for each of the bloggers!

If you are looking for more awesome every week, sign up for the Brush Stroke newsletter where every Sunday I send a collection of links scoured from the depths of the blogosphere for your enjoyment. Add your email below and enjoy!

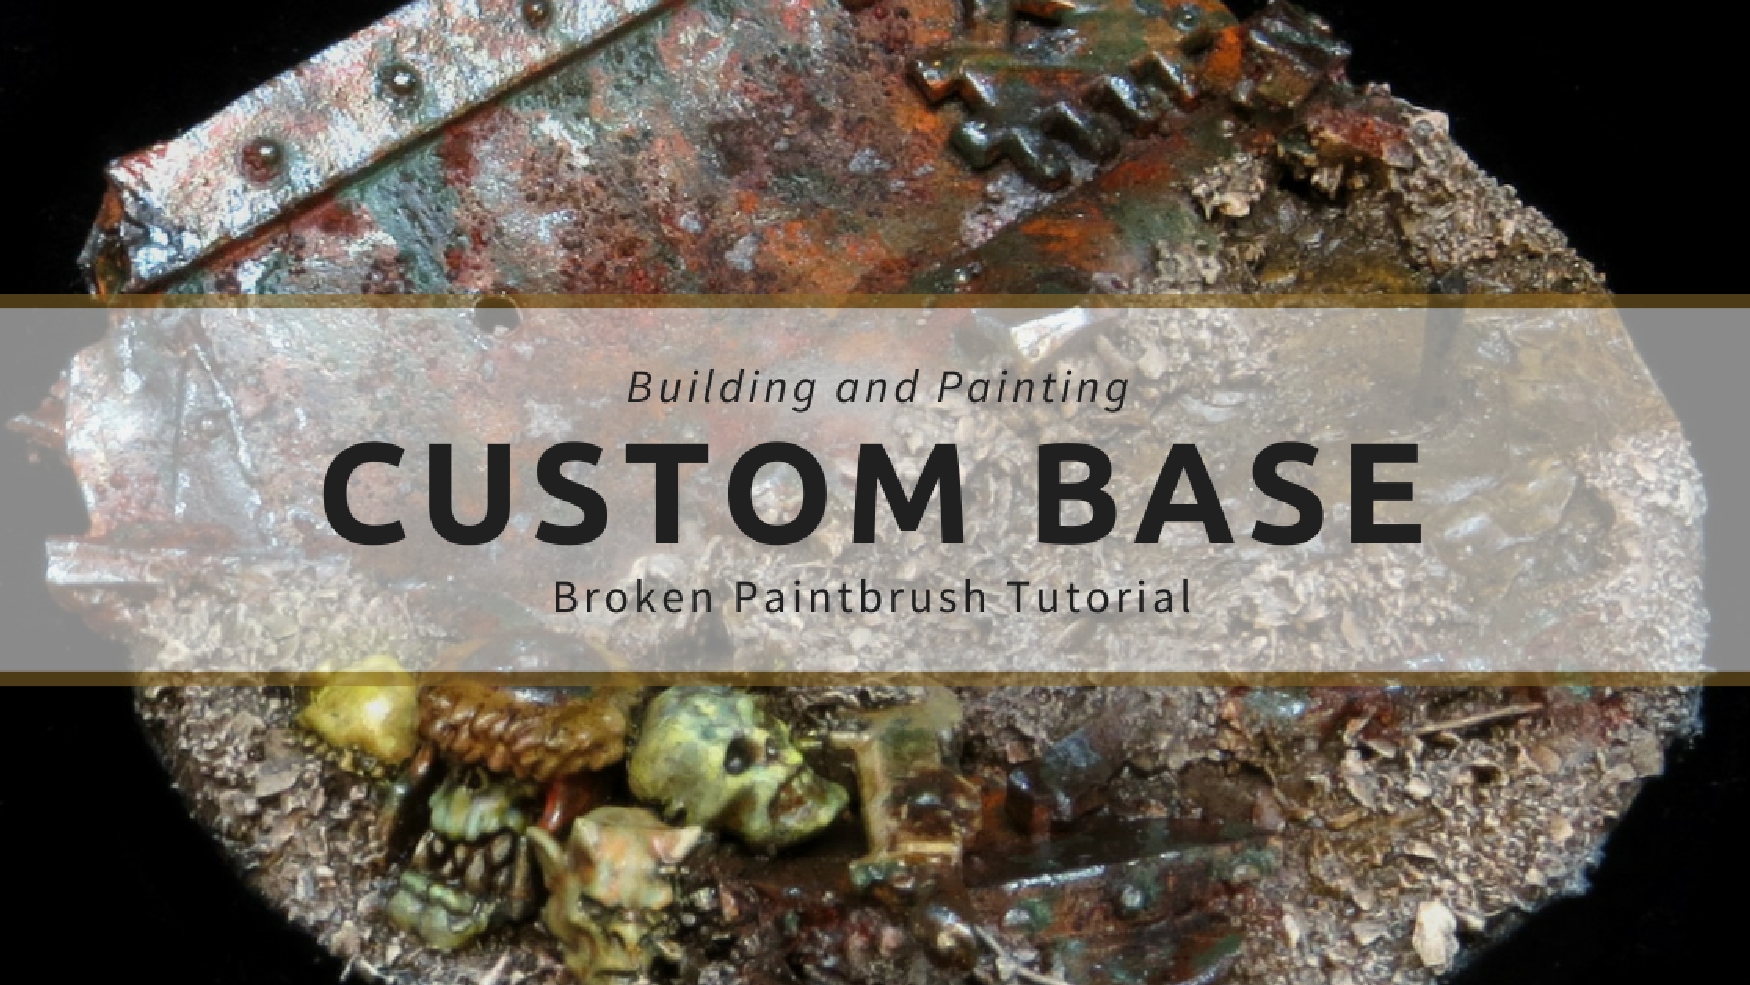
Build and Paint a Custom Base

Building and Painting a Custom Base

A model’s base can be tricky business. Make it too simple, and the model looks simple, make it too busy, and it drowns out the model. One solution is to buy some of the amazing resin bases on the market, but sometimes you want to create a custom base yourself. So let’s do it.

Build and Paint a Custom Base

Today is a tutorial on building a custom base with spare bits, clay, and sand. After completing the base, I add a few extra tips on painting it. While this one is more of an urban ruin, you can also check out my tutorial for a muddy base.

FYI: this is a huge post with a ton of pictures. If you aren’t able to read it now or want to save it for later, I put it into a PDF to download as well! Just skip to the form at the bottom, I will then email you the link to download whenever you want.

Planning Your Base

Yeah, I’ve been harping on this work ‘plan’ for a bit lately, but it does help to create a plan before diving too far into a new project. Remember, we are trying to balance the base between being too simple and being too busy.

Some of this planning goes back to what do you want the model to be doing? Should it be interacting with the base or merely standing upon the corpses of his slain foes?

If you have already built your model, or at least sticky tacked it together, try posing it on the base in different ways, try adding bits or even PlayDoh to visualize how it might look.

Character models look fantastic if you give them some height while walkers look awesome when they are stepping over/on other models.

Gather the Material

There are all kinds of things you can do to create a custom base, but here are a few ideas:

  • Cork – either sliced from a wine cork or more often a cork board
  • Spare bits – or even spare sprue
  • Small rocks – shale or lava rock work well
  • Pieces of wire or fine mesh
  • Clay – air hardening or two-part green/gray stuff

You can let your imagination run wild, but for most bases, limit it to just a few things and make most of them relatively small. A little piece of wire sticking out of a wall could indicate a broken connection, the wire coming out of everywhere is a mess.

First Step of building a custom base is gathering the bits

I get a small Tupperware bin and add pieces until I’m happy I have a bit more than I’ll need. I find it easier not to use something than have to go back and grab a few new pieces before the clay or glue dries.

Some Tricks to Build a Custom Base

Rather than a step-by-step post that may not apply to your project, I wrote up some tips and suggestions for your base. I used many of them in the base for my Mentors Dreadnought conversion pictured. Later on, I switch into painting the base.

Start with the Biggest Rock

If you’ve done any leadership seminar, you have probably seen the filling a container with rocks analogy. If you start with the biggest rocks, it’s much easier to fit everything else in too.

The same hold true here. Build up the most significant bits or scenery pieces first. Need a rocky outcropping for your hero to stand on top? Grab the cork and create the layers. Is it a monster smashing a foe? Add that section first to make sure it’s right.

Adding the first big rock and test fitting the model

With the biggest areas are often the most important for the base, so start there and get it done.

Don’t Glue Bits Flat

It can be tempting to grab that half barrel and glue it right onto the base, or some extra bit from a tank kit. But it looks fake, and well, flat.

glue bits at angles and mix it up

Instead, cut the part at a slight angle or add some scenery underneath to create a change of angle. Don’t be afraid to cut into the bits and mangle them. They are supposed to be ruined material anyway right?

Use Cork, but Don’t

It can be relatively easy to find sheets of cork from hobby or craft shops. Even office supply stores have them. So it’s no wonder that they have become so familiar.

Want some rocks? Just tear off a few bits of the cork and glue it down. Want taller rockers? Tear off more sections and glue the flat sections together. Check out Scott’s work to see what I mean.

Using cork and covering it up for the base

Base by Scott from The Brush Wizard

But also notice, he didn’t stop with the cork. Cork is easy, but it is also easy to tell it’s cork. Everything is uniform height and has flat tops.

So add some interest to it with clay, sand, or other rocks. Dig into the tops to add holes.

Mix Mediums

To add more depth and realism to the base, mix up the filler material. Mix sand, 1-2mm ‘rocks,’ shale, hacked up pieces of sprue, cork, or even clay. The variation adds interest while still keeping it simple.

Natural rockscape

A tip for a ‘natural’ look is to group larger rocks together and fill in around them with sand. This especially looks nice as a transition from cork back to the flat base.

Pin the Model

If the model isn’t being glued directly to the base or is a heavy model, it is important to anchor the piece to the base.

Attach the model to the custom base with pins

I drill in both feet of the model (tail, treads, whatever) and use sticky tack to hold into pins so that they just barely stick out. Add a bit of white paint to the bottom and, while still wet, set it on the base.

The white paint will leave dots where you need to drill. Once done, test fit again then remove the pins. I use ‘penny’ nails which have a small, flat head. I insert them from the bottom of the base so that this head is flat against the bottom plastic. I then cut it to length and attach the model from the top.

I also find it useful to glue the nail in place but not the model. This way you can paint up the base separate but still attach the model when needed.

Add Extra Glue

One of the worst things with bases is having material break off and expose the area underneath. It’s not surprising that it happens as we are trying to attach little pieces of rock against things that aren’t flat to another piece of material.

One thing I’ll do is once I glue everything in place is to take wood glue and mix it 2:1 with water. This makes a sort of sticky glaze that I cover all the rock, sand, clay, and cork.

Once it dries it creates a hard shell over the base that protects all the bits underneath.

A built custom base with various bits

Some Tips on Painting a Custom Base

Awesome, now we have built the base, now it’s time to paint it!

There are as many styles of bases as there are chapters of Space Marines. So, again, rather than diving into my particular base (though I share how I did mine the bottom of the post) I want to present a few high-level tips.

Use Spray Primer

Even if you followed my advice above on adding a layer of glue, there are still a bunch of potentially flaking bits on the base. Sand, especially sand. It never wants to stay glued down

But to add another way to overcome this, I use a spray primer on the base. I know most people use spray primer anyway, but for those who like to brush their primer on, I highly suggest spraying it for the base.

The spray floats in and about all those nooks and crannies in a way that would be difficult for a brush to do without breaking off bits of rock or completely destroying the brush.

Another quick tip with this: start with black and get it nice and covered. You can then do a dusting of brown, gray, white, whatever to provide some quick contrast.

Dry Brush is Your Friend

Bases tend to have a ton of texture, especially when you build a custom base. So take advantage of that and use a dry brush to knock out most of the painting.

Start with a darker color than you need and give it a good, thick dry/almost wet brush. This way you cover most of the primer but still leave the black in the deepest cracks. Work your way up in lightness. I often will end with a light brushing of off-white to make the ridges pop.

But don’t forget to make it dirty! If you are doing a rubble-strewn base, it’s going to have a mix of mud, concrete, metal, rust, etc. So maybe start with browns for the mud, then dry brush the gray concrete and metal areas. Add some rust in, then finally give it all another dry brush of your dirt color.

Mix Glue with Your Wash

If you want to provide even more structure to the base and keep all those little bits of gravel where they belong, add a bit of white or wood glue to your wash. Doing a wash after all that dry brush work tones the color back down and emphasizes the shadows.

Adding a bit of glue to it will harden the wash when it dries and adds another layer of crust to keep everything in place. It also has the nice benefit of protecting those first layers of paint from chipping.

Mix it Up with Powders

If you are going for an epic level of basing, use powders. Either Forge World, Secret Weapon, WarColors, whoever. They all make excellent sets of beautiful pigments in the various earth, rust, and metal notes.

There are two methods I’ve seen and used for powders: the dry dusting and the wet slopping (great names, right?).

Dry Dusting is loading up a brush with dry bristles and tapping it over the base. This causes it to ‘snow’ down and adds coloring as it would naturally fall. The benefit of using this technique is you can do multiple layers of different colors, and they intermingle without thoroughly mixing like paints would.

When done, you can use a fine mister to spray it down and cover with hair spray. This locks it in place without disturbing it too much. You can then spray the whole base with varnish to fully seal the model.

Wet slopping is more like painting. You load up a mixing tray with your different powders and add some medium. It could be just water, but I like using a mix of Airbrush Medium and Flow Aid. That way when it dries it holds the powder in place and the flow aid allows it to get into the small nooks.

After mixing the mediums together (you want it thickish like white glue), you slop it into the areas you want dirtied up. As the mediums dry, the powders add texture and interest.

Static Grass and Snow

A muddy, rubble-strewn base is great for many players, but others like to add another layer of interest.

To make it less barren, you could add stack grass, flock, or pre-made shrubbery. But unless you are going for a verdant theme (great for Treeman armies), it’s best to add it sparingly. Add some interest but not make it looking like the model is prancing in a field.

A different variation is to add snow to the base. Thor has written about how he adds snow to his bases with a few different effects.

Extra Varnish Layers

The base of the model will often get the most handling, jostling, and bumping as you move it about the table top. This is particularly the case for larger models where players may move other models or objective markers onto the base.

Adding the layers of glue is great for keeping things secure, but protecting all those layers of paint and washes and powders requires extra layers of varnish.

So while my models receive maybe two coats (three+ for characters), I often give the base about four coats. This may include a gloss coat between the dry brush step and the wash, and a matte layer after the powders. I then add another layer of the rim color (I use black) and spray a few more times.

As you have already painted the details, the layers of varnish won’t make them disappear as they would with heavy primer and glue layers. So don’t be afraid to add multiple coats.

Overview of My Custom Base

OK, so what to see how I put all this together for my custom base? This base is for the kit bashed Iron Clad that I built for my Mentors. I had modified the feet to make it charging forward and wanted to use that on his base.

So in the gather the bits phase, I found half a dozer blade (used the previous half on some Deff Koptas) and some other odds and ends. The dozer would work great as I could set it at an angle that the dread could be pushing off of it.

Attach the model to the custom base with pins

That was the ‘big rock.’ So I found a good spot for it at the back of the base and cut a bit off the back to angle it slightly (remember, don’t glue things flat). I then drilled the holes for the feet. The back foot needed to be angled slightly, so it made it a bit more fun – only the front pin was glued in place.

I then started layering in more bits.

A spare piece of a box-thing, heads of the enemies, and even the remnants of the back of the dozer blade were all glued in place. Every so often I would put the dreadnought back on to make sure I was adding to it rather than detracting. For example, the pile of heads on the left side balances well with the raised arm on that side.

Using a mix of green stuff and bits for a custom base

To fill in all the gaps and add more variation, I smashed in place a layer of Milliput. It’s not that different from green stuff and holds together the same.

I first focused on adding support underneath the dozer blade and other bits. Make a ball of the clay and, using a silicon shaper, force it into place. I then used common sculpting tools to move it around and add some texture to it. In some areas, I also pressed pieces of shale and rocks to make them look like they are sticking out of the soil.

A built custom base with various bits

I then spread out the white glue and covered it with sand. Let it dry a bit before knocking off the extra. In some areas, I wanted a bit more grit and so added another layer.

Building a custom base - primer stage

After a top layer of glue, I primed it with black and then an overspray of white.

Then I got to work with the paints.

Painting the Base

While my models have a pretty eclectic set of bases, the central theme is muddy, rocky ground with warzone rubble.

Custom base with burnt umber basecoat

To provide a nice, uniform base color, I painted everything with Model Color Burnt Umber (Rhinox Hide). This dark brown not only serves well for the mud but also the worn, rusty metal.

Adding rust with dwarf skin and hot orange

I then started the first layer of rust with Model Color Dwarf Skin (Ratskin Flesh) and Model Color Hot Orange (Troll Slayer Orange). I dabbed areas of the metal with both colors, focusing on the recesses and regions that would collect water.

Theses bright oranges look odd now, but we will tone them back.

Drybrush Gunmetal onto metal

Finally, I added some actual metal color to the metal bits with Model Color Gun Metal (Leadbeltcher). I used a dry brush on this and wasn’t trying to paint the whole thing, just catch the upper ridges and add streaks.

Basecoat the details

I then turned to the detail bits and base coated the faces with:

  • Model Color English Uniform (Ogryn Camo)
  • Model Color Light Brown (Tau Light Ochre)
  • Game Color Dead Flesh (Nurgling Green)
  • Game Color Bonewhite (Ushabti White)

Drybrush Light Brown onto Base

To pick out the rocks and dirt, I drybrush it with Model Color Light Brown (Tau Light Ochre). By saving this for the last pre-wash step, I didn’t have to worry about it getting onto other details. But rather, when it did, it was simply blending the base colors into the details.

In this step, you also see I added a bit of Model Air Gunship Green (Nihilakh Oxide) to the brass to add some patina.

The Magic Dark Brown Wash

And here we have the magically Dark Brown Wash (Agrax Earthshade) – don’t go home with out a few bottles of it!

Drybrush Bonewhite onto the base

After waiting for the wash to finally dry, I then did a quick dry brush Bonewhite (Ushabti White). This provided a quick distinction between some of the metal bits in the base and added stronger contrast with the mud.

Adding layers of rust powders

Here is where I got messy! The orange paint looks ok for basic rust, but to add texture and depth, it’s hard to beat powders.

I started by mixing WarColours Brick Red (same as Forge World’s Rust, but I wanted to try it out) with a drop of Airbrush Medium and a squeeze of Flow Aid. This made a mushy medium that flowed well but still kept some grit to it.

I applied this throughout the metal areas, grabbing a bit more grit here and there.

While the medium was still wet, I used a dry brush to pick up some Forge World Light Earth and Fresh Mud pigments. Holding the brush over the wet spots, I tapped the handle, causing the powder to fall into it.

This method adds even more grit and fine spots of each color. Where colors piled up too high or where too stark, I used the dry brush to push the powders about a bit.

Add more corrosion with Gunship Green

After allowing the medium to dry, but before sealing the powders in, I added spot washes of Model Air Gunship Green (Nihilakh Oxide) with added Flow Aid. This added a layer of corrosion and because the powders weren’t fully set, blended them in a bit.

I then sprayed the base with clear matte varnish to keep everything in place.

Adding back in some of the metal chips

At this point the metal areas where too rusted and brown for me, so I picked out edges with Gunmetal (Leadbeltcher). This was even less paint then the drybrush step above, more of particular application to areas I wanted to highlight.

completed custom base with mud and rust

And finally, I went back and finished the little details for the heads. While they were painted their respective colors, the highlights included a light blue to make them more ‘dead’ looking.

I used:

  • Desert Yellow (Tallarn Sand)
  • Dead Flesh (Snotling Green)
  • Bonewhite (Ushabi Bone)
  • Model Air Pale Blue (Lothern Blue)

With the highlights done, I added washes with a mix of Dark Brown Wash (Agrax Earthshade), Dark Yellow Wash (Seraphim Sepia), and Blue Grey Wash (Drakenhof Nightshade). Again, wanting to balance the ‘warm’ shades of brown with the ‘cool’ blue.

Completed Custom Base With Model

And with the dreadnought placed into position, I am really happy with the result. When I move onto the final details of the dread, I will add washes and powders to his feet that tie him to the base.

Wrap Up

And there you have it. I know this was a doozy of a tutorial post, but I hope that it has inspired you to add some interest to your next hero base. I mentioned at the top that using resin bases allows you to skip the build phase if you are looking for something quick. I use a bunch from Secret Weapon Miniatures and love them.

But I also build some custom ones like this dreadnoughts so that I can get the right pose for him. By using the same colors and techniques across the army, you can pull together all sorts of basing types and still make them look uniform.

Remember, if you want to save this guide for later, you can get the PDF version using the form below. Even all formated, it’s 19 pages long!

Your Tips

I want to end by handing the comments over to you. Do you have additional tips and tricks you use on your bases? Supplies you couldn’t live without? Or maybe you like simple bases. Share your thoughts and suggestions in the comments below, and we can start a conversation.

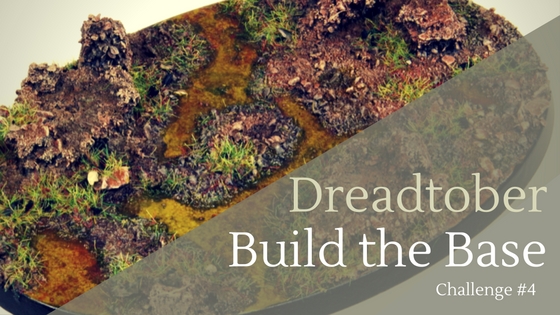
Dreadtober Challenge: Build and Paint the Base

On to Dreadtober Challenge #4: Painting the Base! At this point, our participants have created a plan, built their dreadnought (or similar) and painted the primary colors. Now it’s time to give it a frame.

As a continued reminder, these challenges are only meant as milestones. If you keep your bases simple or super complex, do Dreadtober your own way. As long as you are making progress and having fun, then it’s a success!

Challenge: Build and Paint Your Base

With the Build your Dreadnought and Paint Your Dreadnought (base colors) challenges, I recommend skipping the base as we would come back to it. Well, here we are! Now it’s time to build up an impressive base for your dreadnought to stand heroic. Then get the paint applied!

While I typically wait to paint the base last, I purposely moved this challenge before the Paint the Details. This way, if you get base colors on your dread’s feet or want to add consistent weathering between the base and the model, it will much easier to do at this step.

Result: A Base to Stand On

At the end of this week, you should have a dreadnought (or something cooler!) built, mostly painted, and now on a finished base. You might even consider it done at this point (though I hope you try next week’s challenge too!) and ready to play.

Helpful Tutorials

To help you build and paint your base, I’ve pulled together some tutorials on the subject below. Read what you need, find some inspiration, and I hope, push yourself a bit further. Most of all, have some fun and share it with the community!

Painting Large Bases

I created a tutorial on painting the muddy base used for my Tyranids including using gloss paint to add water effects.

Ice Bases

Thor uses a mix of ice and snow on his bases, so it’s no wonder he created a tutorial for creating ice effects using still water and using a combination of mediums to create fluffy snow effects.

Using Weathering Powder on Bases

Weathering powders are versatile tools, especially for bases. John on the 40k Hobby Blog wrote how he used them to color foam board brick walls.

Creating a Display Base

Andrew from Miniature Miscellany describes his process to build up a display base. I especially like how he uses leftover lids to create the height.

Still Need Help?

Remember, this is a community event, so jump on Twitter, Facebook, or Google+ and post your questions, a WIP picture looking for critique, or ask for opinions. I’ve found Twitter is the most responsive community (I’m more active on there too). Use the hashtag #dreadtober and we will jump in and help each other out.

Get Your Base On!

I’m looking forward to what everybody comes up with! The idea of basing our models has evolved a lot over the years from the simple flock and Goblin Green to some amazing resin and scratch built display pieces.

No matter where you go on this spectrum, it’s your hobby. Have some fun this week, catch up on painting model if needed, and share your progress!

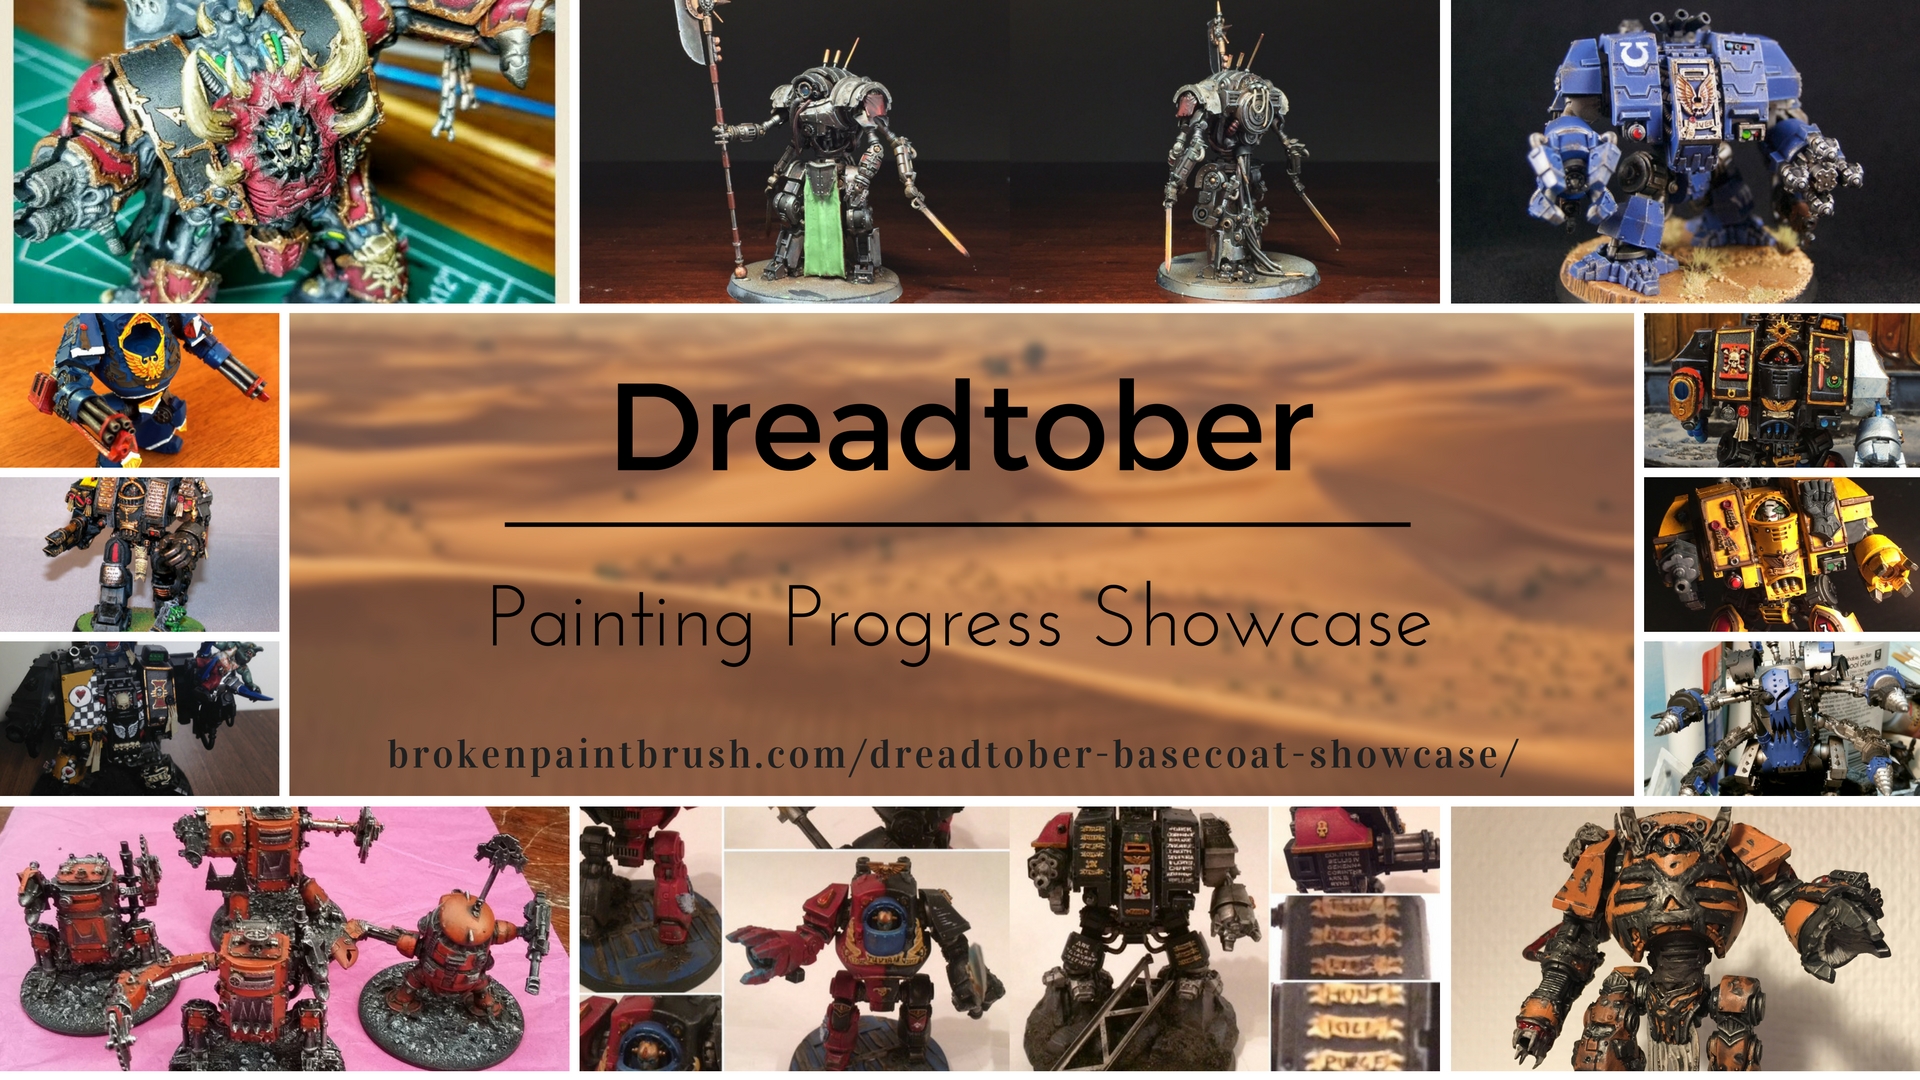
Dreadtober Basecoat Showcase

Dreadtober Basecoat Painting Showcase

We are half way through the Dreadtober challenge and our participants have completed the third challenge: Paint your Miniature (with base colors). As you check out their progress below, keep in mind that each week’s challenge is more of guidance and not everyone follows it exactly.  Some have already finished, others are just getting started!

Dreadtober Basecoat Showcase

In the end we are all having fun building and painting an awesome dreadnought-like model! Check out their progress below, leave them a comment below, or give them a follow to see more of their work.

Basecoat Painting Showcase

Note: Some are copied from last week as they weren’t able to make progress (life ya know!) but I still want to highlight the awesome work everyone is doing.

Albie

3rd Company Imperial Fists Venerable Dreadnought

Albie 3rd Company Imperial Fists Venerable Dreadnought

I’ve made a lot of progress on this Venerable Dreadnought in the last week and it is practically finished! All that is left are the little things.

The Imperial Fists colors are tough. Yellow is a terror, but I like the way it looks. Some techniques I have used other models are present here…

  • Yellow: Citadel Yriel Yellow layered up and shaded with Citadel Reikland Fleishade.
  • Golds: Valejo Model Color Flat Earth with Citadel Hashut Copper on top and shaded with Citadel Nuln Oil.

Instagram: albatron

Daniel Givens

Daniel Givens Dreadnought

I decided to break from how I did my first two dreadnoughts, and went with how I’m starting to go with the rest of my vehicles. I do the normal highlighting, then using a sponge, dab some Ironbreaker to some high points and then follow with some Typhus Corrosion sponged on over top. I think it gives a nice weathering effect. I also painted over the decals by sponging on some of the Macragge Blue I used for the base and painted over it with (I think) Ulthuan Grey to give them a bit of texture.

Instagram: daniel_givens

AJ

AJs Work in Progress

Progress is good! Had some issues with the airbrush on my highlights, but we will see how it goes. Magnets are set.

Facebook: vigilanteminiatures

Ashley

Ashely Murder Fang Dreadnought

Finished my assembly this week. He’s a really fun model, I’m really looking forward to putting some paint on him his week.

Editor’s Note: Ashley did an awesome shoutout on the 40k Radio podcast for Dreadtober too! Check out Episode 6 around the 30 minute mark (listen to the rest for great 40k as well!)

Twitter: chickhammer  | Blog: chickhammer.com

Glenn

14612369_2118834075007736_8901877293825810017_o

All the info should be here: https://www.facebook.com/NarrativeGuys/photos/a.1886477544910058.1073741829.1882082195349593/2118834075007736/?type=3&theater

Facebook: NarrativeGuys

Grenn Dal

20161012_221354

I have started the painting process and have the main colors laid down on the walker. Next up will be the secondary color and then finally the highlights.

Twitter: grenndal  | Blog: xenoftw.blogspot.com

Skyfyre

skyfye-killa-kan

Killa Kan progress. Most the base coats are on, still a few more to go. Then on to touch ups.

Twitter: Nayr00 

Joe B.

Using bonewhite to highligh purity seals and parchment

I have all the base colors, wash, and highlights completed. Next up is to complete the base before going back and doing the weathering and decals. I wrote up a painting tutorial for anyone wanting to learn how to paint Mentor Legion or even any of the colors I used.

Twitter: brknpaintbrush  | Facebook: brokenpaintbrush | Instagram: brknpaintbrush

 Kyle Haydon

Kyle Contemptor Dreadtober

Progress this week went smooth aside from snipping off a thumb claw, which still needs patching. The claws are my principle addition to this already spectacular model – but the studded pturges help fill in its shape and movement I think!r

Instagram: kyle.haydon – primary spot for the WIP work!

Twitter: KyleHaydon  | Instagram: kyle.haydon | Blog: hobbyvices.com

Marc

dreadtober-base-colours

The majority of base colours are down and it isn’t much to look at. I have chosen a bunch of colours that I wouldn’t usually use together, but they fit the Deathwatch/Techmarine scheme. Next I will be adding a shirt-load of depth to everything.

Blog: oldschoolg4m1ng.blogspot.com.au

Norm

 Norm Deathskull Deff Dread WIP

Currently on the second color. As Deathskulls, I pick somewhat random bits to be blue or other shades of metallic to represent looted bits. I use both ultramarines and crimson fist colors, and then as a spot color, and to show they don’t just loot imperials, I usually have a bit or two painted up in Bad Moon colors. Those are yet to come on this one.

Twitter: normnondo

The Mad Mek

Mad Mek Wrecking Deff Dread

I am working on a rescue model. A lot of the original parts were damaged or lost. I replaced one of the arms with a Wrecking Ball and went to two big shootas.

Blog: madmekworkshop.blogspot.com

Mihalis “Cadaver” Skalkos

cadaver-dread-wip

I managed today to finally put some paint on my Death Guard dread. I attach my work in progress. Just some airbrush work at the moment, with some basic shades and highlights. Hope you like it. Hopefully, I will update my blog soon with more info.

Blog: homeofcadaver.blogspot.com

Lonely Kitbasher

d-powers-sratch-dreadnought

I’ve finished my dreadnought! Seeing as we’re not quite halfway into the month yet, I’ve had a go at starting another, just for a bit of a laugh. I’ll have to source another land raider power plant from somewhere now.

Blog: imalonewithadream.blogspot.co.nz | G+: D Powers

Eric

eric-alpha-dreads-wip

I’ve put together my 3rd Dreadnaught, The Deacon and I have base coated all 3 of my Dreads. https://plasticresinmetal.com/2016/10/15/dreadtober-3-oct-15th-progress/

Blog: plasticresinmetal.com | Instagram: eleive1

Anthony aka MasakiSayz

anthony-killa-kan-wip

Progress has slowed down a bit, this has been a busy week. Still trying to nail down the freehand checkers, but they’re off to a good start.

G+: AnthonyPaoliMasakiSays

Rory

Thousand Sons Hellbrute - ghost skin failure.

Ok so taking pictures with a flash on never looks good but this was a real downer this week, I got a lot of work done and sat back and thought it looked pants. Not a happy Lord of Change me. I will have to come back at it soon and see what I can do. My plan is to go for an almost ghostly flesh with this one and then later on cover the metal in writing/scripture/spells. I know that sounds a bit Word Bearer like but I am planning to use this Hellbrute for a Hellcult, a living icon of Chaos. I wouldn’t be shocked to have sorcerers use it as a walking spell book with an attitude problem.

Bonus: Rory’s Guests

Not only is Rory building the awesome dread above, but is hosting a few of his friends’ projects as well. Make sure you check them out http://gamestepping.blogspot.ie/2016/10/dreadtober-2016-part-3.html – oh and he has some bonus LARP shots in there as well!

Twitter: macantsagart  | Blog: gamestepping.blogspot.ie

Doug Kus

trapjaw-week3-dreadtober

My ‘Trap jaw’ helbrute has been base painted and then washed in a heavy mix of Paynes Gray and glazing; however, I still have quite a bit of detail work to complete. Still, it’s progress!

Blog: barehandfishing.com

TheRhino

theRhino Dreadnought

I’m out of town until next week. Before I left, I blocked in most of the colors on my Raven Guard Dread. Normally, I paint one color at a time, start to finish. This is my first time painting multiple colours before advancing. It should save me some frustration when I get to the Nuln Oil wash.

Blog: thinyourpaint.blogspot.com

Black Shield

black-shield-lameters-dread-wip

Progress has been slow lately, but still finding time . Currently focussing on the body, and banner. Banner is lacing something, not sure what to add to it . Still lots to be done.

Twitter: squizzato_eric

Arkhanist

Been struggling to get the battery to fit inside for the LEDs, so new plan with smaller battery. Meant more magnets on the dread chassis, but week’s been busy with the daughters so no paint yet this week.

Blog: theguildhouse.net | Twitter: arkhanist

Dan D.

img_2955


lots of progress pics. Bottom of model is coming together. Not sure I like the teeth, I bought some different metallic to try and mute the shine a bit. Next up is dry-brushing the wings. Base is pretty much done, so I can get more painting done during base challenge week 😉

Niklas D.

niklas-d-wip


No real progress this weekend, school and activities got in the way.

Dave S

image1

Progressed well this week, base coats and weathering are down for the Domitar. Hairspray chipping on the shoulder pads went really well.I also re-designed her staff and am currently resculpting the tabard.

image2

In a move I am bound to regret when I run out of time at the end, I decided to add a stretch goal in the form of a Deathwatch dread, truescaled to match the marines I’m working on.

Blog: plasticresinmetal.com | Instagram: thepolysmith

BruceT

BruceT Flesh Tearers Dread

I’m away this week, so I’ve ploughed ahead to make sure I don’t fall behind. I printed off some transfers from B&C, but I’m not satisfied with the result. I’ve asked a friend who is a graphics whizz to see if he can help!

Facebook: Forged in the Warp

Culial

dread-in-progress

So, my week has taken a few unexpected turns and the build has not progressed as anticipated. I have, however, also made a start on the base – so ahead on one part, behind on another…

I’ll be doing my best to reclaim ground on the project in the coming days!

Blog: Dakka Dakka

Darren Bogus


img_4218

I filled in the gunmetal and washed it. Armies on Parade ate up some time, so I didn’t complete as much as I’d like this week.

Twitter: darrenbogus

Warhammer39999

wh39kcontemptorwip-5

My progress this week is about blocking in the colors on the dread–which I expect to have completed painting by next week. The color scheme is going to be very primary in nature–emulating the classic 2nd edition Ultrmarines that I use throughout my army. You can see more information (and photos) on my blog at this post: https://warhammer39999.wordpress.com/2016/10/12/dreadtober-blocking-in-the-colors/

Blog: warhammer39999.com

Mike

mike-dread-helbrute-wip

Week 3 was busy, but I was able to make some good progress! Most of the trim is done, some detail work is completed, and almost everything has been washed. Next week I’ll be focusing on highlights, additional detail work, and if I’m lucky my first attempt at battle damage. Nothings glued together, hence the rather large gaps in the pictures while it is still dry fit.

Twitter: Mike_Schreiner_  | Blog: mikeschreiner.com

NafNaf

NafNaf Space Wolf Contemptor

Running a bit behind but here is my progress so far. Finished the build now. Trickiest bit was the posing with the left leg and sculpting the bit Inhad carved out. Happy with the final result though, and all the space wolves bling really makes him part of the Vlka Fenryka!

http://objectivesecured.blogspot.co.uk/2016/10/spave-wolves-betrayal-at-calth.html

Twitter: NafNaff81  | Blog: objectivesecured.blogspot.co.uk

WestRider

westrider-dread-trio

I’ve kicked things up a notch by adding in a half-painted SW Contemptor I need to finish for a Tournament this month. Pretty well on pace, since I don’t really need to worry about basing.

http://cascadiangrimdark.blogspot.com/2016/10/dreadtober-3-new-challenger-approaches.html

Blog: cascadiangrimdark.blogspot.com

Dean Kelly

dean-killa-kans

I’ve got all the base colours and highlighting done on the main panels of the models and done a little dry brushing on the bases. There’s still a lot of work to do on the detailing and weathering, but I’m on schedule and still very much enjoying the project – thanks!

Blog URL for this weeks’ work: http://wargames-wasteland.blogspot.co.uk/2016/10/orks-killa-kans-part-3-dreadtober-2016.html

Blog: wargames-wasteland.blogspot.co.uk

Robert

So here are my WIP photos for the build week. As you can see I added did a little repositioning of the legs to help the contemptor look like he was moving forward and look a bit more aggressive.

thumb_img_0587_1024

Additionally, I added the World Eaters iconography from the Forgeworld etched brass set. The skulls on the left shoulder are from the GW skulls bitz blister and the chain is just jewelry chain I picked up from the hobby shop. Finally, I sculpted the ablative armor nodes on the left leg using greenstuff. All in all, a few simple modifications that I think give the model a lot more character. I’m stoked to start painting!

Blog: 30khobbyblog

Mordian7th

brothernihilusptd-4

Crossed the finish line with Brother Nihilus, as I had an October 15th deadline to get him finished for the Armies on Parade event going on at the local GW shop. Continuing experiments with the marbling effect turned out pretty neat, definitely going to be trying it out on future projects in different colors!

Blog: mordian7th.blogspot.com

Jamie Searle

jamie-wip-dreads

Brother Thanatos, my Red Hunter Deathwatch Dread is coming on nicely, base coating is complete and details are getting added.

As a bonus Codicer Tuvian, my Angels Sanguine Librarian Dread is now fully finished. Base and all, highlighting and weathering the black was a learning experience, as was playing with transfers to create an Angels Sanguine Chapter symbol. My other two Angels Sanguine Dreads are also almost fully base coated, so all progress is up to pace. 🙂

Twitter: DrakePoldragon  | Blog: timandjayplay.blogspot.no

Wudugast

slaanesh-sonic-dreadnaught-convertordie-wip-1

So whilst others are celebrating the first layers of paint I’m only just completing the conversion itself. The extra time has proved worthwhile however, the model is looking very much as I first imagined it. Now I just need to get this bad boy painted!

https://convertordie.wordpress.com/2016/10/13/cracking-the-wip-dreadtober-part-2/

Blog: convertordie.wordpress.com

Thomas

Thomas Khrone Chaos Dreadnougt

Progression is pretty good, I got the most of the main base colours down, including the first rough wash and weathering. I’m currently relayering the orange and will start going of the details soon. I will try and experiment a bit the plasma glow once I get there. The paint scheme is of my Chaos Space Marine warband the Lords of Ascension. Here’s a link to the latest WIP post: https://hightimesontheeasternfringe.wordpress.com/2016/10/12/wip-chaos-contemptor-conversion-part-4/

Blog: hightimesontheeasternfringe.wordpress.com

Andrew

Building a complete, modern Forge World model has been exciting for me. The only other experience with FW models was when I made the old (resin!) Valkyrie in the early 2000’s.

Andrew Dart Contemptor Dreadnought

This contemptor dreadnought will be the centerpiece for my new force of Imperial Fists. I’m hoping to portray the entire force as veteran soldiers, their armor ancient relics from past campaigns. As a result in mixing in Mk IV armor, contemptors, and other “relics” into my standard 40k force. I haven’t done anything special to the model as I think it’s wonderfully designed as it is – though I will have to repair a knee plate I accidentally cracked.

More shots of my progress and ongoing campaign (with friend and Dreadtober contributor Kyle.Haydon) can be found on my Instagram: @hobbyvices

Blog: Hobbyvices.com | Instagram: hobbyvices

CJ

CJ Catellax

I took my Castellax apart this week so that I can clean it up and give it a bit less static pose.  https://grimdarkvoid.blogspot.com/2016/10/dreadtober-002-building.html

Blog: grimdarkvoid.blogspot.com

Harry Wagstaff

Gradually getting the suits built, although I’ve had a bit of a delay in getting them magnetised. Nearly ready to prime them ready to paint next week though!

crisis-suits

Link: https://awesomeclaw.wordpress.com/2016/10/03/dreadtober-building-the-crisis-suits/

G+: HarryWagstaff

Wolfsherz

wolfsherz-wip

I’m almost finished the major parts of the model. “Only” some smaller parts like spikes, tongues and and eyes are left. Still suppose that I’ll need the rest of next week to get them done.

Twitter: Wolfsherz  | Blog: wolfsherz.wordpress.com | Instagram: wolfsherz._

Dan from The Narrative Guys

Dan Narrative Guys Dreadtober

This week I am head on goals and somehow my test models turned into part of the project. So now I am doing a team of three Imperial Fist Contemptors. The bases are done and they are all yellow.

Facebook: NarrativeGuys 

Paul

I have had 3 dreads at various stages of finished-ness so I’m using #Dreadtober as motivation to complete these models.

Paul Graddon Dreads

So far I have been working on laying down a basecoat on the least completed pieces, and little shading work and chipping the paint work.

Facebook: paul.graddon.5

Andrzej Mezynski

andrzej-dreadknight-wip

I’m progressing quite well – done all the base and layers, now I’ll be dry brushing and washing

Colours: Basecoat: Chaos black spray. I used leadbelcher for silvers – didn’t decide to use any other layers like ironbreaker, because IMO leadbelcher is good enough silver 🙂 – will wash Armour with thinned Drakenhof and on weapons I’ll use Nuln Oil.

Blacks are done with Abbadon and will be drybrushed with Necron. Reds were done with first Khorne Red and then with few layers of Mephiston – will then wash them with Carroburg Crimson. Gold is Retributor Armour layered with Gehenna Gold and will be washed with Agrax, while for sword I used a mix of Caledor Sky and Leadbelcher. And purity seals are Khorne with Zandri Dust

Twitter: AndrzejMezynski

PopCultureCube

 PopCultureCube Glotkin

Progress is going well. I primed/based the Glottkin with Krylon’s spray camo green, and then painted on a layer of Thrull Flesh from P3 to the raised areas. After that, I washed it in Athonian Camoshade and mercifully arrived at the exact skin tone I was after. The horns I based in Deathclaw Brown (part of a technique I use to get an aged ivory tusk lock) and his hooves in Vallejo Dark Sand. Really happy with it so far. On to the details!

Twitter: popculturecube | Instagram: popculture_cube

#2501

dwdreadfront

When I start painting a model I usually grind on through to the end, so I progressed along a fairly rapidly. In retrospect, I wish I’d taken the time to cut some bevels around the torso panels in front, but even without gold bevelling, I think the metallics get the point across, so I’m generally satisfied with the way it turned out.

Blog: musingsofametalmind.blogspot.com

Makkeru

makkeru-wip-dreads

This week has been slow, I just managed to squeeze in one good evening of painting. Got the main colors and metal parts done but not much more.

Twitter: makkeru | Blog: wip-piw.blogspot.com

Rob @ iToysoldiers

rob-s-itoysoldiers-wip-dread

So the highlighting is coming along. I’m basically using the instructions from GW on how to paint the World Eaters. Small change though: I base coated with Celestra Grey then did a full wash and then a layer of Ulthuan Grey and then a highlight of straight white. Still need to finish the highlights on the metal. But it’s coming along. Up next: Weathering and basing and lastly adding the iconography.

Twitter: iToysoldiers  | Blog: itoysoldiers.com | Instagram: iToysoldiers

Dave Mary

dread-front-paint-3

This week I took on the dreaded edge highlighting of the black armor of the dread. In the end, no so bad. I chose a very fine highlight. Hope it carries well enough – definitely adds definition. Some spot washes and other details, including the plasma canon as well. I will tackle the remaining two weapon options next. The base got some love…I really enjoy mixing spot washes of various colors combined with various dry brush layers to vary the ground cover. Picked out the Eldar helmet on the base.

http://262krieg.blogspot.com/2016/10/dreadtober-2016-update-2.html

Blog: 262krieg.blogspot.com

Greg

wolf86sven-helbrue-wip

Well a new challenge has been set, I need to get a 1500 pts force built. So here is my dreadtober so far. A black legion hell brute. Hope to be fully built and based next week.

Twitter: wolf86sven

Sav

sav-wip-dread

My headless dread is getting there. Couldn’t decide on blue or green so did both!! Just details and base to do

Twitter: sav10g 

Matt


matt-b-wip-dread

Been working away this week so only just managed to get some colour on it!

Instagram: ultramarine__blue

Eric

eric-dark-angels-wip

Progress: Overall I’m pretty much done with painting my dreadnought. I tried to use brighter colors to contrast against the abbadon black and Caliban green.

Siph

seph-contemptor

Hi, I’ve started progress with the Contemptor Dread for Dreadtober. I started from the base upwards, its going to be my 10th Relictors dread, hence the grey scheme.

Blog: weemen.blogspot.co.uk

Jason

jason-dread-wip

Getting into the colours now and the model is starting to look more interesting. Unsure which way to go with the right shoulder (gold or black) weekend comming up so looking forward to more hobby time. 🙂

Twitter: jtuvminis

Mark


mark-dread-wipThis week I painted the Ultramarine colours onto the dread. I’ve been debating on adding a gold element or leaving it more blue and white. I’ve started weathering the feet and body. The base is part resin and I’ve added a lone boarding shield because the dread was able to balance on it plus it adds some character.

Twitter: ultima_ant

Jimmy

2016-10-09-22-38-05

48 hours late, but Bob’s up and walking, sorry about the delay https://jamesworkshop.net/2016/10/09/dreadtober-building-brother-bob/

Twitter: sonofultramar | Blog: jamesworkshop.net

Adam Abramowicz

adam-abramowicz-dread

Between unpacking and setting back up my studio, I was able to build up this dreadnought.

Blog: beyondthebrushstudios.com | Facebook: beyondthebrushstudios | Instagram: beyondthebrushstudios

Chris


chris-dread-wipFinished major highlights trying to do these with airbrush. And I started blocking in some of the major colors on the arms

Instagram: Relic_Knights_Studio

Rob J

20161011_203234

I was gifted the models of the Dark Vengeance set by my Sister and Brother-in-law. Since I have a wife and three young children, I hobby on a budget and nothing can be wasted. I am attempting to convert this Hellbrute into an acceptable proxy for a Venerable Dreadnaught for my Dark Angels.

Blaž

blaz-deathwatch-dread

Since I am a chaotic painter I’m glad I was finally in the mood to add edge highlights to my dreadnought. Still a long way to go, though.

Twitter: blazoncek  | Blog: blaz.at/home

Tibbs

tibbs-dragoon-wip

I’ve got one Dragoon pretty close to done. I need to finish up some decals and add weathering, then finish the base. I have a full base coat down on the next, and I’m working on the third before I wash them down and start adding highlights. This Skitarii and Cult Mechanicus army is still pretty new for me so there’s still a lot of experimentation going on. Check out the lightning arcs on the taser lance, though!

Blog: tibbsforge.com | Twitter: linguartisan

Patrick H

patrick-h-dread1

Dread painting meet nothing but setbacks all week. Dread one got 4 coats of paint just to get a base coat, and dread two didn’t get based at all. The paint I chose came out like water from the airbrush. I’m hoping it was a bad batch and I have more on the way for try number two on dread number two.

I’m behind across the board but I think I can get caught up.

Blog: legioxviii.blogspot.com/

Matt

matt-wip-dread

I’m making a Dark Angels Venerable Dreadnought for my Angels of Silence successor chapter. I’m working on learning airbrushing and building contrast … it’s a process, and work on catching up this week.

G+: MattFussell

Other Participants

The following are those who have signed up and either haven’t been able to start yet (some are on honeymoons! or moving 🙁 ) or not yet replied (if that’s you, reply to the email!).

  • Matt K.
  • Greg Zeitlin
  • J.R.
  • The Drill Abbot
  • Zork
  • Jack Shrapnel
  • Karl Hungis
  • Greggles
  • David Raghanti
  • Reuben
  • Rob aka Voracious Gamer
  • Chris
  • Mike
  • Gothmog
  • Xach
  • JF Dubeau
  • Ruleslawyer
  • Andrew Taylor
  • James
  • Ryan
  • Tarron
  • Will

Did I miss yours?

At the time of writing this, there are 91 people signed up Dreadtober. Which is both awesome and a bit overwhelming! So if I didn’t get your pledge posted above (or got it messed up), sorry and just let me know! Look for an email like “Dreadtober Challenge #1: Call for Showcase” and hit reply, or leave a comment below.

More To Come

Tomorrow the next challenge will be posted where the participants are to build and paint their base. Of course, it is also a float week for those who need to spend more time on the base colors or get started on the details. Either way, it’s going to be more awesome progress!

Good Reads 37

Good Reads 37

Good Reads is all about sharing some awesome content from fellow hobby bloggers. Every day you guys are building, painting, and writing some amazing things. I try to gather some of my favorites here to share with all of my readers.

Good Reads 37

With Dreadtober in full swing, I haven’t been able to fully keep up with all the blogs, so if I haven’t commented lately, sorry! And since I missed last week’s post, this one will be a bit longer than normal.

Keeper of Secrets

Slaanesh Demon Prince Conversion from Verminlord

Slaanesh Demon Prince by WestRider on Cascadian Grimdark

Not one to wait another dozen years for the model, WestRider converted his own Slaanesh Demon Prince from a Vermin Lord. It’s an incredible twist on the Dark Princelings.

Death Rattle Army

Death Rattle Army by Heavens Teeth

Army by Heaven’s Teeth

One of the nice benefits of the new ruleset in Age of Sigmar is being able to create small armies that play well. No longer needing blocks of 100 skeletons, Heaven’s Teeth built up this Death Rattle army rather quickly and it looks great.

Learning About Infinity

pictures property of Corvus Belli

pictures property of Corvus Belli

Corrm recently had a guest writer, Chris Rhode, who shared his experience on learning about Infinity and how he got hooked. I like the idea of these small skirmish games as you get a lot more character in each model.

Painting Word Bearers

How to Paint Word Bearers by Death of a Rubrist

Word Bearer by Apologist

Apologist from Death of a Rubrist does incredible work, the latest is creating a multipart painting guide for Word Bearers. Some incredible tips from this amazing artist.

Nekima in Blood

Nekima painted by Zab

Nekima by Zab

Zab from Almost Perftec has been working on this lady for awhile but has now completed his Nekima model. He’s got some great tips on make the gory red base in there too which is awesome.

Magnetized Hills

Creating Gaming Hills with Magnets

Hills by Dagger and Brush

Creating scratch terrain isn’t as common as it once was with the plethora of gaming companies creating awesome sets. But hills are always a great addition and fairly easy to make. Dagger and Brush put together a guide for creating hill with magnets to hold on trees.

Dreadtober Build Showcase

Dreadtober Build Showcase #2

So you couldn’t get away to fast without a hint of #dreadtober right? Well if you missed last week’s Showcase post, make sure you go check out what all the amazing participants are working on. And tomorrow, the next will go live!

Wrap UP

I want to do a general call out for my newsletter that I post weekly. It has a similar flavor as Good Reads in that I share a bunch of great posts from the webs. Mixed in with the latest posts from Broken Paintbrush are articles I have found for painting, building, photography, or just plain inspirational.

So if you want more hobby goodness in your inbox (better than coupons right?) fill in the form below and enjoy!

Mentor Legion Painting Guide for the base colors

Painting the Mentor Legion Dreadnought Part 1

Ready to start painting your model but not sure how to begin? In today’s tutorial I will show you how to paint a Mentor Legion Dreadnought with plenty of tips and tricks that you can apply to your own models.

Mentor Legion Painting Guide for the base colors

This is part two of this six-part series for Dreadtober 2016. Last week I showed you my processes for building a custom model through kit bashing. In this post we do all the main colors, leaving the final details for another tutorial.

The Mentors are a great chapter to teach a bunch of different colors as they have white (gloriously hard white!), dark green and red, and I even throw in some yellow to mark them as the second company. Add in the metallics, cabling, lenses, and later detail work I am pretty confident that there will something in here for you.

Getting Started

We left of last week’s tutorial with an assembled model ready for paint. So the first thing to do is give him a coat of primer. The primer does two things: covers all the different materials (color and texture) and gives something for your paint to hold on to.

I don’t use anything fancy for my primer, sometimes it the cheap stuff from Walmart. The trick is to apply it correctly and Dave G put together how he does it. The basic steps are:

  1. Spray on warm, non-rainy days or in a spray booth
  2. Shake the can really well to mix up the paint
  3. Attach the model to cardboard or a small wooden stick
  4. Start spraying off to one side of the model and sweep across it
  5. Do a light coat on one side, turn the model and do the others
  6. Allow it to dry before doing any more layers

Another thing to note about priming is that it doesn’t have to be completely uniform as you will be covering it with paint anyway. It just needs enough for your layers to stick well.

I have played with different colored primers and found that using black is the best way to start as it creates instant shadows in all those nooks that are otherwise impossible to get a brush into. This way they are left black (and thus hard to see anyway) rather than stark white.

Customized Dreadnought for the Mentor Legion

If it is a light colored model (like the Mentor Dreadnought here) I then do a second, very light spray of white or light gray. I tilt the can about 45 degrees from the model which leaves the underside dark. This pre-shading is often call zenithal and works great if you are airbrushing your model as the different shades of primer really help.

Since I currently hand brush everything, the second coat of primer really just helps paint the white and yellow areas.

Painting the Base Colors

With the priming out of the way, I like to paint all the main colors on the model. You will see this in pretty much any of my tutorials as it helps me figure out where each color will go and not miss areas if is just paint a single color at a time.

Base Colors on Mentor Legion Dreadnought

So you can see I painted the base colors throughout my Mentors Dreadnought using the following colors:

  • Red: Model Color Red
  • Green: Game Color Dark Green
  • White: Game Color Bone White
  • Yellow Game Color Golden Yellow
  • Parchment: Model Color Light Brown
  • Silver: Game Color Gunmetal
  • Brass: WarColours Dark Copper

The key here is to be fairly neat with each color block but it doesn’t have to be perfect the first time through. In fact when I painted the green (which was the first color laid down) I pretty much slopped it everywhere to get into the nooks.

You can easily paint the touch ups in each area to cover mistakes as there are no highlighting or shading to worry about. At later stages I will be adding a wash, highlights, and even weathering. At each of these points it can cover up or hide any mistakes made.

Brown Wash

So with the base colors all finished up, I then applied a full-body wash to the model. I use Vallejo Dark Brown which is close to Agrax Earthshade Brown but comes in a wont-spill-on-you bottle.

The caveat for this wash is the white areas. Where possible (like the large armor plates) I only add the wash to the recesses. This will save time later when I need to paint the Bone White back over it.

Add brown wash to Mentor Legion Dreadnought

The rest of the model gets dosed in the brown wash using a large Wash Brush from Games Workshop. I have a second brush on hand to pull out the extra wash that accumulates in the bottom side of the model. It’s a balance of adding enough wash that it flows everywhere but not too much that it leaves massive drip marks that cover details.

For much of the model, the wash really helps the details stand out and makes it look almost finished (especially compared to the base colors above). White is a hard one though and looks awful with anything but a pin wash.

Once the wash dries (many hours later) I will go back and reapply the Bone White to most of the white areas, leaving only the recesses with the brown wash.

Painting Green

For the green, I wanted to keep it fairly dark with brighter edge highlights – similar to a Dark Angels look.

So the base coats took a few layers to get this right as the Vallejo Dark Green is somewhat translucent. I ended up mixing a bit of black into the green to make it uniformly dark and then added another layer of the Dark Green.

After the brown wash, I tidied up a bit with the Dark Green before moving on to the edge highlights.

Green Highlight 1: Sick Green

This style of painting is called “extreme highlighting” as it goes from the dark black-green to a bright yellow-green. While more layers in between can give a nicer look, I have only done two layers for my highlights.

Green Highlight to the Mentors Dread

Here I started with Sick Green and hit all the edges. Where I could, I use the side of the brush and pull it sideways along the edge. This leaves paint in a neat line along the ridge. Otherwise, I started with a thin line of paint to make sure I could keep a straight line.

Follow on layers helped brighten and thicken the lines – especially on the top side.

Green Highlight 2: Escorpena Green

Mentors Dread Second Green HIghlight

With all the green edges highlighted (even the bottom side) I went back with Escorpena Green. As the name suggests, its very similar to GW’s old Scorpion Green. Using similar techniques to hit the edges, I kept this green only to the upper edges of the green.

Think of where light would be reflecting off the model, and paint those edges only.

As I mentioned up top, not all the lines and highlights were perfect. But I can fix some with pin washes (highly directed wash in the crevices) and with weathering. So I’m not fretting the details here and just moving forward.

Painting White

What is one of those “really hard colors,” mostly because if you paint straight white, you can’t highlight. This is why I start with Bone White as it is a bit off-white towards the brown side. I use this to keep the warm contrast against all the cooler green rather than using a blue-white.

White Highlight 1: Bone White

With the Bone White applied, the brown wash mess, and the second layer of Bone White to clean up, the white is looking pretty good.

Painting White Relaying the White Base

This layer was more of a cover-all-the-mess coat rather than a true highlight. But by leaving the brown wash, and slightly washed white in the recesses, it still has a good amount of depth.

White Highlight 2:  Dead WhiteI

With my Mentors Dreadnought, I choose to keep the off-white from above. If you want an very white look and still have crisp highlights, add a layer here of mixed Bonewhite and Dead White.

Mentor Dread White Highlight

This is where I added a highlight to the white with Dead White. It add a nice edge to the Bonewhite – an actual white highlight.

Focus on the ridges, what you are trying to do is make all the details pop.

Painting Yellow

To balance the orange-red as well as designate this dreadnought as part of the Second Company, I add yellow spot colors throughout the model. And by using a more orange yellow as the base coat (Game Color Gold Yellow) it combos with the red-orange to create a split-complimentary pair with the green.

Yellow Highlight 1: Sun Yellow

As yellow is another one of those hard colors, it took a few layers to get a smooth coverage. After the brown wash I use the Gold Yellow again to bring back much of the color before moving on to the Sun Yellow.

Adding Yellow Highlight to Mentor Dread

As much of the yellow areas are flat, the edge highlights were a bit forced. Rather than accentuating the details, we are creating interest within the otherwise flat surface.

For the eagles, I used more of a drybrush technique to hit all the raised edges.

Yellow Highlight 2: Moon Yellow

Mentor Legion Dreadnought with Yellow Highlights

I then added a highlight with Moon Yellow. As with most yellow paints, this has a tendency to be translucent when applied. So it took a couple of layers to add a nice highly. Just wait for the first to dry before adding the second or it will smudge.

Painting Red

Using red on the Mentor Legion is a mixed blessing. It contrasts well against the green, but has a tendency to become Christmas colors. To adjust for that, I bring the reds towards the orange end.

Red Highlight 1: Bloody Red

With the base layer of Game Color Red, which is fairly dark to begin with, and the brown wash dried, I move on with Bloody Red.

Highlighting the Red with Bloody Red

It’s a very red, red, but tends towards the orange I’m adding next – without actually being orange.

I hit all the ridges as before, but the skull helm required a bit more of an blend then edge highlight.

So thin some red down and paint all the upper surfaces and ridges. When it dries it will have become a bit lighter. Adding a second coat (but not fully covering the first) allows for a smooth transition without actually blending the colors.

Red Highlight 2: Fiery Orange

Mentor Legion Dreadnought Red Highlights

Using Fiery Orange as the highlight again pulls the red away from a strong Christmas look without going to far with the orange.

As with the green highlights, this layer was kept to the topmost edges and blended into the top of the skull.

 Painting Parchment

I need to make my parchment stand out from the white armor which is already off-white-brown. So I started with an even darker base coat of Model Color Light Brown. After the Brown Wash had dried, it had a nice, dark brown look.

Parchment Highlight 1: Light Brown and Bonewhite

Adding first brown-white highlight to parchment and purity seals

To keep it fairly brown, but still more paper-like, I used a mix of Light Brown and Bonewhite at a 1:1 ratio. Painting everything but the recesses and tears, it creates a nice brown-white that is still distinguishable from the white armor.

Parchment Highlight 2: Bonewhite

Using bonewhite to highligh purity seals and parchment

To highlight the parchment, I added an edge highlight of Bonewhite. As this is the same color as the armor, I needed to ensure that enough of the brown and wash separated it from the armor plating.

Next Steps

At this point, the process of painting a Mentor Legion Ironclad is nearly finished. It is tabletop ready if you will and I’m already fairly happy with it.

But I’m not done. In fact I have a whole other post to show how add decals, use those decals for freehand work, weathering, and final details. But before all that, I need to finish the base! So the next post will switch to building and painting up his base.

Challenge #3 Basecoat Painting

Dreadtober Basecoat Painting Challenge

This is Challenge #3 of Dreadtober 2016! At this point, you built your model, and now it is time to start the basecoat painting for your miniature.

Challenge #3 Basecoat Painting

As we progress through the Dreadtober challenge, each week’s goal is to get you one step closer to accomplishing your pledge.At this point, you have put together your plan and then built the actual miniature. Now we move on to slapping down paint.

Challenge: Paint Your Miniatures

This week’s challenge: paint your miniature.

That’s it, just finish painting it all in a week.

OK, so unless you are one of those guys who can crank out armies in a day, this week’s challenge is simply to paint the main colors of your dreadnought. Skip the base, skip the details, skip the weathering.

Apply whatever ‘base colors’ means to your miniature and painting style, and get it done.

Result: A Basecoated Model

At the end of this week,  you should have your model painted as many would call Ebay ‘pro-painted’ level. Meaning it has more than just a primer and a few slathers of paint.

If you are worried about getting it done this week, a reminder of the next two challenges:

  • Building and painting the base
  • Painting the Details

But also remember, I only mean for these challenges to be guidelines and how I paint a model. So if you need to move thing around, want to take an extra week to paint the base colors because you can do the base in a day, or pre-paint 1000 layers of rust before any paint (ala Greg).

Helpful Tutorials

To help you get past hurdles painting your model, I’ve pulled together some articles on the topic of painting. Use what you need, try something new, and most importantly, have some fun!

Using an Airbrush

If you want to try an airbrush on your model but just getting started, I have a Watch This with OrcPainterNerd who demonstrates the basics of the tool and how to paint a model with it.

You could also check out the Watch This on painting a Morkanaught with Doctor Faust. It’s not only a dread but uses an airbrush for the main colors. Quick and easy base coating.

Doing Zenithal Lighting

Zenithal lighting is a technique similar to object source lighting, but at a much higher level. The idea is to prime the upper areas of a model with a lighter color than the shadows. Then, as you paint the model, the lighter and darker primer effect the overall look. Ron wrote up an excellent article on how he primed and painted in this style.

Picking Colors in Theory

The idea of color theory is that certain colors fit well together, others provide a nice contrast, and others create something as ugly as sin. Some painters put together their thoughts on it:

Painting Position

Keeping a steady hand is a major step in painting. Another article from Massive Voodoo, this one on how to brace your hands and use your whole body to paint.

Speed Painting

For those in a hurry (or perhaps joining us a bit late!), DakkaDakka has a helpful write-up on Speed Painting and some basic techniques to get models painted fast. The main takeaway for anybody: use the biggest brush possible.

Still Need Help?

Remember, this is a community event, so jump on Twitter, Facebook, or Google+ and post your questions, a WIP picture looking for critique, or ask for opinions. I’ve found Twitter is the most responsive community (and I’m more active on there). Use the hashtag #dreadtober and we will jump in and help each other out.

Grab Your Brushes

This is it Meks, time to seize your brush and put some paint on those dreadnoughts, Kans, bugs, or Jacks. Post work in progress pictures on Twitter with #dreadtober, write up your progress on your blog and invite your friends to check it out.

Speaking of checking it out, if you want to jump in and join us you are more than welcome! Fill in the form below and I will send you an email with information on how it works. In the meantime, grab a dreadnought sized model that needs to get finished and start painting it!

Dreadtober Build Showcase #2

Dreadtober Build Showcase – See What They Built

You ready for some awesome! Dreadtober has started and the participants are ready to show you their built models. This is the Showcase of the second challenge for Dreadtober: Build the Model.

Dreadtober Build Showcase #2

Each participant was challenged this week to build their model, be it a dreadnought, Deff Dread, or Warjack. Below you will see each of their accomplishments, so cheer them on!

AJ

AJs Work in Progress

Progress is good! Had some issues with the airbrush on my highlights, but we will see how it goes. Magnets are set.

Facebook: vigilanteminiatures

Ashley

Ashely Murder Fang Dreadnought

Finished my assembly this week. He’s a really fun model, I’m really looking forward to putting some paint on him his week.

Editor’s Note: Ashley did an awesome shoutout on the 40k Radio podcast for Dreadtober too! Check out Episode 6 around the 30 minute mark (listen to the rest for great 40k as well!)

Twitter: chickhammer  | Blog: chickhammer.com

Glenn

14612369_2118834075007736_8901877293825810017_o

All the info should be here: https://www.facebook.com/NarrativeGuys/photos/a.1886477544910058.1073741829.1882082195349593/2118834075007736/?type=3&theater

Facebook: NarrativeGuys

Grenn Dal

Grenndal Dragoon

I am progressing nicely and have finished the build phase and am moving onto the painting phase. I had to make a couple of molds to get an acceptable body for my Balistarius. I also had to use magnets on this build so I can swap between the two drivers. you can see my posts
here: http://xenoftw.blogspot.com/2016/10/dreadtober-first-update.html and here: http://xenoftw.blogspot.com/2016/10/dreadtober-building-continues.html

Twitter: grenndal  | Blog: xenoftw.blogspot.com

Joe B.

Customized Dreadnought for the Mentor Legion

Built up the Iron Clad by removing all the Blood Angels bits, reposing the arms, and adding a few new bits. I wrote up a post on how I did it as well.

Twitter: brknpaintbrush  | Facebook: brokenpaintbrush | Instagram: brknpaintbrush

 Kyle Haydon

Kyle Contemptor Dreadtober

Progress this week went smooth aside from snipping off a thumb claw, which still needs patching. The claws are my principle addition to this already spectacular model – but the studded pturges help fill in its shape and movement I think!

Instagram: kyle.haydon – primary spot for the WIP work!

Twitter: KyleHaydon  | Instagram: kyle.haydon | Blog: hobbyvices.com

Marc

Marc's Techmarine Dreadnought

I sacrificed an Ork Killer Kan to the Omnissiah! http://oldschoolg4m1ng.blogspot.com.au/2016/10/dreadtober-construction-complete.html

Blog: oldschoolg4m1ng.blogspot.com.au

Norm

Norm Nondorf Dread

Got the first color on Da Skreema Killa last night.

Twitter: normnondo

The Mad Mek

Mad Mek Wrecking Deff Dread

I am working on a rescue model. A lot of the original parts were damaged or lost. I replaced one of the arms with a Wrecking Ball and went to two big shootas.

Blog: madmekworkshop.blogspot.com

Mihalis “”Cadaver”” Skalkos

Cadavar's Contemptor

I tried to keep it as simple and original as possible. The model itself is a beauty and I don’t want to spoil it with too many conversions. That said, I only added some Death Guard photo etched iconography that I had laying around, adding to the model fluff and flavor. See more images at: http://homeofcadaver.blogspot.gr/2016/10/death-guard-contemptor-dreadnought-wip.html

Blog: homeofcadaver.blogspot.com

Lonely Kitbasher

My Amphis’ bane dread is flying together, and I’m so awfully excited about it! I’m going to be adding a multi-melta on the lascannon arm and somehow incorporating a heavy bolter into his CCW.

D Powers Scratch Built Dread
I learned something very interesting this week– there are never enough hours in a day for everything…

Blog: imalonewithadream.blogspot.co.nz | G+: D Powers

Eric

Eric Traitor Contemptor Dreadnoughts

The 2 plastic Dreads are nearing completion sculpting wise. For The Devoured (left) I added a chain, and bodies attached to the hull and legs. The Devout, (right) I added impurity seals. The 3rd Dread is still in pieces, however I’m mocking up something special for the talon leader. I will put up a post tomorrow

Blog: plasticresinmetal.com | Instagram: eleive1

Anthony aka MasakiSayz

Progressing along with good speed! Assembled fully, but considering modification.

Anthony Killa Kan

https://plus.google.com/+AnthonyPaoliMasakiSays/posts/PzYbwmEq7zA

G+: AnthonyPaoliMasakiSays

Rory

Rorys Helbrute

Lots of green stuff applied this week, more so than I have put on one mini before. The problem I had was silly, as I was trying to work on one section I would end up placing my hands on a bit I had already done. Leaving another finger print to be smoothed out! Eventually I managed to start holding it by the base and the very top of the mini, keeping the tools wet and playing around with things a little. Hence my Reaper Auto-cannon has a happy little snake face.

Bonus: Rory’s Guests

Not only is Rory building the awesome dread above, but is hosting a few of his friends’ projects as well. Make sure you check them out http://gamestepping.blogspot.com/2016/10/dreadtober-2016-part-2.html

Twitter: macantsagart  | Blog: gamestepping.blogspot.ie

Doug Kus

trapjaw-week2-1

I finished sculpting Trapjaw, of Masters of the Universe fame, with only some mold lines and basing left on my plate. The weapon arm is magnetized, and the ogryn head was modified in order to give him a metal lower jaw and skull crusher-style helmet. He will soon be ready for some paint.

http://barehandfishing.com/dreadtober-week-2-update/

Blog: barehandfishing.com

TheRhino

theRhino Dreadnought

I got most of the model assembled in a night, magnetized the second night, and only a few small details like purity seals left. I’ll be making a custom base to match the rest of my Raven Guard.

Blog: thinyourpaint.blogspot.com

Black Shield

Lamenters Dreadnought WIP

Progress is going smoothly, right now working on blocking in colours on the main body. The only pieces that are done is the blood claw and the leg armour.

Close up images of completed parts are posted on Twitter-@squizzato_eric

Twitter: squizzato_eric

Arkhanist

ba_dreadnought

Dread is held together with spit and bluetack for photo – will be painted in parts, so pose not yet final! Trickiest part was getting the right leg put back together in the right position after cutting it (and my thumb) to bits.

Blog: theguildhouse.net | Twitter: arkhanist

Dan D.

Dan Flying Tyrant

Converted model to add wings (from old ‘Clix’ model). Colors are mostly blocked. Paint scheme will be old school genestealer blue / purple with green gun. Really want to work on my shading and am going to try to get a ‘leathery’ pink/purple look on the wings using dry-brushing technique. I hope to have some of the model shaded next week. Also I can’t complete building because I want to paint under the bits and behind without them interfering.

Niklas D.

Niklas Helbrute

Model is built. Not much time to work on it yet. Goal is to get 3-4 colors on model and work on general painting techniques (only have painted 2 models in my life total so far).

Dave S

Dave S dreadtober

So I am woefully behind as work got a little crazy this week. Happy to have most of the big stuff done, all that’s left to model are the hoses and cables and some sculpting on the cloth.

Blog: plasticresinmetal.com | Instagram: thepolysmith

BruceT

BruceT Dreadnought

I got off to a good start with airbrushing the sarcophagus, then brushed a wash over it. Big mistake! My W&N brush left brush strokes over it, so I had to start again! I’ve seen a couple of things that I would change for next time, such as smoothing out the filing of the plastic, just a totty bit more!

Link https://www.facebook.com/media/set/?set=a.1786673298236845.1073741832.1457460507824794&type=3

Facebook: Forged in the Warp

Culial

dread-in-progress

So, my week has taken a few unexpected turns and the build has not progressed as anticipated. I have, however, also made a start on the base – so ahead on one part, behind on another…

I’ll be doing my best to reclaim ground on the project in the coming days!

Blog: Dakka Dakka

Darren Bogus

Darren Bogus Helbrute

I’ve built the Helbrute this week, and completed gap filling with liquid greenstuff. In respect, I probably should have assembled him with plastic cement instead of super glue. I also primed the model black to prepare it for painting.

Twitter: darrenbogus

Warhammer39999

39999 Dreadnought

This week was all about the prep work/build. He was already magnetized, so I was cleaning up the model, assembling the missile launcher, and adding some brass etch. I even got started on the painting a bit…

Dreadtober – Contemptor Style

Blog: warhammer39999.com

Mike

Mike Helbrute for Dreadtober

My latest WIP has the Helbrute nearly completely base coated with initial highlights in place. For more shots and WIP check out my Twitter.

Twitter: Mike_Schreiner  | Blog: mikeschreiner.com

WestRider

Got the build pretty much done on both of them. Just need a little more filling and touch up with putty.

dscn2098

http://cascadiangrimdark.blogspot.com/2016/10/dreadtober-2-dreadening.html

Blog: cascadiangrimdark.blogspot.com

Dean Kelly

I’ve completed re-construction of the models and added some basing material. They’re still sporting their original “bought from eBay” paint jobs and will be resprayed and overpainted next.

Dean Kelly Killa Kans

More information is available on my blog at: http://wargames-wasteland.blogspot.co.uk/2016/10/orks-killa-kans-part-2-dreadtober-2016.html

Blog: wargames-wasteland.blogspot.co.uk

Robert

So here are my WIP photos for the build week. As you can see I added did a little repositioning of the legs to help the contemptor look like he was moving forward and look a bit more aggressive.

thumb_img_0587_1024

Additionally, I added the World Eaters iconography from the Forgeworld etched brass set. The skulls on the left shoulder are from the GW skulls bitz blister and the chain is just jewelry chain I picked up from the hobby shop. Finally, I sculpted the ablative armor nodes on the left leg using greenstuff. All in all, a few simple modifications that I think give the model a lot more character. I’m stoked to start painting!

Blog: 30khobbyblog

Mordian7th

Modian 7th Dread

Pressing on with Brother Nihilus – finished up the line highlighting and marble effect on his right shoulder, and now on the detail work with the reds and golds!

Blog: mordian7th.blogspot.com

Jamie Searle

Jamie Dreadtober Dreadnought

Building has gone great on my Deathwatch Dread, I got him finished by the middle of the week. Had some trouble with my planned Deathwatch style shoulder pad, my greenstuff sculpting wasn’t good enough. Still need to work something out there. I have also started on basecoating.

Twitter: DrakePoldragon  | Blog: timandjayplay.blogspot.no

Wudugast

sonic-dreadnaught-convertordie-1r

Progress hasn’t been as fast as I’d planned but the Sonic Dreadnaught is coming together. He still needs more greenstuff before he’s ready for paint but I feel this is the key stage so I don’t mind spending a little longer on it, even if it means I end up missing next week’s deadline as well. He’s certainly proving to be one of the most fun conversions I’ve tackled in a while. As ever I’m keen to get feedback from the rest of the Dreadtober participants so if you’ve got any thoughts on the model so far please head over to the blog and let me know.

Cracking The WIP – Dreadtober Part 1

Blog: convertordie.wordpress.com

Thomas

Thomas' Converted Chaos Contemptor Dreadnought

I’ve done all conversion work on the model and are getting ready to start painting it. Why a fifth Helbrute? I want to run the Helfist Murderpack!
The latest WIP post https://hightimesontheeasternfringe.wordpress.com/2016/10/01/wip-chaos-contemptor-part-3/

Blog: hightimesontheeasternfringe.wordpress.com

Andrew

Building a complete, modern Forge World model has been exciting for me. The only other experience with FW models was when I made the old (resin!) Valkyrie in the early 2000’s.

Andrew Dart Contemptor Dreadnought

This contemptor dreadnought will be the centerpiece for my new force of Imperial Fists. I’m hoping to portray the entire force as veteran soldiers, their armor ancient relics from past campaigns. As a result in mixing in Mk IV armor, contemptors, and other “relics” into my standard 40k force. I haven’t done anything special to the model as I think it’s wonderfully designed as it is – though I will have to repair a knee plate I accidentally cracked.

More shots of my progress and ongoing campaign (with friend and Dreadtober contributor Kyle.Haydon) can be found on my Instagram: @hobbyvices

Blog: Hobbyvices.com | Instagram: hobbyvices

CJ

CJ Catellax

I took my Castellax apart this week so that I can clean it up and give it a bit less static pose.  https://grimdarkvoid.blogspot.com/2016/10/dreadtober-002-building.html

Blog: grimdarkvoid.blogspot.com

Harry Wagstaff

Gradually getting the suits built, although I’ve had a bit of a delay in getting them magnetised. Nearly ready to prime them ready to paint next week though!

crisis-suits

Link: https://awesomeclaw.wordpress.com/2016/10/03/dreadtober-building-the-crisis-suits/

G+: HarryWagstaff

Wolfsherz

Wolfsherz Dreadtober

Im almost finished my second skin layer by the end of week one which is a pretty good progress for me . So i have two weeks left over to get skin and carapace done, then paint all the small details and then finish the base in the last week. Looks like i am just in time.

Twitter: Wolfsherz  | Blog: wolfsherz.wordpress.com | Instagram: wolfsherz._

Dan from The Narrative Guys

Dan Narrative Guys Dreadtober

This week I am head on goals and somehow my test models turned into part of the project. So now I am doing a team of three Imperial Fist Contemptors. The bases are done and they are all yellow.

Facebook: NarrativeGuys 

Paul

I have had 3 dreads at various stages of finished-ness so I’m using #Dreadtober as motivation to complete these models.

Paul Graddon Dreads

So far I have been working on laying down a basecoat on the least completed pieces, and little shading work and chipping the paint work.

Facebook: paul.graddon.5

Andrzej Mezynski

Current Status: I’ve put first coat of base paint on all model so far, this weekend I will add secondary colours – will decide on which gold to use (will probably go with old fashioned balthasar+gehenna combo).

20161006_132614254_ios

Why I chose this model? I wanted to do something bigger than standard Dreadnaught – condition was simple – must be loyalist and must be usable in my future armies. Besides been just reading the new Grey Knights book, so the answer was simple 🙂

Twitter: AndrzejMezynski

PopCultureCube

PopCultureCube Glotkin

Got him all assembled and the worst cracks filled. Primer/basecoat is also applied, as is a wash of Athonian Camoshade. Chose the Glottkin because I’ve had him nearly 2 years and it’s an intimidating model – time to bust him out and get him on the table!

Twitter: popculturecube | Instagram: popculture_cube

#2501

2501 Deathwatch Dreadnought

I completed assembly this weekend (the last thing to go on was an Imperial Fists logo), and during the week I’ve been painting it in bits and pieces.

More assembly pics at http://musingsofametalmind.blogspot.com/2016/10/dreadtober-assembly.html

Blog: musingsofametalmind.blogspot.com

Makkeru

0-1

One furioso that will be a Death Company furioso and one TL Lascannon dread to give some fire support.

Twitter: makkeru | Blog: wip-piw.blogspot.com

Rob @ iToysoldiers

Rob iToySoldiers Dreadnought

So I have to admit, right now the progress is pretty much pedestrian. I have it on a temporary base (pending acquisition of the Sector Imperialis bases that I’ve orders). The next stage is priming this bad boy with matte black spray. I use Krylon for this kinda thing (or more accurately, all kinds of work).

Link to more (along with commentary): http://itoysoldiers.com/munitions/modeling-projects/contemptor-dreadnaught

Twitter: iToysoldiers  | Blog: itoysoldiers.com | Instagram: iToysoldiers

Dave Mary

Built and primed the Deathwatch Venerable Dreadnought from the Death Masque boxed set. I magnetized the gun arm and used tacky putty to keep plastic areas clean for later gluing with plastic cement.

Possibly getting ahead of myself…but I had a couple sessions this week and made additional progress…

dread-progress-1

Painted head and front panel enough to assemble the sarcophagus.  Then got carried away painting trim and details!

http://262krieg.blogspot.com/2016/10/dreadtober-2016.html

Blog: 262krieg.blogspot.com

Greg

20161007_224027

Marine dreadtober, after missing the first week away in canada with work. A quick progressing project for me.

Twitter: wolf86sven

Sav

Savs first dreadnought

Here is my guy all primed up. A few dinks and scratches added. Never done a dreadnought before so I bought one and hey presto dreadtober comes along. Ooh spookey!

Twitter: sav10g 

Matt

Matt B Contemptor Dreadnought

Building as part of the Betrayal at Calth set as it’s a good introduction to 30k. Definitely looking to buy some fireworks stuff going forward!

Instagram: ultramarine__blue

Eric

imag0134

Finished the assembly of my Dark Angels Deathwatch dreadnought despite already being a bit behind due to work. The reason I’m doing a DA dreadnought is because I’ve always been a fan of the dark angels and the lore behind them and he’ll fit wonderfully with my already completed dreadnought for my deathwatch army.

Siph

sam_0002

I have just posted my progress with the BaC Plastic Contemptor. I am going to follow my usual Relictors palette to get this one done and off the huge To-Do pile.

Blog: weemen.blogspot.co.uk

Jason

20161008_164317_resized

As this dread came to me pre built i naturally took him apart.  Repositioned the arms into a more dynamic pose and clawed the left foot. All subtle changes but really helps break the stiffness of these models.

Twitter: jtuvminis

Mark

image1

I’m pretty far in my build, the leviathan I will be painting I’m going to try some new weathering techniques that I haven’t tried. Check back on my Twitter @ultima_ant for more pics!

Twitter: ultima_ant

Jimmy

2016-10-09-22-38-05

48 hours late, but Bob’s up and walking, sorry about the delay https://jamesworkshop.net/2016/10/09/dreadtober-building-brother-bob/

Twitter: sonofultramar | Blog: jamesworkshop.net

Adam Abramowicz

adam-abramowicz-dread

Between unpacking and setting back up my studio, I was able to build up this dreadnought.

Blog: beyondthebrushstudios.com | Facebook: beyondthebrushstudios | Instagram: beyondthebrushstudios

Chris

chris-norman-dread

Just joined in and building up this beast.

Instagram: Relic_Knights_Studio

Rob J

20161011_203234

I was gifted the models of the Dark Vengeance set by my Sister and Brother-in-law. Since I have a wife and three young children, I hobby on a budget and nothing can be wasted. I am attempting to convert this Hellbrute into an acceptable proxy for a Venerable Dreadnaught for my Dark Angels.

Other Participants

The following are those who have signed up and either haven’t been able to start yet (some are on honeymoons! or moving 🙁 ) or not yet replied (if that’s you, reply to the email!).

  • Matt K.
  • Greg Zeitlin
  • J.R.
  • Matt
  • The Drill Abbot
  • Skyfyre
  • DandyPandy
  • Zork
  • Tibbs
  • Jack Shrapnel
  • Karl Hungis
  • NafNaf
  • Greggles
  • David Raghanti
  • Reuben
  • Rob aka Voracious Gamer
  • Chris
  • Mike
  • Gothmog
  • Xach
  • JF Dubeau
  • Ruleslawyer
  • Andrew Taylor
  • James
  • Ryan
  • Tarron
  • Will

Did I miss yours?

At the time of writing this, there are 91 people signed up Dreadtober. Which is both awesome and a bit overwhelming! So if I didn’t get your pledge posted above (or got it messed up), sorry and just let me know! Look for an email like “Dreadtober Challenge #1: Call for Showcase” and hit reply, or leave a comment below.

Prepare to Paint

This wraps up Dreadtober Challenge #2: Build Your Model. Congrats to everyone who completed the challenge!

If you are ‘falling behind’* don’t beat yourself up as life happens and this is supposed to be a fun hobby challenge. Do what, and when, you can and set your own pace.

 * I put it in ‘air quotes’ because, as I said, this is a fun hobby challenge. These weekly challenges are only meant to provide guidance and milestone encouragement. If you operate at a different pace, then don’t worry about it!

Want to get started and join in? It’s never too late (well Oct 31st might be!). Fill in the form below and I will send you info on how to partake – we will be excited to have you!