Latest Posts

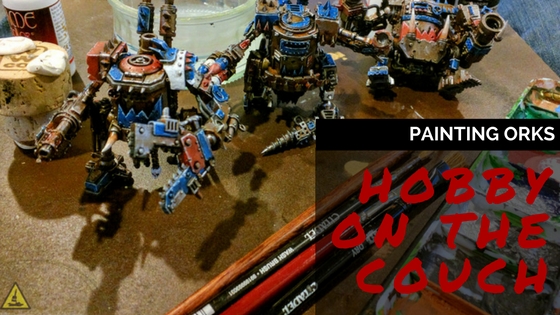
Hobby on the Couch - Ork Style

Orks in Progress and Hobby on the Couch

There is nothing as satisfying as painting Orks. Ok, there are plenty of things that are more satisfying, BUT they are a blast to paint. Especially when done on the couch with a glass of whiskey.

Hobby on the Couch - Ork Style

As a way to restore some hobby time from the sprint that was Dreadtober, I’ve been working on a couple of the Orks that have been lingering in the Closet of Doom (TM Mordian7th). The simple and crude nature of Orks makes them quick to paint and rather fun.

I also wanted something I could work on while watching movies with the family. It’s how I painted a bunch of the Tyranids before and figured why can’t Orks watch a flick or two as well?

Megaboss

When I saw the Orruk Megaboss I knew I needed one for my growing Ork hoard. That is something as I haven’t had a ‘must buy’ impulse for new miniatures in a while. At the time I did an unboxing video and some rough ideas on how I would turn him into a 40k Warboss.

I’ve since following up with the conversions as seen below. I switching the giant ax for a combi big shoota/missile launcher. I used a Nob biker hand which fit really well. The weapons all came from the Deff Dread kit with some creative placement to make them fit together.

The buzz-saw hand also came from the Deff Dread kit with the socket cut off and a tiny bit of green stuff to fill the gap.

I loved the original face so I didn’t want to switch out the head. Instead, I added an extra power cable to his noggin and an eye patch. Both bits were extras I had cut off the shoota/missile launcher bits. To make his face more visible, I tore off one of the armor’s teeth.

Orruk Megaboss Converted into 40k Warboss Built

The final conversion will come after I finish much of the painting. I left the front armor plate unglued so I could get to his face. While this makes it easy to get all those details, it does leave the should pad and skull with small gaps.

The shoulder pad should be easy to fill back in, touch up the paint and be good as new. For the skull, I wanted to give it more presence in 40k, and taunt by brother-in-law a bit by making it into a Tyranid skull. By adding a couple of ridge plates it should make a believable Carnifix!

Megaboss Basecoat and Wash

Since this guy is more of a showcase model, I have been painting him at the painting desk. It’s going to be a much longer process than the others, but hopefully well worth it.

I painted all the main colors to get a sense of coverage and balance. While my Orks are Deff Skulls, the main colors are metallics with lots of blue accents. The red and white scrap are thrown in to emphasize their nature of grabbing whatever is nearby. It also adds some fun colors to the model.

Megaboss as 40k Bigboss WIP - Skin Completed

After a good Dark Brown Wash, I focused on the face. This way I could attach the front plate before getting too far along on the other colors. The skin was built up with the following Vallejo Game Color paints:

  1. Cayman’s Green (GW Castellan  Green)
  2. Goblin Green (GW Warboss Green)
  3. Camouflage Green (GW Elysian Green)
  4. Dead Flesh (GW Nurgling Green)
  5. Flesh Wash around the mouth (GW Reikland Fleshshade)
  6. Blue Wash around the Eyes (GW Drakenhof Nightshade)
  7. Re-highlight with Camouflage Green and Dead Flesh

Orrk Megaboss 40k Style Face

Rather happy with how the skin turned out. You can’t see it in this picture, but I also added some light freckles along the neck and the back. The large areas needed something extra to fill them in. So small dots of the Flesh Wash were highlighted with the Dead Flesh.

Killa Kans

These were the first models to undertake the couch challenge. In November’s White Dwarf, the Killa Kans were added to the Hall of Fame, and with great reasons. They really are a blast to put together with lots of options and minimal fiddlybits.

While I only photographed two (fit better in the photobox) I painted all three at the same time. As I often go for the rule of cool over game winning options, I armed them with the Grotzoka, missile launcher, and flamer. I figured that by the time I got a full Dread Mob running, I would have plenty to choose from for real games.

Rusty Base for Killa Kans Painting in Progress

As I go for a quick and dirty rust effect on them, the models were primed black then sprayed with brown spray paint. I don’t really bother with which brand as most of it gets covered anyway.

With a mix of Game Color Hot Orange (GW Troll Slayer Orange) and rust powders (I happened to use GameColours) and flow aid, I grabbed an old dry brush and smashed the paint all over the place. It wasn’t quite dry brushing, as I wanted the mix to be in the recesses. This is where the Flow Aid came into play.

I followed this on with a rough dry brush of Gunmetal (GW Leadbelcher). I call it rough because I wasn’t trying to cover everything. I wanted enough of the rust and browns to show through to give it the rusty look. I know I could have pulled a Greg and used a masking layer instead, but to be honest it looks like too much work!

Killa Kans with Base Colors Down

With the metals done, I followed on with all the base colors. Lots of Imperial Blue (GW Kantor Blue) with areas of Scarlett Red (Khone Red) and Bonewhite (Ushabti Bone).

Deff Skull Killa Kans with Colors Highlighted

The colors were then highlighted with Magic Blue (Caledor Sky), Bloody Red (Evil Sunz Scarlet), and Dead White (White Scar). The blue and red areas were then given an extreme highlight of Bonewhite.

The white is a bit hard on the blue/red, but helps unify the look and adds more pop. I’m a fan of the rather cartoonish look of Orks, so the extreme highlight works well for me.

Still left to go on them are the final weathering and the base. I had ordered some bases from Secret Wargame Miniatures but choose the wrong size. The right size has since arrived and waiting for a day I can get them primed and ready.

Morkanaught

I’ve had the Gorkanaught/Morkanaught kit in my closet for a long while, probably since they came out a few years back. Many have complained about it’s stubby legs, but I think it’s a nice tie-in between the Stompa and Deff Dreads.

I had been holding off on building this guy as I had hoped to add a bunch of LEDs (I had added some to my Knight and the Stompa I was building). In the end I’ve pushed that off as the amount of work is a bit much for what I really wanted to do.

Rust Base Layer for Morkanaut

So instead, built him up as a Morkanaut (who doesn’t like cool zappas!) then followed the same layers as the Killa Kans. Spray prime black, spray brown, smash in some rust, dry brush gunmetal.

Base Colors Applied to Morkanaut

I think because of his size, the blue and red areas look stark compared to the metal so once I have everything highlighted, I’ll add paint chips and weathering to tone them back down.

Second Colors Applied to Morkanaut

I also ordered a base for him from SWM (the urban rubble) but need to take the Dremel to it as the bricks stick up and make him look like he’s floating!

Hobby on the Couch

As I mentioned above, I’ve been painting the walkers while sitting on the couch watching movies with the family. This works great as my three-year-old son loves to watch the same movies about a billion times.

The setup is pretty simple, I have some wooden squares from a previous project to use a platform, grab some large brushes, the paints I need for that sitting, water, and a basic pallet.

Doing Hobby on the Couch - Killa Kan Style

While the poor lighting and position would make this rather impossible for good painting, it works great for my Orks.

In the future, I plan to add a small shelf to the wooden square with holes for the brushes and paints as they tend to roll off when I need to move.

I think in some ways, this is the most amount of paint I’ve laid down in a long while, most certainly for 40k models. It feels great getting so many Ork-goodness completed and can’t wait to push on to the Stompa itself!

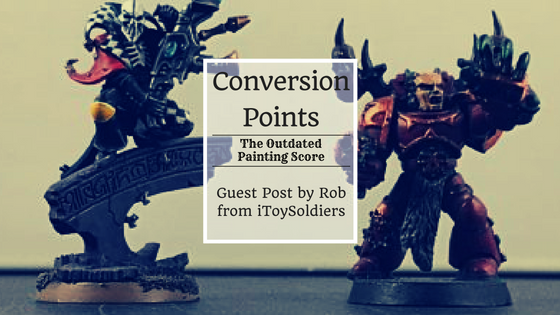
Conversion Points - an Outdated System by Rob

Conversion Points in Painting Scores: Why They Should Pass Into History

Good morning, class.  In today’s “History of Miniature Wargaming” lesson we’re going to talk about a concept called, “Conversion Points” and how they factored into painting scores, why this approach was introduced, and how some forward thinking event organizers led the charge to make the conversion points a thing of the past.

Much like the fossil fuels used in the 20th and 21st centuries, conversion points were added into painting scores for a number of really great reasons but as miniature model technology improved the need for them to be present was eventually phased out.

To extend the metaphor, Zero Point technology made oil based industry obsolete.  And like ZPT and the Oil Wars, conversion points led to massive conflicts before their use was deemed obsolete.  For the next eight hours (Solar Standard) we’ll be discussing this topic and the impact it had on the history of competitive play in relation to miniature wargaming…

I jest, of course. There probably won’t be a war. But this blog post really is about how conversion points in painting scores is an obsolete rule set.

Conversion Points - an Outdated System by Rob

Rob, from iToySoldiers, joins us to discuss his thoughts on painting scores using conversions as a modifier.

But first: What exactly am I talking about?

So, in a fair number of competitive formats, there’s a score for “Painting.”  The idea is to reward players for putting gorgeous models on the table during an event. Some events even award a prize for the best-painted army.

I am ALL FOR THIS. Painted models made for a better game, says I. What we are talking about is this one category that I keep seeing popping up and it looks like this:

Conversions/Theme

2 – The Army has a single cohesive theme (i.e. it doesn’t look like you borrowed your buddy’s army to ally it in)
2 – The army has a few conversions
1 – The army has many conversions

Or perhaps, gods forbid, this:

0-10 CONVERSIONS

0 – No conversions or contains conversions which do not enhance the appearance of the army.
1 – A few minor conversions. (Weapons, Heads, repositioning of arms, etc.)
3 – Minor conversion with one or more extensively converted models.
6 – Many extensively converted models. (Body alterations, additional greenstuff work, etc.)
8 – Majority of the army is converted with many extensive conversions throughout.
10 – Majority of the army is strikingly converted.

Now before we go into what’s problematic with these and why they’re obsolete I’d like to state that I’m pretty sure I know why they came into being.  It’s twofold:

Why Conversion Score Exist

First, we’re gamers and we’re playing competitively (i.e. a tournament) and there needs to be some standard system for assigning points in various categories.

Battle is easy. If you win, you usually get more points than your opponent. Easy peasy.

For more subjective things, like painting, some rubric needs to exist for the event organizers to assign a score fairly and so there’s usually some point based system – be it votes or the rubrics shown above.

For the second reason, conversion points exist we need to gaze into the distant past at the models that were available.  Once upon a time, miniature wargaming models were pretty static.

Companies like Games Workshop and Ral Partha released a handful of poses for each model and they tended to look fairly similar.  Additionally, the models themselves were usually made in a single piece or (hopefully) you had arms you could attach.  Observe:

Old school GW models

Models taken from Rob’s collection: http://itoysoldiers.com/users/sizzly

These four models are from the Games Workshop line for Warhammer 40K back in the day (not sure when but I picked them up for Third Edition).  As you can see they pretty much share a similar pose no matter what range they were from.

In order to have a dynamic looking army – with a variation on poses, weapon load-outs, etc. one was forced to convert.  You didn’t have much choice if you didn’t want a unit to look like it was made up of frozen clones.

Sure, there was nothing wrong with using the base poses and models but there was a clear reason to break out the saw and greenstuff and make the models your own – otherwise your army would look like the guy’s next to you, and that’s not fun.

So, of course, there was a reason to put a conversion score in with painting. It was a clear (and necessary?) way to differentiate the appearance of an army on the table.

Conversion Points Don’t Accomplish the Goal of Rating Army Appearance

So what’s the problem?

If the original rationale for conversion points being included in a painting score were well intentioned, why would I suggest that they be obsolete now? I have three main arguments to support the removal of conversion points, and I’ll chat about each in depth but here’s the short version:

  1. The models we have available to us today are fantastic and offer up modelling opportunities with just the base kits that render the need to extensively convert moot.
  2. Simply having conversions doesn’t make the models better.
  3. Thought dictates form, or if you’re a fan of the aesthetic as is, you shouldn’t have to convert models just to get points.

Models now have options

So the first bit is the quality of models that are available today.

We’re spoiled for choice these days and companies such as Games Workshop and Privateer Press are producing kits that not only have a ridiculous number of options but also are modular.

Yep!  You can take pieces from one kit and apply them seamlessly to another.  This is cool because you can create varied and dynamic models without the need for sculpting.  Simple conversions – conversions that using the conversion point system don’t generate many points – look amazing.

Just take a look at this stunning conversion from the folks at Tabletoptactics:

Dark Eldar Archon

A superb Dark Eldar Archon from Tabletoptactics (https://www.instagram.com/tabletoptactics/)

What’s really cool about this conversion is it makes use of the modular elements of the Dark Eldar range of models to craft a really unique archon. I can see at least four different kits in use and I have the sneaking suspicion that they all fit together with minimal conversion skills.

This is what we’re aiming for, isn’t it? Beautiful armies that look great on the table. We want to give a score to reflect how good the models look.

Conversions != Better

Ultimately it’s about the appearance, and so the scores should reflect that rather than arbitrary criteria that doesn’t necessarily reflect an improvement in appearance.

Case in point: These two models are from my collection.

Models to compare army appearance

Two models from my collection (http://itoysoldiers.com/users/sizzly). Demonstrates that conversions alone aren’t all there is to army appearance.

I think it can be said that the Harlequin Death Jester is clearly the better looking model.  But the Chaos Space Marine has a conversion (granted, a pretty pedestrian one). I’d have a hard time justifying the CSM as the better looking model just because of that conversion.

Here’s something you don’t want to hear: When asked how one could get a better score, a tournament organizer responded with, “Ah, well. Your army is amazing, but it didn’t have conversions.  You should just stick some stuff like skulls or something on to the base.  That’d get you another two points.”

Ugh.

I get it. Those points are on the sheet and so contribute to the score. If you don’t have them then you don’t get the points. Which brings me to the crux of the argument against points for conversions for the sake of conversions:

Conversions don’t necessarily make the model better and so giving points for checking off a box doesn’t accurately gauge the appearance of the army.  Thought should dictate form and the aesthetics of an army should be judged based on the overall effect of the models as a whole and not whether a specific task was completed.

The last thing you want is for folks to just say, “I’m not going to bother with the painting thing ‘cause I can’t convert.”

Over to You

What are your thoughts on conversion scores in competitions? Are they outdated or do they push competitors to take it up a notch? Leave your comments below, and we can start a conversation.

Watch This Brush Control with Kujo Painting

Watch This: Brush Control – Tips on Holding Your Brush

If you find it hard to get your paintbrush to go exactly where you wanted it to go, you aren’t alone. In this Watch This, Kujo Painting shares tips on holding your paintbrush to get fine detailed brush control.

Watch This Brush Control with Kujo Painting

If you can ignore the cheesy music interruptions, Kujo’s tips are really handy and stabilizing your hands and putting the bush to work. Let’s watch:

My Notes

For quick reference, or for those who like words, I put his ideas into my notes below.

  1. The point is to be able to get paint exactly where you want it
  2. Use the middle finger on your painting hand to rest the brush
  3. Index finger and thumb pinch it against your middle finger
  4. With your other hand holding the mini (or a cork handle in this case) stick your thumb up high enough to rest your painting hand against
  5. Elbows on the table!
  6. Place the brush against the model and use your index and thumb to pull the brush backward
  7. It should slide against your middle finger
  8. Do a funky dance

Good brush control really helps when painting details and freehand, but even highlights benefit from being able to control where the paint lands. A good brush makes a big difference as well, but it doesn’t have to be expensive. I did a review on the WarColours brushes and still love their quality, only now have I abused the #2 that it is starting to split.

Wrap Up

Fairly quick video for today but I hope you found it helpful and will give the pinch and pull technique a try, I have been trying while painting my Ork Megaboss and, while looking funny on the video, does help with stability.

Makes sure you follow Kujo Painting on YouTube for more hobby tip videos and leave him a Thumbs Up if you liked it.

Cool Tool: Canva

Cool Tools: Canva – For Awesome Blog Headers and Social Shares

I’ve had a couple of people ask me how I make the blog headers and other images I use. When I shared Canva with them, I’ve had nothing but positive feedback. So I figured it was time to share it with all of you: use Canva (a free tool) to make awesome images with pictures and text.

Cool Tool: Canva

Before we get too far along, I want to clarify that Canva is a free tool (with paid upgrades of course) and there are no affiliates, meaning I get nothing for sharing this tool with you. It’s simply a tool I have found super helpful and want to share with you.

What Is Canva?

I found Canva as I’ve dived into the how-to-blog world. Amongst all the bloggers-selling-to-bloggers crud I have found a few gems worth sharing with hobbyists. With Canva being one of them.

As an online web app, Canva is super easy to get started, create images from anywhere, and use them for anything. It prompts you to create a new design based off of a ton of different pre-configured sizes like Facebook posts or Instagram

Not only is the sizing pre-configured for the usage type, but it then has a bunch of templates to build from that are optimized for the use as well. While some include premium images (little dollar sign gives it away) you can delete the image and upload your own.

You can easily change the text, fonts, colors, and even image effects similar to Instagram filters. One click later the image is downloading with no hassle from Canva to upgrade.

But Why?

Some of you may check it out and decide you have no use for an image creation tool, but you may want to check it out anyway because it has some awesome uses.

For Bloggers: I’m not going to jump too far into why images are important for your blog post (I’ve already covered it here and Thor wrote about using them to keep attention). The short of it is, images help posts stand out and get read. They are also more likely to get shared on social media.

Non-designers: Most of us aren’t designers or have the time to create custom graphics in Photoshop all the time. Canva provides a ton of examples to work off from and is literally drag-an-drop easy.

It’s Not Hard: Combining multiple images and text can be hard to make look good in photoshop, and even worse in Power Point… But I’ve used Canva to combine two or three pictures, up to a 30+ picture array for Dreadtober.

Canva Basics

I use Gimp (free alternative to Photoshop) for all my main photo editing and I used to use it to create the blog headers. Since finding Canva, it has literally saved me hours by making it so easy to switch designs, move pictures, and edit the text.

Below are the steps to create a new image (like a blog header):

1. Choose a size/style

Choosing a Canva Design

The first step is to decide what size and style you want. Most of mine are the Blog Title size but sometimes I will make one especially for Facebook or Twitter. What’s nice about this is that sometimes you need very specific sizes, like the header/cover art on social media sites.

2. Find a layout to Start From

Choosing a Canva Layout Example

After choosing the size, Canva gives you a ton of options for example layouts. As mentioned above, some of these are ‘premium,’ meaning the stock image used will cost you a dollar – but since we will probably be replacing it with images of our miniatures anyway, pick a design that you like, delete the image and go.

Note, these layouts are only example starting points. This works well for me so I don’t have to think about font families or adding boxes/lines myself. After uploading the picture I often move the text areas around to fit my need.

You could also build your own from scratch using the ‘Elements’ tab and ‘Grids’ to place picture grids. This is how I did the multiple pictures for Dreadtober and Good Reads. You can then add your own text and decorations.

3. Upload your picture(s)

To add your pictures to Canva, just drag them onto the screen. The tool is smart enough to switch to the ‘Uploads’ tab and catch the image. All your uploaded images are stored on canva and can be dragged into the empty picture locations.

This is one of the glorious features of Canva, as you drag an image over one of the placeholders (green hills and clouds), it will automatically resize and place the image in that spot. Sometimes you may need to adjust how it fits the image in, but you can quickly do this by clicking on the image and select ‘Crop’ at the top. This allows you to drag the image around in the box or increase the size.

There are a ton of options to adjust the picture too, like adding filters, adjust the brightness, or even make it transparent.

4. Change the text

You can then change the text, add new text boxes, or get rid of extra ones. Canva comes with a good selection of fonts and logo-like blocks under the ‘Text’ tab. Play around until you get something you like. I find it’s super easy to drag elements around and try new things.

5. Download and Use!

Even though Canva is a free tool, they don’t provide any barrier to downloading and using the image. You click download, it prompts you to choose the image type (jpg, png, pdf) and after crunching the image, it just downloads.

If you don’t use any Canva images, there is pretty much no license restrictions, and even the free images can be used for pretty much anything. If you are just using for your blog posts or social media, upload it and go. If you are using it in something you want to sell or other uses, make sure you read the license agreement first.

Ways to Use it for Hobby

While Canva is clearly aimed marketers and social media gurus, it still super useful for hobbyists and hobby bloggers.

Blog headers and social shares

This is what I use it for the most. Each of my blog posts now has a “Blog Title” that I use for both an interesting image at the top, but also for the “Featured Image” that WordPress uses throughout the site.

Usually, this same image is used by social media when I promote it or others share the page. It’s not always the ideal image for Facebook and Twitter but works well enough. If I really care about making it look good, I’ll create a separate image for the social shares and use that instead.

Flyers and Event Banners

For anyone who hosts a hobby/gaming event, you could use Canva to create posters, invites, or flyers to get attention. I used it to promote the Dreadtober event back in September to get people to sign up.

Posters and  Inspiration

Paint Every Day Poster

(actually a full-size poster, fell free to print!)

Another way that I plan to use it is to print posters of references and inspirational images for projects I’m working on. Since it’s so easy to combine multiple images, add some text for reference, and download there is little barrier in making your own cool posters.

Have You Tried It?

So if I’ve convinced you to try Canva (www.canva.com) or you’ve tried it before, let me know your thoughts below. Perhaps even add your favorite image you created as well to the comments so we can check it out!

Happy Creating!

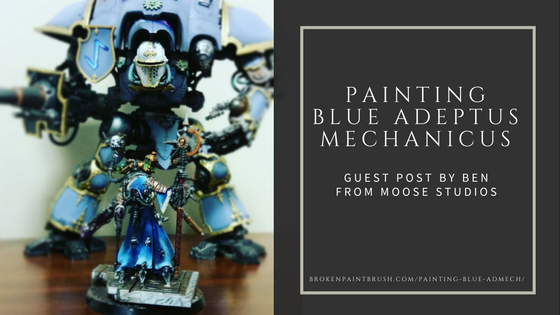
Guest Post by Ben on Painting Blue Adeptus Mechanicus

Painting Blue AdMech

Hi there fellow hobbyists and welcome to the inaugural “Painting With The Moose” article!

Ben from Moose Studios joins Broken Paintbrush as a guest writer with this great tutorial on painting blue AdMech. His social accounts are at the bottom, so welcome Ben and give him a follow!

In the next few minutes, I will break down how I achieve the blue paint scheme that I have chosen for my Adeptus Mechanicus War Convocation. Before I begin any painting project, there are a few steps that I go through that save me some time and headache as the project progresses.

Guest Post by Ben on Painting Blue Adeptus Mechanicus

Painting In Sub-Assemblies

First, I always paint my models in sub-assemblies. For this project, I separated the individual models into four parts: torsos, heads, legs, and arms. All you need to do this is an inexpensive box of push pins. I treated myself and sprung for the jumbo push pins. This makes it easy to hold and paint without actually touching the model.

Trust me when I say that once you do this, it will be hard to convince you not to paint in sub-assemblies.

Secondly, I do a second basecoat. My first one is aerosol spray paint, and my second one is the same color, but it is airbrushed on. With all of this done, it is time to get to laying down some color and bringing that gray plastic to life!

Choosing the Color

For my Adeptus Mechanicus, I knew I wanted to paint them in a scheme that was non-traditional. Don’t get me wrong; I don’t mind the traditional red scheme of AdMech, I just knew it wasn’t for me. It also helped that I am building and painting this army for a cause: ALS awareness, a cause that is near and dear to my heart, and whose colors are also blue and white.

Once I decided on my overall scheme, it was time to select my colors. I like to line my colors up in a gradient from darkest to lightest, and for my main colors, I usually work with four colors total. I also work from dark to light when I paint. It makes it a little easier to fix things working that way.

The first model I painted using this scheme was my Tech Priest, and I was very pleased with the final product:

Painting Blue AdMech and Knight Titans

Painting Blue AdMech

The first color I lay down is Vallejo Game Color Stormy Blue.

Disclaimer at this point: I use an airbrush for most of these colors, but a brush can be used.

I like the coverage of this color. It is an especially good shade color over a black undercoat. Do not be discouraged if you aren’t sure that you have covered every area that you wanted to cover. It’s hard to tell the difference between it and black. This is what it should look like at this point:

Showing Coverage with Stormy Blue

The second color I lay down is what I consider my base color. I chose GW’s Caledor Sky for this project because it would provide a nice contrast with the Stormy Blue, and would pop with a couple of highlights.

I made sure to avoid places that would be clearly shadowed and exercised some trigger control as I feathered it into the darker areas. I wanted to ensure I left some Stormy Blue around the areas where their arms would attach as well as towards the top of the cloak area.

This is what it looked like after this stage:

Adding a Layer of Caledor Sky

The last step that I will use my airbrush on is the first true highlight I give these models. This stage requires supreme trigger control, as I try to feather this corner around the edges of the cloak, as well as any obviously raised areas on the model. Things will look sloppy and strange at this point. It will come together.

I went for a big-time highlight with this one and chose Vallejo Model Color Deep Sky Blue:

Vallejo Deep Sky Blue

The final stage on these cloaks (as well as the fabric part of the heads), is the usually dreaded edge highlight.

For the longest time, I avoided edge highlighting my models. It was partly because I was not very good at it (among other things), but it always looked goofy to me. If you decide to edge highlight, water down your paints as you normally do, get it on you brush, and then run the side of the brush along the edge of the model.

Don’t rush it, and if you have to give it multiple passes to get the right coverage, that is perfectly normal. I went just a shade higher for this and went with Vallejo Model Color Sky Blue for this:

Edge Highlighting Blue Admech Robes

Finishing Up

And there you have it!

In my next article, I will tackle the white color I achieve for their arms and pants. If you would like to get in touch about a hobby project, I do take commissions, and you can find me on Facebook (Moosehead Studios), Instagram (@mooseheadstudios86), and Twitter (@moosestudios86).

If you would like to help support tutorials like this, as well as entertaining battle reports, informative product reviews, and other hobby-related content, I would be honored if you would consider becoming one of my Patrons on Patreon (patreon.com/mooseheadstudios86). Happy hobbying people!

Good Reads 40 Hobby Articles to Check Out

Good Reads 40

Happy Thanksgiving my fellow Americans and to the rest of the world, happy Good Reads Day! Whether you are bored at your family’s house, or trying to make it to Friday, I hope the selection of hobby articles will help 🙂

Good Reads 40 Hobby Articles to Check Out

As I’ve taken a few weeks off to recover from Dreadtober, this week’s Good Reads is a bit longer. So sit back, click through the links, and enjoy a day of happy hobby reading!

Painting Space Marines

How to Paint Space Marines

Painting Space Marines by Garfy

The team at Tale of Painters is constantly putting out good looking models, and Garfy has been featured a few times in White Dwarf. Over the years he has put together a ton of tutorials as well, and now all his Space Marine painting guides are gathered in one place. It’s cool to see the colors and styles all together.

Mechanical Vermin Lord

Mechanical Vermin Lord

Vermin Lord by Jake at Ex Profundis

Going in the other extreme, Jake is showing off his WIP Skavan Vermin Lord built from a Knight kit! I’m not sure why he wants a twelve inch tall rat, but I am sure it would be intimidating to play against.

Quick and Easy Urban Bases

Easy Urban Bases Painting Tutorial

Bases by Mr. Pink

It’s easy to forget about the model’s base, but it can make a huge difference it the model’s composition. To get a set of Sector Imperialis bases down quickly, Mr. Pink gives tips on using simple drybrush and washes. There is even a part two that adds in masking fluid and rust effects.

Making Wargaming Trees

Realistic Wargaming Trees Tutorial

Gaming Trees by Dagger&Brush

Peithetairos creates artful scenes for his wargaming tables, with trees being a big part. It’s not a typical tutorial, but he gets a ton of advice for taking basic plastic/wire trees and turning them into realistic forests. A ton of reference shots and little details to add in.

Imperial Guard Spec Ops

Converted Spec Ops Imperial Guard

Spec Ops by Rory

Taking a step outside his Chaos Marines, Rory tried out some commission work with these Spec Ops Imperial Guard. Not only do they look great, but he was given a bunch of third party bits to use on them, making them truly unique.

Deleted Scenes of Burning of Prospero

Burning of Prospero Humor

Cust Scenes by Honda

To mix in some humor, Honda took the pictures from Forge World’s Burning of Prospero table and added his own deleted scenes commentary. Adds a new spin to the wonderful models on display and if I ever get the chance to see it in person I think I’ll have Dust in the Wind playing through my head too!

Converted Haemonculus/Raider/Flyer/… Thing

Converted Dark Eldar Haemonculus

Haemonculus by Mr. Pink

Mr. Pink’s Dark Eldar coven is among my favorite converted armies. Something about the dark kin make them ripe for disturbing and amazing conversions. In a peek inside his mental state, Mr. Pink shared the steps to create the Haemonculus transport… thing? Lots of greenstuff and creative use of bits.

Golden D6 Issue 8

Golden D6 Hobby Magazine Issue 8 with Painting Orks

Golden D6 Issue 8

While not exactly a blog post, Issue 8 of the Golden D6 is out and Adam knocked it out of the park yet again with his ability to pull together some awesome material and work with his designer to mold it into something very enjoyable to read. The article on painting ork skin is timely for me as I’ve been working on my Ork Megaboss at the moment. Note, this one is a referral link so if you buy the issue (and you really should!) I get a cut – a little way to support this blog if you will 🙂

Until Next Week

That’s it for this week’s Good Reads. I hope you found a couple of articles enjoyable and please share Good Reads with your friends!

Dreadtober Recap and Thoughts on the Event

Dreadtober, a review and thoughts on running the event

Well Dreadtober 2016 has come and gone, but I want to take a moment and look back at what happened during the event and my thoughts from running it.

Dreadtober Recap and Thoughts on the Event


As some of my readers have gathered from my lack of posts the last two weeks, Dreadtober wore me out both on the hobby front as well as the blogging. While I have no regrets doing it, I needed some time to step away and paint a few models for fun.

What Happened

For those who missed it, or didn’t follow the full journey, Dreadtober was a challenge to build and paint a Dreadnought-like model during October. Greg started it last year and I ran this year’s event.

I ran it a bit different this year by breaking it down into six weekly challenges and using email to communicate with the participants.

Challenge #3 Basecoat Painting

Starting at the end of September, I challenged each member to plan out their project and state their commitment. It then continued into building, painting, finishing, and photographing the miniature.

The results of each week were posted on Saturday’s showcase so everyone could follow along.

The Results

To officially sign up for the event I requested everyone provide me with their email. This way I could send everything out at once and gather the progress in my inbox.

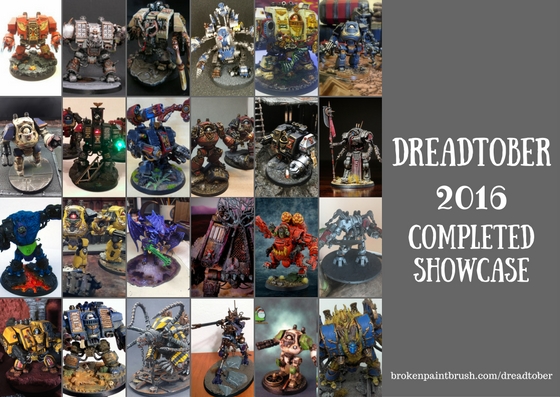
By the time Dreadtober had completed, I had 116 people sign up, 72 provide some sort of update, and 50 complete their models by the final showcase. This doesn’t include the other 11 participants that Rory hosted on his site who all completed the challenge.

Dreadtober 2016 Completed Showcase

While those numbers are incredible, what was even more awesome was to see so many levels of hobbyist work on the projects together and create such a diverse set of models.

Even though there were 49 Space Marine Dreadnoughts finished (with 8 of the Deathwatch), they all had their own story and look.

Survey Results

Last week I sent a survey to all the participants, asking how they felt the event went and what could be improved for next year.

What They Liked

By far the largest response on what everyone liked about the event was the community nature of sharing status updates on social media and the weekly showcase. Many enjoyed that everyone was working on a similar project which created a sort of comradery.

There were also fans of the weekly updates as it helped keep them motivated and make steady progress.

And of course, Dreadnoughts!

What They Didn’t Like

While no one likes to hear negative feedback, I welcomed it for this event so we can find ways to improve for next year.

  • A few that wished the event was even bigger! One of the points of feedback was to include multiple organizers/hosts which I will touch on below.
  • Not enough interaction between participants. Part of this was that some users were on Twitter and many found Dreadtober from other platforms. It also seems there was some disappointment in not getting more comments on people’s projects.
  • There was confusion on the fact that if a participant didn’t send in an update, I just copied it from the week before.
  • Falling behind and not being able to finish their project.

The Tutorials

Every week I had intended to turn my Dreadtober project into a tutorial for that week. I got about halfway through before falling too far behind and the last two tutorials were actually just a huge list of other tutorials on the web.

tutorial-survey-results

When asked if they were helpful, 35% said they were very helpful, 57% thought they were somewhat helpful, and and 8% said they weren’t helpful at all. The comments were interesting in that many found the tutorials to be interesting but had variations on “I like my way.”

Many responses, as clear from the chart above, enjoyed the tutorials as part of the challenge. This was great to hear as an important part of the event for me was to have everyone try something new.

Other Results

Overall most people thought the six weeks was about right, if not slightly long. Some liked the extra ‘cheat’ week that was focusing on photography, others thought it took away from the formal October 31st end date.

It was also great to see that so many people felt comfortable asking questions to the community. As one response put it: “Sharing, teaching and learning are all part of the community.”

how-did-you-hear-about-dreadtober

It was also interesting to see where everybody found out about Dreadtober this year. While I know a number of members participated last year, or at least followed it, there was clearly a lot of movement from Twitter and word of mouth.

My thoughts on running it

Running Dreadtober was a mixture of high endurance stress and awe induced honor.

Much of the stress was my own self doing by putting together the weekly challenges, tutorials, and showcase articles. Had I been able to get them all written in September as originally planned it would have been better.

On the flip side, I was able to witness 116 hobbyist on their journey from ‘I guess I’ll do this model’ to ‘hey! I completed it!’ And when I jumped on Twitter I saw a bunch of the participants helping each other out.

I got so into it that I was truly bummed when a few members emailed with reasons they wouldn’t be able to finish. Things like life, spoiled primer, and cancer got in the way for some, others I think lost interest. Nothing wrong with any of that (except for that stupid cancer) but I wish I could have done something more to help everyone succeed.

Ideas for the future

The big question is: would I run something like this in the future? Oh yeah!

But I do have some thoughts on what I would change, both for Dreadtober, but also other events that I am thinking about doing as well.

1. Don’t Go it Alone

One of the biggest mistakes I made was attempting to run the event by myself. I think Greg had attempted to warn me about this when we talked, but I clearly wasn’t listening.

For an event of this size, it should really be ran by a team. It would be easy to split up the work between factions, regions, or roll of the dice. But having a couple of people running it would reduce the work and allow each of us to get more into the community aspect.

2. Allow for Users to Post

By far the biggest overhead was to copy and paste each user’s update from email to the page. I would then have to download the image from the email and upload to WordPress. And then format everything.

To simplify this I want to find a way for each user to post their own updates. One option is to move it to a Facebook group. It would have the added benefit of allowing everyone to post comments directly to the user as well. The downside is that not everyone uses Facebook and it wouldn’t organize the updates like the showcases do.

If anyone has a good suggestion on a solution for this, please leave it in the comments!

3. More Focus on Community

Not only did I spend a good deal of time with copy-paste, but I was focusing on getting all the posts completed, emails out, and only then would I try to squeeze in some commenting and social replies.

Between the two changes above, I would want to take that extra time to really building the community interaction. Going way above just ‘liking’ and re-sharing posts, I think it’s important that everyone get’s support and encouragement. I think a few more participants would have finished if they had felt involved.

4. Keep the Weekly Cadence But Simplify

Overall the participants liked the weekly cadence for challenges and requests for updates. If we solve for #2 above, this would be easy to implement and prepare ahead of the event. The email tool I am using even allows for scheduling out the emails, so it could have been ready to go day 1.

What I would change for Dreadtober is focus it around the actual start and end of October rather than the Saturdays near it. I think the prep week and photography week were good ideas, but took away from the main theme.

So instead, I would change it so October 1st everyone posts what they pledge to do, and on October 31st they post their final results. The weekly challenges would fit within these two dates and help each member make progress that week.

5. Prize and/or Sponsor Support

While Dreadtober has never been a competition, there was a suggestion to add some sort of prize incentives. For those not on the Dreadtober email, Secret Weapon Miniatures gave Greg a coupon code to share last year and agree to support the event this year. It was a nice little surprise and generous of Mister Justin.

For next year, it would be interesting to see what sort of prizes and sponsors we could get. Current the idea would be prizes for everyone who finishes on time and maybe smaller prizes to everyone who completes the challenge of the week.

Until Next Year

Well this wraps up my thoughts on Dreadtober 2016. It was an awesome event, and thank you again to everyone who participated – from those who finished to those who got distracted along the way.

I’m sure sometime in September 2017, Greg and I will wake up and go “oh yeah, we should work on this!” and figure out the plan.

Dreadtober 2016 Completed Showcase

Dreadtober 2016 Showcase

Dreadtober 2016 is completed! I want to thank everyone who participated and those who cheered everyone on. It’s been a great adventure and some AWESOME models have been completed.

Dreadtober 2016 Completed Showcase

I’ve been honored to have had the opportunity to host it this year and it’s been incredible to see what everyone has done. So many of your tried new things or pushed yourself to improve something in your hobby. So even overcame school, work, and illnesses to get things done. So congrats to everybody.

Gothmog – COMPLETED!

Gothmog Mortis Dreadnought for the Red Hunters

This Red Hunter’s Mortis Dread was achieved simply with successively brighter silver undercoats and then washes of blood letter glaze for the red and seraphim sepia for the gold, with some Nuln oil in all the recesses and exposed silver parts. This method can achieve these results in a single night and is a great way to get a Tabletop/tournament quality army ready to go.

Blog: sepulchreofheroes.blogspot.com

Albie – COMPLETED!

Albie Imperial Fist Dreadnought

Dreadtober was a fun challenge. As dreads are pretty easy builds it was cool to see what custom work people did, I kept it simple, only minor modification from the original model with the wreath helmet and imperial fists logo on the front. The base fell in line with the rest of my army and so far this guy has done well for me on the tabletop. Loved the challenge. Looking forward to next year.

Instagram: albatron

Daniel Givens – COMPLETED!

Daniel Givens Dreadnought

I decided to break from how I did my first two dreadnoughts, and went with how I’m starting to go with the rest of my vehicles. I do the normal highlighting, then using a sponge, dab some Ironbreaker to some high points and then follow with some Typhus Corrosion sponged on over top. I think it gives a nice weathering effect. I also painted over the decals by sponging on some of the Macragge Blue I used for the base and painted over it with (I think) Ulthuan Grey to give them a bit of texture.

Instagram: daniel_givens

AJ – COMPLETED!

AJ Blood Angels Dreadnoughts

Dread Dreadtober was great! I really liked the challenge of getting the dread done by a deadline. I was even able to catch up after being on holiday for 2 weeks at the beginning of the month!

Facebook: vigilanteminiatures

Ashley

Ashley Murder Fang WIP

Unfortunately, I had a health issue arise and I was not able to finish my Murderfang. But on the plus side, he’s finished enough that I can now use him in games.

Twitter: chickhammer  | Blog: chickhammer.com

Glenn

img_20161022_180009742-1

Catching up on #dreadtober project. Painting done, washes and highlights done. Transfers are next, which I’m looking forward to. I’ve got a test base that I did a while back, but need some more bits for the “ruined industrial” bases I have themed my Iron Hands with. Waiting to connect with a buddy who has some Hirst Arts molds that fit the bill perfectly.

https://www.facebook.com/NarrativeGuys/posts/2130255247198952

Facebook: NarrativeGuys

Grenn Dal – COMPLETED!

Grenn Dal Dragoon

This week I finished up my two walkers. I am really happy how they turned out. More pictures can be found at http://xenoftw.blogspot.com/2016/10/dreadtober-mission-accomplished.html

Twitter: grenndal  | Blog: xenoftw.blogspot.com

Skyfyre – COMPLETED!

Dreadtober was excellent. First dread sized model i have completed. Also my first attempt to use the new snow texture paint Valhallan Blizzard. Really easy to use, love the out come.

Twitter: Nayr00 

Joe B. – COMPLETED!

Joe B Mentor Legion Dreadnought


Not 100% finished, but I’m calling this dreadnought done! I played around with more weathering powders on the feet and used decals as templates for the Mentor’s red eagle badge.

Twitter: brknpaintbrush  | Facebook: brokenpaintbrush | Instagram: brknpaintbrush

 Kyle Haydon

Kyle Contemptor Dreadtober

Progress this week went smooth aside from snipping off a thumb claw, which still needs patching. The claws are my principle addition to this already spectacular model – but the studded pturges help fill in its shape and movement I think!r

Instagram: kyle.haydon – primary spot for the WIP work!

Twitter: KyleHaydon  | Instagram: kyle.haydon | Blog: hobbyvices.com

Marc – COMPLETED!

Marc Techmarine Dreadnought

For the final photo I wanted a picture that would tell the story of my Dreadnought. I have created a photo-collage of images I have taken of my Dreadtobernaught, the Techmarine that inspired him and the Scythed Hierodule that ate him! The photos were processed using the free online editing tools Pixlr and BeFunky.

For pictures of the Dreadnought itself, check out http://oldschoolg4m1ng.blogspot.com.au/2016/11/dreadtober-to-done.html

Blog: oldschoolg4m1ng.blogspot.com.au

Norm – COMPLETED!

Norm Da Skreema Killa Deff Dread

Final shot of da Skreema Killa! I did not make my stretch goal of doing the killa kans due to some other apocalyptic projects I’m working on.  My favorite part was having my buddy Pete and I paint up each other’s casualties, but really enjoyed Dreadtober overall, the camaraderie, tips, and all that. Thanks to my new followers, I hope to have more to show you soon.

Twitter: normnondo

The Mad Mek – COMPLETED!

Mad Mek Deff Dread with Wrecking Ball

Finished the Deff Dread!

Blog: madmekworkshop.blogspot.com

Mihalis “Cadaver” Skalkos – COMPLETED!

Kadaver Death Guard Contemptor Dreadnought

I have finally managed to finish my model, and I am really happy that I tagged along this challenge that got me inspired and motivated all the way to make me finish it! I attach a picture of it finished, you can see more on my latest blog update http://homeofcadaver.blogspot.gr/2016/10/pre-heresy-death-guard-contemptor.html

Blog: homeofcadaver.blogspot.com

Lonely Kitbasher – COMPLETED!

D Powers Amphis Bane Scratch Built Dreadnougt

You know, Dreadtober isn’t only about getting the unit finished, when you think about it– it’s a fellowship of wonderful people sharing a common interest. I for one was a terrible recluse to begin with, even online– but this gathering of hobbyists has really made me feel at home. Everyone’s so social, free to share ideas and criticism, and the things we can achieve is astounding! Be sure to thank our good host for all the work he’s done. Bye bye for now.

Blog: imalonewithadream.blogspot.co.nz | G+: D Powers

Eric – COMPELTED!

Eric Word Bearer Contemptor Dreadnoughts

 I did final detailing on the Devout and the Devoured. I also got the Deacon most of the way to completion. You can see the detail work on my blog: https://plasticresinmetal.com/2016/11/05/dreadtober-6-the-endening/

Blog: plasticresinmetal.com | Instagram: eleive1

Anthony aka MasakiSayz

anthony-killa-kan-wip

Progress has slowed down a bit, this has been a busy week. Still trying to nail down the freehand checkers, but they’re off to a good start.

G+: AnthonyPaoliMasakiSays

Rory and Team – 12 Completed!

Rory's Mini Dreadtober

Joe: Rory hosted 11 of his friends to a local Dreadtober on his site and they all did some incredible work.  Make sure to click through and see their stuff as well.

I cannot understand how Joe or Greggles before him managed to do this project. I had eleven wonderful people along with me for the ride and they produced some stunning work. Some came back from years not playing or painting and others brought new stompy dreadnought goodness to their armies. There was a number of brand new painting and modelling techniques tried.

To get more info and check out their work: gamestepping.blogspot.ie/2016/10/dreadtober-2016-part-5.html 

I am even tempted to run a similar event in January to encourage people to get a squad they got over Christmas or sitting on their shelf done to kickstart the new gaming year.

Twitter: macantsagart  | Blog: gamestepping.blogspot.ie

Doug Kus – COMPLETED!

Doug Kus Trapjaw Dreadnought

I enjoyed the Dreadtober challenge immensely; motivation was to be found in all of the excellent projects by the contestants, as well as through Joe’s encouragement and additional links and tutorials.  I am already looking forward to the 2017 challenge!

Blog: barehandfishing.com

TheRhino – COMPLETED!

TheRhino Raven Guard Dreadnought

This was the first time I’ve tried painting all my base colors before moving on, and I didn’t do very well with it. After washing, I found myself going back and redoing a lot of things because of small mistakes. I did change my recipe for white for this model. I only went to a grey-white on the panels, and then edge highlighting with pure white. I like the effect and think it’ll really stand out on infantry.

Blog: thinyourpaint.blogspot.com

Black Shield

black-shield-lameters-dread-wip

Progress has been slow lately, but still finding time . Currently focussing on the body, and banner. Banner is lacing something, not sure what to add to it . Still lots to be done.

Twitter: squizzato_eric

Arkhanist – COMPLETED!

James Blood Angels Dreadnought

Keeping going when it’s all looking a bit rubbish in the middle is the hardest part – but I’m glad I managed to stagger over the finish line! I’ll definitely feel more confident with airbrushing after this project. I used Flory Models clay-based weathering washes for the first time too, and I love the effect they give. I’ll do a project log of colours & techniques etc, but a few days break first…

Blog: theguildhouse.net | Twitter: arkhanist

Dan D. – COMPLETED!

Dan D Flying Hive Tyrant

Here’s my final model. I am very happy with my results. The challenge was just the thing to get this model done and now I plan on using the momentum to get more of the swarm done.

Niklas D.

niklas-d-wip

No real progress this weekend, school and activities got in the way.

Dave S – COMPLETED!

Dave S Domitar-Lamina Battle Automata of the Cult Stochastic

Dreadtober was a combination of fun and learning; committing to wrapping a whole model in a month when I’m REALLY slow was a bit scary. But I loved seeing everyone’s progress each week, and the tutorials (Trello! Where have you been all my life) were inspiring and incredibly useful. I can’t wait to do it all again.

Showcase Post: https://plasticresinmetal.com/2016/10/31/dreadtober-2016-part-2-finished/

Blog: plasticresinmetal.com | Instagram: thepolysmith

BruceT

bruce-t-wip

Most of the detail done, base and minor detail to finish.

Facebook: Forged in the Warp | Twitter: thefleshtearer

 Darren Bogus

Darren Bogus Helbrute WIP

My wife and kids have been sick, so I’ve fallen behind. I’ve managed to work on the bone colored areas, getting them about 50% complete.

Twitter: darrenbogus

Warhammer39999 – COMPLETED!

image1

I’m happy to say that I’ve finished ahead of schedule. I still need to work up a base for him, but I’ll postpone that for another day when I have time to work on all of the other derelict bases in need of love.

Blog: warhammer39999.com

Mike – COMPLETED!

Mike Daemonkin Helbrute

This week I finished my Helbrute! He fits in nicely with the rest of Khorne Daemonkin army too. On top of my usual attention to detail I decided to attempt battle damage on this model for the first time, it turned out pretty good and I learned quite a bit about it for use on future models.

Twitter: Mike_Schreiner_  | Blog: mikeschreiner.com

NafNaf

NafNaf Space Wolf Contemptor

Running a bit behind but here is my progress so far. Finished the build now. Trickiest bit was the posing with the left leg and sculpting the bit Inhad carved out. Happy with the final result though, and all the space wolves bling really makes him part of the Vlka Fenryka!

http://objectivesecured.blogspot.co.uk/2016/10/spave-wolves-betrayal-at-calth.html

Twitter: NafNaff81  | Blog: objectivesecured.blogspot.co.uk

WestRider – COMPLETED!

WestRider Helbrute


There weren’t any tips in the photo post that I was able to take advantage of in the last week, so I’ve just got the same pics again for the final showcase: http://cascadiangrimdark.blogspot.com/2016/10/dreadtober-4-better-late-than-never.html

Blog: cascadiangrimdark.blogspot.com

Dean Kelly – COMPLETED!

Dean Old School Killa Kans

Finished the Kans!

Blog URL for this weeks’ work: wargames-wasteland.blogspot.co.uk/2016/10/orks-killa-kans-part-5-finished.html

Blog: wargames-wasteland.blogspot.co.uk

Robert

So here are my WIP photos for the build week. As you can see I added did a little repositioning of the legs to help the contemptor look like he was moving forward and look a bit more aggressive.

thumb_img_0587_1024

Additionally, I added the World Eaters iconography from the Forgeworld etched brass set. The skulls on the left shoulder are from the GW skulls bitz blister and the chain is just jewelry chain I picked up from the hobby shop. Finally, I sculpted the ablative armor nodes on the left leg using greenstuff. All in all, a few simple modifications that I think give the model a lot more character. I’m stoked to start painting!

Blog: 30khobbyblog

Mordian7th – COMPLETED!

brothernihilusptd-4

Crossed the finish line with Brother Nihilus, as I had an October 15th deadline to get him finished for the Armies on Parade event going on at the local GW shop. Continuing experiments with the marbling effect turned out pretty neat, definitely going to be trying it out on future projects in different colors!

Blog: mordian7th.blogspot.com

Jamie Searle – COMPLETED!

Jamie Completed 5 Dreadnoughts for Dreadtober

Been a busy week this time too, although I have started on a 30k force based on doing that extra #Dreadtober Dread. 🙂 I got a lot out of a couple of tutorials you posted up this time. Improved both my skills and equipment for taking photos with my iPhone and gave photoshopping (Gimp2) a go. My results were not perfect, but that is due to time rather than anything else, still my Garam final pic is fun.

So here is what #Dreadtober has left me with, almost doubled the amount of finished Dreadnoughts I have. 🙂 Check out the full post: timandjayplay.blogspot.no/2016/10/dreadtober-almost-all-wrapped-up.html

Twitter: DrakePoldragon  | Blog: timandjayplay.blogspot.no

Wudugast – COMPLETED!

Wudugast Slaanesh Dreadnought Helbrute

Here we have it, my Dreadtober contribution finished at last. My enthusiasm for painting may have waxed and waned over the month but I wasn’t going to let the final Dreadline pass without a fight. Here he is at last, my heavily converted Sonic Dreadnaught, ready to go howling and braying onto the battlefields of the 41st Millennium.

See more pictures of the finished beast here: https://convertordie.wordpress.com/2016/11/05/slaanesh-built-my-dreadnaught/

Blog: convertordie.wordpress.com

Thomas

Thomas Khrone Chaos Dreadnougt

Progression is pretty good, I got the most of the main base colours down, including the first rough wash and weathering. I’m currently relayering the orange and will start going of the details soon. I will try and experiment a bit the plasma glow once I get there. The paint scheme is of my Chaos Space Marine warband the Lords of Ascension. Here’s a link to the latest WIP post: https://hightimesontheeasternfringe.wordpress.com/2016/10/12/wip-chaos-contemptor-conversion-part-4/

Blog: hightimesontheeasternfringe.wordpress.com

Andrew – Completed!


Andrew Dart Imperial Fist Contemptor Dreadnought

I got off to a fast start with the build, and knocked a few steps out in a few nights, but think I bit off more than I could chew with finishing it.  My rare free time to commit to hobby stuff didn’t let me put enough detail on this in the deadline given. Here’s what I’ve got!  I’ll likely go back and touch up domthe stuff.  P.S. the new iPhone 7+ camera is pretty sweet – you don’t need a fancy DSLR!

Blog: Hobbyvices.com | Instagram: hobbyvices

CJ

CJ Catellax

I took my Castellax apart this week so that I can clean it up and give it a bit less static pose.  https://grimdarkvoid.blogspot.com/2016/10/dreadtober-002-building.html

Blog: grimdarkvoid.blogspot.com

Harry Wagstaff

img_20161019_223148

Reasonably happy with how the bases have come out but I’m quite far behind with painting the actual models!

Link: https://awesomeclaw.wordpress.com/2016/10/19/dreadtober-the-base/

G+: HarryWagstaff

Wolfsherz – COMPLETED!

Wolfsherz Dimachaeron

Overall the whole project went pretty well. Every step was finished in time. I really liked painting the model especially the skin. It has so much more detail compared to the normal tyranid models. I’m really pleased how he turned out!

Twitter: Wolfsherz  | Blog: wolfsherz.wordpress.com | Instagram: wolfsherz._

Dan from The Narrative Guys – COMPLETED!

Dan from the Narrative Guys Dreadtober

The challenge made me stretch my skills in basing, assembly, and transfers. I really stepped up my game and am proud of the results.

Project Log: https://www.facebook.com/NarrativeGuys/photos/?tab=album&album_id=2119539511603859

Paul

I have had 3 dreads at various stages of finished-ness so I’m using #Dreadtober as motivation to complete these models.

Paul Graddon Dreads

So far I have been working on laying down a basecoat on the least completed pieces, and little shading work and chipping the paint work.

Facebook: paul.graddon.5

Andrzej Mezynski – COMPLETED!

Andrzej Dreadknight

How Dreadtober went? Well, I think I’m quite happy with the result. This Dreadknight was the most complicated model to assembly and paint, but I think I managed. Learned few new techniques and tried new ways of painting – like putting layers of different dry paints to get the required effect.

Twitter: AndrzejMezynski

PopCultureCube

img_2240

Things are going well – focusing on the details now, and adding shades. Likely will start looking into the base next week.

Twitter: popculturecube | Instagram: popculture_cube

#2501 – COMPLETED!

#2501 Imperial Fist Dreadnought

I had to build up a matching right arm for the 40k-era Venerable-style left arm, which meant bulking out the plastic Contemptor multi-melta shoulder with card for symmetry, as well as magnetizing for good measure. I should’ve built an assault cannon as well, bt they’re so underwhelming on a machine this size I left it off.

After building up the metallics on  panels mid-way, I hit them with Agrax Earthshade to darken them again and pick out the fine details. At one point I was worried I’d covered him with a few too many trinkets, but as you can see it all worked out in the end.

More at: http://musingsofametalmind.blogspot.com/2016/10/dreadtober-finale.html

Blog: musingsofametalmind.blogspot.com

Makkeru

Makkeru Death Company Dread WIP

I didn’t manage to finish my dreads but they are started at least. One has some weathering left and the other is in the highlighting stage.

Twitter: makkeru | Blog: wip-piw.blogspot.com

Rob @ iToysoldiers – COMPELTED!

Rob at iToySoldeirs World Eater Contemptor

So I’m finally done! This was my first attempt at weathering. Not 100% happy but it’ll be okay. I can’t wait to get this bad boy on the table. I only have 37 more infantry models to finish to make it happen.

Twitter: iToysoldiers  | Blog: itoysoldiers.com | Instagram: iToysoldiers

Dave Mary – COMPELTED!

Dave Mary's Deathwatch Dreadnought

I updated highlights to get a little extra sharpness and contrast.  Added heat effects to the lascanon, assault cannon, and exhaust pipes.  Generally cleaned up any last things that stood out and then sealed everything with a good flat coat.  Mission accomplished!

Mone on the blog: 262krieg.blogspot.com/2016/10/dreadtober-2016-update-4.html

Blog: 262krieg.blogspot.com

Greg – COMPLETED!

Greg Black Legion Helbrute

So starting a new project, Black legion the focus. Here is my hellbrute for dreadtober, over time I will add bits of weathering as I go.

Twitter: wolf86sven

Sav – COMPLETED!

Sav Ultramarines Veteran Dreadnought

My first ever dread is done. With added bumps, bruises and a few bullet holes ! The base got some extra treatment to add to the drama. Hard day at the office for my guy but he’s still standing and ready!

Twitter: sav10g 

Matt

matt-b-wip-dread

Been working away this week so only just managed to get some colour on it!

Instagram: ultramarine__blue

Eric – COMPLETED!

eric-dark-angels-wip

Progress: Overall I’m pretty much done with painting my dreadnought. I tried to use brighter colors to contrast against the abbadon black and Caliban green.

Siph – COMPLETED!


Siph's Contemptor Dreadnought for the Ultramarines

Relictors Dreadnought “Strength of Will” striding through the battlefield on Craxus III, a hive world in the outer rim of the Eye of Terror, a region of realspace the Relictors have been charged with defending from the forces of chaos, heretics, xenos and traitors… the Contemptor advances, punching a hole in the arch-enemy forces with well aimed bursts from his Assault Cannon and Storm Bolter Powerfist, alongside the Grav Cannon armed Devastators and Tactical Squad, all of them 4th Company. The Inquistion may label the Relictors as heretics, but it is through these actions that they strive to absolve themselves and justify their somewhat ‘darker’ methods of war – in the name of the Emperor!

Jason – COMPLETED!

Jason's Deathwatch Dreadnought

And he is done. clean paint job, fresh from the workshops ready for action.

I tried a couple of new things. Heat burning using the airbrush rather than weathering powders and plasma coil glow. not 100% on the glow but I like the heat burns.

Big thanks to Joe for hosting this year’s dreadtober. great to see the other examples.

Twitter: jtuvminis

Mark – COMPLETED!

Mark Ultramarine Dreadnoughts

Finally the new brother joins his family. This Dreadtober is pushing me to go back and base and weather the other fellas to better standard. The month rushed by, I originally thought, oh it’s just a month I can’t take my time, but if those deadlines weren’t in place my dread would be still in manufacturing. Thanks!

Twitter: ultima_ant

Jimmy

2016-10-09-22-38-05

48 hours late, but Bob’s up and walking, sorry about the delay https://jamesworkshop.net/2016/10/09/dreadtober-building-brother-bob/

Twitter: sonofultramar | Blog: jamesworkshop.net

Adam Abramowicz

adam-abramowicz-dread

Between unpacking and setting back up my studio, I was able to build up this dreadnought.

Blog: beyondthebrushstudios.com | Facebook: beyondthebrushstudios | Instagram: beyondthebrushstudios

Chris

chris-dread-wipFinished major highlights trying to do these with airbrush. And I started blocking in some of the major colors on the arms

Instagram: Relic_Knights_Studio

Rob J

20161011_203234

I was gifted the models of the Dark Vengeance set by my Sister and Brother-in-law. Since I have a wife and three young children, I hobby on a budget and nothing can be wasted. I am attempting to convert this Hellbrute into an acceptable proxy for a Venerable Dreadnaught for my Dark Angels.

Blaž – COMPLETED!

Blaz Deathwatch Dreadnought

I did finish painting the dread, but have decided to wait with the base until I finish painting all of my Deathwatch units. That way I’ll make sure all of the bases have the same look. I put magnets in dread’s feet so it sticks to the base while I’m still able to replace it later. 🙂

This time I did my best to get the edge highlights as thin as possible & I think I succeeded. 🙂

Twitter: blazoncek  | Blog: blaz.at/home

Tibbs

tibbs-dragoon-wip

I’ve got one Dragoon pretty close to done. I need to finish up some decals and add weathering, then finish the base. I have a full base coat down on the next, and I’m working on the third before I wash them down and start adding highlights. This Skitarii and Cult Mechanicus army is still pretty new for me so there’s still a lot of experimentation going on. Check out the lightning arcs on the taser lance, though!

Blog: tibbsforge.com | Twitter: linguartisan

Patrick H

patrick-h-dread1

Dread painting meet nothing but setbacks all week. Dread one got 4 coats of paint just to get a base coat, and dread two didn’t get based at all. The paint I chose came out like water from the airbrush. I’m hoping it was a bad batch and I have more on the way for try number two on dread number two.

I’m behind across the board but I think I can get caught up.

Blog: legioxviii.blogspot.com/

Matt – COMPLETED!

Matt Fussell Angels of Silence Dreadnought

Presenting the venerable Brother Riordan of the Angels of Silence. Brother Riordan was an assault marine prior to entombment within the sarcophagus, and his tendency to go exploding through cover and otherwise solid objects keeps his enquiries and servitors busy trying clean and repaint this ancient weapon of war.

I tried a number of new techniques with varying levels of success, including airbrush blending and use of Citadel washes where previously I had mixed my own.

I would also magnetize the model differently now that I’ve worked with the final painted assembly.

G+: MattFussell

ComradeQuiche – COMPLETED!

ComradeQuiche Deff Dread

Dreadtober was awesome! I am very glad I participated, it was great to see what everyone was working on, especially because they were all walkers which I love! I updated my photo a little bit… Different angle, played with a backdrop texture, also played around in photoshop with levels and adding a dark vignette around the border, and a bright burst of white directly behind the miniature.

Instagram: ComradeQuiche

The Drill Abbot

drillabbot-dread-wip

As for my heresy-era Alpha Legion Contemptor for #dreadtober, things hit a bit of a delay the past week or so. I had worked ahead on basecoating and some highlights, so I’m not too far behind, though. I am not doing anything super detailed with the base itself.

Just threw some Astrogranite and Agrax Earthshade on it so far to get a dirty rubble look. I want the focus to be on the model, though, so I doubt I’ll do more than a little tuft or two of static grass to break it up. Next step is some major weathering and details like eye lenses.

Twitter: DrillAbbot

Jack Shrapnel – COMPLETED!

jack-wip

Basically once I finished the Khorgorath I just really hated the head of the thing, wasn’t stoked about the oval base it was on, or the fact he was somehow made to stand on a rock with a tree on it. I thought I’d be okay with it once it was done, but in my mind the face of the thing is a really bad design that is hard to read.

Off to the bits box I went, and found some stuff to make the base cooler (a khorne symbol a friend had given me) and figured the bloodthirster head fit the model a lot better.

It may not be a Khorgorath anymore exactly, but I actually might field it now

Blog: creativetwilight.com

Ruleslawyer – COMPLETED!

Ruleslawyer's Iron Warriors Maulerfiend

So after a stuttering and overly ambitious start to Dreadtober, I settled on making my Iron Warriors Maulerfiend. I’ve never been a big fan of spiky chaos and wanted to try something different. Very happy with the final result and feel this is a great start to an Iron Warriors army that I plan to build.

I also plan on posting more stuff on twitter so find me on @Ruleslawyer01 under the #IronWarriors hashtag

Twitter: Ruleslawyer01

Wrap Up

We are at the end of our six week journey together for Dreadtober 2016, but I know that I had a blast and I know many of you shared similar sentiments. I think the most exciting thing was watching the community come together and give each other encouragement.

I don’t know what the plans are for next year but I think it is clear that it needs to happen again! I also had a few people mention to me that they want to run other challenges throughout the year. I don’t have any details on them but I will be sure to share them with you as well.

Again, thank you to everyone who participated, congrats to those who completed their models, and I hope everyone reading clicks through their bios and gives each a follow!


Good Reads 39 - Hobby Blogs to Check Out

Good Reads 39 – Lots of Hobby Blog Goodness

Did you miss this awesome hobby posts for them last two weeks? Well I have you covered with some of my favorite (non-Dreadtober related) posts I found and want to share them with you!

Good Reads 39 - Hobby Blogs to Check Out

Magos Titus

Converted AdMech Magos

Magos by Apologist

Apologist is a constant source of amazing conversions. His AdMech Magos is no exception. That and the awesome fluff he wrote for it makes it well worth the read.

Genestealer Cults Rockgrinder

Goliath Rockgrinder by Amy

Goliath Rockgrinder by Amy

One of the cool aspects of the Genestealer Cult is their utilitarian look. Amy really brought this out with her Goliath Rockgrinder with that awesome red dust effect.

Building a Boat

img_09011

Wooden boat by Alex

I’m not sure how this fits into our hobby, but I thought it was a cool diversion. Alex created a step-by-step tutorial for how he built this boat from wooden coffee stir sticks. Now that’s scratch built!

Marines and Paint Set

Marines by Zab

Marines by Zab

Want a hobby challenge, one that limits what you can use? Zab did that with painting up the Marine starter paint set. Only the 8 basic colors and press-fit marines. But they look awesome. He has a couple of WIP posts on it too that show his thoughts on color usage.

When Weathering Goes Bad

Shamelessly Stolen from Gothmog

Shamelessly Stolen from Gothmog

Bringing some perspective to the weathering rage, Gothmog shares his thoughts on weathering vehicles from his actual experience in service. It’s a good read even if you like making your tanks super rusted but could be a reality check for some of us.

That’s a Wrap

I hope you enjoyed this week’s Good Reads and found some awesome things to check out. Until next week, keep on hobbying!

How to Photograph Your Mini

Huge List of Tutorials for Miniature Photography

You spent all this time to build and paint your mini, and now it’s time to share it with the world. Do yourself (and your work of art) a favor and take a bit of extra time to take the best picture you can. Below I’ve put together a bunch of tutorial links on miniature photography to help you do just this.

Tutorials for Miniature Photography

I must admit that it kills me a bit inside when I see what could be a fantastic looking model but it’s hard to see because it was snapped on a busy desk or a bit blurry. As many of the articles below prove, you don’t need a fancy camera and photo studio to take good pictures. Just a bit of setup and care.

So dive into the tutorial and find a few things that you could improve to improve your model’s glamor shot.

Miniature Photography Basics

For some good start-to-finish tutorials, these guides to miniature photography will help you get going. From something as simple as leaning a piece of paper against the wall and setting a couple of lamps nearby to doing some quick editing.

  1. Budget Miniature Photography | Rust and the City showing some tips on taking pictures of your mini with minimizing the expense.
  2. Basic Guide to Miniature Photography | Pirate Viking King from setting up a light box to using your camera correction to editing.
  3. Beginner’s Guild to Photography | Tale of Painters Garfy discusses a bunch of the hows and whys of taking pictures of his minis
  4. Miniature Photography | Massive Voodoo Part 1 of a nice series including comparing a point-and-shoot vs. a DSLR camera
  5. How to Photograph Your Minis | Giovanni Modelling Yet another excellent overview of the basics, very simple stuff but vast improvements
  6. Photographing Minis | Home of Cadaver Another DIY light box and desk lamps, Cadaver talks about his setup.

Light Boxes – DIY and Reviews

Providing proper lighting can make a huge difference in how your models look on camera. BUT it doesn’t have to be a big fancy light box. Below I’ve got a couple of DIY photo light boxes that you can build with essentially a cereal box. For those who want something a bit more portable, I have a couple of reviews of the Foldio as well.

  1. Make a Simple Photo Box | Coloured Dust Arbal makes a nice light box out of cardboard and tracing paper.
  2. Experimenting with Lightboxes | Old School Gaming Marc uses a lawn mower box for his DIY light box.
  3. Create an Inexpensive Lightbox | WikiHow step by step with lots of photos, but sorry for the ads
  4. Foldio 2 Review | Feed Your Nerd Greg was an early backer of the Foldio and did a great review of the Foldio 2
  5. Foldio Unboxing and Review | Broken Paintbrush I followed in Greg’s recommendation and bought a Foldio 2 as well and shared my thoughts.
  6. Simple Homemade Light Box | 40k Addict Dave uses simple items from around the home to make his light box.
  7. Creating a Home Studio | Nesbet Miniatures a bit sturdier DIY box made from architecture wood sticks
  8. How to Build a Photo Setup | Massive Voodoo Roman takes a garbage can and turns it into a light box, so if the MV guys use a DIY solution, you can too!

Backgrounds

Sometimes what the sets a model apart is simply the background they are photographed against. Something as simple as a white piece of paper is a huge step up from the cluttered desk. And the next step still is to use colored backgrounds that can set off the models highlights or make the picture look more interesting.

  1. Scavvy Bunker Background | Chest of Colors creating a simple diorama piece for photographing minis in the mood
  2. Cloud Backdrops | Corvus Miniatures Free downloads to print and create cool looking backdrops
  3. Hangar 18 Review |Chest of Colors Mahon provides a great write-up of these backgrounds. I’ve heard a lot of good things and will need to get a set myself someday.

Camera Settings

All those dial settings and options on your camera can be a bit intimidating. While fixing the mode to ‘Auto’ often works well enough, learning about some of the options can help take the picture to the next level and make up for some bad lighting or particularly dark models.

  1. Use your iPhone to Photograph Miniatures | Tale of Painters You don’t need a fancy camera, an iPhone (or any smartphone) can work well if you sent it up right.
  2. Using the DSLR to Take Pictures | Massive Voodoo Part 2 of their post, this time with lots of tips for using the settings on the camera
  3. Basic Camera Settings | WAMP Goes into depth on the options and how they affect the picture
  4. Camera Settings | Nesbet Miniatures Tons of pictures of minis with various settings like White Balance and Exposure Value
  5. Taking Great Pictures with Your Camera Phone | The Mossop another write up for using your camera phone to great results

Video Recording

Something that I’ve dabbled with a few times and have plans for more in the future, doing video shares many of the same tips as still photography.

  1. Vision for the Future | Wappel James shares his thoughts on his latest video recorder.

Post-Processing Photos

Once you take the picture, you aren’t yet done. Taking a minute or two to post process an image can dramatically improve the picture. From cropping out the extra frame to improving the white balance, many of the post process steps are incredibly simple for huge gains. Others can help fix mistakes or add effects to create a cinematic look.

  1. Simple Photo Editing with GIMP | Broken Paintbrush I share tips on using the free alternative to Photoshop to edit your miniatures
  2. Advanced GIMP Editing | Broken Paintbrush Going deeper into the rabbit hole, I added a video to this one to share advanced editing tips
  3. Grim Dark Glamour Shot | Eternal Hunt Kraut Scientist uses photoshop to add dramatic effects and backgrounds to his minis and shows you how to do it too
  4. GIMP the Basics | WAMP A different take on GIMP basics, lots of good stuff.
  5. Photoshop Basics | Nesbet Miniatures Part three of his series showing some Photoshop magic to change the background

Using Pictures on Your Blog

Now that you have your final pictures, here are some tips to add a bit of a boost to your blog. Either improving the findability or combining them into a neat spin video.

  1. Get Your Pictures Found | Broken Paintbrush some tips to help get your pictures (and blog) found by using Alt and Title tags
  2. 360 Spin Pictures | Vanus Temple Dezartfox shares a web script that he uses to turn a collection of pictures into a rotating piece.
  3. How to Make Rotating Pictures | Coloured Dust Arbal took Dezartfox’s tutorial above and extended it.

Your Turn

While I dived through my blog feeds and the Google searches and my favorite hobby sites to find the helpful links above, I know there are more out there. So if you have some helpful guides to miniature photography, DIY lightboxes, or something else that would fit, leave it in the comments below so I can add it in.

Photograph Your Mini Challenge

Dreadtober Challenge: Photograph Your Mini

While October has come and gone, and hopefully everyone completed their Dreadtober models, we still have one challenge left: photograph your model.

Photograph Your Mini Challenge

This may seem a bit redundant as each of us has been taking pictures along the way and posting them in the showcase articles. But I felt it was important to take a week just to improve our skills of photographing miniatures, editing the picture, and loading it to your site of choice.

Challenge: Photograph Your Model

So this week your challenge is this: read/watch some tutorials on photographing your miniatures (some helpful links below), build a simple light box if needed, and take the best picture of your model possible.

As you will see in some of the tutorials, you don’t need a fancy camera or photo booth. A white sheet of paper and your cell phone can take some amazing pictures – if you take the time to do it right. So this week, take that time and up your photography game.

Result: A Beautifully Photographed Model

After four weeks of building and painting, your dread has transformed from lifeless gray plastic to a brutal work of art. But if you just use your project table as the backdrop and don’t bother with lighting, no one will be able to appreciate it.

So do your Dreadtober a favor, and make it look pretty for everyone to see!

Helpful Tutorials

To help you accomplish this task, I’ve pulled together some helpful tutorials on photographing miniatures. This includes doing it on the cheap with basic supplies but also post processing and loading it to your website.

Photographing Miniatures basics

Rust and the City has an excellent overview of photography basics – all aimed for the budget hobbyist in mind. The Pirate Viking has a good overview as well that includes some photo editing tips.

Creating a Photobox

Arbal from Colored Dust created a photo box out of cardboard and tracing paper. Simple, very cheap, and works great.

Marc built one out of a giant cardboard box and tea-stained cardboard background.

Foldio Review

For those who want to buy a light box, Greg and I both reviewed the Foldio. It works well and, more importantly for me, it folds down and easy to store. (Greg’s Review | My Review)

Using Your Phone

Think you need a fancy camera to take good pictures? Garfy destroys this myth with his guide to using your iPhone to photograph miniatures. He also goes crazy in depth on camera settings using a DSLR.

Editing with GIMP

Awesome, you now have better lighting, backgrounds, and camera shots. Now it’s time for post editing! The Pirate Viking and Garfy go into it a bit, but I also have an in-depth guide to editing with GIMP (a free alternative to Photoshop) and another with advanced tips for GIMP.

Thematic Backdrops

Want to take it one step further? KrautScientist uses Photoshop (or GIMP) to create glamor shots of his models. By using some editing and cool backgrounds, you make it your model look like it is striding through the 40k world.

Help Your Pictures Get Found

If you are posting your pictures to your blog and want to bring in more search traffic, then paying attention to the details matter. I wrote up a guide to getting the most out of your image tags. Simple steps but can help people find your work in Google Image search.

Need More Help?

Remember, Dreadtober is about the community. So if you are stuck with a camera setting, recommendations for lighting, or anything else, post it to the community. Use #dreadtober to be seen and we can all help each other improve our hobby skills.

Lights, Camera, Dreadtober!

OK team, break out the lights, the photo box, cameras of all types, and your trusty computer and take some pictures! This is the final week of the Dreadtober challenge so let’s finish strong!

This week’s Showcase will be the final feature of your models, which is why I saved this challenge for last. It’ll be immortalized for all Dreadtober time as the participants of the 2016 Challenge!

Dreadtober Showcase #4 Painting Completion

Dreadtober Painted Showcase

Ladies and Gentleman, October has pretty much come to an end. This week our participants were challenged to finish their models, completing their Dreadtober pledge.

Dreadtober Showcase #4 Painting Completion

While there is still one week left of the challenge where we will work on photography, today we put our brushes down and declared victory!

Gothmog

Gothmog Mortis Dreadnought for the Red Hunters

This Red Hunter’s Mortis Dread was achieved simply with successively brighter silver undercoats and then washes of blood letter glaze for the red and seraphim sepia for the gold, with some Nuln oil in all the recesses and exposed silver parts. This method can achieve these results in a single night and is a great way to get a Tabletop/tournament quality army ready to go.

Blog: sepulchreofheroes.blogspot.com

Albie

albie-base-wip

So the base for my dreadnought is designed after the red rocky terrain of Mars. I started with a blank base and a piece of 1/4″ thick cork. This way the dreadnought will stand over most other models. I broke away pieces until I liked the shape fitting on the base and so the dreadnought could stand nicely on it.

Then I painted the whole base brown to start. Then layered on the cracked earth technical paint Martian Ironearth. After letting that dry I touched up any spots I missed with Tuskgor Fur, then I drenched the base in Argax Earthshade. After that dried, a bit of dry brushing with Squig Orange brought out some highlights.

Instagram: albatron

Daniel Givens

Daniel Givens Dreadnought

I decided to break from how I did my first two dreadnoughts, and went with how I’m starting to go with the rest of my vehicles. I do the normal highlighting, then using a sponge, dab some Ironbreaker to some high points and then follow with some Typhus Corrosion sponged on over top. I think it gives a nice weathering effect. I also painted over the decals by sponging on some of the Macragge Blue I used for the base and painted over it with (I think) Ulthuan Grey to give them a bit of texture.

Instagram: daniel_givens

AJ

AJ's Blood Angels Dreadnought

This was the fist time I have done battle damage on a vehicle type unit. I think it turned out rather well and wish I was a better miniature photographer. The magnetizing worked out great and this dread will make a great addition to my Shield of Baal Blood Angels, all of which are battle damaged!

Facebook: vigilanteminiatures

Ashley

ashley-wip-murderclaw

Nurgle bestowed his blessings on me the last two weeks, so I got a bit behind. But Murderfang is base coated and has his first wash. I’ll be catching up this weekend with his base and starting his details.

Twitter: chickhammer  | Blog: chickhammer.com

Glenn

img_20161022_180009742-1

Catching up on #dreadtober project. Painting done, washes and highlights done. Transfers are next, which I’m looking forward to. I’ve got a test base that I did a while back, but need some more bits for the “ruined industrial” bases I have themed my Iron Hands with. Waiting to connect with a buddy who has some Hirst Arts molds that fit the bill perfectly.

https://www.facebook.com/NarrativeGuys/posts/2130255247198952

Facebook: NarrativeGuys

Grenn Dal

Grenn Dal Dragoon

This week I finished up my two walkers. I am really happy how they turned out. More pictures can be found at http://xenoftw.blogspot.com/2016/10/dreadtober-mission-accomplished.html

Twitter: grenndal  | Blog: xenoftw.blogspot.com

Skyfyre

skyfye-killa-kan

Killa Kan progress. Most the base coats are on, still a few more to go. Then on to touch ups.

Twitter: Nayr00 

Joe B.

custom-base-done-and-model-placed

Last week I made some great progress and not only finished the base, but also wrote up a giant tutorial on basing techniques. Next up is the decals and weathering to finish him off.

Twitter: brknpaintbrush  | Facebook: brokenpaintbrush | Instagram: brknpaintbrush

 Kyle Haydon

Kyle Contemptor Dreadtober

Progress this week went smooth aside from snipping off a thumb claw, which still needs patching. The claws are my principle addition to this already spectacular model – but the studded pturges help fill in its shape and movement I think!r

Instagram: kyle.haydon – primary spot for the WIP work!

Twitter: KyleHaydon  | Instagram: kyle.haydon | Blog: hobbyvices.com

Marc

Marc's Techmarine Dreadnought for Deathwatch

I have spent a lot of time picking out the details, such as the lenses, as well as shading the red and metallic sections. I have also weathered the armour, particularly around the legs, as well as the Dark Angels symbol on the barrel. During photography week I will also be finishing off the servo-arms and attaching them.

Blog link: http://oldschoolg4m1ng.blogspot.com.au/2016/10/dreadtober-detail-and-weathering.html

Blog: oldschoolg4m1ng.blogspot.com.au

Norm

Norm's Skreema Killa Deff Dread and Pete's Raven Guard Dreadnought

Da Skreema Killa is finished. Had a painting session with my buddy Pete (of NGC40k fame), and he painted the Raven Guard casualty on my base, while I painted the dead ork on the base of his incredible ironclad/venerable dread. Let’s all encourage him to finish that beast!

Twitter: normnondo

The Mad Mek

Mad Mek Deff Dread with Wrecking Ball

Finished the Deff Dread!

Blog: madmekworkshop.blogspot.com

Mihalis “Cadaver” Skalkos

Kadaver Death Guard Contemptor Dreadnought

I have finally managed to finish my model, and I am really happy that I tagged along this challenge that got me inspired and motivated all the way to make me finish it! I attach a picture of it finished, you can see more on my latest blog update http://homeofcadaver.blogspot.gr/2016/10/pre-heresy-death-guard-contemptor.html

Blog: homeofcadaver.blogspot.com

Lonely Kitbasher

D Powers Scratch Built Dreadnoughts

So that’s that, I suppose. I didn’t quite get the second Amphis’ Bane finished before the end (2nd in the image), but it was worth a try. Still pretty chuffed with what I could achieve! This certainly gave me a lot of confidence to be a bit more “free” with converting bigger projects like my IK, and I suppose it eases me back into painting large things again, something that has always intimidated me.

Full showcase on my blog: http://imalonewithadream.blogspot.co.nz/2016/10/dreadtober-progress-3-finished-by.html

Flikr album: https://www.flickr.com/photos/141353226@N05/albums/72157675682741086

Blog: imalonewithadream.blogspot.co.nz | G+: D Powers

Eric


Eric's Alpha Legion Contemptor Dreadnoughts
Eric here, while I didn’t quite finish my goal I came real close and got all 3 dreadnoughts to 70-80%. You can see my full update here:

https://plasticresinmetal.com/2016/10/29/dreadtober-5-devout-and-deacon-progress/

Blog: plasticresinmetal.com | Instagram: eleive1

Anthony aka MasakiSayz

anthony-killa-kan-wip

Progress has slowed down a bit, this has been a busy week. Still trying to nail down the freehand checkers, but they’re off to a good start.

G+: AnthonyPaoliMasakiSays

Rory

thousand-sons-hellbrute-2

As we are coming into the final stretch the 12 projects on my blog are wrapping up with some already completed and others racing for the Monday deadline. My next post will be going up on the 31st, that is if I finish the last details on my own…

Twitter: macantsagart  | Blog: gamestepping.blogspot.ie

Doug Kus

Doug Kus Trap Jaw WIP

With the base complete, I was able to add some detail work to Trap Jaw.  This mainly included some rather basic, hatch-style highlighting on the dark blue/black armor, as well as some added details where the lava flow meets the bare rock.

Blog: barehandfishing.com

TheRhino

TheRhino Raven Guard Dreadnought

This was the first time I’ve tried painting all my base colors before moving on, and I didn’t do very well with it. After washing, I found myself going back and redoing a lot of things because of small mistakes. I did change my recipe for white for this model. I only went to a grey-white on the panels, and then edge highlighting with pure white. I like the effect and think it’ll really stand out on infantry.

Blog: thinyourpaint.blogspot.com

Black Shield

black-shield-lameters-dread-wip

Progress has been slow lately, but still finding time . Currently focussing on the body, and banner. Banner is lacing something, not sure what to add to it . Still lots to be done.

Twitter: squizzato_eric

Arkhanist


Arkhanist Blood Angels Dreadnought

Airbrushing larger flat surfaces was new to me, and trying to get graduations that don’t totally suck is harder than it looks. I’m in awe of the people that have managed to paint 3+ dreads in a month, I’ve not even finished this one! Still, two more days left in October yet, and I’m almost there.

Blog: theguildhouse.net | Twitter: arkhanist

Dan D.

Dan Purple Hive Tyrant WIP

Pretty happy with my progress. A bit more detailing, one arm to glue on and basing. I hope to be done this weekend.

Niklas D.

niklas-d-wip

No real progress this weekend, school and activities got in the way.

Dave S

image1

Progressed well this week, base coats and weathering are down for the Domitar. Hairspray chipping on the shoulder pads went really well.I also re-designed her staff and am currently resculpting the tabard.

image2

In a move I am bound to regret when I run out of time at the end, I decided to add a stretch goal in the form of a Deathwatch dread, truescaled to match the marines I’m working on.

Blog: plasticresinmetal.com | Instagram: thepolysmith

BruceT

bruce-t-wip

Most of the detail done, base and minor detail to finish.

Facebook: Forged in the Warp | Twitter: thefleshtearer

Culial

dread-in-progress

So, my week has taken a few unexpected turns and the build has not progressed as anticipated. I have, however, also made a start on the base – so ahead on one part, behind on another…

I’ll be doing my best to reclaim ground on the project in the coming days!

Blog: Dakka Dakka

Darren Bogus

Darren Bogus Helbrute WIP

My wife and kids have been sick, so I’ve fallen behind. I’ve managed to work on the bone colored areas, getting them about 50% complete.

Twitter: darrenbogus

Warhammer39999

image1

I’m happy to say that I’ve finished ahead of schedule. I still need to work up a base for him, but I’ll postpone that for another day when I have time to work on all of the other derelict bases in need of love.

Blog: warhammer39999.com

Mike

Mike Daemonkin Helbrute

This week I finished my Helbrute! He fits in nicely with the rest of Khorne Daemonkin army too. On top of my usual attention to detail I decided to attempt battle damage on this model for the first time, it turned out pretty good and I learned quite a bit about it for use on future models.

Twitter: Mike_Schreiner_  | Blog: mikeschreiner.com

NafNaf

NafNaf Space Wolf Contemptor

Running a bit behind but here is my progress so far. Finished the build now. Trickiest bit was the posing with the left leg and sculpting the bit Inhad carved out. Happy with the final result though, and all the space wolves bling really makes him part of the Vlka Fenryka!

http://objectivesecured.blogspot.co.uk/2016/10/spave-wolves-betrayal-at-calth.html

Twitter: NafNaff81  | Blog: objectivesecured.blogspot.co.uk

WestRider


Westrider Iron Warriors Helbrute

Finally got around to getting my light box setup and documenting my progress over the last couple of weeks. There’s still more I’d like to do, but I’m calling it good for now: http://cascadiangrimdark.blogspot.com/2016/10/dreadtober-4-better-late-than-never.html

Blog: cascadiangrimdark.blogspot.com

Dean Kelly

Dean Old School Killa Kans

Finished the Kans!

Blog URL for this weeks’ work: wargames-wasteland.blogspot.co.uk/2016/10/orks-killa-kans-part-5-finished.html

Blog: wargames-wasteland.blogspot.co.uk

Robert

So here are my WIP photos for the build week. As you can see I added did a little repositioning of the legs to help the contemptor look like he was moving forward and look a bit more aggressive.

thumb_img_0587_1024

Additionally, I added the World Eaters iconography from the Forgeworld etched brass set. The skulls on the left shoulder are from the GW skulls bitz blister and the chain is just jewelry chain I picked up from the hobby shop. Finally, I sculpted the ablative armor nodes on the left leg using greenstuff. All in all, a few simple modifications that I think give the model a lot more character. I’m stoked to start painting!

Blog: 30khobbyblog

Mordian7th

brothernihilusptd-4

Crossed the finish line with Brother Nihilus, as I had an October 15th deadline to get him finished for the Armies on Parade event going on at the local GW shop. Continuing experiments with the marbling effect turned out pretty neat, definitely going to be trying it out on future projects in different colors!

Blog: mordian7th.blogspot.com

Jamie Searle

img_4104

Brother-Thanatos Deathwatch Dreadnought, previously of the Red Hunters is now complete. I’m very pleased with how it’s turned out. Some of the details could have been a little cleaner, but big success. With three of my four Dreadnoughts complete I’ve started on a fifth to fill out the month. A heavily weathered World Eaters Contemptor.

Twitter: DrakePoldragon  | Blog: timandjayplay.blogspot.no

Wudugast


Wudugast Slaaneshi sonic dreadnaught

Well, my Slaaneshi sonic dreadnaught is almost – but crucially not quite – finished in time for the showcase. There’s still a few things I’d like to do before he’s done so I’ll be taking full advantage of cheat week and hopefully by this time next week I’ll have a model worthy of the Dark Prince himself

See more pictures, and leave any feedback you may have, here: https://convertordie.wordpress.com/2016/10/29/cracking-the-wip-part-5/

Blog: convertordie.wordpress.com

Thomas

Thomas Khrone Chaos Dreadnougt

Progression is pretty good, I got the most of the main base colours down, including the first rough wash and weathering. I’m currently relayering the orange and will start going of the details soon. I will try and experiment a bit the plasma glow once I get there. The paint scheme is of my Chaos Space Marine warband the Lords of Ascension. Here’s a link to the latest WIP post: https://hightimesontheeasternfringe.wordpress.com/2016/10/12/wip-chaos-contemptor-conversion-part-4/

Blog: hightimesontheeasternfringe.wordpress.com

Andrew

img_1236

Armies on Parade slowed my progress this week (got bronze!). Attached are my base layers painted: bone white spray, 50-50 Agrax Earthshade and Lahmian Medium mix in recesses and rivets, with Lamenters Yellow glaze slathered on top.  Next step is details and cleanup!

Blog: Hobbyvices.com | Instagram: hobbyvices

CJ

CJ Catellax

I took my Castellax apart this week so that I can clean it up and give it a bit less static pose.  https://grimdarkvoid.blogspot.com/2016/10/dreadtober-002-building.html

Blog: grimdarkvoid.blogspot.com

Harry Wagstaff

img_20161019_223148

Reasonably happy with how the bases have come out but I’m quite far behind with painting the actual models!

Link: https://awesomeclaw.wordpress.com/2016/10/19/dreadtober-the-base/

G+: HarryWagstaff

Wolfsherz

Wolfsherz Dimachaeron

Overall the whole project went pretty well. Every step was finished in time. I really liked painting the model especially the skin. It has so much more detail compared to the normal tyranid models. I’m really pleased how he turned out!

Twitter: Wolfsherz  | Blog: wolfsherz.wordpress.com | Instagram: wolfsherz._

Dan from The Narrative Guys

dreadtober-week-3

Travel schedules have played havoc with progress. Attaching the dread to the bases turned out to be very difficult. It was very hard to get them to stand the way I wanted them to and get the pins lined up with something that I could drip into. Lesson learned, think more about where the model will stand on big models while building the base.

Project Link: https://www.facebook.com/NarrativeGuys/photos/?tab=album&album_id=2119539511603859

Facebook: NarrativeGuys 

Paul

I have had 3 dreads at various stages of finished-ness so I’m using #Dreadtober as motivation to complete these models.

Paul Graddon Dreads

So far I have been working on laying down a basecoat on the least completed pieces, and little shading work and chipping the paint work.

Facebook: paul.graddon.5

Andrzej Mezynski

Andrzej Dreadknight

It was the most complicated model I ever built – lots of parts, some challenging details, like that heraldry on left pauldron. I’m quite happy with how the model ended. Might not be to Heavy Metal standards, but it’s best I ever painted 🙂

What I tried new? Mixing of paints. The sword is Leadbelcher with Caledor Sky, and for that blueish tint I drybrushed it first with Imric Blue, to cover it with drybrush of Necron – despite my tries I could not get the Drakenhof Nightshade to be that light blue (and that’s the colour of shade that was mentioned in many tutorials)

Twitter: AndrzejMezynski

PopCultureCube

img_2240

Things are going well – focusing on the details now, and adding shades. Likely will start looking into the base next week.

Twitter: popculturecube | Instagram: popculture_cube

#2501

#2501 Imperial Fist Dreadnought

I had to build up a matching right arm for the 40k-era Venerable-style left arm, which meant bulking out the plastic Contemptor multi-melta shoulder with card for symmetry, as well as magnetizing for good measure. I should’ve built an assault cannon as well, bt they’re so underwhelming on a machine this size I left it off.

After building up the metallics on  panels mid-way, I hit them with Agrax Earthshade to darken them again and pick out the fine details. At one point I was worried I’d covered him with a few too many trinkets, but as you can see it all worked out in the end.

More at: http://musingsofametalmind.blogspot.com/2016/10/dreadtober-finale.html

Blog: musingsofametalmind.blogspot.com

Makkeru

Makkeru Death Company Dread WIP

I didn’t manage to finish my dreads but they are started at least. One has some weathering left and the other is in the highlighting stage.

Twitter: makkeru | Blog: wip-piw.blogspot.com

Rob @ iToysoldiers

itoysoldiers-base-wip

And here’s the base. It’s the first Sector Imperialis base I’ve painted up and I have to say I’m pretty happy with it. It matches my table. Woo hoo!

More on the modelling project page:
http://itoysoldiers.com/munitions/modeling-projects/contemptor-dreadnaught

Twitter: iToysoldiers  | Blog: itoysoldiers.com | Instagram: iToysoldiers

Dave Mary


Dave Mary Deathwatch Dreadnought

I updated highlights to get a little extra sharpness and contrast.  Added heat effects to the lascanon, assault cannon, and exhaust pipes.  Generally cleaned up any last things that stood out and then sealed everything with a good flat coat.  Mission accomplished!

Mone on the blog: 262krieg.blogspot.com/2016/10/dreadtober-2016-update-4.html

Blog: 262krieg.blogspot.com

Greg

Greg Black Legion Helbrute

So starting a new project, Black legion the focus. Here is my hellbrute for dreadtober, over time I will add bits of weathering as I go.

Twitter: wolf86sven

Sav

Sav Ultramarines Veteran Dreadnought

My first ever dread is done. With added bumps, bruises and a few bullet holes ! The base got some extra treatment to add to the drama. Hard day at the office for my guy but he’s still standing and ready!

Twitter: sav10g 

Matt

matt-b-wip-dread

Been working away this week so only just managed to get some colour on it!

Instagram: ultramarine__blue

Eric

eric-dark-angels-wip

Progress: Overall I’m pretty much done with painting my dreadnought. I tried to use brighter colors to contrast against the abbadon black and Caliban green.

Siph

Siph Relictors Contemptor Dreadnought

I finished a project and a few days ahead of schedule! Thanks to everyone participating in Dreadtober, it really motivated me to get this Dread done and off the To-Do pile! Great work everyone, and thanks to Joe. I tried a little heat stain on the barrels which came out okay, so a nice cheap plastic Contemptor now done and ready to join the 4th Company Relictors – I already have a very large 5th Company, so this is needed elsewhere.

I was quite pleased with the repositioning of the leg with greenstuff, and a twist at the waist and careful positioning of the arms to follow the motion through, hopefully he looks like he is turning.

More pictures will be up at weemen.blogspot.co.uk/search/label/Dreadtober%202016

Jason

Jason's Deathwatch Dreadnought

And he is done. clean paint job, fresh from the workshops ready for action.

I tried a couple of new things. Heat burning using the airbrush rather than weathering powders and plasma coil glow. not 100% on the glow but I like the heat burns.

Big thanks to Joe for hosting this year’s dreadtober. great to see the other examples.

Twitter: jtuvminis

Mark


Mark Ultramarine Dreadnoughts

Finally the new brother joins his family. This Dreadtober is pushing me to go back and base and weather the other fellas to better standard. The month rushed by, I originally thought, oh it’s just a month I can’t take my time, but if those deadlines weren’t in place my dread would be still in manufacturing. Thanks!

Twitter: ultima_ant

Jimmy

2016-10-09-22-38-05

48 hours late, but Bob’s up and walking, sorry about the delay https://jamesworkshop.net/2016/10/09/dreadtober-building-brother-bob/

Twitter: sonofultramar | Blog: jamesworkshop.net

Adam Abramowicz

adam-abramowicz-dread

Between unpacking and setting back up my studio, I was able to build up this dreadnought.

Blog: beyondthebrushstudios.com | Facebook: beyondthebrushstudios | Instagram: beyondthebrushstudios

Chris

chris-dread-wipFinished major highlights trying to do these with airbrush. And I started blocking in some of the major colors on the arms

Instagram: Relic_Knights_Studio

Rob J

20161011_203234

I was gifted the models of the Dark Vengeance set by my Sister and Brother-in-law. Since I have a wife and three young children, I hobby on a budget and nothing can be wasted. I am attempting to convert this Hellbrute into an acceptable proxy for a Venerable Dreadnaught for my Dark Angels.

Blaž

Blaz Deathwatch Dreadnought

I did finish painting the dread, but have decided to wait with the base until I finish painting all of my Deathwatch units. That way I’ll make sure all of the bases have the same look. I put magnets in dread’s feet so it sticks to the base while I’m still able to replace it later. 🙂

This time I did my best to get the edge highlights as thin as possible & I think I succeeded. 🙂

Twitter: blazoncek  | Blog: blaz.at/home

Tibbs

tibbs-dragoon-wip

I’ve got one Dragoon pretty close to done. I need to finish up some decals and add weathering, then finish the base. I have a full base coat down on the next, and I’m working on the third before I wash them down and start adding highlights. This Skitarii and Cult Mechanicus army is still pretty new for me so there’s still a lot of experimentation going on. Check out the lightning arcs on the taser lance, though!

Blog: tibbsforge.com | Twitter: linguartisan

Patrick H

patrick-h-dread1

Dread painting meet nothing but setbacks all week. Dread one got 4 coats of paint just to get a base coat, and dread two didn’t get based at all. The paint I chose came out like water from the airbrush. I’m hoping it was a bad batch and I have more on the way for try number two on dread number two.

I’m behind across the board but I think I can get caught up.

Blog: legioxviii.blogspot.com/

Matt

matt-base-wip

There hasn’t been much progress this week as I’ve been swamped. I’m hoping to get some hobby time this weekend.

G+: MattFussell

ComradeQuiche

I love the Deff model so much, it has such potential for converting! I decided that to make it more dynamic I wanted to have him running. Because of this I decided to pin his one foot to the base for increased strength. Comrade Quiche Deff Dread

I had made the original base from a spare chimera rear door, and then cast the entire base in plastic so it is completely solid, this made it very easy to pin securely. I took two bombs from the Bomba model and 3D printed new nose cones that I drew up in Solidworks (because I wanted  ACCURATE checkers and decided to cheat by making each square stand out!) I cut out the perforated metal detail on the back of the model and replaces the stock exhaust with the new custom rokkit pack. The pilot is from the Stompa kit, with a Stormboy head. And of course since I wanted it to go fast, I went with a RED PAINTJOB!

Since this week we were challenged to work on our photo skills I decided to try and play with lighting. I used a simple pop-up white photo studio with cheap lights shinning through both sides to give the model soft, even lighting. One the left side of the picture I increased the brightness of the lights, and moved them closer to the back of the model to cause a slight edge glow effect to try and pop the model off the backdrop as much as possible.

Instagram: ComradeQuiche

The Drill Abbot

drillabbot-dread-wip

As for my heresy-era Alpha Legion Contemptor for #dreadtober, things hit a bit of a delay the past week or so. I had worked ahead on basecoating and some highlights, so I’m not too far behind, though. I am not doing anything super detailed with the base itself.

Just threw some Astrogranite and Agrax Earthshade on it so far to get a dirty rubble look. I want the focus to be on the model, though, so I doubt I’ll do more than a little tuft or two of static grass to break it up. Next step is some major weathering and details like eye lenses.

Twitter: DrillAbbot

Jack Shrapnel

jack-wip

Basically once I finished the Khorgorath I just really hated the head of the thing, wasn’t stoked about the oval base it was on, or the fact he was somehow made to stand on a rock with a tree on it. I thought I’d be okay with it once it was done, but in my mind the face of the thing is a really bad design that is hard to read.

Off to the bits box I went, and found some stuff to make the base cooler (a khorne symbol a friend had given me) and figured the bloodthirster head fit the model a lot better.

It may not be a Khorgorath anymore exactly, but I actually might field it now

Blog: creativetwilight.com

Ruleslawyer

Ruleslawyer's Iron Warriors Maulerfiend

So after a stuttering and overly ambitious start to Dreadtober, I settled on making my Iron Warriors Maulerfiend. I’ve never been a big fan of spiky chaos and wanted to try something different. Very happy with the final result and feel this is a great start to an Iron Warriors army that I plan to build.

I also plan on posting more stuff on twitter so find me on @Ruleslawyer01 under the #IronWarriors hashtag

Twitter: Ruleslawyer01

Wrap Up

This has been a great week of accomplishments for the Dreadtober painters and it has been a blast to get to this point. I hope everyone involved has had a great time and was able to grow their hobby powers.

Tomorrow the final challenge of Dreadtober goes live where the focus is to take the best possible pictures of our models. This way everyone can see the amazing work that each of us has done.