Latest Posts

Work in Progress Stompa and Inq28

Stompa Progress and Squaduary

Making good progress on the Stompa (still to be named) as I am focusing on his central body section before moving on the extra bits. I also have an update on the INQ28 squad and announcing my pledge for Squaduary.

Work in Progress Stompa and Inq28

I’ve been working on adding more work in progress posts, in part because I know many of you like them, but it also relieves some pressure to create big, full posts every week.

Stompa Progress

I’ve been working on the Stompa during couch time and following the same steps as the Morkanaut. But the sheer size of this beast is a bit overwhelming. Not only is it about twice the height of the Morkanaut, but the surface area due to his bulk is massive.

So I started by focusing on just the main body piece. While it’s the largest, once I get it done I can crank out all accessory pieces and glue them on as I go.

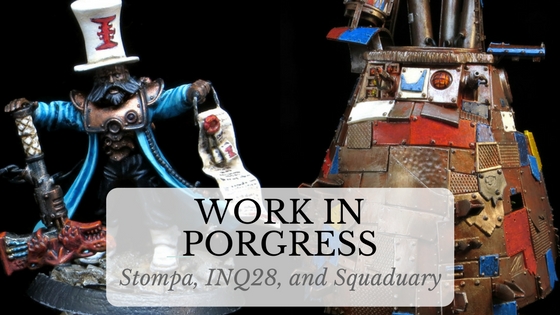
WIP Death Skull Stompa

At this point I have all the rusty metal done and the colored panels highlighted. I need to go back through all the details, including the Grots and finish them off then some black-lining to add more depth.

WIP Death Skull Stompa Back

I’m going to wait to do weathering until it is finished so I can keep that consistent across the model and see where everything goes. You can see on the back side there are pieces missing as I left them off to paint – those are the little bits I will finish next.

Inquisitor Team Progress

On the main painting desk is my INQ28 team inspired by the Techno-Barbarian I did last year. While some may argue that they aren’t Blanchian enough to be INQ28, they fit my painting style and gives me an excuse to kitbash and paint turquoise.

WIP INQ28 Team with Turquoise Robes

While the whole squad has it’s base colors and the mighty Dark Brown Wash, I pressed forward with the Inquisitor.

An outrageously over the top tophat? Yes, it is! The fantastic bloke NafNaf over at Objective Secured sent me a cast copy of the hats he uses for his amazing Dance Macabre. So I had to put it to good use right?

WIP Inquisitor with top hat

There is some clean up work to do on him, and I’m going to leave finishing the base until I can do all five but he is pretty much finished at this point.

Squaduary

Part of why I was trying to get these both done, is that February starts Squaduary hosted by Rory on Stepping Between Games. The challenge is to build, paint, and finish a squad during the month.

I’ve pledged the Ork team from Blood Bowl, though I must admit that I already have them built and half of them primed. But even then, it will be a challenge to finish them by the end of the month!

Purple Ork Blood Bowl Team

Blood Bowl Team by James Gallagher from White Dwarf, used without permission

After looking through different team colors, I’ve decided I’m going to go with a purple uniform like the excellent ones from James in January’s White Dwarf. I don’t have anything in purple, and it looks outlandish on them! I’m not sure about the teal spot color, but need to look back on the color wheel to see what would work.

So here we go!

Let me know if you have any feedback on the WIP models or the purple idea. Otherwise, stay tuned for more progress over the coming weeks.

Good Reads 44 by Borken Paintbrush

Good Reads 44

Welcome back to another week with Good Reads 44, a collection of hobby articles from around the web that you don’t want to miss. With tutorials, inspiration, and some amazing models, these are well worth checking out.

Good Reads 44 by Borken Paintbrush

Acastus Knight

Acastus Knight Porphyrion

Acastus Knight by Jake of Redscorps

So the Acastus Knight is an incredible kit from Forge World and Jake of Redscorps did a fantastic job of painting his. Between the well done blue and white scheme and just enough weathering, it’s an excellent centerpiece.

Making Robes from Tin

Making robes out of tin

Custom Robe by D Powers

While not for the faint of heart (and thin-skinned), D Powers put together a tutorial on how to use thin sheets of tin to create custom robes. The end effect is incredible as it creates a much thinner robe than using green stuff.

Age of Munda

Age of Munda game

Logo by Big Boss Red Skullz

The freedom that INQ28 allows is an interesting concept that I have started playing with, but the rules are scattered and a bit complicated for basic games. So  I love what BigBossRedSkullz did by combining the game mechanics of Age of Sigmar with Necromunda. Allows for great narrative while minimizing the game complexity.

Painting Principles

Skarre

Skarre, Queen of the Broken Coast by Jon aka Von

Creating your own painting style and principles is an important part of maturing in the hobby. Jon shares his personal painting principles and why he built his list. It’s a great starting point for anybody building their own painting skills.

50 Articles and Tutorials Not to Miss

Garandur Step by Step by Sergio Calvo

I shared Volomir’s big list of miniatures not to miss in 2016 in the last Good Reads, and this time he is back with 50 don’t miss articles that featuring painting and sculpting tutorials by some of the best artists in the industry. I’ll be coming back to many of these for later.

George the Stompa

Ork Stompa

George the Stompa by Grenn Dal

Perhaps it is because I am currently painting my Stompa, but I’ve seen a few of them pop up over the last few weeks including George painted by Green Dal. I particularly like all the grots that keep it stomping forward.

The Lash Banshee

The Lash Banshee by Heresy of Us

The Chapel Project is heating up and the Heresy of Us has finished this fantastic ghost. The Lash Banshee is not only an amazing conversion, but he created a fun back story for her as well. Would hate to get on her bad side.

DIY Stones

DIY Stonehenge with foam

Stonehenge by Dean Kelly

Don’t let anyone tell you that DIY scenery is dead. Dean proves that with his Stonehenge rock grouping made out of a chunk of dense foam insulation. Sure, there aren’t skulls on every square inch, but it would still be fun terrain to play over.

Wrap Up

That’s it for this week, I hope you found something new, left a comment on each of the hobbyist’s sites, and found some inspiration for the week. Until next time, keep on painting!

Using X-Acto Hobby Knife for miniatures and craft projects

Cool Tools: X-Acto Hobby Knife Blades

Today’s Cool Tool is going to feature the mighty X-Acto hobby knife and the ubiquitous #11 blade. While most hobbyists have a set of X-Acto blades in their hobby supplies, did you know there are a bunch of other blades to use?

Right tool, right job.

Using X-Acto Hobby Knife for miniatures and craft projects

For our hobby, having a sharp blade helps with all sorts of things. Removing parts from sprues, scraping mold lines, cutting off unwanted bits, creating battle damage, and cutting plastic card for kitbashing.

Affiliate disclaimer: links to amazon are affiliate links, meaning that if you buy them through my link, I get a tiny cut from Amazon (at no change of price to you). Other than the scalpels that I mention below, everything else is products I use and recommend. So if you need new blades and want to help pay for my server bills, consider the links below.

The General #11 Blade

standard hobby knife the XActo 11 blade

That is where the mighty #11 X-Acto blade comes in. This is the ‘standard’ blade that comes with most knife kits and the one you see in the checkout line. It makes sense; it has a straight blade (great for scraping) and a sharp tip (great for scoring or fine detail work).

What most hobbyists don’t realize is because the X-Acto hobby knife blades are so sharp, they dull quickly as well. Especially when you are doing lots of mold line scraping. So it is important to replace the blade often, not only to be efficient, but a sharp knife is safer than a dull knife.

But they are expensive!

I hear ya, if you are buying the X-Acto brand in tiny five packs at the grocer, yes they add up in a hurry. Instead, I recommend picking up a 100-pack like these on Amazon that are only $15. They are off-brand but so are the one’s I use, and they work great (just read the reviews).

I’ve had my 100-pack for years, and because I no longer worry about the price of each blade, I end up switching blades more often.

Specialty Blades

But enough of the standard blade, X-Acto has about a dozen different knife blade types that fit into two categories based on the handle size: lightweight and heavyweight. Most of our hobby needs fall into the lightweight category, but I did list a heavyweight blade that I use from time to time as well.

The #16 Scoring Blade

X-Acto #16 Hobby Knife Blade

This is much like the #11 but only has the first part of the blade. This makes it great for getting into tight areas of the model or removing insignia as a very small chisel tool. It seems odd having such a small blade at the tip, but I have found more than once that it gets the job done much easier than the #11.

As this is a specialty blade, I don’t pick up a big pack. I use it for what I need, then put it back away. So a 5-pack works just fine.

The #17 Lightweight Chiseling Blade

XActo #17 Chisel Blade

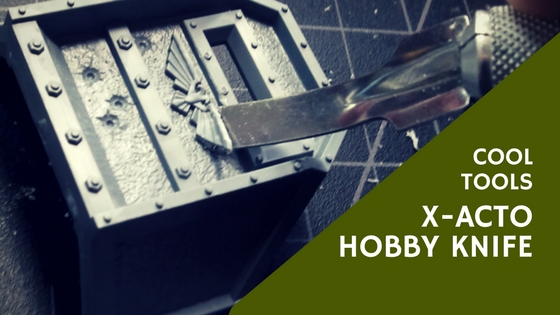
As the name suggests, this blade is a small, perpendicular blade meant for chiseling out material. One of the best uses of this blade for me is to remove Imperial Aquilas from kits to use for my Chaos armies.

Using an X-Acto Chisel blade to remove Aquila

By setting this blade flat against the surface, I can press against the raised detail and remove it, while leaving a flat surface behind.

The #18 Heavyweight Chiseling Blade

Hobby chisel blade X-Acto #18

And where the smaller chisel blade won’t cut it, it’s big brother can get the job done. This is one of the blades that fall into the heavyweight category so won’t fit in the typical hobby-sized knife handle.

What could we use a knife like this for on our little army men? Terrain mostly. The larger size works well when modifying building kits or hacking away at Styrofoam hills.

Just use extra caution when using this blade as it can be tempting to cut away too much at once and end up with the blade in your leg. ALWAYS use a cutting mat, cut away from you, and ideally a pair of safety goggles – yes they look stupid, but at least you will continue to be able to see that they look stupid.

The #15 Keyhole Saw

Keyhole Saw for hobby projects

I didn’t know about this one until I started writing this article and looked up the different blades X-Acto made. But now I can’t unsee it’s potential! I’ve already put one in my cart for later.

While the ‘keyhole’ name implies it is meant to be inserted into a hole to cut out interior sections, the tiny saw blade would work great for cutting off bits that are a bit too large to slice with the hobby blade.

Alternatives

There are alternatives to X-Acto hobby knives that offer different uses, or usually cheaper. I mentioned the off-brand #11 above as one way to go, but here are a few others to look at.

Snap-off Blades

Retractable box hobby knife

The first alternative is the super cheap, snap-away box cutter. The idea of these blades is that as you dull the tip (where most of the work is done), you can just snap off that section, leaving a new tip below it.

The retractable nature is also handy, so you can just throw this in your hobby drawer/box/desk, and not work about stabbing yourself when you rummage through looking for that missing bit. You can pick up a 24 pack for $12 on Amazon, and since each blade has about ten segments, that is a pretty good value.

Scalpel Blades

Scalpel for hobby projects

I haven’t used scalpel blades before, but I have seen others use these for hobby work. Similar to the X-Acto hobby knives, the blade is replaceable and attaches to a standard handle. Considering they are typically used for surgery, they are going to be sharp and have a fine point.

Back to You

What are some of your favorite hobby blades? Did I miss one that you found is invaluable to your kitbashing? Leave me a comment below with your thoughts.

How to Paint Ironjawz Brute by Em

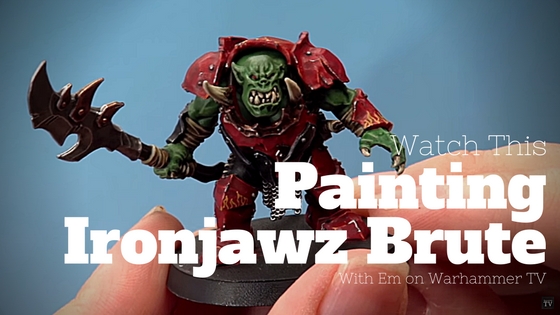
Watch This: Painting Red Ironjawz featuring Em

Yes, I like greenskins so it is hard to pass up videos featuring them. Especially as I’m trying to finish my Dread Mob and start the Ork Blood Bowl Team. What I like about Em’s tutorial on painting these red Orruk Ironjawz Brutes is how simple each step is, yet the finished model looks great.

How to Paint Ironjawz Brute by Em

Below I embed the video from Warhammer TV where Em steps through each part of the miniatures and gives some great tips from using different types of washes to highlighting the bone spikes with lines.

I’ve tried to gather as many of these notes as I could below for those who like to read along to wanted to quickly grab all the colors she used.

Quick note: I am using this video and notes without permission, but wish to share this great tutorial and provide my own thoughts to it. In no way do I claim any copyrights to the video or any of Games Workshop’s trademarked colors below.

Watch How to Paint Ironjawz Orruk Brutes

My Notes

First I’m going to list the paints required as it is flashed rather quickly in the video. The paints also include the closest Vallejo equivalent for those who like dropper bottles.


  • Waaagh! Flesh (Game Color Heavy Green)
  • Warboss Green (Game Color Goblin Green)
  • Biel-tan Green (Game Color Green Wash)
  • Skarsnik Green (Game Color Scorpy Green)
  • Mephiston Red (Game Color Heavy Red)
  • Nuln Oil (Game Color Black Wash)
  • Lahmian Medium (Airbrush Medium)
  • Evil Sunz Scarlet (Game Color Bloody Red)
  • Fire Dragon Bright (Game Color Orange Fire)
  • Balthasar Gold (Game Color Hammered Copper)
  • Agrax Earthshade (Game Color Umber Wash)
  • Runefang Steel (Game Color Silver)
  • Rhinox Hide (Game Color Charred Brown)
  • Gorthor Brown (Game Color Brown)
  • Zandri Dust (Game Color Khaki)
  • Ushabti Bone (Game Color Bone White)
  • Abbadon Black (Game Color Black)
  • Eshin Grey (Game Color Heavy Charcoal)
  • Leadbeltcher (Game Color Gun Metal)

So let’s dive right into how Em paints up this Orruk Brute:

  1. She starts by painting the green skin:
    1. Basecoat of Waaagh! Flesh with a basecoat brush
    2. Remember: two thin layers!
    3. Paint Warboss Green over everything. The translucent nature works well over the Waaagh! base layer
    4. Shade with Biel-tan Green and let dry for 1/2 hour or so
    5. Brighten with Warboss Green, layering only the higher levels
    6. Hit the ridges with Skarsnik Green
  2. Next is the red armor:
    1. Start with covering it with Mephiston Red
    2. Avoid the skin and it doesn’t need to be all the armor as they could be silver or brass
    3. Do a shade with a mix of Nuln Oil and Lahmian Medium, feeding it into the recess only
    4. Highlight with Evil Sunz Scarlet to bring out all the ridges and edges
    5. Final highlight with Fire Dragon Bright to add a nice contrast to the sharpest edges
  3. Next step is the brass armor plates
    1. Start with a basecoat of Balthasar Gold, may need two coats to get good coverage
    2. Wash the plates all over with Agrax Earthshade to dirty them up
    3. Highlight/neaten up with Balthasar Gold
    4. Edge highlight with Runefang Steel
  4. Paint the remaining armor plates black:
    1. Start with Abbadon Black, even if it still has the black primer as they are different shades of black
    2. Edge highlight with Eshin Grey
    3. Hit the sharpest points Runefang steel
  5. To weather the red armor plates:
    1. With Rhinox Hide, rub it against a few sections of the edges
    2. Highlight the worn areas with Runefang Steel
  6. The metal weapons, rivets, and other details were done next
    1. Basecoat with Leadbelcher
    2. Do an all-over wash with Nuln Oil
    3. Edge Highlight with Runefang Steel. Use the flat side of your brush to pick out the links in the chain mail and edges of the weapons
  7. The clothes were painted with Abbadon Black highlighted with Eshin Grey. Fix any mistakes with more Abbadon Black.
  8. All the wood, leather, and belt are painted using Rhinox Hide basecoat, shaded with Argrax Earthshade. Neaten back up with Rhinox Hide before highlighting with Gorthor Brown to bring out the details.
  9. The teeth, bones, stitches, and bindings were all painted the same:
    1. Base coating with Zandri Dust – again two even coats
    2. Shade with Agrax Earthshade to add the recesses
    3. Highlight with Ushabti Bone. On the bones, highlight with stripes to show grow marks
    4. Final highlight with Screaming Skull but only on the bone, teeth and claws.
  10. Touch the eyes with Mephiston Red with a tiny paintbrush.
  11. The yellow flames were added next:
    1. Built up from Averland Sunset and Yriel Yellow to make them nice and bright.
    2. Start by marking where the base of the flames will go and the height of each flame.
    3. Paint squiggles between each base mark and the tip mark
    4. Fill in with Averland Sunset
    5. Brighten them up with Yriel Yellow

Queue the battle music and rotating model shots as this Brute is finished!

Final Thoughts

Em leaves us with some nice tips to remember:

  1. Be as neat as possible with your washes so they don’t pool or mess up other layers
  2. Build up weathering gradually so it doesn’t overwhelm the model and look goofy
  3. Be patient with freehand markings, you can always neaten up later on

If you aren’t following Warhammer TV on YouTube, you are missing out on some great painting tutorials that typically feature Duncan Rhodes, so make sure you give them a follow and this video a big thumbs up.

If you want to see more of Em’s work, catch her over on Twitter where she shares he paiting progress and Twitch streams.

Painting Death Skull Killa Kans and Showcase

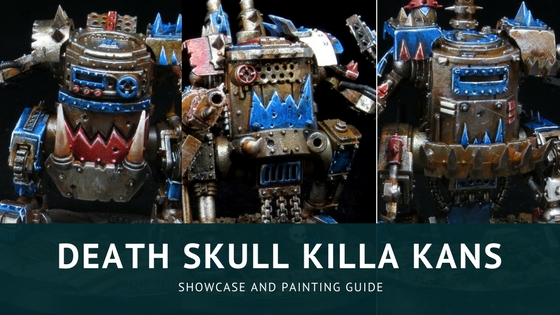
Showcase: Death Skull Killa Kans

I finished these a few weeks back but hadn’t posted the showcase for them yet. I also put together a painting guide for them as well. While not much different than the Morkanaut, they are a simpler version due to their size.

Painting Death Skull Killa Kans and Showcase

As with my other Ork walkers, I’ve been painting these on the couch so I wanted them to be quick and easy. This is why I went with the drybrush rusty metal and spot colors of the blue, red, and white.

Showcase

First up is the finished Death Skull Killa Kans. I built each one up with different weapons, in part because each looks cool, but also I don’t really know what is the best load out with them. I figure when I get 4-5 squads built up with different weapons I can pick and choose 🙂

Death Skull Killa Kan with Big Shoota

First up is the flamer armed Klip Klopper. I could image a whole squad of these guys would be great for close range support.

Death Skull Killa Kan with Missile Launcher

Next up is Da Hole Maker which has my favorite close combat bit in the box along with what is probably the most versatile weapon of the missile launcher.

Death Skull Killa Kan with Grot Launcher

And last up is Scrap Maka’ with a cool buzz saw and the weapon unique to the Kans: the Grot Launcher. Probably a terrible weapon, but it has a cool theme to it!

Painting Steps

One of the great things about the Killa Kans is how quick they can be to paint up. The first layers are done with spray cans and the largest brush that fits. Then only a few select sections of armor get paint and they are good to go.

Brown Primer

Painting Killa Kans Step 1: Brown Primer

So the first step is priming the models. If I had brown primer on hand I would use that, but instead, spray them with black primer and then with brown. These use Rustoleum’s Brown Leather but it doesn’t really matter what shade it is.

Rusty Metal

Painting Killa Kans Step 2: Adding Rust

Next up is the basic rust effect by making a mess with orange. I used Game Color Hot Orange (GW Troll Slayer Orange) and did a mix of dry brushing and stippling. The idea is to leave some brown showing through and get some of the orange in the nooks and crannies.

Metallic Dry Brush

Painting Killa Kans Step 3: Metal Dry Brush

The final base layer is to drybrush Game Color Gunmetal (GW Leadbelcher) over the model. By focusing on the edges and sharp areas, it should leave brown/orange areas.  Don’t worry about the silver and rust being too bright at this stage as we wash it all down later.

Base Colors

Painting Killa Kans Step 4: Painting the Base Colors

Here is where I start adding colors to the model by blocking in Game Color Imperial Blue (GW Kantor Blue), Scarlett Red (Khone Red), and Bonewhite (Ushabti Bone).  Not pictured here is the follow on wash with Game Color Dark Brown Wash. This tones down the rust and silver while providing

This tones down the rust and silver while providing a nice wash to the colors.

Highlights

Painting Killa Kans Step 5: Highlighting the Colors

Finally, each of the colors were highlighted with a high contrast edge highlighting. So I mixed Magic Blue (Caledor Sky) with Dead White (White Scar), Bloody Red (Evil Sunz Scarlet) with Golden Yellow (Yriel Yellow), and Dead White by itself.

Hitting only the edges, the extreme highlight can look harsh, but it provides a nice look when everything is finished. To finish the model, I went back and black lined the deepest recesses. This adds a nice finish to each color

Wrap Up

And that’s it for this squad of Killa Kans. Only one more squad for the Dread Mob, but as every Mek knows, you can’t stop with just a few Kans.


My Hobby Spend Resolutions

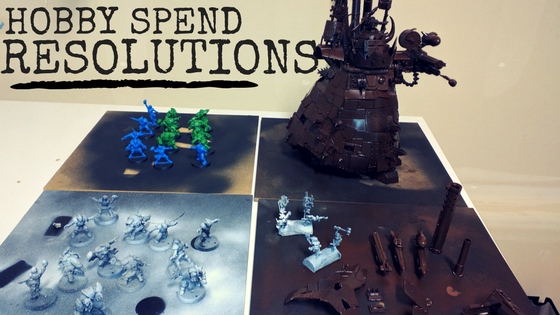
Hobby Spend Resolutions of 2017

I know I already talked a bit about my hobby goals for the year, but after talking with a few guys on Twitter about not buying any new kits, I wanted to revisit it here. Thus I present my Hobby Spend Resolutions of 2017.

As some of you may know, I have my version of the Closet of Doom (TM) with way too many kits that need to be built. To combat this pile of gray sprues, keep me motivated to finish more projects, and yet reward myself for completing mini-milestones I have put together the following plan.

We pretend that Closet of Doom has been trademarked by the great Mordian7th as he is the first to have used the word.

I’ve broken down each of my major projects into Must Finish and Wish List. There are more things in my box of sprues than are on the Must Finish list, but I figured this would be an excellent way to make it easier to accomplish some smaller goals first.

Ork Dead Mob

Must Finish

  1. Stompa – this will be a huge accomplishment as this guy has been half assembled for 2+ years and now is built with a fresh coat of primer. While not an actual member of the Dead mob, who wouldn’t want to follow a Stompa into battle?
  2. Megaboss – I’m still super excited about getting this guy finished. He doesn’t help with the Dead mob either, but he is a bad ass model
  3. Deffdread – My wife just got this for me as well, so I need to build it up and get it done
  4. Big Mek and Mek – I have both in my bits box, and they will be needed

Wish List

  1. Gorkanaut – just finished the Morkanaut but I need a second to complete that part of the Dead mob, this one I will do as a Gork for all that Dakka
  2. Killa Kans – I need one more squad of these guys, that and they are fun to build and paint
  3. Painboy – I don’t think I have one of these in the bits box. While I could bash something together, I like the GW model and may start with it for a conversion.

Blood Bowl

That’s right; I’ve joined the league of ball chasing fools 🙂 My beautiful wife gave me the game for my birthday, so now, of course, I must resist buying the Skaven team and converting star players, and all that fun stuff.

Must Finish

  1. Human Team – no clue what I’m going to paint them or call them, so that’s probably step one.
  2. Ork Team – same deal here

Wish List

  1. Skaven team – I want to have a couple of different teams to be able to play with my family when they visit
  2. Build/Convert ogre, troll, and rat ogre players for each of the teams

Mentor Legion

These guys are my long term Space Marine project that I have a love/hate relationship with. I love the way they look, their background, and what their special rules could be – I did just see someone using Deathwatch Rules for them. But I hate them because of all that white and the fact they are two different colors.

Must Finish

  1. Razorback Command Tank – This is about 60% completed, so I just need to finish the highlights and weather it.
  2. Second Stormtalon – base coated so it could also be fairly quick at this point
  3. Stormraven – he is built and primed but zero paint on him
  4. 2 Terminator Squads – I have a regular and an assault terminator squads half built that I want to finish and paint

Wish List

Right now I don’t want any more Mentor Legion models. Instead, I want to get some Deathwatch squads for the sole purpose of painting different colors. I plan to paint them where only their left arm is black/silver, and the rest is their chapter colors.

Not only will this allow me to paint all sorts of colors but also an excuse to use the Space Wolf and Blood Angle bits I have from previous box sets.

Anything New

So in general, anything else new category I lump two other HUGE projects. This kind of suck regarding the amount of work ahead of me but by having them block anything else I want to start may motivate me to knock a few out

Must Finish

  1. 4×4 Tablescape Board – I got this so I could play some games at home which may even allow me to play some 40k! But I want to paint them right and…
  2. Huge building on all non-road tiles – I have a bunch of building kits from GW and Pegasus that I want to bash together to build up a hive city feel. I want each non-road tile in the Tablescape set to be a building of at least two feet high. Adding LEDs to the buildings will be an awesome stretch goal
  3. Two Knights – I bought the renegade knight box, and both knights are sitting forlornly in the bits pile. I want to add these to my current knight and get all three wired up with LEDs.

Want

Have you seen all the new kits GW is putting out? How can anyone not want so many things? One new project that I would like to start is getting back into AoS with a Sylvaneth army. We’ll see if this happens considering the massive backlog above, but man does they look good.

Do you have a list?

What about you? Do you have a Must Finish and a Want list? Would a system like this work for you or hold back your inner muse?

Good Reads 43

We are into the first few weeks of 2017, and I have your first Good Reads of the year! Get ready to be inspired, learn a few new things, and enjoy some great posts by your fellow hobbyists.

Sculpting a Witch Hunters Hat

Sculpting hats for witch hunters

Witch Hunter Hats by Nazroth

With the new Agents of the Imperium book out, it seems fitting that Nazroth put together a tutorial on creating Witch Hunter hats. I think his focus is on Mordheim miniatures, but the tips work well for all sorts of armies.

Blood Effect: Theory and Tutorial

How to to do blood effect with paint

Blood Effects by Will

Will from Miniatures of Tomorrow has been cranking out some amazing commission pieces, and along the way, he created some helpful tutorials including this one on painting blood effects – specifically blood splatter.

Slaanesh Lord

Slaanesh Chaos Lord on Steed

Chaos Lord of Slaanesh by Thor

As someone who has a ton of half-finished models in boxes, I applaud Thor on finishing his Slaanesh Chaos Lord. Not only is this a fantastic looking miniature, but he also took the extra time to magnetize all the weapon options – and check out that snow!

Angron Painting Guide

How to paint Angron

Angron by Spot1cus

As much as I’ve seen finished Primarch miniatures, I haven’t seen anyone do a painting guide on them, so it was great to look through Spot1cus’ tutorial painting for Angron. These are amazingly complex models, and it was fun to see each section given some attention.

Canoness Veridyan

Converted Canoness Veridyan

Converted Canoness by D Powers

What is cooler than a classic GW artwork brought to life as a miniature? Watching D Power turn the Canoness into an incredible miniature of imagination. Watch for those XActo blades, though. This is a fantastic execution of a conversion and a great dedication to Blanche himself.

Eversor Assassin

Painted Eversor Assassin

Eversor Assassin by 30k plus 40k

As someone who hated playing against the old metal Assassins (remember when they had their own codex?) it is still cool to see well-painted versions of their modern counterparts. 30kplus40k finished up his Eversor, and I particularly love the red armor sections as a perfect, and cruel-looking, contrast to the black body suit.

Casper

Casper a INQ28 Blanche Conversion

Casper by Heresy of Us

I just come across Heresy of Us and the latest post was this amazing, and crazy creation named Casper. I find it incredible when hobbyists can pull together the most random bits (and doll heads?) to create something brand new, and yet fits right into the 40k universe.

50 Miniatures Not to Miss in 2016

I’m not the only one who compiled a huge list of things to look back on for 2016. Volomir is another new blog for me and is a great find as he seems to focus on non-40k miniatures. His list of 50 Miniatures Not to Miss in 2016 is a fantastic collection of award winning painters and sculptures at their best.

Wrap Up

I hope you enjoyed this week’s Good Reads list and, I hope, took away a few new things to try or be inspired by.

I wanted to start off the year by reminding you about my weekly newsletter, The Brush Stroke, that will not only keep you up to date on all of Broken Paintbrush’s posts but also some great articles that I have found on the web as well. So make sure to sign up in the form below and check it out!

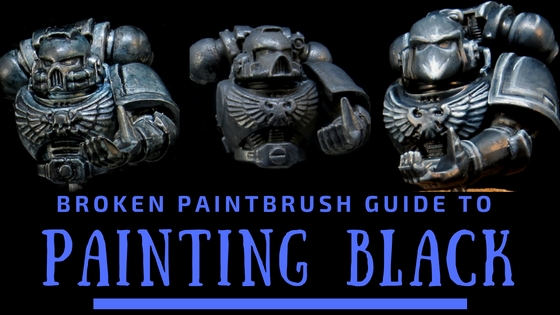
How to Paint Black Armor and Clothing

Guide to Painting Black – How to Paint Black Cloth and Armor

I’ve received the question on how to paint black a number of times so a few weeks back I put the question to the greater community and have compiled this guide to painting black armor and clothing.

How to Paint Black Armor and Clothing

I broke this guide down into a few different sections: background/color theory of black, general tips on painting black, three different methods to paint black, and further reading with tutorials by other bloggers.

Want this as a PDF? I took the extra time on this post to create an eBook for you to download and take with you. Check out the form at the bottom of the post to grab it.

So let’s jump in!

What is Black and Why is it Hard?

What makes black such a hard color to paint? Painters suffer from the opposite problem as painting white: it is hard to shade black. Reds, blues, yellows, they can all be shaded and highlighted. You can change the tone or saturation by mixing in other colors.

Black, well is black.

So while you can’t shade black, you can highlight it lighter greys. Just take a look at this black fabric:

Black Fabric with Wrinkles

You can look at it and see it is clearly black, but the only place that it is fully black is the recesses. Notice the highlights go from near-black to light grey.

Collection of black objects

Look at the different black objects above and notice the colors within the black. From the blue tones in the car to the grey-greens in the rock. Texture also plays a part in the highlights as shown by the plastic case having very little variation in color while the car and cloth go from black to near-white.

General Tips on Painting Black

Ok so ready for some tips to paint black? I have more in-depth tutorials below, but here are a number quick tips:

  • Leave pure black only in the recesses
  • Paint main areas very dark grey
  • Add a little turquoise to add some color to the black
  • Try other colors to contrast your other colors
  • Keep highlights on upper edges, don’t be tempted to highlight all edges
  • Think about the texture, metallics should have more extreme highlights
  • Don’t just highlight over the black primer, it won’t match the black bottle and touch-ups may stick out. Repaint the whole model with the bottled black.

Methods to Paint Black

I painted up three different Space Marines, well torsos really, to showcase different methods to paint black. The first two, washes and dry brush, are meant for quick and dirty black effects, while the last shows how layering and edge highlighting provide good looking results.

Using a Wash to Paint Black

The first method is by far the messiest but takes very little time of actual painting. Here we will use washes to deepen the recesses with multiple layers.

How to paint black with washes

As shown in the picture above, I started with a white primer. White seems like an odd start for black and perhaps a mid-tone grey would be a good alternative for fewer layers.

The basic steps are to apply multiple a thin layer of black wash, let it dry, and repeat until you are happy with the depth. I also added a layer of turquoise glaze halfway through to provide a bit of color to the black.

Painting Black with Dry Brushing

The second method for painting black is to use dry brushing. It’s not in vogue, I know, but it is quick and easy while providing good tabletop quality results.

How to paint black with dry brushing

The biggest trick with dry brushing black is to do multiple layers of progressively lighter greys, with each layer using less and less paint. I do a final wash a black to tone back the highlights, deepen the recesses, and smooth the brush strokes.

Highlighting Black with Layers

The final method I will highlight is painting black with layers and edge highlighting. It is more time consuming and requires fine brush control. On the other hand, it provides the best results when done well.

How to paint black with edge highlighting

I started off by painting a mix of 3:2 Black to Cold Grey over the black primer, leaving the pure black in the recesses. Then add more Cold Grey to get a 1:1 ration and hit all the edges. This does contradict my “don’t highlight the edges” rule, but it helps provide contrast for all the details.

Next, add even more Cold Grey and hit all the upper edges. For smooth areas like the helmet and shoulder pad, add a thicker layer on the top areas and blend back down with more black. Switching to Wolf Grey, highlight only the top most edges.

And finally, to tone down some of the highlights and deepen the recesses, use a detail brush and black wash. But rather than an all over wash, use the brush to add paint only to the recesses.

Further Reading

What is Black? The guys at Massive Voodoo explore different brands’ black paint to determine what black actually is. They rate each on glossiness, darkness, and blackness with interesting results.

Painting Black Armor. Ghool from Hand Cannon shows how he paints the black armor on a Warjack. His basic rule for black: “If you want a surface to appear black, then 50% or more of that surface must remain pure, untouched black.”

Learning how to Paint Black Armor. Ron at From the Warp has a classic on how he did some experimentation on painting black armor. He settled on a combination of zenithal primer, black wash, and an edge highlight.

Black Color Painting Tutorial. Flameon put together a tutorial for very shiny black armor, an almost non-metallic metal look for black. It’s a nice alternative look than the traditional edge highlighting.

Back to You

I hope this guide to painting black was helpful and gives you a couple of ideas to try on your miniatures. Don’t forget you can get a PDF eBook you can take with you for later reference, just fill in the form below to get it.

If you put any of the steps to use, I would love to see the results in the comments below, either upload an image or add a link!

Have other tips to paint black? Leave those in the comments below as well so we can all learn a bit from you as well.

5 Steps to Create an Inspiring Creative Studio Space

5 Steps to Creating an Inspiring Studio Space in your home

Adding an artistic touch to your life can make a big difference considering the quality of your overall lifestyle. Therefore, having a place to commit to your own artistic ideals can mean a lot when days are busy and stressful. Also, depending on whether you’re a professional, semi-professional or an amateur artist, you’ll have to invest and organize this space accordingly.

5 Steps to Create an Inspiring Creative Studio Space

This guest post comes from Emma who is blogger based in Australia. While she comes from outside our hobby niche, she has some great insight on creating artisitc spaces and DIY. If you want to see more, check out the links to her bio at the bottom.

For professionals, their own studio will act as their home office while those who enjoy such creativity as a hobby can recreate their own little sanctuary with few helpful pieces of advice.

For hobbyists, a dedicated space reduces the barrier to getting some extra painting done and keeping the rest of the house happy.

1. Plan your budget

The budget for your perfect studio space won’t be the same for a professional artist and an amateur. It will also differ depending on what medium one uses the most in their artworks. Still, supplies are the biggest investment you should consider.

While you can be frugal with everything else, it’s important that you have top quality stuff that will assist you in your talent and creativity. Therefore, make sure to check how much money you’re willing to spend on your perfect studio space and assign the highest percentage of that money to art supplies.

2. Choose the area

How to Choose a Good Space for your Art Studio

Another important aspect of creating an inspiring studio space is actually finding the best place in your home for this designated area. Therefore, you should analyze the space that you already have. If you want to be artistic and creative as a part of your hobby, then you can easily get away with one corner of any room that suits your tastes and needs the best.

On the other hand, a professional artist should strive to redecorate an entire room or even an outdoor garage space so that they can discover their full potential and stay inspired as they work.

The ideal space would have plenty of lighting and storage options (more on both below). Anything from a desk pushed into a corner to a full cabinet setup with display shelves and maybe even a spray booth.

Just find a place that works for your needs within your budget.

3. Storage solutions

Storing Art Supplies is Important

Storage is one of the essential bits when it comes to a productive and inspiring studio space. Everything has to have its respective place. It would be best to store your supplies the way you can actually see them all at once. There are special storage solutions and shelves for artists specifically, but this is also an aspect of studio space where you can be frugal.

By visiting garage sales and applying some creative DIY projects, you can easily recreate your own perfect storage for your particular needs and supplies. As they work, artists may be a little messy but it’s essential that every pencil, marker and paint pot can be returned to its designated space inside the storage unit.

4. Proper lighting

All artists know just how important lighting is for a true studio. You can’t work on your creative pieces if you constantly strain your eyes or have trouble seeing your own lines and strokes. In that respect, even if there’s not enough natural light, you can make things brighter and more visible by introducing different types of artificial lighting.

What’s more, don’t get depressed over the fact that a certain lamp or bulb doesn’t give you the effect you want. Thanks to your natural creativity, you can always play with some DIY lighting solutions and create the perfect atmosphere that would keep you inspired and productive.

Something as simple as a daylight bulp in a few extra floor lamps make make a huge difference.

5. Clean your studio regularly

Importance of Cleaning your Hobby Space

The final step may not involve creation of the studio space but it’s essential if you want to actually use that space properly and never experience the lack of inspiration. Therefore, it’s really important that you keep the studio space clean and clutter free.

Also, take the time to clean your brushes and sharpen your pencils whenever you’re done using them. If you leave your stuff dirty and never take care of it, it will be harder to use them again and the damage may soon be too drastic to repair.

While it is recommended that you keep your studio space relatively simple and mess-free simply because you already have a lot of supplies to take care of, that doesn’t mean that you should neglect your personality. Aesthetically pleasing plants, personal décor and your favorite artwork on the walls can only boost your inspiration.

Your Thoughts

Joe B. back. So what do you think about Emma suggestions and which ones have you done well, and which are you challenged to work on now? While many of us paint our miniatures as a fun diversion, it is still important to set up some space to build and paint – especially if you live with someone else 🙂

So let me know your thoughts below and maybe even a picture of your own studio/hobby/painting space.

More About Emma

Emma is a true home decor and DIY fanatic. Emma is interested in music and also is a big reading enthusiast. Finding new designs and patterns is her daily task. She got hooked on home accessories and decorations during her traveling and now cannot stop searching for new inspiration.

Find and follow on Facebook | Twitter | Blog

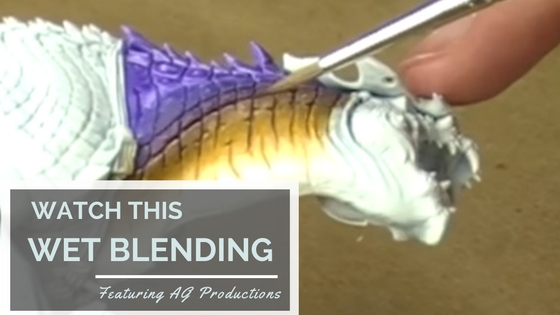
How to do Wet Blending Video Tutorial by AG Productions

Watch This: Wet Blending

Blending is the technique of transitioning one color of paint to another, with wet blending being a particular style that involves adding layers while the paint is still wet. In today’s Watch This, I feature AG Productions’ video on wet blending.

How to do Wet Blending Video Tutorial by AG Productions

While the hot thing lately is to use airbrushes to create super smooth blends and highlights, wet blending has been around for a long time. It works great for those who like to use brushes or in tight spots that an airbrush would be difficult to get in to.

So check out the video below or skip to my notes where I break down his steps and tips for making the most of your wet blending.

Watch How to Do Wet Blending

Wet Blending Overview

Here are my notes from AGP’s video on how to do wet blending.

He is painting a Carnosaur with a fade from white to yellow to purple that looks incredible.

  1. Focus on small sections of the model at a time
    1. Use features on the model to break up where you apply paint
  2. Go from lighter colors to darker colors before moving back down
    1. Helps to start with a white primer
  3. Add a very small amount of paint to the palette
    1. He doesn’t use a wet palette, but it would help as well
  4. Add a puddle of water near the paint – not in the paint
    1. Watering down paint for wet blending
    2. Then slowly pull a tiny amount of paint into the puddle
    3. Pull more of the paint drop in until it has a smooth consistency
  5. Load your brush with the watered down paint and touch the ferrule end against a paper towel
    1. This pulls out some of the extra water from the bristles, leaving more pigment
  6. Apply to the model, it will be thin and very subtle, but that’s ok because we will add more layers
    1. Apply Thin Coats for Wet Blending
    2. Hold the miniature so that the pigment will flow downwards towards where you want it to lay
  7. Add additional layers to build up the color you want for the base coat
  8. Water down the highlight color (white in his case) and add it over the base color
    1. focusing on the raised areas or where you want the lightest tone
  9. Move back and forth between the colors to smooth out the blend
    1. Key is to add the other color while the previous is still a little wet
  10. If you get too much color in an area, you can wet the brush and pull the extra off
  11. For hard color transitions (he had golden yellow and purple), go back and forth with the thin layers to pull the transitions back and forth
  12. The back-and-forth is very subtle and can take a while to complete, but provides a very smooth transition between the colors
  13. You can add some layers of non-watered down color to add extreme highlights or solid-colored sections

Wrap Up

If you liked AGP’s video make sure to give him a follow on YouTube and give the video a thumbs up.

What are your thoughts on wet blending? Too much work? Rather use an airbrush? Or love it, want it, and need some more of it? Hit up the comments below and let me know!

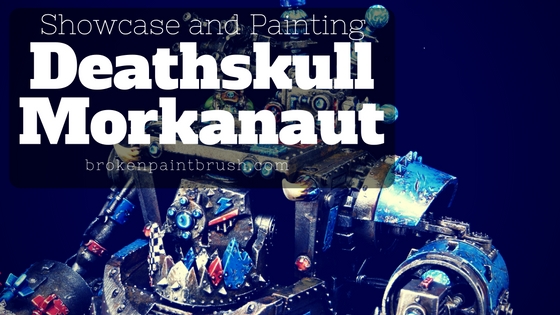
Showcase of Deathskull Morkanaut

Showcase: Deathskull Morkanaut

In my continued quest to complete an Ork Dreadmob, I finished my Deathskull Morkanaut and not only have the showcase but also how I painted it. The Gorkanaut/Morkanaut kit is an amazing kit to build and paint and I look forward to building and painting the second one.

Showcase of Deathskull Morkanaut

I already showed a bit of my progress in another post where I talked about painting on the couch while watching tv/movies with the family. I not only finished this Morkanaut but also a squad of Killa Kans in a very short time – short for me at least!

Morkanaut Showcase

As I said already, the Morkanaut kit has so many fun bits to build and paint that it was super quick to knock it out. I had originally planned on keeping the arms and doors unglued to they could move but decided to secure them in place since they kept dropping and/or knocking into the other bits.

Completed Morkanaut Front with Weathering

As I was painting this model up as a Deathskull Morkanaut, I added tons of blue but also kept some black and white checks from the Goffs, and some red sections from the Speed Freaks. These not only add some nice color contrast but are fitting for the Ork clan.

Showcase Deathskull Morkanaut Back with weathering

As Orks aren’t wont to keeping their war machines in pristine order, I made sure to keep lots of rusty metal and chipped paint. This is particularly helpful for all those large panels as it helps to break them up.

Deathskull Morkanaut Backside with rust

The base is from Secret Weapon Miniatures from their urban rubble section. To get it to fit snugly, I had traced out where the feet would go and broke out the Dremel.

Once I flattened enough of the stray bricks, I drilled holes through the base into the feet Into each of these holes, I added a penny nail to hold the model to the base.

Deathskull Morkanaut with Kustom Force Field and Megablasta

One of the fun elements of the Morkanaut (as compared to the Gork equivalent) is all the energy details like the custom force field and megablasta. I painted these up in brighter blue than the main blue areas and included lightning details.

Deathskull Morkanaut Kustom Force Field and Driver Details

Oh, and there is an Ork driver in there too! I painted him separately before putting him into place.

Painting the Morkanaut

I went for a quick-and-dirty approach, in part because they are Orks, but also because I want these to be my speed painted army.

Lots of Rust

With that in mind, the first three layers were a combination of rattle-can spray and large dry brush mess.

Rust Base Layer for Morkanaut

The rust base coat was done in three steps:

  1. Black Primer
  2. Brown Spray Paint (doesn’t really matter as long as it isn’t gloss)
  3. Drybrush orange (used Game Color Hot Orange / GW Troll Slayer Orange)

The final base step is to do a very rough dry brush of silver (Game Color Gunmetal / GW Leadbelcher). The idea is to add highlights to the metal but leaving lots of the rust color, especially in the recesses.

Base Colors

Next up was placing all the base colors. I like blocking out where each primary color will go, add a wash of dark brown, and finally build up the highlights. This way I can get a sense of balance between each color.

This was especially important on these Orks as it can be easy to go overboard on the secondary colors or leave too many areas metal and/or blue.

Base Colors Applied to Morkanaut

The base colors were:

  • Game Color Imperial Blue (GW Kantor Blue)
  • Scarlett Red (Khone Red)
  • Bonewhite (Ushabti Bone).

I made sure most of the colored areas were blue so it is clear it is a Deathskull vehicle, but with plenty of other details in red and white.

I then washed the whole model with Game Color Dark Brown Wash (GW Agrax Earthshade Brown). I took my time to make sure it wasn’t puddling anywhere as this can be a problem with such large models.

Highlights

With all the base colors done, I started on the highlights.

Second Colors Applied to Morkanaut

Each color were highlighted with their respective lighter color:

  • Magic Blue (Caledor Sky)
  • Bloody Red (Evil Sunz Scarlet)
  • Dead White (White Scar)

I saved the extreme highlighting until after the weathering step. Where the highlight step also helped was where I was a bit sloppy on the base colors and wash. The highlight allowed me to quickly cover up the mistakes.

Weathering

A clean Ork is not an Ork.

Adding weathering to the Morkanaut

To break up all those metal areas and deepen the shadows, I used a combination of Black Wash and Dark Brown Wash to deepen the scratches molded into the model as well as adding new scratched.

I also used Burnt Umber (GW Rhinox Hide) to stipple on some other wear and tear onto the model. The largest areas then had black added to the centers.

Finally, each color was given their extreme highlight. This involved adding Dead White to the highlight color and focusing on the upper edges. Each of the major chips/scratches was given a highlight as well to make it pop.

Finally, the metal areas were highlighted with Game Color Silver (GW Runefang Steel)

Final Touches

And to finish him up, I completed all the details including the tusks, lamps, lightning, and checks.

Completed Morkanaut Front with Weathering

The bone tusks were painted by adding lines of Burnt Umber from the base towards the tip, followed by adding black and creating narrower lines from the base. I then repeated this process in reverse by painting Bonewhite from the tip followed by Dead White.

The checkered board look was done by painting a thin, black line in one direction, then the other. Additional lines were then painted to create the grid. The black squares were then filled in and the white squares were touched up. Again, since Orks’ aren’t tidy, the squares don’t need to be perfect, just good enough.

Your Thoughts

The Morkanaut was a blast to paint and maybe someday he will see the tabletop to blast things to bits!

I am curious about your thoughts not only on my model here, but about the Morkanauts in game play. Also, if you have painted one up, add the picture in the comments or a link so we can check it out as well!

Reviewing 2016 and Looking Ahead to 2017

Broken Paintbrush 2016 Review and Looking Ahead

Ah, the time of annual hobby reviews and thoughts on 2017. Not a popular post for many to read, but, as with many others who write one, this post is mostly a reflection for myself and introspection on what I want to do next year.

Reviewing 2016 and Looking Ahead to 2017

If you believe the internets, 2016 was a shit of a year in many ways, and as one put it, much of the low points will setting us up for an even tougher 2017. Call me an optimist, but I think 2016 was a remarkable year, and 2017 is going to be unbelievably awesome.

For Broken Paintbrush, I know this is true as this was my best year yet regarding painting quality, blogging consistency, and community growth. And yet, I have some plans for 2017 that have me giddy with excitement. So let’s get started, shall we?

Looking Back on 2016

Hobby Accomplishments

While 2016 wasn’t my most prolific year regarding painting, I am happy with what I did get done as I spent more time focusing on improving techniques, creating tutorials, and trying new things.

Mansions of Madness

Painted Chthonians

At the beginning of the year, I got Mansions of Madness and had an awesome time playing it with my family as it is a mix of Clue and simplified RPG. I spent much of the summer/fall painting each of the heroes and monsters. While I have a few more to post from the 1st Edition set, I got a whole pile more when my brother-in-law got me the 2nd Edition boxes!

INQ28

Converted INQ28 Techno-Barbarian

I also started delving into the world of INQ28 with a Techno-Barbarian. Not the most balanced looking model, I agree, but I did enjoy building him and trying a new color with the Turquoise. I have the remainder of his squad on my painting table now and hope to finish them soon.

Painting Skin Tutorial


Painting Black Faces

As I painted the Mansions of Madness set, I had some people comment on the diversity of skin tones I used. So I grabbed a pile of spare heads and created two sets of painting tutorials, one for light skin, and another for dark skin. Not only do I hope these tutorials are helpful, but I tried a slightly different technique/recipe for each to push my skills forward.

Mentor Legion Dreadnought

Joe B Mentor Legion Dreadnought

For my entry into Dreadtober 2016 (more on that below) I converted a Furioso Dreadnought into a Mentors Legion Ironclad. This was a huge accomplishment for me as I’ve grown to struggle to get anything for my Mentors done (he is the only one to get finished in 2016!).

Ork Walkers

Ork Dreadmob with Morkanaut and Killa Kans

To finish off the year, I started painting some of my Ork walkers while watching movies on the couch. The Orks are a great army to do this as being sloppy is part of their charm 🙂 They are also super fast for me to paint so I was able to finish up the Morkanaut and a set of Killa Kans in just a few weeks. I haven’t posted up a post for them yet, but I should get to it soon.

Blogging Accomplishments

A year ago I pledged to significantly improve my blogging in a few different ways but primarily by staying consist in writing posts and improving my reader’s experience on the site. Much of this was set back the first few months as I was still unpacking from our move into a new house and a new job.

But at the end of the year, this has been my best year of blogging ever!

Consistency and Growth

My original goal of blogging this year was to write two posts per week. The Tuesday post would be either a tutorial, review, or a work-in-progress post, and Thursday would be a community post with either a Good Reads or Watch This.

For a blog of 9 years, I only have 284 posts, but 100 of those have been from this year alone! Not only that, but nearly all of those posts are over 1,000 words, and 23 of them were tutorials.

Trello Posts of 2016

A big piece of this was using Trello to plan out my post schedule using the calendar power-up. As I wrote each post, I created a header image that I also attached to the Trello card and created a column for each month. This helped keep the motivation as I could quickly look back at how many posts I’ve done since April.

Broken Paintbrush WordPress States for 2016

This consistent posting, along with many of the other changes I did, clearly built up the traffic over the year. With WordPress stats showing 51k visits by 28k visitors, I am very honored and blown away by how many people visited my corner of the interwebs.

Dreadtober 2016

Dreadtober 2016 Completed Showcase

Another significant contributor to October and November’s traffic growth was that I had the honor of hosting Dreadtober this year. It was an incredible amount of work, and as I mentioned in my review, I wouldn’t do it the same way again next year.

But bringing together the community for this month long challenge produced 50 incredible models and many more hobbyists encouraged to work on their projects.

Guest Posts

Be a Guest Writer on Broken Paintbrush

One of the other things I changed this year was opening the site to guest writers. I had six writers so far that have brought some remarkable insights to the site. Thor gave some great blogging tips, Sean shared his love for Oldhammer, Rob discussed the conversion points metrics from tournaments, Ben had a tutorial on Blue Skatarii, and D Powers discussed finding your painting style.

Many of the authors have additional post ideas to share, and a few more have shown interest in writing, so hopefully I can have even more to share in 2017.

Want to add your voice in? Check out the simple guidelines or shoot me an email: joe@brokenpaintbrush.com!

Site Updates

In my goal of improving reader experience, I have been doing a bunch of back end upgrades. Many of these I got for free for Broken Paintbrush as I was also building a professional blog as well.

While the end results have been great, most were a pain in the ass and crashed the site more than one. Thank God for backups as I screwed up WordPress way too many times to count and even deleted the whole directory once! So to all my fellow hobby bloggers: BACK UP YOUR SITE! Do it right now…

Did you back it up? How about now? Seriously, back it up.

Some of the changes I did for the site in 2016:

  • Updated theme with a more minimal look but with a nicer front page
  • Upgraded to a WordPress optimized server that runs a ton faster
  • Added an email newsletter and automated emails for new signups
  • Added a Blogroll featuring all the hobby blogs I follow
  • Tweaked a bunch of plugins and removed ones that didn’t add value

In the end, the site loads faster, it’s easier to read, and am growing my readers with the newsletter and blogroll. Still plenty more to do, but this has set up an excellent foundation to build off.

Goals For 2017

And now for the fun part! Looking forward to 2017, I have a ton of goals both on the hobby side and the blogging side.

Hobby Goals

One of my big goals for 2017 is to build up a hobby table using the Secret Weapon Miniatures TableScape tile I picked up. Not just content to paint up the 4×4 set, I have a huge pile of Games Workshop and Pegasus building kits that I plan to use to build up a tall city table to fight over.

For the Orks, I have a Stompa that is half assembled that will be next for my couch painting. I also have the Megaboss that I have partially completed. I’m not sure where I will go with them after that as I have a ton of boys, nobz, and characters waiting in the bits box.

Also on my painting table waiting to get completed is the rest of the INQ28 squad. I’m hoping I can get these done in the next week as I want to get them done for my birthday and something exciting that I plan to do with them.

Finally, I have a huge backlog of Mentor Legion, Mansions of Madness, and even some Tyranids in the box of shame. For now, I’m going to focus on getting the models that I’ve started completed.

So the models I commit to finishing in 2017 are:

  1. Ork Stompa!
  2. INQ28 Inquisitor and squad
  3. Ork Megaboss
  4. 4×4 tile set of Urban Ruble TableScapes
  5. At least four big buildings for the TableScape
  6. Mentor Legion Razorback
  7. Mentor Legion Storm Talon

Blogging Goals

On the blogging side, I have some ambitious targets as well. First and foremost, I want to continue the twice-a-week post schedule including the Watch This and Good Reads features. Also working in guest posts on as many Saturdays as I can find writers.

I also have a goal of producing one big tutorial every month similar to the skin tones or custom base articles I did this year. Each of these I want to turn into an eBook to download as well.

There is a bunch of maintenance-style work to do as well including updating the menus, organizing all the tutorials and showcases, and updating.

Among the exciting things I have planned for 2017 is three book-style products that I have been working on. The first of these is almost ready, and I’m pledging myself to have it ready by the end of January.

In short, my blogging goals are:

  1. Continue the twice a week post schedule
  2. Get more guest writers and have previous guests write more articles
  3. Create a big tutorial every month with a PDF
  4. Update the menus and blog structure
  5. Release 3 products to help painters while providing an income for the blog

Happy New Year!

With all that said, I want to thank each and every one of you who has read my blog, left comments, and shared it with others. It means so much that others find Broken Paintbrush useful and that I’m able to add to the community.

I am looking forward to the adventures of 2017 and all those models that will be painted!