Latest Posts

Good Reads 47

Good Reads 47

Need a dose of awesome hobby reading? Then get ready for my picks for Good Reads 47 and be prepared to spend a few hours enjoying some excellent content.

Good Reads 47

Painting Black

Painting Shiny Black with Matte Paint

Shiny Black by David Powell

A few weeks back I wrote an article on painting black using some quick and dirty methods. For those looking for a more advanced discussion on the topic, check out David Powell’s post on painting shiny black.

Squaduary Finished

Squaduary 2017 Completed

While my Squaduary pledge was a failure, plenty of other hobbyists fished their squads in this final showcase. With at least 40 participants and 205 finished models, I think Rory created a fantastic new event. I can’t wait until next year (I really will complete something I promise!)

Monster March

Monster March Painting Challenge

If you haven’t seen it already and enjoyed Squaduary or Dreadtober, Swordmaster is hosting Monster March! As the name implies, this event is all about completing a Monster this month. So far it looks like 19 people have started, so grab your nearest monster-on-the-sprue and join in!

Titan Maniple

Legio Mortis Titan Maniple for Epic

Titan Maniple by John

There are times I wish that I had picked up Epic as the idea of moving whole battalions and god-machines would be amazing. While John was longing to build a Titan Maniple for 40k, the mortgage needed to do so, pushed him to create this awesome looking Epic version instead.

Vehicle Damage Table

Vehicle Damage Rules Modified by Spot1cus

I didn’t start playing 40k until 3rd edition, but reading Spot1cus’ post on vehicle damage tables makes 2nd look like an entertaining beer game. While I would love to see something like this for small games of 40k, it would add another layer to a currently overly complicated game. Perhaps a mini-game?

Monetizing a Hobby Blog

Monetizing a Hobby Blog

All of us blog for different reasons, but at some point, many of us get tempted to make money off our site from all these “work from home” ads. Jacob does a great job of bringing reality into our niche and how it is possible to earn enough for server costs, but none of us will retire soon.

Painting a Blood Bowl Ogre

Painting Blood Bowl Ogre

How to Paint Blood Bowl Ogre by Thor

I know Rory highlighted Thor’s first tutorial on painting his Blood Bowl Ogre, but I wanted to call out the other two tutorials Thor did as he completed this monster. He put a ton of details into his tutorial, and it shows through onto the model as well.

The New Games Workshop

It’s been very apparent that GW has changed up its internal brief on using social media and how employees can interact with fans. The Jester wrote up some great thoughts about how this has affected his shopping experience with GW, and the individual impact stores can make.

Stained Glass Windows

Making a Stained Glass Window for Miniature Wargamming

Stained Glass Window by Will

Will is creating another epic display for a client, but what I love about his work is that he takes the time to create a few tutorials as he goes. This week he shows his tricks to create a stained glass window. By using a sharpie and Mod Pog, it looks excellent for small scale – though the Tamiya Clear paints sound like a pain.

Tips for Improving Your Paint Skills

Yes, I’m sharing own of my articles (it’s cool right?). But I put a ton of work into creating this post on how to improve your painting skills. It’s part two of my series on developing your skills, and I created a downloadable PDF with it as well.

Wrap Up

So when I looked back at my list for this post I thought it was extra long because I didn’t write the last Good Reads (thanks again Rory!). But no, these guys have been extra productive this last two weeks!

So make sure you check out all these awesome posts, leave them a comment, and get some hobby done!

Tips to improve your painting skills

How to Improve Your Hobby Painting Skills

In part two of Improve Your Hobby Skills series, I want to share some ways to improve your hobby painting skills. I’ve broken this huge topic down into eight areas that can improve the way you paint.

improve your hobby painting skills

As painting is a huge aspect of our hobby, this is going to be a rather long article, but don’t forget you can download the article as a PDF, including part 1: building skills.

[convertkit form=5003522]

Painting ability is where a lot of us focus when we think of what we need to improve. Understandable since there are so many aspects of painting to learn, so many incredible artists out there, and we spend so much time on it compared to the build.

But just as with the build suggestions, I recommend you focus on one idea at a time so you don’t get overwhelmed. Also, let your painting style build upon itself, don’t pressure yourself to be the next Blanche, ‘Eavy Metal, or name-your-favorite-artist. Get comfortable with what you can do already, and progress from there.

1. Prime Your Minis Right

From Part 1: Improve Your Hobby Building Skills, you should have a well put together model ready for paint. But you can’t start laying it down just yet. Most paints will not readily adhere to plastic, resin, or metal and will chip off when you start handling it.

Instead, you need to use primer, which is a special mix of paint designed to adhere to the mini’s surface.

Prime in ideal conditions

The most common primer is an aerosol spray as it is quick, easy, and can provide an even coat. But it is easy to spray too much which obscures the details, or spray when the weather isn’t ideal, causing the paint to ‘dust’ and add extra texture.

While you can sometimes remove the texture, it is much easier to spray it correctly the first time.

To properly use a spray primer, it is important to read the label and see what temperature range the paint can work in. Too hot and it dries before reaching the model. Too cold and it doesn’t dry right at all. Humidity and rain can cause bad priming conditions.

Some hobbyists take advantage of the seasons and will build and prime a bunch of models in ideal weather and paint them through the winter months.

You can spray inside

Because of the temperature and humidity restrictions, it can be tempting to spray inside. And while possible, you need to take care of the fumes – and overspray. When you use a spray can, the paint is mixed with chemicals that allow it to spray out. These chemicals are dangerous to breathe and need to vented outside.

Airbrush Spray Booth

Spray Booth from Amazon

A spray booth allows for the fumes to be filtered out as well as capturing the extra paint that gets sprayed. As a bonus, you can use the booth for airbrushing if/when you get to that stage of painting.

If you are going to use the spray booth for aerosol sprays, make sure the booth can handle flammable fumes. The chemicals in the spray cans can be dangerous and the fan motors must be designed to extract them correctly.

Tips on spraying

When you get set up to spray, place all the models onto a piece of wood or cardboard that keeps them upright. Use sticky tack or double-sided tape to hold the model down. Place newspaper underneath and cover about two feet out – the paint sprays long ways and you don’t want to explain why the floor is now black.

Start spraying just to one side of the model, move across the model, and let go on the other side. The start and stop of the spray can add extra blobs of paint, and this method prevents it from landing on the model.

To make sure you don’t overdo the primer, do quick, light coverage on each side and let dry for a few hours. If it needs more primer, move the model to expose missed areas and give it another layer. Multiple thin layers are always better than a thick mess.

Spray can isn’t the only way

When spraying isn’t an option you can use a brush-on primer. While slower than spraying, it can be done at your painting space with little fuss. Just follow the same tip: multiple thin layers is better than one overly thick one. As the primer is the first layer of paint, this is extra important as it can prevent any further layers of paint from showing the details.

What color to prime

When it comes time to painting on the primer, the question gets asked: “what color should I use?”

The two traditional primers are black and white. Using black has the advantage that if miss an area of the model it just looks like a shadow. Black also provides a great base layer for metallic paints. The downside is that lighter colors such as yellow or white will take more layers to cover the black primer.

White has the opposite problem. Light colors are quicker to paint and tend to be brighter, but if you miss areas, they will pop out. Models primed white have a lighter composition which works well for certain armies and looks but not so much for models that you want to look dark and sinister.

Brown and gray primers are less common in spray cans but are available in brush-on or airbrush paints. Gray provides a balance between the white and black primers as it allows colors to cover quickly, but without being overly bright. Brown is helpful for rusty metal armies (like my Orks) or ‘natural’ looking armies.

Example of Zenithal Priming

If you have only black and white rattle cans to work with, a great technique is called a zenithal base coat. You start by priming the model black, making sure everything is covered and dry.

Then take your white spray and do a quick spray from above.

The white paint settles on the top side of the model while leaving the bottom and recesses black. Not only do you have instant shading, but when you add layers of paint, they will be brighter where the light would hit the model.

2. Thin Your Paints

All of you have probably heard countless times to thin your paint. But why?

Thin paint = happy minis

It comes back to not covering up details. If the paint is too thick, it can fill recesses that were supposed to be folded cloth and leave brush marks that are hard to remove.

Yes, thin paint doesn’t cover as well and can require multiple coats. But when you thin paint correctly, it is also faster to apply as more of it gets pulled into the brush and is easier to pull back out of the brush.

How thin is thin?

How much to thin your paint depends on the brand and color. Not trying to be cryptic, but different paints have different chemical makeups to provide the coverage and hue the manufacturer wanted.

Using a Wet Palette

So to thin your paint, I recommend using a palette of some type (more below) and apply some of your paint to it. Then dip your brush into clean water and mix it into the paint. If it all starts to run, it is too thin. If it has ridges and peaks, it’s too thick. So either add a bit more paint to thicken the mix or a bit more water to thin it.

The idea is that when you fill the bristles and brush it on the model that it leaves a smooth layer of paint behind. If it starts running into the recesses like a wash, clean of your brush, dry it on a paper towel pressing it into the runny paint, the dry brush will pull the paint back out, and you can try again.

Much of the skill of thinning your paints comes from experimenting with different amounts. But even just adding a little bit of water can make a big difference.

Water isn’t the only solution

Liquitex Airbrush Medium

The next step past using water is adding mediums to the paint. ‘Medium’ is a technical word for the liquid the pigment is suspended within. Some Mediums can change the paint’s properties.

Games Workshop’s Lahmian Medium, otherwise called matte medium, increases the paint’s transparency while not making it runny. This makes for nice glazes and using it to highlight. Note that this doesn’t thin the paint, but rather dilutes the pigment to make the paint more transparent.

I like to use Airbrush Medium as it is a nice mix of thinning the paint with water and decreasing the opacity with matte medium. Add a drop or two of your paint and mix it in.

3. Use The Right Brush

We paint tiny models in our hobby. And with some kits, the details can be hard to see without lenses. This makes it tempting to grab a tiny little brush to paint the model.

Just as trying to drybrush with a traditional brush, using the wrong brush will kill the bristles fast.

Use a bigger brush

Don’t give into the temptation of trying to paint the whole model with detail brushes. A brush that is too small will not only take a long time for you to paint but will often cause you to add too much paint in an attempt to make up for the lack of progress.

My workhorse is the #2, which is about the same size as GW’s Standard Brush. This brush gets me from basecoat down through most of the highlighting. I will usually only switch down to a 1 or 0 to get the finest details like eyes and text.

While it was terrifying to take such a large brush to the model, it has helped with both my painting speed and quality.

So switch up your brushes and try painting more of the model with a larger brush and work your way down as the details get smaller.

Learn your brush types

The ‘standard’ brush we use in our hobby is called a round or pointed round brush by traditional art conventions. The size of the brush is classified with a number where a #2 is similar to Games Workshop Standard Brush, #1 being a bit smaller and the #0 being similar to the fine detail brush. Being named by the creative types, smaller brushes just add on a few extra 0’s so a 000 is about the smallest brush you can buy.

A dry brush is similar in looks to the round brushes, but the bristles are selected to be stiffer so that they can hold up to being knocked about your miniature. While you can use normal brushes for this, they won’t last long before bristles start to fall out. But if you wash you brush out after each use, a dry brush can last a long time. If you need an alternative to a ‘dry brush’ grab a small flat brush as they are often made of stiff bristles as well.

I think Games Workshop created the ‘wash brush, ‘ but it is another specialty style of round brush. Here the bristles are selected to hold more paint in the belly (the fat part of the bristles) so that it can grab a bunch of wash and dump it onto your model. Other brush lines might call this brush a #3 pointed round or something.

4. Get a Good Brush

Just as a larger brush helps get more done, getting a good brush makes a huge difference. But don’t skip over this step if you are a frugal hobbyist – instead, check out my review of WarColour brushes. They are great brushes and very reasonable prices.

WarColours Paintbrushes

So what makes for a good brush?

It comes down to the quality of the bristles: can it hold a fine point and does it transfer the paint well. In terms of holding a point, some of this can be attributed to good brush care (see below) but cheap brushes tend to splay quickly, creating multiple clusters of bristles that just won’t work.

What I mean by being able to transfer paint is that good brushes will pull paint off of your palette into their belly and let it go again as you pull it across the model. Cheap brushes often struggle with this and force you to glop more paint on the bristles and smash it on the plastic.

Natural or synthetic

Brushes come with ‘natural’ vs ‘synthetic’ bristles which is to say, are the hairs plucked from an animal or made in a machine. I’m not going to touch this topic other than to say the ‘nice’ brushes tend to be natural.

Brush Recommendations

Here is a list of quality brushes that I have either used have been recommended by many good painters. I’ve included the price for a #2 brush at the time of ths writing.

  • Windsor & Newton Series 7 $20 – the standard response to the best brush on the market. They are really nice brushes (I have a 1 and 0) but are pricey.
  • Rosemary & Co. $5.20 – I haven’t used these but have seen many hobbyists love them.
  • WarColours $4.20 – I received a set to review and recently bought more. They are great brushes, especially for the price.
  • Da Vinci Maestro $16 – Another recommendation from painters who love their quality.

5. Take Care of Your Brush

Now that you are using a larger brush and bought a nice set, it’s time to make sure you are using them correctly. I’m going to break this into two parts: care while painting, and care after painting.

Care while painting

While you paint with the brush you want to make sure you don’t get paint all the way up into the ferrule (the metal bit that holds the bristles in place). If you do, it can quickly dry and split the bristles.

It’s also a good idea to ‘pull’ the bush along the mini rather than push paint into the nooks. Think of each bristle as a tiny straw, if you smash it against something hard, it crinkles and can snap.

This is the same reason you shouldn’t use regular brushes for drybrush. Instead get brushes designed to hold up against that torture.

And the last tip on brush care while painting is to rinse the brush now and then while painting so it doesn’t dry on the bristles. Pay attention when applying paint that most of it is coming off the brush, if not, give it a good rinse.

Care after painting

This rinse should be a bit more generous when you finish painting. You really want to make sure no paint is left on the brush.

While you can start with just using cold water (warm water can loosen the glue holding the bristles) and hand soap, I really like using Brush Soap. It conditions the hairs while being relatively cheap and lasting forever. Rinse the brush, pull it against the soap, and rinse again. Use a paper towel to wipe the bristles as you pull the bristles through it.

Repeat the process until it comes out clean.

Using your palm to reshape a paint brush

Next, we need to reshape the bristles so it dries back to a point. While I don’t recommend doing it, I often give the bristles a lick (gross right, but it’s a hard habit to break…).

Instead, wet the brush and place the bristles in the crease of your palm just below your pinky. Squeeze your hand just enough to put pressure on the bristles and pull, rotating the brush slightly as you do. This should leave the brush in a nice point.

And finally, don’t just throw your brush back into a drawer. You worked so hard to keep the brush in good condition for that right? Instead, use a pen cup on your desk and place it bristles up. Alternatively, you can keep those clear plastic tubes that the brush came with and carefully put it back over the bristles, just watch that you don’t separate the hairs.

6. Use a Palette

By not painting right out of the pot, a palette helps incentives you to thin your paints.

A palette doesn’t need to be one of those funny shapes Bob Ross used. Instead, find anything that has a smooth, non-porous (doesn’t absorbed) surface. A lid or Tupperware works well.

Using a palette

If you have a paint pot (as compared to a dropper bottle), use the handle of your brush to pull paint out of the pot and onto the palette. Once you have enough, close the container and use the brush to add some water and thin your paint. Mix the paint and water together on the palette.

As the paint starts to dry on the palette, you can add a little more water to thin it down or add more color if you start to run out.

One of the benefits of using a palette is that you can start to experiment with mixing colors and blending. Add a second color on the palette nearby your first and use your brush to mix them together.

Try a wet palette

A bonus level would be to build or get a wet palette. This is basically a sponge that is soaked with water and covered with parchment paper. The paper is absorbent enough to let water through but doesn’t suck in the paint.

Using a Wet Palette

The benefit of the wet palette is that it keeps your paints usable for much longer. If you use a closeable container, you can even save your paints on the palette for days. The downside is that the sponge can get a bit gross. So every once in awhile bring it to the sink and give it a good wash with dish soap.

7. Learn Basic Color Theory

Now, back to mixing colors, and what colors to actually use. The next tip on painting is to learn the basics of color theory. Or, in other words, learn what colors look good together, and which do not.

Color basics

While the physics of color is measured by a linear spectrum from red to violet, artists created the concept of a color wheel to understand how each color interacts to shape the color we perceive.

Basic Color Wheel

This handy tool is super helpful once you understand how to put it to work. To start, there are three ‘primary’ colors of red, yellow, and blue.  These are called primary because, in theory, you could mix them to create any other color you need. Adding in black and white would complete the set.

If you look between the primary colors you can see secondary (and tertiary) colors are made by mixing the neighboring primary colors.

Complimentary Colors

Colors that are the opposite colors on the color wheel are called complimentary colors. So red compliments green, and blue to orange. Complimentary colors provide the strongest contrast to each other without looking garish.

Color Wheel Showing Complimentary Colors

Split complementary colors are where you split one end and step it out each way. So green has the split compliments of purple and orange – colors that would usually clash. But the added green makes the model as a whole work.

Complementary colors make good spot colors. That is, while most of the model or army is blue, small bits are painted orange. They stand out in a good way and provide some interest to the collection.

Color temperatures

A term artists use when talking about colors is temperature, which is how warm or cool the color ‘feels.’ Blues and greens are cool colors, associated with water and ice. Reds and oranges are warm colors associated with fire. The temperature can create a mood within your miniature or provide a different level of contrast. Cool miniatures that have spot colors of warm colors, for instance, can look more intimidating than the pose would seem.

Mixing colors

As I mentioned above, you can take different colors on the color wheel and mix them to create new colors. If you take colors nearby, it creates mid-tones between them. Alternatively, if you mix a color with its complement, it creates a gray tone. This is helpful if you want to create a desaturated look such as with Blanchitsu style artwork.

There is a whole science to color mixing and creating brighter or darker hues or different saturation levels of a color mix. These are beyond my skill but are something that you can play with on your palette until you find a mix that fits your need – just make sure to write it down!

8. Proper Lighting

You can only paint as well as you can see the miniature. This applies to both trying to pick out the details as well as the actual color of the paint. Trying to paint relying on overhead lights can tire out your eyes as you attempt to focus on the miniature.

Natural Light

If you have it, painting in front of a window is a great way to get lots of perfect light. Even if it isn’t a sunny day, the light coming in will often be brighter than typical room lighting, and as it is real sunlight, it won’t change the color of the paint as a yellow-hued light bulb would.

Daylight Bulbs and LEDs

For those of us who don’t have the ability to get lots of natural light, grab yourself a desk lamp and either a ‘daylight’ bulb or a bright white LED bulb. Both of these provide light on a broader spectrum than typical bulbs, meaning that they won’t shine yellow onto your white paint.

You can get as expensive as you like here with a lamp designed for hobby work. I have two simple adjustable arm desk lamps that I picked up cheap and daylight bulbs in each. These provide more than enough light and I can move them around as I need to adjust.

9. Varnish Your Work

To protect all that hard work you put into your model, take the time at the end to give it a couple layers of clear varnish. Sprays like Testor’s Dull Coat are a matte spray without any paint color, but dry as a hard layer on top of your paint.

But you don’t have to wait until the model is finished to varnish it. On some models, especially metal or resin miniatures, it can be helpful to varnish after you complete different layers of paint. This prevents them from being worn down as you handle the miniature during your painting sessions. There are some hobbyists who spray between each layer of paint!

For smaller areas, such as protecting decals, you can use brush on varnish so you don’t have to wait for a spray to dry. Another option that Greg pointed out is to use airbrush matte varnish which dries quicker and easier to control if you already have an airbrush setup.

Wrap Up

I know this was a huge article with a lot to take in but I hope it helps improve your hobby painting skills. As another reminder, you can download this as a PDF for reading later, just add your info below and I’ll send you the download link.

I would love to hear your thoughts on the ideas above. Were they helpful, overly simplistic, or only half the story? Leave your comments below so I can fix any omissions or correct any mistakes.

Catching Up – Squaduary, Posts, and Looking Ahead

You know those crappy weeks where Real Life ™ destroys any hobby or personal time? Yeah, that has been the last two for me as I put it way too many hours at work to get projects completed. Finally wrapped up on Friday, only to come down with the flu. Whoa is me right?

Anyway, you came here for the hobby, and while it’s been super quiet for me, I do have some updates, news, and looking ahead.

Squaduary – Fail (but barely)

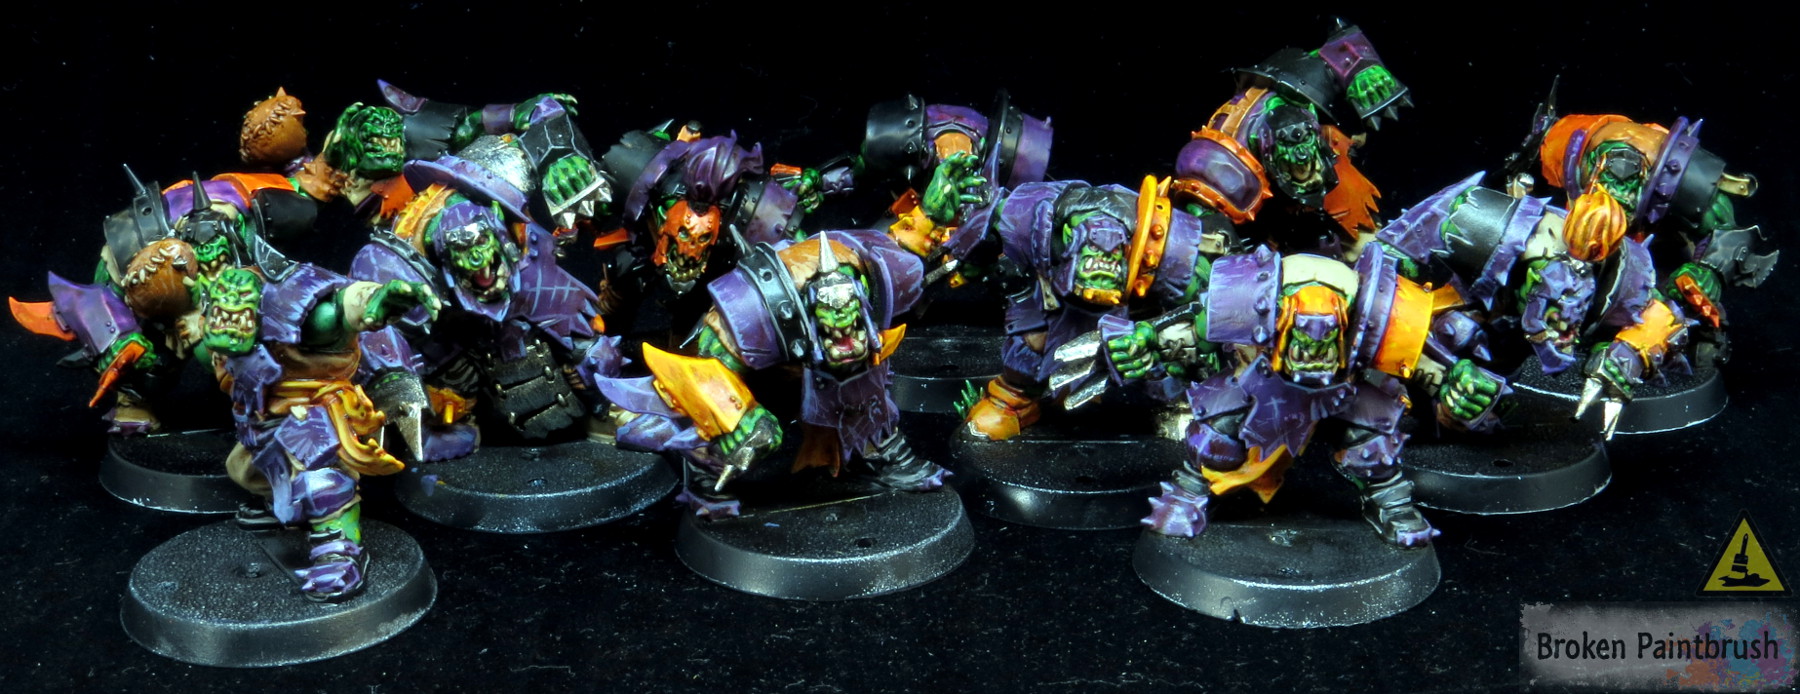
First, February I was supposed to complete the Ork Blood Bowl team for Squaduary. I was off to a great start with having half the team highlighted.

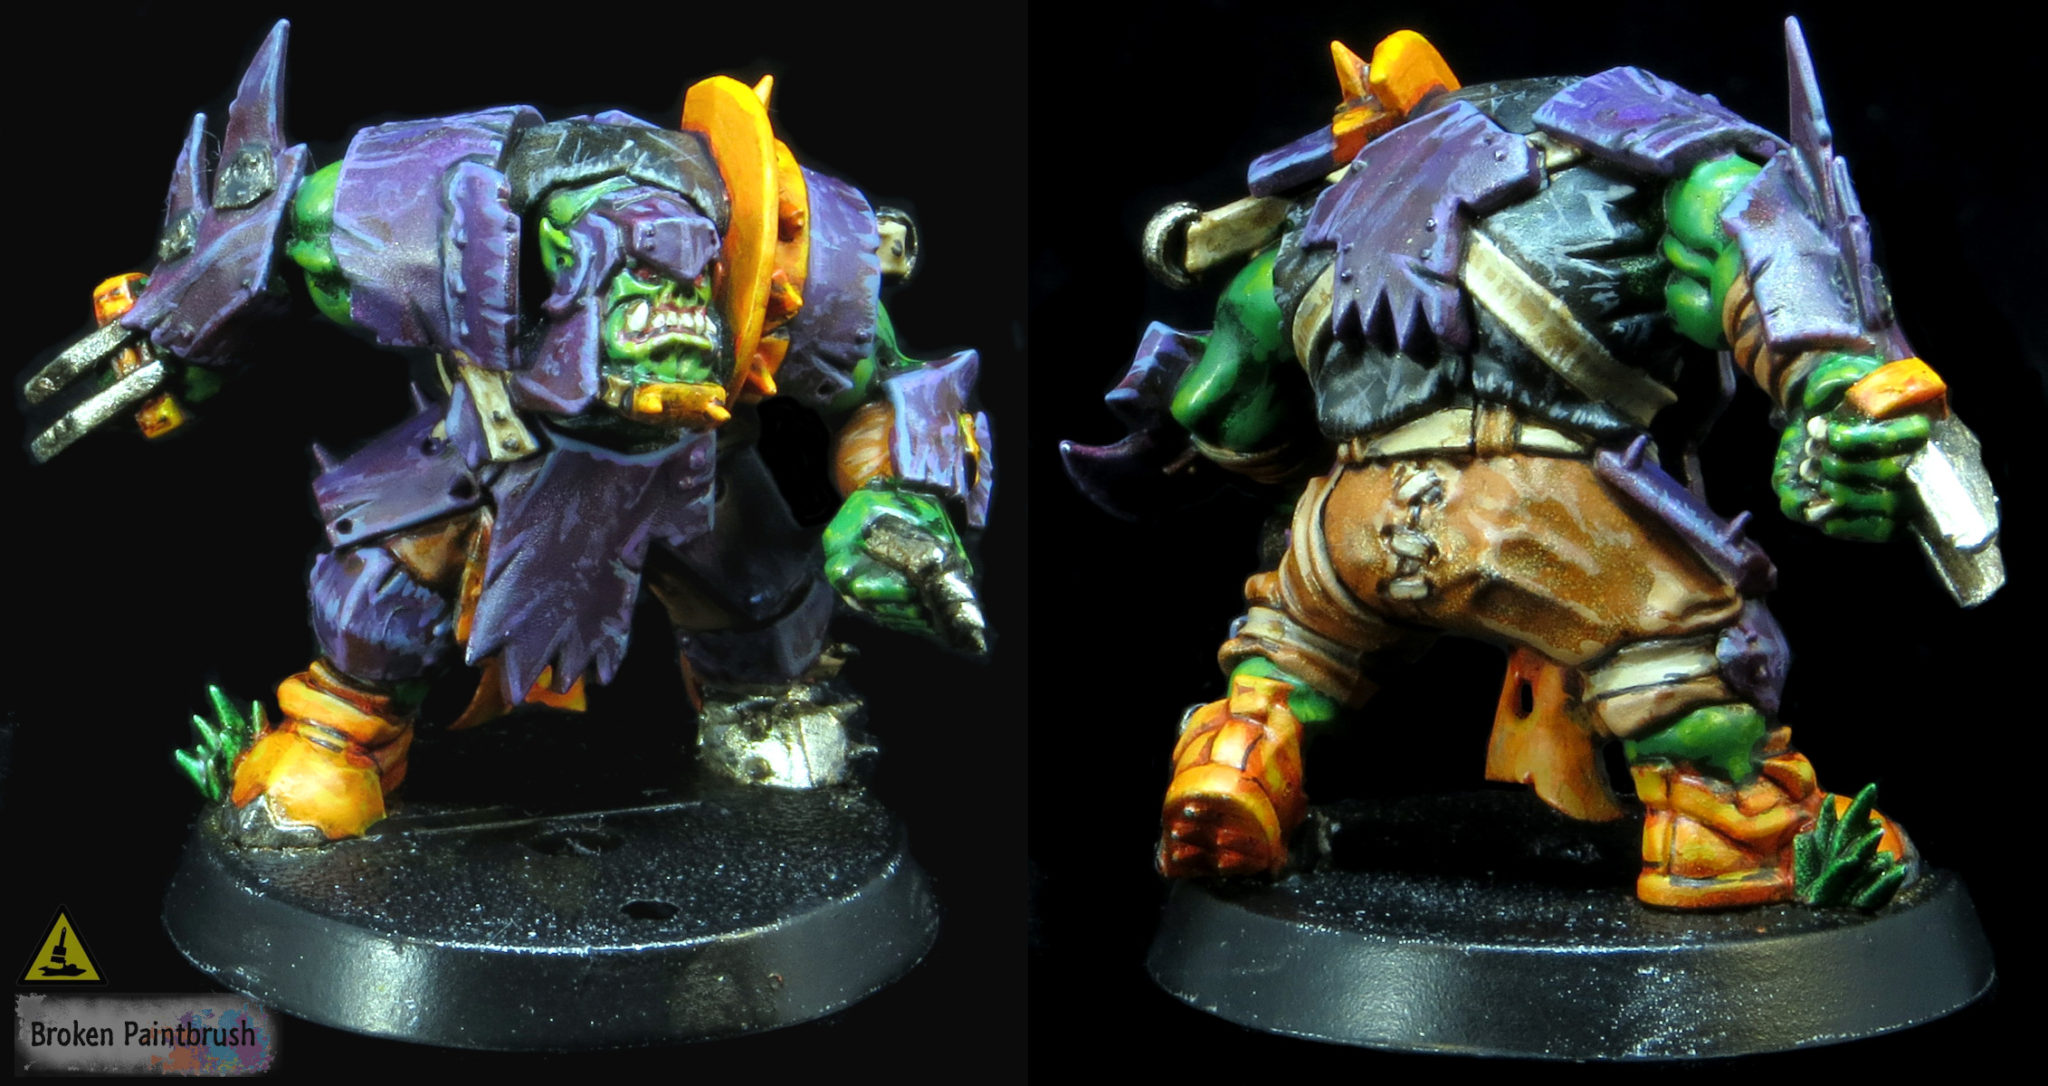
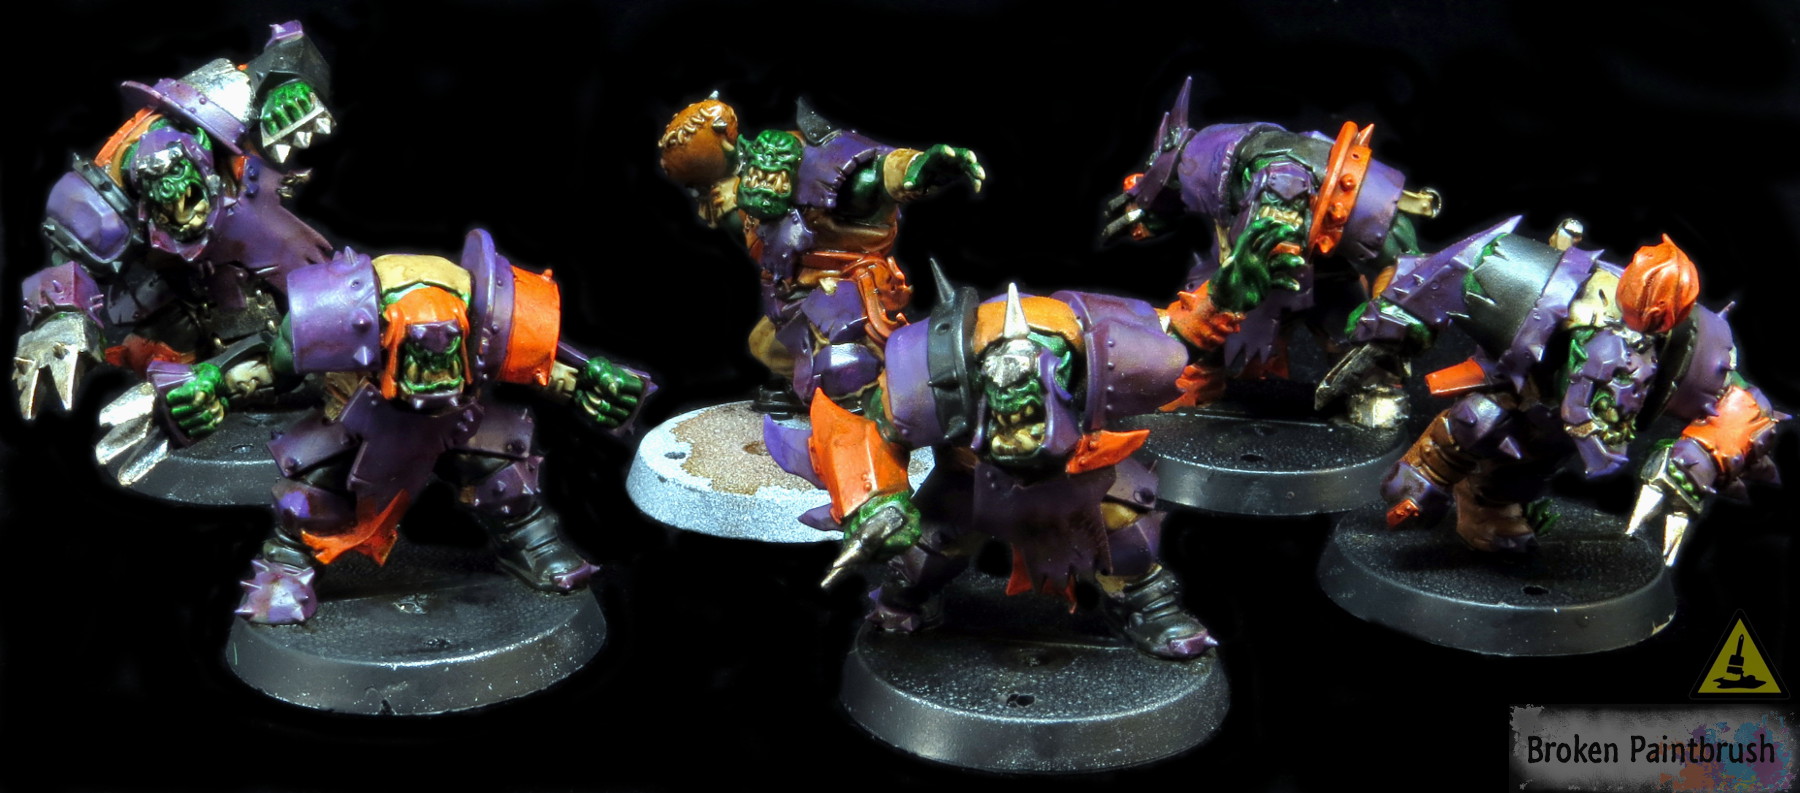
After getting the highlights on, I was really happy with the purple and orange scheme. I was waiting to do weathering and the base once the whole team was completed.

Over the weekend I was able to get the other half base coated and washed (though I forgot the metal bits). This was great progress, but still long ways off from completion.

With it being the final day of the month, I am going to have to call it as it is: Squaduary was a Fail. But it was a great opportunity to push me to finish a whole squad (or team) in a month. I also saw a bunch of other hobbyists get their projects done, so congrats to all of you.

You can see that the second half of the team has a bunch more orange than the first half. I wanted to mix up the painting a little bit since I didn’t do any conversions on the team. It’s not a complete switch, but rather I mixed up where purples and oranges went.

Awesome Guest Writers

For those who follow the blog, you may have noticed it wasn’t all quiet here thanks to the awesome contributions of Mr. Pink and Rory who both wrote articles for the site.

For anybody looking at improving their sculpting work, Mr. Pink wrote two articles on it. Part one focused how to improve your sculpting skills while part two shared some tips and tricks to make it easier to do.

Good Reads has become a regular post where I highlight some of my favorite posts from the week. With the craziness or the work week, I asked Rory to fill in, and he delivered an awesome set of articles well worth your time to read. It was great to see what he found as each of us follows so many different blogs and forums.

I want to say a big thank you to both of you for not only writing the articles but also putting them together during this crazy few weeks. Oh and give them both a follow on Twitter! Mr. Pink (@mod_synth) and Rory (@macantsagart) are awesome #warmongers and great for the community.

Coming Up Next

I’m current try to pick the post schedule back up and have two more articles in the How to Improve Your Hobby Skills series in the works – though the painting one is getting a bit long and may need to get broken up.

I also want to call out Swordmaster is hosting a build and paint challenge next month called Monster March! He reached out to me during Dreadtober, wanting to create a fantasy themed challenge and has been planning it ever since. So if you have a large create of nightmares that needs painting, head on over there and join in! I may have a late addition if I can finish my team this week.

Good Reads 46 – with Rory’s Finds

OK so I am not Joe B but I am instead Rory /Thousand Eyes from over at Stepping Between Games. I am the guest writer for this weeks Good Reads, the trick here being I use these posts to find the random wonderful blogs from around the blogsphere. As such many of the tutorials I have saved for reference actually came from here, but I am not one to shrink from a challenge.

So here are a few good blog posts for you all:

Creative Twilight

Blood Bowl Ogre

Blood Bowl Ogre by Thor

Thor has done up a wonderful post on painting the skin on his Bloodbowl Ogre, he uses a few more steps that I could have imagined but the work speaks for itself. Truly a great guide to painting up any pink skin.

Painting and Converting Legion of the Dammed

How to convert and paint legion of the damned

Legion of the Damned by juckto

This next Good Read isn’t actually from a blog but from a Relic News forum post back in ’09. It contains a wonderful set of instructions for making Legion of the Dammed, from converting to painting them up. It is one of those pages I visit every now and then and ponder if I have the time to do up a squad.

Trust in Rust 2.0 Battle Report

Dread Mob battle vs Tau

Battle Report by Greg

I am sure many of you are familiar with Greggles over at Feed Your Nerd and if you aren’t then you are in for a treat. Not only does he have a wonderful blog but lately he has been putting up reports of one of the armies I have been most jealous of on the internet for a long time, Trust in Rust. His all kicking, all stomping, all shooting and most missing Dread Mob of epic proportions. In this report he goes head to head with two Tau Stormsurges.


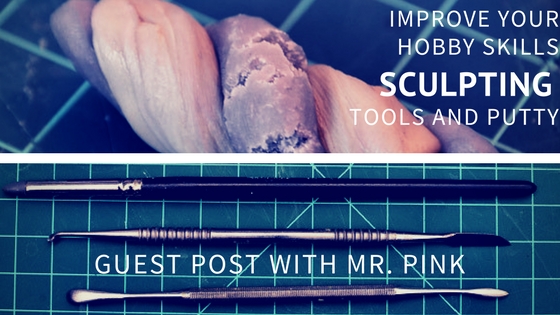
Improve Your Through Sculpting 2 Tips & Tricks

How to Improve Your Sculpting Skills by Mr. Pink

So this is a great tutorial and has a link back to part 1, both of which are very worth reading.  The more observant amongst you may notice it seems very familiar to this fair site. That is only because Broken Paintbrush puts out a lot of wonderful articles, so you may have missed one or two. Great tips and techniques in this post.

Deadpool in 40K?

Building Deadpool for 40k

Deadpool by Spot1cus

Spot1cus has a good look and bringing everyone’s favorite merc with a mouth into 40K. There is a lot of scope for playing around with bringing your super heroes into the game. This one was a good go at it.

Wrap up

Well that is all from me, I shall let you return to your regular scheduled Joe time. I hope the links were of some use to you all. Good Reads demonstrates that there are so many more blogs and articles than any one of us can actually read, but we can rely on Joe finding us some gems.

How to Improve Your Sculpting Skills by Mr. Pink

How To Improve Your Hobby Skills Through Sculpting 2 – Tips & Tricks

Hey, it’s Mr. Pink here again from the blog Modern Synthesist to share some more tips and tricks about How to Sculpt Miniatures. In my previous post, I outlined the basics tools you need to start sculpting and went into a bit of detail about how to use them. In this post, I want to impart my 4 Sculpting Caveats and a couple of tips and tricks or greenstuff hacks.

How to Improve Your Sculpting Skills by Mr. Pink

Sculpting Caveats

My 4 Sculpting Caveats are the following:

  1. Use Lubricant
  2. Be Patient
  3. Work in Levels
  4. You Need Practice

1) Use Lubricant

We kind of already covered this in the previous bit where I suggested that lubricant is a key part of your sculpting tool box. Greenstuff is so sticky that it is impossibly hard to work with if you don’t find a way to keep it from sticking to your tools or hands. The only further tips are that you should only use as much lubricant as you need, and you need to keep the lubricant mostly on your tools/hands and not on the models or putty you’re using.

For example, I don’t want to get my cream all over the model or putty, so when I’m first kneading the putty and placing a ball of it on the model, I use water to lubricate my hands and tools. Water won’t cling to either the putty or the model, and it dries pretty quickly. Only once I’ve successfully attached the putty I’m working with to the model do I put a thin skein of cream on my tool, wiping any excess off on my hand.

2) Be Patient

Many a sculpting project has been marred by trying to do too much at one time. You get a bit of detail perfect on the model’s face…

Modern Synthesist Sculpting Skills

…and then you go to sculpt a bit on its leg, but—WOOPS—you just mashed your finger into your carefully sculpted face detail while shifting your grip on the model!

Modern Synthesist Sculpting Skills

DOH!

I speak from experience. I still do this from time to time when I’m excited to get one miniature done. Sure, if you’re fastidious about mounting your models on corks and never touching the actual model, you might not need to worry about this. However, no one is perfect, and it is never worth a big fat fingerprint where an awesome detail should be.

A little bit of patience in the short term will save you a lot of sanity in the long term.

I typically have a couple of projects I’m working on at once so that when I’m happy with a detail on Model A, I can set it down and switch to sculpting on Model B to allow Model A plenty of time to dry. The working time of Epoxy putty is 2-3 hours, so I’d recommend setting a model aside for at least 2 hours before going back to it and sculpting something else. If in doubt, check if the putty is dry by prodding it gently with a tool. There’s a way to speed up the drying process, but I’ll get to that below.

3) Work in Levels

I think a lot of people get frustrated with greenstuff because they take a big lump of it, plunk it on a model, and assume they’re going to sculpt a head/shoulder plate/whatever from scratch. However, greenstuff is very pliable in its workable state, so if you’re working on a big hunk of it, without a solid structure beneath to work against, it has a habit of distorting and stretching.

To remedy this, build your greenstuff up in layers, allowing time for each layer to fully set before you start on the next, and add fine details only in the very topmost layer.

If you’re sculpting thin things that stick out from the model, like arms, tails, or weapons, start with an armature: a piece of strong wire that you bend into the rough shape of the thing you want to sculpt.

Modern Synthesist Sculpting Skills

Then add a layer of greenstuff to rough in the shape of the appendage, and allow this to set.

Modern Synthesist Sculpting Skills

This combination of a wire armature with cured, hardened greenstuff over it, makes the wire less likely to bend and the greenstuff less likely to snap. Once you’ve got the wire armature reinforced with a layer of fully set greenstuff, you can go back and sculpt in final details and sharp edges with your final layer.

If you’re sculpting bigger things onto the body of the model, rough in their size and detail with one layer of greenstuff, allow it to set, then sculpt in the fine details and sharp edges using a subsequent layer.

In both these examples, your greenstuff work is less likely to distort or warp because you are working with a solid backing. What’s more, in both of these cases the cheap and plentiful Apoxie Sculpt I highlighted earlier is the perfect material for your roughed-in base layer, and then you can sculpt over it (once it’s cured) with a thinner layer of greenstuff to add the details. Here’s an example of how I did that on my Tyranid Dominatrix from a Hierodule project.

First, I created a wire armature for the hand, then blocked in the palm with apoxie sculpt:

Modern Synthesist Sculpting Skills

I let this set, then went back to add the details to the hand using Greenstuff:

Modern Synthesist Sculpting Skills

4) You Need Practice

If you think you’re going to become a greenstuff whiz by reading some articles on the net or watching some YouTube tutorials, I’m sorry to disappoint, but it’s not a realistic goal. It might seem like an obvious conclusion, but the only way to get good at sculpting is by DOING IT. All of the tips I’m sharing in these articles are meant to give you the most solid basis possible for starting your sculpting journey, but, at the end of the day, you’re the one who needs to step up and try it out on some models.

I’m only as good at sculpting as I am because I’ve been practicing (and failing!) for years. Don’t believe me? Well here’s some proof.

Modern Synthesist Sculpting Skills

Exhibit A: My first ever attempt at sculpting a Tyranid Dominatrix from a Forge World Heirodule model. Impressive scale, but not a sculpting job that’s going to win any awards. You can see this was done in 2007.

Modern Synthesist Sculpting Skills

Exhibit B: My second attempt at sculpting a Tyranid Dominatrix from a Forge World Heirodule model. This one was done a year after the first, applying everything I’d learned from sculpting the first one. And, with a proper paint job from Moloch, that one DID actually win a Golden Demon 😀 (If you’re interested, you can read my full article on Creating a Dominatrix from a Hierodule)

Modern Synthesist Sculpting Skills

What I’m trying to illustrate is that no one is born as a natural sculptor. Anyone you’ve seen who can do eye-watering greenstuff work is someone who, at one point, produced a bunch of really rough, finger-print-studded, greenstuff duds at one point in their career! So, once again, the only way to get better at sculpting is by picking up your tools, digging out those old ork models you never threw away, and experimenting with some actual sculpting.

Greenstuff Hacks

The 4 Caveats outlined above will get you most of the way they when it comes to handling epoxy putty without tearing your hair out. However, I’ve been gifted two other hacks that focus on extending the life of greenstuff so you can buy less of it and get a longer lifespan on the putty you mix.

Greenstuff Hack: Mixing Greenstuff with Apoxie Sculpt

In my first article, I mentioned how Apoxie Sculpt is a cheaper and more plentiful alternative to greenstuff. Though it has its own properties that differ from greenstuff, the two are, essentially interchangeable. In fact, they’re so close in terms of application and chemical composition that you can combine them!

Modern Synthesist How to use epoxy putty

Modern Synthesist How to use epoxy putty

Why would you ever want to combine greenstuff and apoxie putty you ask?

The main reason I do it is that it makes my somewhat pricey greenstuff stretch further. Everything I sculpt these days is made of a 1:1 mix of greenstuff and apoxie putty. This hybrid putty, which I’ve dubbed Apoxie Green (TM), has all of the benefits of the two putties with none of their weaknesses. It also means that I use half as much greenstuff as I usually would by diluting it with the cheaper apoxie sculpt.

In general, I would definitely recommend everyone pick up some Apoxie Sculpt. You get so much of it for such a reasonable price that I feel like it inspires me to try out bigger projects without worrying about wasting putty if they come out horribly. I’ve been able to use it to great effect in creating Tyranid scenery, for example.

Modern Synthesist Tyranid Barricades

Modern Synthesist Tyranid Mycetic Spores

Greenstuff Hack: Use Hot and Cold

The chemical process that causes all epoxy putties to cure is affected by hot and cold. High temperatures cause the putty to set faster, and cold temperatures cause the putty to set slower.

If you’re in a hurry and want your sculpting to harden quicker, you can place your sculpted model close to a halogen lamp. However, don’t do this with sculpted details on plastic or resin models as the heat will also warp the plastic!

Modern Synthesist How to use epoxy putty

If you want your putty to last longer, you can decrease the temperature of it. This might not seem like a very useful application as no one wants to be sculpting in an icebox. However, where this fact is very useful is in extending the life of putty you’ve mixed up from 2-3 hours to 1-2 days.

This, I feel, is one of the most game-changing revelations about epoxy putty and greenstuff. I used to waste so much of the stuff because I would mix too much and not be able to use it all before it set. Now, whenever I start sculpting, I portion my extra greenstuff into even sized balls…

Modern Synthesist How to use epoxy putty

…Dump them into a small, sealed container…

Modern Synthesist How to use epoxy putty

…and drop them in the freezer.

Modern Synthesist How to use epoxy putty

Then, as you’re moving through your sculpting queue, you can remove the greenstuff one ball at a time, leaving the rest in the freezer.

If you get the putty into the freezer right away, and you have a particularly cold freezer, I’ve been able to pop the stuff out and use it as much as 2 days later. You might even be able to stretch it to three, but I’d say that’s pushing it a bit. Best thing to do is test the putty, and if it feels like it’s getting too hard, chuck it all and mix some more.

With these two hacks in your back pocket, you should start to get a lot more mileage out of your greenstuff. If you’d like to read some more of my thoughts on the Caveats or Greenstuff Hacks, check out my post How to Sculpt Miniatures 3: Sculpting Skills.

Go Get Sculpting!

Now that you’ve got the basics for pushing putty, there’s really no reason why you shouldn’t get out there and try some sculpting for yourself!

I hope you’ve enjoyed my two articles on greenstuff skills and sculpting. Like I’ve mentioned, there’s a lot more where that came from on Modern Synthesist under the How to Sculpt Miniatures series.

I’m also trying to come up with some more ideas for this series, so if there’s anything you’d like to know about sculpting, please share your questions below. Additionally, if there are specific things you’d like to learn how to sculpt (like stitches, or spinal columns, or musculature or whatever), please share those suggestions, and I’ll see if I can whip up some more detailed tutorials for everyone 🙂

Improving Your Sculpting Skills with Mr. Pink

How To Improve Your Hobby Skills Through Sculpting 1 – Tools & Putties

Howdy! Mr. Pink here from modernsynthesist.com for a guest post all about sculpting.

Though Joe touched a little bit on Greenstuff/epoxy putty for doing things like filling gaps when building models, there is a whole world of miniature modification that opens up to you when you embrace greenstuff and sculpting.

Improving Your Sculpting Skills with Mr. Pink

However, I understand that greenstuff and sculpting, in general, can be a daunting thing to tackle if you have no prior experience. I felt the same way once, and that’s why I created my How to Sculpt Miniatures series to give people tips to get them started with sculpting. In this post, I’m going to give a high-level summary/introduction, and if you’d like to read more, you can feel free to explore more of my series on my blog at Modern Synthesist.

Tools of the Sculpting Trade

Just as Joe has outlined for his other articles, to be successful when sculpting, you need the proper tools. At the simplest level, you need:

  1. A Sculpting Medium / Putty
  2. Some Sculpting Tools
  3. Lubricant

That last tool is one that not everyone is properly told about, and it could well be the most important! Let’s break down the list now.

1. Sculpting Mediums / Putty

What follows is not an exhaustive list of putties. I’m going to highlight the two types of sculpting putty that I use most often and which I think can handle 98% of your sculpting projects. Other puttiess to consider, which I don’t have as much experience with, are brownstuff or grey/whitestuff (which are like Greenstuff but take sharp details better) and Super Sculpey (which is typically used to sculpt full models at larger scales).

Kneadatite Epoxy Putty (Greenstuff):

Modern Synthesist How to use epoxy putty

The most common putty that most miniature-based hobbyists choose. This is the slang term for it, and what you’re actually dealing with is Kneadatite Epoxy Putty. The name “greenstuff” derives from the fact that this is a two part putty that comes in blue and yellow. When these two parts are combined, it sets off a chemical reaction that causes the putty to start to harden.

If you’ve never before used greenstuff, think of its consistency as being similar to a hard Silly Putty.

Upsides of Greenstuff: It is easy to find in hobby shops and online. It is very tacky, so you don’t need to worry about it sticking. It is also stretchy while you’re working with it, which allows you to do some interesting things when sculpting fabric or skin. The cure time is pretty long (you can work it for about two hours. Finally, it sets to pretty hard, but it is still slightly rubberized, so you don’t have to worry about it being brittle.

Downsides of Greenstuff: It can be expensive if you’re looking to do a very large project with it (especially if you’re buying your greenstuff directly from GW). The stickiness of it can get annoying in some circumstances. Though it’s not brittle, it’s also not as strong as some putties, so it needs to be sculpted onto armatures (wires) if you plan on making anything long and skinny with it. This also means that, though you can file greenstuff, it doesn’t respond as well to heavy machining/carving (like taking a Dremel to it, for instance).

Aves Apoxie Sculpt:

Modern Synthesist How to use epoxy putty

This putty is well known to people who do a lot of sculpting in the community, or people who sculpt very large models. Though not as common as greenstuff, you should be able to find it at most specialty sculpting stores (that does not include your average art store). If you’re having trouble finding it, contact Aves Studio, the manufacturer, directly. I found their customer service staff to be very helpful when I was living in the UK and had to track down some putty in Wales.

If you’ve used greenstuff before, then you can easily use Apoxie Sculpt. It is the same idea, where it comes in part A and part B, and when you combine them together, a chemical reaction causes the putty to start hardening.

Modern Synthesist How to use epoxy putty

Modern Synthesist How to use epoxy putty

Modern Synthesist How to use epoxy putty

If you’ve never before used Apoxie Putty, it has a consistency similar to plasticine.

Upsides of Apoxie Putty: It is CHEAP! It is a high-quality sculpting medium, and you can get about a pound of it for the same price as you’d pay for a tube of greenstuff. It sets pretty hard, which means you can machine and file it. Its cure time is comparable to greenstuff, and it is slightly less sticky than greenstuff (if that kind of thing appeals to you).

Downsides of Apoxie Putty: Because it’s so hard, It can get brittle if you’re making very small/finicky details out of it.

Putty Conclusion:
If you’ve never sculpted before, I would recommend using greenstuff. It’s tacky/sticky nature is helpful when you’re sculpting onto an existing model, and its stretchiness helps when spreading/smoothing it over a surface. Apoxie Sculpt is cheap and amazing, but I find it more useful for larger sculpting projects or sculpting on many models. If you’ve already got your feet wet with sculpting, and you want to take on larger projects (particularly terrain, or scratch sculpting a bunch of bases), I recommend getting some Apoxie Sculpt. However, with small projects, I mostly use Apoxie Sculpt to extend my greenstuff (which I’ll talk about later).

If you’d like to take a deeper dive into my thoughts on putties, check out my article How To Sculpt Miniature 2: How to Use Epoxy Putty, Greenstuff, Apoxie Sculpt.

2. Tools

Though Joe is right that you need the proper tools to get serious about a given part of the hobby, these tools are just a baseline that you will grow from. A successful sculptor is not a product of their tools, and anyone who tries to show off how many tools they have is probably making up for something.

I have a core set of about seven tools that I use regularly:

Modern Synthesist Tools for Sculpting Miniatures

However, of those seven tools, I say that if I had to flee the planet suddenly in the wake of a Tyranid invasion, I would take only the following 4 Tools:

Modern Synthesist Sculpting Miniatures Tools

Realistically, though, I mostly use the bottom three tools (the top one is a custom one my hobby buddy Hydra made me). If you went out tomorrow and bought only three sculpting tools, I would recommend these three. They are called the following:

A) Silicone Shaper / Silicone Brush tool
B) Le Cron Wax Carver / Games Workshop / Blade tool
C) Beale Wax Carver / Dental Elevator / Spoon tool

I’m sorry about the confusions in the names there. I’ve accrued my tools from a number of different places, and I stole #3 from my brother, so I have no idea where it came from or what it’s supposed to be called. However, if you google those names, they should lead you to the right places.


A) Silicone Shaper / Silicone Brush:

Modern Synthesist Sculpting Miniatures toolsJoe has written about these wonders before. If I were only now getting into sculpting and hadn’t already developed a sculpting groove with other tools, I would be able to do 80% of my sculpting with this tool alone. It is like a brush for greenstuff, which is HUGELY helpful when sculpting organics (skin, bone, flesh, Tyranid stuff), or when trying to blend GS into a model. If you’re already sculpting and don’t have a silicone shaper, go and buy one. If you’re just starting sculpting, this is a great tool to get.

Here’s an example of the kind of soft, organic results you can get from a silicone shaper:

Modern Synthesist Sculpting Miniatures techniques


B) Blade/Games Workshop Sculpting tool:

Modern Synthesist Sculpting Miniatures tools

Though you can get this elsewhere, this is the tool Games Workshop sells for sculpting, and it’s best for sculpting sharp lines and flat surfaces. I guess it makes sense for them to sell it as most people play marines >:P  The most useful part of this tool is the blade as the tiny spoon shape on the other end is a poor substitute for the third tool I’ll describe. This tool is a favourite of Tyranid players as it is, pretty much, the Tyranid Armour Plate Sculpting Tool. The best way to use it is to cut sharp lines into your putty with the blade end, then smooth flat surfaces with the flat side of the blade. It can achieve effects like this:

Modern Synthesist Sculpting Miniatures techniques


C) Spoon/Beale Wax Carver/Elevator tool:

Modern Synthesist Sculpting Miniatures tools

Before I discovered the silicone shapers, this was my hands-down, all-time-favourite sculpting tool. Actually, it might still be my favourite sculpting too. The convex side of the curved, spoon-shaped end is phenomenal at smoothing out putty to eliminate fingerprints, and generally pushing it around on a models surface. The concave side can be used like a spoon to scoop out excess putty. And then the other end of the tool has a very small dart/blade shape that has all kinds of uses. I think everyone should have one of these tools. Here’s an idea of what it can accomplish:

Modern Synthesist Sculpting Miniatures techniques

Tools Conclusion:
You don’t need very many tools to start sculpting. You also don’t need to use these tools if you have something else that works for you (I knew of a guy who used an old, metal Howling Banshee sword as a sculpting tool!). However, if you are not sure where to start with sculpting tools, these three will serve you well. Once you want to expand your collection, check out the rest of the seven tools I outlined in my article How to Sculpt Miniature 1: Best tools for sculpting miniatures.

3. Lubricant

The oft-forgotten but ESSENTIAL tool in a sculptor’s arsenal is lubricant. It is so simple, but very much required. Greenstuff is a very sticky medium, which is good when you want to stick it to a model, but annoying when it sticks to your tools or your fingers. There’s not much to say about lubricant other than you should use it.

You have two options for lubricant:

  1. Water (or spit, if you’re gross)
  2. Cream

Water works pretty well. Simply dip your tools in a pot of clean water frequently to keep them wet. Similar with your fingers if you’re touching the greenstuff. The downside of water is that it will dry up pretty quickly.

Cream is my preferred lubricant. A long time back, my hobby brother Hydra told me to use pure Nivea cream as a lubricant for my tools, and I’ve never considered using anything else.

Modern Synthesist Sculpting Miniatures sculpting skills

The benefit of using the cream as lubricant is that it lubricates your tools for much longer as it leaves a sheen of oil on them. However, you want to use it SPARINGLY so that you’re not getting it all over your models/putty. If you wipe cream on your tool, then wipe most of it off on your hand, the tool will look pretty clean but will still have a residue on it that will keep putty from sticking. Here’s what that looks like:

Modern Synthesist Sculpting Miniatures sculpting skills

What’s more, that leaves you with a reserve of cream on your hand, and the softest knuckle in the land!

Modern Synthesist Sculpting Miniatures sculpting skills

Lubricant Conclusion:
Use lubricant, but not too much. When I learned how to use water on my tools, I went from being unable to use greenstuff to being decent with it. Once Hydra told me to use Nivea, my ability with sculpting jumped yet again as it makes it so much easier to get a smooth finish on your sculpting and buff out annoying fingerprints.

One thing to consider, though, when using cream is that you should probably wash your miniatures with soap and water after you’re done sculpting to remove any residual oil. That being said, I’ve been doing this for a while, and have sculpted bits on my whole Haemonculus Coven, and I’ve never had issues with primer adhering (I don’t wash my models). So, though I never bother with washing, it’s something you might like to consider.

Now Get Sculpting!

With these tools in hand, you are ready to start experimenting with greenstuff and taking it beyond simple gap filling on your models. However, this is just part one of a two-part series on sculpting and greenstuff. In my next article, I will impart my 4 Sculpting Caveats, which are meant to make the sculpting process a little less frustrating for new sculptors. I will also share a couple of hacks for making the most of your greenstuff.

Until then, please feel free to share any sculpting questions you might have, or your own tips for best tools. My goal with sharing these articles is to demystify sculpting and greenstuff so that more people will feel comfortable modifying their models or creating new ones from scratch!

See you next time!

WIP Ork Blood Bowl Lineman With Purple and Orange Armor

Squaduary Week 2 – Half of ork team almost done

Short post for today but wanted to share some my updates on my Ork Blood Bowl team for week Squaduary Week 2.

WIP Ork Blood Bowl Team for Squaduary Week 2

The first half of the team is almost finished with all the highlights. After highlighting the orange towards yellow, it works a lot better with the purple armor. I did finish the middle lineork as you can see below and on the rest, I only have the purple and black left to finish.

WIP Ork Blood Bowl Lineman With Purple and Orange Armor

I haven’t done any weathering or the base yet as I am going to wait until the whole team is ready so they look uniform.

The next two weeks are looking super busy at work so it might be a bit quiet from me. But I do have a couple of guest posts lined up thanks to the awesome Mr. Pink and Rory. Hopefully, I can still sneak some painting in to relax in the evenings.

How to Paint White - AdMech Style

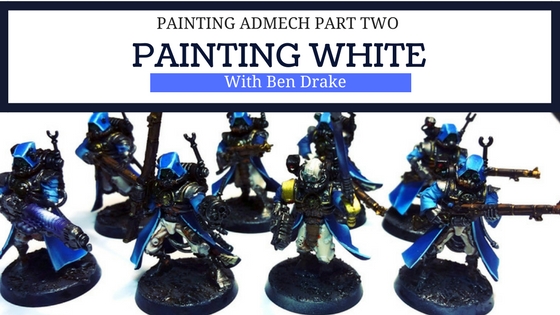
Painting AdMech Part 2 – The White Sections

Hey, everyone! Ben here again from Moosehead Studios with the second and final part of my painting AdMech articles (for now, at least). In this article, I am going to cover the second-largest section of my Skitarii Vanguard and Rangers: the white sections.

How to Paint White - AdMech Style

If you missed the first article it is where I painted the blue sections.

White is one of the most difficult colors to paint, right up there with yellow and black. What I have discovered works best for me is to build up layers on whatever it is that I am painting and trick the eye into believing that what it is seeing on the model is pure white cleverly applied instead of several layers of different colors built on top of each other.

And I can’t stress this enough when painting white: it is always better to apply several thinned layers of paint instead of one thick.

I mean, this is the cardinal rule of painting as spoken by the one and only Duncan Rhodes (@WHTV_Dunc on Twitter). When you are working with really light, transparent colors, streaks are much more visible if you just slap thick layers of paint on. Put a couple of drops of water into your paint, mix it, drag your brush into a nice point, and lay down some solid thin layers.

Painting White With Layers

Normally, I would build up to pure white from a base layer of a light gray, but for this project, I chose to build up from a base layer that more closely resembled a bone color (I used Vallejo Bonewhite). I had used it previously on my Onager Dunecrawler and felt like this idea of these cybernetic warriors having a piece of them resemble human bone was an interesting concept to represent on the model.

Base Layer of White on the AdMech

Once this layer had been applied smoothly over all of the areas that I was working on, I gave it a wash of GW’s Reikland Fleshshade, making sure that it darkened up the recesses. I then came back with my base color (Bonewhite) to clean up areas that the shade may have gone that were not recessed. Once this is all dried, you should have a very clear distinction between your recesses and everything else.

Painting White AdMech Midtones

After this stage, I had to begin adding layers so that I could start tricking the eye into believing that it saw pure white.

This first layer I added was Flayed One Flesh from GW in a zenithal (top-down) method. This blended with the darker Bonewhite to look like a natural transition from where the light would normally be hitting the model from the top down as if I was shining a light directly above it.

Highlighting the White Layers

This color is very close to white, and you could honestly stop right here if you felt like it. But, I didn’t, and it’s easy to add one more layer and makes the white “pop.”

Now is the time to bring in some pure white for the models. Using thinned-down paints, a brush with a good tip, and a steady hand, I applied edge highlights to the raised folds on the cloth. I used Vallejo White, but GW’s White Scar would work just as well.

WhiteFinished Painting White AdMech

I was very pleased with these results by using this simple method.

Check out my Instagram (@mooseheadstudios86) or my Facebook page to see some samples of what I’ve painted. If you have a hobby dream you’d like some help accomplishing, or have ideas for future articles, send me an email at mooseheadstudios86@gmail.com and I would love to talk to you!

Good Reads 45

Good Reads 45 – Awesome Hobby Posts to Catch

Back with some awesome hobby posts from the last two weeks, I’ve some great articles for you to check out from 30k, 40k, AoS, and Blood Bowl! I even have two tutorials in there for you to learn some new painting tips.

Good Reads 45

Ultramarine Battle Tanks

Horus Heresy Ultramarine Tanks

Ultramarine Tanks by Lord Halfpenny

I love tanks, and Lord Halfpenny’s mobile detachment for his 30k Ultramarines caught my eye. Between the nice shade of blue and the weathered tracks, they fit the nice balance between the traditional boys in blue and realistic military vehicles.

Drakon Riders

Converted Drakon Riders from Cold Ones

Drakon Riders by Swordmaster

When I first looked at Swordmaster’s Drakon Riders, I thought they were simply a dragon kit that I didn’t remember, only to read his post and find out the are converted from Cold Ones and Vargheist wings! Not only a cool conversion but a nice paint job as well.

How to Paint Non-metallic Metallics

How to Paint Non-Metallic Metals on Greyfox

Greyfox WIP by Blazmo

Painting non-metallic metals is an advanced painting concept that can look nice when pulled off. Blazmo has been learning how to do it on his Greyfox Inquisitor. In the process, he decided to create his tutorial on how to do NMM.

NMM Sword

How to paint NMM sword

NMM Tutorial by The Fantasy Hammer

For a different perspective on painting NMM, The Fantasy Hammer also wrote a tutorial on how to do a NMM sword. This is great in that it more subtle than most NMM swords you see but looks great when finished.

The Mighty Zug

Red Lantern Blood Bowl Team with the Mighty Zug

The Red Lanterns by Jack

The resurrection of Blood Bowl has created some cool looking models including the Mighty Zug. Jack did an excellent job of painting up both this star player and the whole team with a metallic red.

Painting Yellow

How to Paint Yellow Armor

Painting Yellow by Scott

While it might be another Blood Bowl post, Scott created a great tutorial on painting yellow armor for his Ork team. I like how it provides a vibrant yellow look without taking too many layers.

It’s the Little Things

Extra creatures for The Chapel Project

Creatures by Heresy of Us

The Chapel Project continues to evolve as the various talented hobbyists put their work into it. The Heresy of Us adds to the depth of the world with three mini-characters in the form of a crab skull, wraith bat, and devil rat – each with their stories and intrigue.

Trees of Wraith

Kurnoth Hunters with great swords

Kurnoth Hunters by Turkadactyl

Guys like Turkadactyl are killing my resolve when it comes to not starting anything new until I finish a bunch of my projects. His latest addition to his Sylvaneth Grove is this trio of Kurnoth Hunters with great swords. Don’t mess with the trees.

Weathering with Salts

How to paint weathered metal with salts

Weathered diorama by Will

Will has put together some incredible dioramas for clients and takes us along for the WIP ride. He has also put together some great tutorials like this one on using salt to painted weathered metal and chipped paint.

Wrap Up

That’s it for this week, and I hope you were able to catch a few things that you may have missed from the past weeks. As always, if there was something you think I missed, add it to the comments!

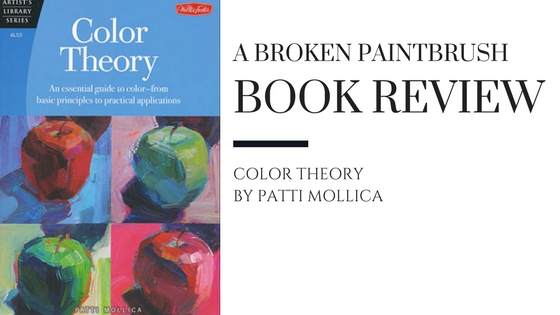
Book Review of Color Theory by Patti Mollica

Book Review: Color Theory by Patti Mollica

While doing research for my painting basics post, I pulled out a book I’ve had on color theory. After reading through it, I thought I would provide a book review and my takeaways from this book.

Book Review of Color Theory by Patti Mollica

Color Theory by Patti Mollica is a fairly short but dense book in the Artist’s Library Series aimed at more traditional artists. What I mean by this is that the colors she mentions and tools used are the typical set used by canvas painters. So while the topic of learning color theory is helpful, we just need to translate it into painting miniatures.

I am listing learning color theory as one of the things to help painters improve. By learning how colors interact and mix, you can create moods and feeling, or create focus to particular areas of the model.

Book Contents

At only 52 pages, it is easy to skim through Color Theory and get a sense of what it offers. Patti breaks the book down into five sections: the history of color, color basics, pigments & paints, communicating with color, and color in action.

History of Color

I think a better title to this section would be What is Paint/Color as the history side is rather light. But what is interesting is where she discuss the physics of color and pigments. We may have learned about it in high school physics class, but getting a refresher on how we see colors was interesting.

Color Basics

This is where Patti breaks down the color wheel, hue and saturation, color temperature, and color schemes. This could be the most helpful section as it provides the foundation of color choices and how they interact.

Color Theory Book Review with Hue

Copy of page from Color Theory

Hue and Saturation are two of the terms that painters throw around that can be frustrating if you don’t get what they mean. Instead, Patti gives good examples of how hue is what happens to a color if you mix white, black, or gray.

Saturation Examples by Patti from Color Theory

She also has three paintings showing what a saturated color scheme looks like compared to a desaturated one, and how doing a mix provides even more interest.

Picking a color scheme using the color wheel

Color Scheme from Color Theory book

The final part of this section that could be helpful to hobbyist is how the color wheel can help us pick color schemes. But instead of just talking about using complementary colors or a triad scheme, she has example paintings that show it in action and tips on using it to the best effect.

Pigments and Paints

This section may at first appear to not be helpful as the color selection for hobbyists is huge and mixing paints isn’t often required.

What I did find helpful is in creating desaturated colors as most of the paint ranges are quite vibrant. By mixing a bit of the color’s compliment it provides a ‘colorful gray’ that still provides a distinct color, but less vibrant.

This can also be done by mixing colors that ‘lean’ towards the compliment. By leaning, she means the color is towards a compliment. So an orange-red ‘leans’ towards yellow, same as a blue-green. If you mix both of this together you get a purple, but a duller version.

Communicating with Color

This is where color philosophy and mood get discussed. Historically, each color has taken on a different meaning and feeling. You can use this to emphasize individual elements on your miniature. Reds and oranges add intensity while blues and purples imply coolness and royalty.

It was also interesting to see the different styles of traditional painting and how they would relate to our hobby. There are those who paint in a way to capture realism, while I think I fall in the ‘painterly’ style – meaning brush strokes are loose, and what is usually called Blanchian could be considered Expressionist in that colors are chosen to convey mood rather than accuracy.

Personal Approaches to Color

In this final section, Patti shows some of her work and discusses how it uses the different techniques discussed in the book. It is a nice wrap-up and an excellent way to see the abstract concepts in use.

Takeaways

Overall I think Color Theory is a nice book to help hobbyists understand the concepts and start to apply them in their work. It breaks down the vague concepts like color temperature and displays what it means to put it to use.

You can pick it up for only $10 on Amazon and start improving your painting.

Do you have other painting books you have found helpful or use color theory concepts to improve your painting skills? Hit up the comments below and let me know.

Ork Blood Bowl Team WIP

Blood Bowl Ork Team WIP for Squaduary Week 1

Already making progress on my Squaduary pledge and have an update on my Blood Bowl Ork Team WIP. As mentioned in my last WIP update, I wanted to paint them with purple armor and decided that orange would be a good spot color.

Ork Blood Bowl Team WIP

At this point, I have half the team base coated and washed with brown. They look rough right now, and I hate showing this stage of painting, but as part of Squaduary, I need to show some updates right?

So while this week of Squaduary was supposed to be build week, I already had the team built up and primed. So between the head start I already had and wanting to get the Stompa done this month as well, I have been plowing ahead.

Colors:

All colors are Vallejo Game Color.

  • Dark Green
  • Khaki
  • Silver
  • Parasite Brown
  • Black
  • Hexed Lichen
  • Hot Orange

Next steps

Now that the first six are base coated I can start highlighting each color. I have the other six to do as well but need to wait for the rain to stop so I can prime them.

How to improve your hobby build skills

How to Improve Your Hobby Building Skills

In a rush of excitement, you rip open your brand new model kit. While thrown back at first by the sheer number of tiny pieces, you smash it all together with glue, slap paint everywhere you can, and plunk it on the table top. But at some point, you realize that you are unhappy with how it looks, especially compared to your buddies models.

How to improve your hobby building skills

If you are new getting into the hobby, or a long timer gamer wanting to improve the look of your army, then you understand the frustration of trying to figure out what to work on. Or comprehend all these terms thrown about by veteran hobbyists. This is why I put together this list of ways to improve your hobby skills.

I’ve created the series From Beginner to Happy to get you to the point of being happy with your hobby skills. While this won’t be an exhaustive guide to all the hobby basics, I made an overview of topics you can work on to bring your models from 3-color minimum, so something you are happy to share with others.

Note: if you want to download this guide for later reading, fill in the form and I will send you the link.  Not only does this free eBook contain the topics here, but also the articles on improving your painting and showcasing skills as well.

[convertkit form=5003522]

To get this done, I’ve broken the guide down into three sections: Building, Painting, and Showcasing. Each section will help you improve on different elements so feel free to pick and choose where you want to focus. I would suggest grabbing one topic from each section and start working on that before moving on to the next.

Improve Your Hobby Building Skills

The model is your canvas. It’s also a game piece, or perhaps, a display piece. But to improve your painted miniature, you need to improve your built miniature. This is why it is important to focus on building a better model before you can paint a better model.

So take a look through each of the suggestions, grab one you need to work on first, and focus on improving that one thing.

1. Prepare Your Mini

Making the canvas, or in this case, your mini from the start is the best way to improve the finish. What I mean by preparing your mini is simply getting each of the bits ready for paint.

Get it off the sprue

This starts with getting each part off the sprue – the plastic frame all the bits come on. While it can be tempting just to snap or twist parts off, the plastic can easily tear and ruin the piece you need.

Instead, use flush clippers like these Xuron ones pictured below and make a clean cut as close as possible to your bit.

improving your hobby building skills by using flush cutters

A flush cutter, or sprue clipper, is a tiny set of scissors with a flat edge. To cut out the bits, press the flat side against the part you want to keep as it creates a relatively smooth cut line. The remaining plastic will need to be removed with a hobby knife.

Get rid of those mold lines

Yes, cleaning mold lines are a pain. And tedious. And awful. None of us like cleaning mold lines. But if you miss them, they have a tendency to show up on the finished model in the worst way.

So take some time and clean up where the piece was attached to the sprue with an X-Acto blade and then scrape the edge along the mold line to get rid of it.

Notice, I said scrape, not cut.

Improving your hobby skills by scraping mold lines

Keep the blade perpendicular to the part and slide it along the parting line. The sharp blade will catch the raised plastic on the mold line and scrape it away.

Other hobbyists have pointed out that they like using Games Workshop’s Mouldline Remover Tool. It doesn’t have a sharp point or blade which makes it safer to use, especially around children. It uses the same principle of scraping off the extra plastic.

Fill the gap

Even on the newest kits parts don’t always join together as a perfect fit. Small gaps in armor plates or robes can be as unsightly as mold lines.

If it’s a small gap, start with some Liquid Green Stuff and paint it in. Apply a bit more than you need to fill the hole. Once the green stuff is dry, you can scrape off the extra and smooth it down. For larger gaps, use regular green stuff or Milliput and stuff into the gap. You can then smooth it down with some sculpting tools.

Wash up

If you are building a resin model, make sure you wash all the parts with soapy water. They spray the molds with a non-stick agent before adding the resin. This helps it from sticking to the mold but also prevents the paint from sticking. So a nice bath can clean it all away.

Keep it separated

You don’t always need to glue the whole model together before painting. On large or dynamic models, pieces can overlap making it hard to get your paintbrush into position.

So instead, leave the pieces separate and cover the glue joint with sticky tack. This keeps paint off of it, making for a better bond once you finish painting and glue it together.

Some hobbyists have taken this to the extreme and paint every bit separately before gluing anything together. I’m not sure how they make it fit together, but it works for them.

2. Use the Right Glue

When I first got started in building miniatures, it was scale aircraft, and I was trying to use those awful foil tubes of plastic cement. My first Warhammer miniatures were put through the horror of this glue as well. Except for my metal minis, which I couldn’t understand why they wouldn’t hold together.

Know the difference between super glue, plastic cement, and white glue

This is a simple example of the importance of using the right glue. While there are a ton of glues in the world, we focus on three in our hobby: plastic glue, super glue, and white glue.

Plastic Glue

While I switched from the tube of plastic glue to the awesome Testors Model Master, it acts just the same as many other brands of plastic glue: chemically melt the plastic. When you press two pieces together, they become physically intertwined as the plastic melts and reforms before curing solid.

This allows for some adjustment while it cures but provides a super strong bond between the pieces once dry. So you can dab a bit of glue on each shoulder, attach the arms, and move them around a bit to make sure the weapon fits correctly in the model’s hands.

Plastic glue can be used to fill small gaps in models

Plastic glue is also great for covering small gaps in plastic bits. Add a tiny amount of extra glue to the gap and let is sit for a moment. You can then smear the glue and the melted plastic around to fill the gap. Once the glue dries, scrape off any extra.

But remember, this glue only works on plastic-to-plastic joints. And only certain types of plastic. So for everything else…

Super Glue aka Cyanoacrylate

Super glue sticks to just about everything (including your fingers) which makes it a must have for hobby work. It also dries quickly so that assembly is often faster with super glue. Use it to assemble metal or resin bits or when you add a pin to hold the model together.

I’ve also noticed that not everyone likes to use plastic glue as they want to be able to snap off bits later. Instead, they use super glue to attach the model which doesn’t provide the melted adhesion.

Either way, be extra careful with super glue as it is a somewhat dangerous chemical and rather easy to get everywhere with the tin tubes it comes in.

White Glue aka Polyvinyl Acetate aka Elmer’s Glue

The final glue I will talk about is PVA, better known as white glue. Often used in school crafts, this glue is water based which makes it easy to clean up.

I reserve white glue to bases and scenery as the lower cost means it will go a lot further. I will lay down a thick layer onto the base and then dip it into a tin of sand. Once dry, I take a watered down mix of glue and apply over the sand to provide a sealant layer.

You’re Probably Using Too Much Glue

No matter which glue you are using, you are probably using more glue than you need. The extra glue will seep out of the seam and can ruin other details. One way to prevent this is to use glue applicators with fine tips (why I like the Testors Model Masters) or put the glue onto a palette and use a toothpick to apply it where you need it.

If you end with too much glue on the mini, dab the extra away with a paper towel – just be careful where you set it down, I have more than one paper towel glued to my desk.

3. Use the Right Tool

There is a saying: right tool, right job. If you use the right tool for a job, it is much easier to get it done, and done well. This remains true for our hobby. While this set of tips does include buying new equipment, not all of them are expensive, and you may not need many of them depending on what you are working on.

Flush cutters and X-Acto blades

I have mentioned the first two tools already: flush cutters and X-Acto blades. These are indispensable when it comes to building models. But you don’t need fancy brand name ones.

Bits Bashing Tools for Custom Miniatures

As I mention in my post on X-Acto blades, I buy non-brand blades and also recommend box cutters as alternatives. The key is to keep a sharp blade and once it starts to dull, switch it out – the few pennies are worth a clean, safe cut.

Jeweler’s files

Another tool that comes in super handy for large models is a set of jeweler’s files or needle files. These are usually sold in a set of different shapes that have rows of little teeth that, when you drag it along a surface, scrape off a layer.

The rectangular one is great for smoothing down large seams or squaring up joints – especially on vehicles where there are lots of flat surfaces. The other shapes can get into other angles or spaces if you need to get rid of the odd mold line.

Pin vice and drill bits

For pinning models or creating gun barrels, a hand vice and micro drill bits are needed. Just make sure the hand vice can hold the smallest bits you need.

When drilling out a barrel, find a size that is a bit smaller than you think you will want and put it into the hand vice. Using your hobby knife, mark where the center should be and press the tip into the plastic. This gives the drill bit something to grip when it gets started.

After drilling the hole, if you need it slightly bigger, insert the hobby blade and twirl it a bit to widen the hole – trying to re-drill with a bigger bit will often split the plastic.

Oh, and don’t push too hard while drilling, the tiny bits have a habit of snapping if you do.

Cutting mat

As you start to do more building, especially if you start kitbashing or scratch building models, you will want something to protect your desk from knife marks and drill bits – especially if you work on the kitchen table!

A cutting mat has a hard plastic bottom and a rubbery top. The top is made out of a self-healing material, meaning that as you cut into it, it will press back together.

Another benefit of using a cutting mat is that you can cut against it rather into your thumb. By knowing your work surface is safe from errant blade attacks, feel free to take advantage of that and cut towards it when separating parts.

You can grab this one from Amazon for only $7.

4. Kit Bashing and Conversions

Moving out of the nuts and bolts of building, I want to suggest you add kitbashing to your set of skills. Yes, GW and other companies are putting out amazing kits. But when you want a character to look a certain way or hold certain weapons, you need to learn to kit bashing (or bits bash, conversion, or scratch build).

Just the freeing feeling of taking bits from one kit and putting it to work on another can release new levels of creativity and enjoyment into your hobby. This can translate into better-painted miniatures as well since you have become more invested in the creation of this new character.

Kit Bashing

At the simplest level, and where I would suggest you start, kit bashing is taking two kits and mixing up the bits. Taking a helmet from the command squad and putting it on your devastator sergeant is a great start. You have now made something new and now yours.

Traitor Guard Veteran Squad

Some hobbyists really get into the conversion aspect and create characters, teams, or whole armies based off elaborate kit bashing. You can go as far as you want to get the look you desire or limit it to the simplest of swaps. But I do recommend that you give it a go as it starts to open up all sorts of options.

Conversion

The next step up from simple bit swaps is converting the bits used on the model. This may include using bits from different kits such as using fantasy bits on 40k models, but it could also mean cutting the hand off, turning it slightly, and re-glueing it back into place.

Joe B Mentor Legion Dreadnought

I go deeper into this style of customization in another post using a dreadnought as an example. While some of these changes require some green stuff, it isn’t much more than filling gaps as I don’t yet consider myself a sculptor. Instead, I focus on cutting off army badges from other kits, reposing the model, and adding parts of bits to build up something new.

Sculpting

On the end of the conversion spectrum, is those who sculpt up brand new parts or even whole miniatures. I’m not going to touch how to do that here, but it is something that is very possible for you to get to by starting with small additions to a model such as new army badges or battle damage.

To get more tips on sculpting, check out the article by Mr. Pink on how to improve your sculpting skills. In this miniseries, he talks about putties and tools and how to get the most out of them. He then goes onto giving a set of helpful advice for anybody looking to do work with green stuff.

Scratch building

For vehicles, the term scratch building is used to talk about using plastic sheets and rods. Companies like Plastruct sell all sorts of thicknesses of plastic sheets, including textures, as well as rods, tubes, I-beams, and other shaped sticks of plastic. By cutting them apart and gluing them back together, you can create all sorts of neat stuff. Just take a look at Klaus’ work for what is possible.

5. Composition

This ties into conversion a bit, but even if you build the stock kit, you need to think about how the figure is posed. Composition is the artist term for how well is it balanced, how does it flow, does it give a sense of motion.

Consider where the model is looking or what it is doing in its frozen moment of time. Does the weapons, arms, and legs all create a scene that makes sense? Try getting up and getting into the pose yourself. Where do your toes point? Which way does your hand rotate? Try to bring that back into the model to get more natural poses.

Improving your hobby building skills by reposing miniatures

You can give the miniature a lot of character just by how it is posed. Stoic leaders can be straight legged and looking over the battlefield. Acrobatic warriors, on the other hand, would look silly in this pose.

Test different looks

So grab some sticky tack and press bits into place before gluing it together. See if the pose is what you want to achieve. If not, then find new bits or think about what would need to change to make it look like you want.

WIP INQ28 Techno-Barbarian Conversion

If sticky tack isn’t enough, use a tiny amount of super glue to one edge of the joint. It should be able to be broken off once you are happy with all the adjustments and re-glue it with a stronger bond.

Modify the bits

If you need to adjust the bits to get the look you want, start by cutting at the joints. You might be able to just cut the outside joint, bend the plastic, and fill in the gap. This works well for minor adjustments, but bigger bends or rotating bits will require you to cut off the piece and reconnect with a pin. See the conversion article above for some tips on that.

Wrap Up

I know this was an epic post on how to improve your hobby building skills, with lots to do. It may be a bit overwhelming for beginners and perhaps common sense to vets. But to each I say:

For the beginner: pick a single topic from above and work on improving it for your next build. Focusing on improving one thing at a time not only helps you achieve results but prevents burn out from the frustration of it working out.

For the vet: it is always a good idea to review how you do the ‘basics.’ The way I look at them may be a bit different than how you learned them and can provide a new perspective on how you could improve or do something different. None of us are done learning, so if you aren’t happy with how your models look, think about why that is and practice until you improve.

But don’t look at this list as the only way to do your hobby. It is more of a guideline to build upon. Make it yours and improve where you need.

If you do have some suggestions on things I missed that you think hobbyists should work on, leave them in the comments below. Otherwise, let me know some of the things you are working to improve.

You can find the other parts of this series here: