Latest Posts

Skink Chief

Skink Heroes

Skink Chief

Skink heroes seem to be often looked in favor or the mightier Suarus Scar-Vets or used only as Slann sight-glasses.

Used correct Skink Chiefs can be perfect wizard hunters, war-machine destroyers or  a great boost for hunting Skinks. With their movement of 6 they can get where they are needed quickly and with 3 attacks at I6 and S4 they will often strike the first blows against their intended target. Add in the Bane head to double wounds on a specific character and the Burning Blade to punch through armor and even the little skink can take much larger foes down.

Skink Chief

In 7th edition, Skink Priests were often used as an extension of the Slann’s eyes and perhaps dropping a thunderbolt here and there. The can only pick from Lore of the Heavens which had some great spells but also some not-so-great spells. With the revamp of spells and magic system, the Skink priest has the potential of laying some smack down with chain lightning or the comet or really messing with the enemies plans by making a unit re-roll all their 6’s.

Skink Priest

Those of you who have been around for a while may recognize these models as the old metal command. To me the banner bearer is a perfect representation of a prophet of the lizard gods. The little drummer… er lizard… is still laying in the bitz box awaiting a painted life.

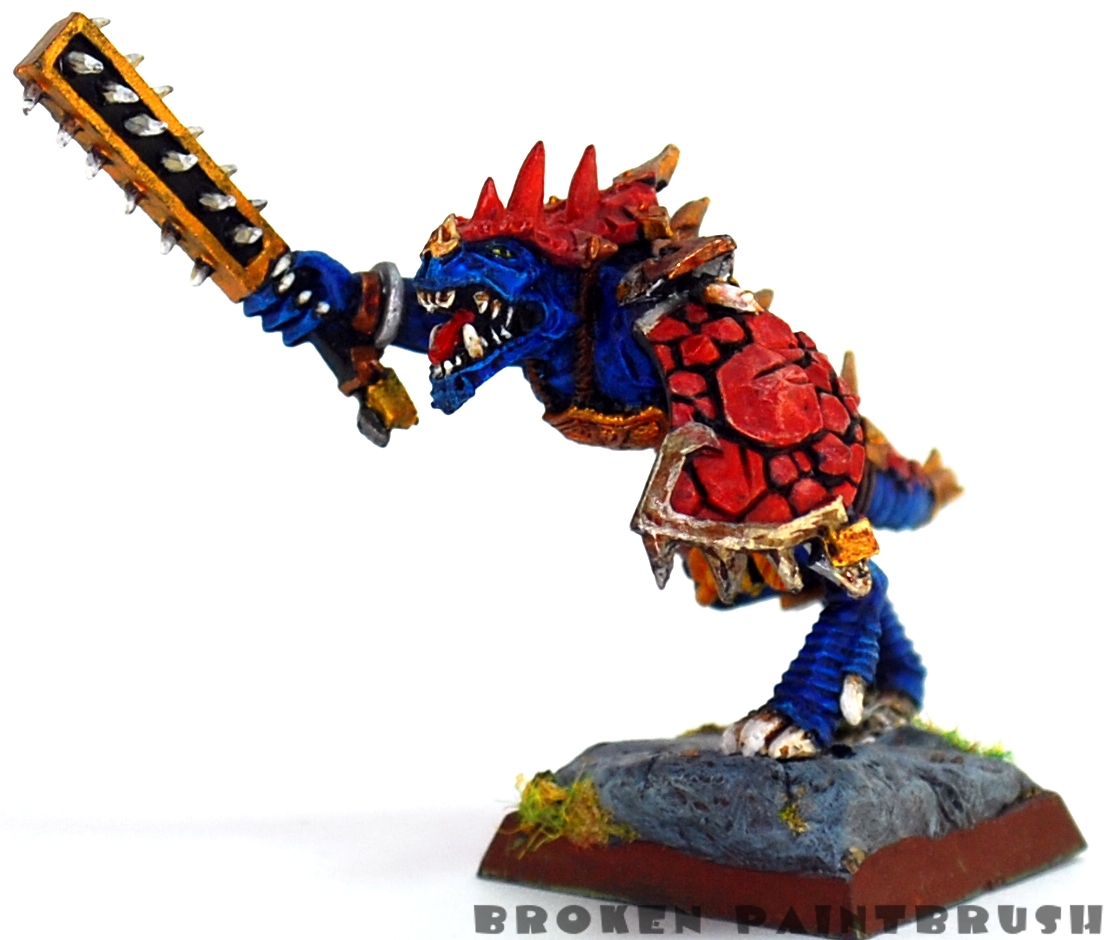
Lizardmen Scar-Veteran

Lizardmen Scar-Veteran

Lizardmen Scar-Veteran

Next up in my Lizardmen showcase is the Scar-Veteran.

While not the most powerful hero in the game, he is a solid character at only 85 points base.With S/T of 5 most troops won’t wound him on less than a 5 while he’ll wound on 2’s.

My standard upgrades include the Sword of the Hornet, Enchanted shield and light armor. This gives him a 2+ save and always strikes first.

Tactics are pretty straight forward: place him in a unit of Saurus and charge the toughest unit the enemy has. Between his 4 attacks and the 13 S4 attacks of the unit, entire ranks of enemy are knocked down and eaten.

Scar-Veteran, right side Scar-Veteran, left side

The scenic base was more of a necessity as this model is very front heavy and would often fall forward when I moved the unit or placed on any sort of downward slope. I built up the rock mound with flash from the metal kits to create a bit more weight to the base then covered it with green stuff and contoured it to create a jutting rock face.

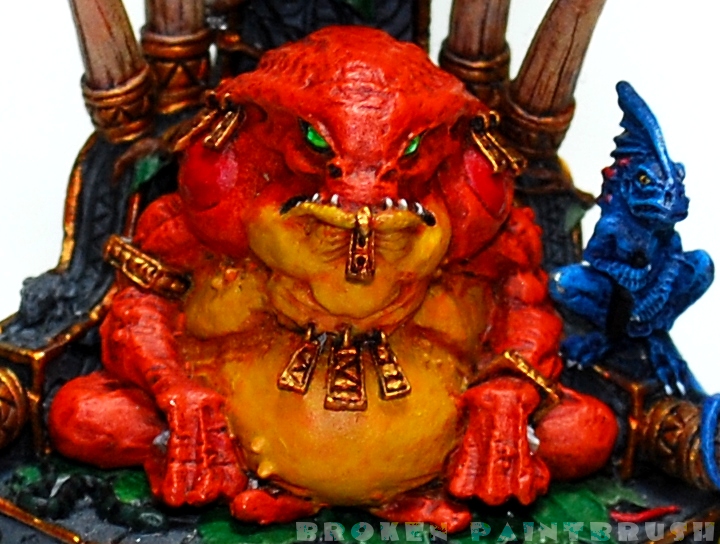
Lizardmen Slann Mage Priest

Slann Mage-Priest

Lizardmen Slann Mage Priest

To introduce my Lizardmen army I could think of no better model that the Slann in charge!

My starting steps in to the Warhammer hobby was the 5th edition Fantasy box with Bretonia and Lizardmen (an odd combination to be sure!). While I no longer have the Bretonian army, the old lizards are still part of my favorite fantasy army. I mean who wouldn’t want to take an army that has angry toads as the lord and dinosaurs as their pawns?

Before 5th edition 40k sucked me away from fantasy, the Lizardman army was my rock solid force. Saurus are dependable, between their cold-blooded leadership tests, toughness 4, and 4+ armor saves they could take a beating and return it in kind. And the skinks! I have an entire army of them and man can they do some damage. With the changes to skirmishers they may have a tougher time, but that is yet to be seen.

Any way, I’ve lost myself on a tangent… the Slann Mage Priest! I do agree that the latest army book nerf’d the Slann a bit though I think it also added a great deal of versatility. In the previous army book you needed to “upgrade” the Slann to older generations to increase his power or get certain abilities, now you get to pick an “upgrade” for free and can mix and match up to 3 more. One that I often used in the past, and will become even more helpful now, is Becalming Cogitation where the Slann points out an enemy wizard within 24″ and any power dice that roll 6’s get thrown out!

My army is lacking any Temple Guard to protect the Slann, and while they are on the wishlist I will either use normal Suarus to protect the lord or give him another great discipline, Higher Stat of Consciousness that ignores all non-magical attacks. I can then float him around the back of the battle field firing off spells and keeping the skinks in line.

Slann Mage Priest

I really wanted the Slann to stand out from the rest of the lizards so I painted him with the warm shades of orange and yellow. After taking these pictures I noticed that there is still work that needs to be done and parts that need rework. There are at least two small lizards that never got painted… anybody see them? 🙂

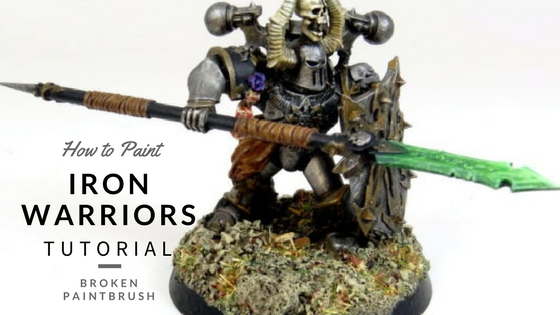
How to Paint Iron Warriors

How to Paint Iron Warriors a Painting Tutorial and Guide

The Iron Warriors were my first 40k army. I picked them in part because they had a simple painting guide int he 3rd edition Codex. Both my painting skills, as well as the hobby, have changed since then. But here is my updated guide to how to paint Iron Warriors.

How to Paint Iron Warriors

I’ve broken down how I paint Iron Warriors in six detailed sections on the specific parts of the model.

How to Paint Iron Warriors Part 1: The Metals

Following on my step-by-step paint guides for my Sorcerer and Fabius Bile I figured it was time to do one for the bread and butter of my army: the Iron Warrior. I’ve broken this down into multiple parts to give more detail in each step. So first up is the metals. This is the prominent feature of any Iron Warrior: iron/silver armor and gold trim. It is also the messiest stage which is why I always do it first.

Step 1: Primer

How I paint Iron Warriors, Stage 1: Metal, Step 1: Primer

I always prime my Iron Warriors black. If anyone has tried to paint metallic over a white base coat, you know why.

Step 2: Silver

How I paint Iron Warriors, Stage 1: Metal, Step 2: Mithril Silver

This is by far the messiest stage. Depending on how fast I’m trying to paint the model I sometimes water down Mithril Silver and coat the whole model silver in one go. For most of the models though I try and only paint the areas I know will be silver as extra paint can quickly cover up details.

I paint this layer smooth using Mithril Silver. I use Mithril Silver since I lather two washes onto the model and I don’t want it to look too dull.

Step 3: Gold

How I paint Iron Warriors, Stage 1: Metal, Step 3: Shining Gold

For my gold areas, I use a mix of Shining Gold and Iyanden Darksun. I add the Iyanden because I do get a bit lazy, pure Shining Gold doesn’t cover well, especially when I get spots of silver on areas that should be gold. To do it right I should go back and repaint the gold areas black but I found adding a bit of the foundation paint doesn’t change the color much but significantly improves the gold’s ability to cover.

It doesn’t come through much in the picture, but at this point, the model looks like a 5th grader painted it: nice and shiny with no depth.

Step 4: Black Wash

How I paint Iron Warriors, Stage 1: Metal, Step 4: Black Wash

This is where the magic starts. Ever since the wash sets came out I’ve bought more washes than paints because I use so much of them. This is why in part I stopped buying Badaab Black wash and made my own using Chaos Black, lots of water, and a drop of dish soap.

I take the big wash brush and liberally apply the black wash all over the model. I really slosh it on there at first so that it gets into the deeper crevices. Once the model is dripping black I clean off the brush and begin to “pull” the extra wash off the flat areas of the model.

I forgot to take a picture between applying the mud wash and the final dry brush, so this is a two-part section.

Step 5: Mud Wash

How I paint Iron Warriors, Stage 1: Metal, Step 5: Devlan Mud Wash

Once the black wash thoroughly dries (2+ hours) I’ll then apply a second wash using Devlan Mud. This wash is used more for its coloring than adding depth. It gives a more tarnished look to the metals that is perfect for warriors fighting for centuries in the Warp.

When I apply this wash I don’t put on as much as the black, but spread the color around the model to get good coverage. Large flat areas I purposely streak the wash along the lines of the model, such as the arm guard on this model would be streaked down its length.

Step 6: Dry Brush

Once the mud wash is completely dried (another 2+ hours) I then Mithril Silver and very lightly dry brush the full model. This helps bring back some of the shine to the hard edges and tarnishes the gold a bit more.

I often skip this step for my core marines but for the “eye-catching” units I spend the little bit of extra time to do this step.

At this point, the models could be considered “table top ready” and recognizably Iron Warriors. The following stages will add the details to the model that bring it from table-ready to display-ready.

How to Paint Iron Warriors Part 2: The Leather

After I have finished the metals, all the details are done in no particular order. In this case, I chose to do the leather parts of the model first.

Step 1: Vermin Brown

How I paint Iron Warriors, Part 2: Leather, Step 1: Vermin Brown

All the areas that will be leather I painted with Vermin Brown. It is a nice dark red/brown that covers the metallic paint well.

Step 2: Snakebite Leather

How I paint Iron Warriors, Part 2: Leather, Step 2: Snakebite Leather

Snakebite Leather is then used to highlight the leather areas. This is a heavy highlight, meaning that only the deepest recesses are left, Vermin Brown.

Step 3: Snakebite Leather and Bleached Bone

How I paint Iron Warriors, Part 2: Leather, Step 3: Snakebite Leather and Bleached Bone

I then start to mix Bleached Bone into the Snakebite Leather for the highlights. This is a progressive stage where I start 2:1 SL to BB, then 1:1 and finally 1:2 SL to BB.

Step 4: Bleached Bone

How I paint Iron Warriors, Part 2: Leather, Step 4: Bleached Bone

I then spot highlight with pure Bleached Bone. This is focused on the top most areas and adds a bit of shine to the leather.

Step 5: Ogryn Flesh Wash

How I paint Iron Warriors, Part 2: Leather, Step 5: Ogryn Flesh Wash

Finally, I use Ogryn Flesh to tie the highlights together and tone back the pure Bleached Bone. Devlan Mud could work for this wash as well, but I wanted a slightly redder looking leather.

Now that the leather is done I move on to the next stage: the bone.

How to Paint Iron Warriors Part 3: The Bone

The bone areas are done next.  For quick and dirty bone I have seen, and sometimes use, the Dehneb Stone, Devlan Mud approach but I find it too flat and dull. Instead, I use a few more layers, and Sepia wash instead.

Step 1: Khemri Brown

How I paint Iron Warriors, Part 3: Bone, Step 1: Khemri Brown

I start with a base coat of Khemri Brown for all the bone areas. This is a great Foundation Paint that covers all the darker areas well and provides a nice brown to start to bone from. I do avoid deep cracks or the eye sockets which should still be black from the primer.

Step 2: Khemri Brown and Bleached Bone

How I paint Iron Warriors, Part 3: Bone, Step 2: Khemri Brown and Bleached Bone

Bleached Bone is then added to the Khemri Brown in incremental amounts. I start with a 1:1 mixture of KB and BB since the foundation paints contain so much pigment. I work this up to about 1:3 KB to BB.

For the horns, I do less and less highlighting near the base to create a darker look. Near the tip, I completely cover the ridges and grooves until the final highlighting to create a bright area.

The skulls are often a mixture of highlighting the ridges of the face and creating false ridges on the top and side of the skull to create additional depth to the otherwise flat plane.

Step 3: Bleached Bone

How I paint Iron Warriors, Part 3: Bone, Step 3: Bleached Bone

Pure Bleached Bone is then used to continue the highlighting.

Step 4: Bleached Bone and Skull White

How I paint Iron Warriors, Part 3: Bone, Step 4: Bleached Bone and Skull White

Skull White is then added to the Bleached Bone to create highlights near the tip of the horns and edge of the ridges on the skull.

Step 5: Skull White

How I paint Iron Warriors, Part 3: Bone, Step 5: Skull White

Pure Skull White is then used to do spot highlighting.

Step 6: Gryphonne Sepia Wash

How I paint Iron Warriors, Part 3: Bone, Step 6: Gryphonne Sepia Wash

Finally I wash all the bone areas with Gryphonne Sepia Wash. This helps re-establish the ridges in the horns and creates a more aged look. The wash is focused on the base of the horns and cracks in the skull. Extra wash is pulled off the tips of the horn and flat areas of the skull where I want to keep some of the brightness.

This can be a time-consuming step of my Iron Warriors, but one that I think is important to keep them from looking too bland and dark.

So now that the bone areas are done, it is time to move onto the next detail: the Daemon Weapons.

How to Paint Iron Warriors Part 4: The Daemon Blade

I am now on Part 4 of how I paint my Iron Warriors. This stage is how I painted my Daemon Blades for my chosen, but the same still can be used for power weapons using reds or blues instead.

Step 1: Orkhide Shade

How I paint Iron Warriors, Stage 4: Daemon Sword, Step 1: Orkhide Shade

Orkhide Shade is an excellent base coat for any green. It is dark and covers quickly.

Step 2: Goblin Green

How I paint Iron Warriors, Stage 4: Daemon Sword, Step 2: Goblin Green

Goblin Green is then painted on as the first highlight. The Orkshade Green is left in the deep recesses and near the handle of the blade.

Step 3: Scorpion Green

How I paint Iron Warriors, Stage 4: Daemon Sword, Step 3: Scorpion Green

This is where the “power lines” start to show. Scorpion green is used to highlight the edges, tip, and contours of the blade. It is then brought down the blade’s length in an irregular pattern, with more focus near the tip.

Step 4: Scorpion Green and Skull White

How I paint Iron Warriors, Stage 4: Daemon Sword, Step 4: Skull White and Scorpion Green

Skull White is added to the Scorpion Green to add even more brightness to the blade. This is primarily near the tip and highest edges of the details.  The lines of power are highlighted at this stage.

Step 5: Skull White

How I paint Iron Warriors, Stage 4: Daemon Sword, Step 5: Skull White

Skull White is then used to do spot highlighting near the tip and certain parts of the power fields to give them more accent.

Step 6: Thraka Green Wash

How I paint Iron Warriors, Stage 4: Daemon Sword, Step 6: Thraka Green Wash

Finally, I wash all the whole sword with Thraka Green Wash. This tones down the white areas and pulls all the colors together. The effect is subtle, but helpful since I don’t do a lot of blending.

I use this same process for most of my painting: dark base coat, mid-highlight, bright highlight, wash. It won’t win Golden Demons but it gets the job done quickly.

How to Paint Iron Warriors Part 5: The Daemon Face

Part 5 of how I paint my Iron Warriors deals with the daemon faces that often adorn the armor or weapons of the warriors of the Warp. Depending on the model I will paint the face either red or purple with the opposite color tongue (if they even show it). Such is the case for the shield on this chosen model.

The bone was done in Part 3 above.

Step 1: Mechrite Red

How I paint Iron Warriors, Stage 5: Daemon Face, Step 1: Mechrite Red

Mechrite Red is used as the base. The color is very similar to Scab Red but covers easier (finding a trend here for the base coat?). I only avoid the deepest pockets with this color.

Step 2: Blood Red

How I paint Iron Warriors, Stage 5: Daemon Face, Step 2: Blood Red

Blood Red is painted on next. For the reds I don’t spend time on blending, the colors lend themselves well to layering. This is laying down the main color so I only avoid the lower levels to stay as Mechrite, everything else gets bloody. On some spots I did do a second layer of Blood Red to make sure it was smooth and bright.

Step 3: Blazing Orange

How I paint Iron Warriors, Stage 5: Daemon Face, Step 3: Blazing Orange

To highlight red, you don’t add white; it just makes it pink. Instead move to orange then yellow. So for this step, I move to Blazing Orange to highlight. This layer brings out the ridges and protrusions.

Step 4: Golden Yellow

How I paint Iron Warriors, Stage 5: Daemon Face, Step 4: Golden Yellow

Yellow acts much like a white on other colors for the highlight. I use Golden Yellow as the spot highlighting for the red, pulling out the sharpest points and topmost ridges.

Step 5: Liche Purple

How I paint Iron Warriors, Stage 5: Daemon Face, Step 5: Liche Purple

Moving on to the tongue I use Liche Purple as the base color. This gives a good contrast to the red and gives the face an other-worldly look.

Step 6: Shadow Grey

How I paint Iron Warriors, Stage 5: Daemon Face, Step 6: Shadow Grey

I don’t go straight to Shadow Grey but rather use 1:2 LP to SG to create the highlight. For the tongue I only go with the one set of highlights, but when painting the faces purple I continue on with Space Wolf Grey as the spot highlight.

Step 7: Leviathan Purple Wash

How I paint Iron Warriors, Stage 5: Daemon Face, Step 7: Leviathan Purple Wash

The whole face (other than the bone/teeth)  is then washed with Leviathan Purple to pull it together. It cools down the red face and smooths the simple layering of the tongue.

The red to yellow progression is the same I use on my Traitor Guard tanks but using a different technique of application.

How to Paint Iron Warriors Part 6: The Base

Now the final touches are done on the model. I’ll go back and do any touch-ups at this point including any “lining in” with Chaos Black.

This is the final part of how I paint my Iron Warriors. I always wait to do the base for last for two reasons:

  1. I can be a messy painter and will often “splash” the base while working on other parts
  2. It helps signify that the model is now “done”

Step 1: Graveyard Earth

How I paint Iron Warriors, Stage 6: The Base, Step 1: Graveyard Earth

The usually takes at least two coats. The first I’ll mix a bit of Foundation paint in and water it down to almost a wash. I also add a bit of white glue. This first mix gets between the gaps in the bigger rocks and helps them all stick together a bit more.

I will then go back over the base with pure Graveyard Earth once the first layer is done. This gives a nice brown base to work from.

Step 2: Bleached Bone

How I paint Iron Warriors, Stage 6: The Base, Step 2: Bleached Bone

Bleached Bone is then used to highlight the base. I sometimes do an intermediate layer of Graveyard Earth and Bleached bone before moving to the pure Bleached Bone.

Step 3: Glue

How I paint Iron Warriors, Stage 6: The Base, Step 3: Glue

I then take an old paint brush and “paint” on glue where I want the flock to go. This should be a here-and-there application, and I often look for places on the base where some of the rocks have come off, or blobs of paint make it look bad, these will get covered up with grass.

Step 4: Pile of Flock

How I paint Iron Warriors, Stage 6: The Base, Step 4: Pile of Flock

I take a huge pile of my flock medium and dump it on the base and allow it to dry for a bit. I’ve created this mix out of the Burnt Grass from GW, used tea, and ballast from a model railroad shop.

Step 5: Flocked

How I paint Iron Warriors, Stage 6: The Base, Step 5: Flocked

After letting the glue dry for a short bit, I’ll knock the extra flock off into the container and gently blow on the base to help the grass stand up.

Step 6: Chaos Black

How I paint Iron Warriors, Stage 6: The Base, Step 6: Chaos Black

Finally, I paint the rim of the base Chaos Black.

Once the base is done, this model is now a “finished” model in my collection and will move on to be matte varnished to protect the paint job.

How to Paint Iron Warriors Wrapup

I hope this multi-part guide has been of help for any would-be Warsmiths or any that could pull out tips for their own army. Let me know if there are any of my other models that you want to see a step-by-step for. It may give me an excuse for buying some more models!

You can see the full Iron Warriors collection on its army page or more pictures of the Chosen in their post.
Book Review: Iron Warrior by Graham McNeill

Being a bit of a fan of the Iron Warriors I was super excited when I heard about the new novella from Black Library titled “Iron Warrior“. This is another Graham McNeill store featuring Honsou and the Ultramarines continuing after the end of “Dead Sky, Black Sun.”

Iron Warriors Book Review: Short Story and Disappointing Pictures

Iron Warriors Book Review, Novella by Black Library

The biggest selling point that got me to shell out the extra for this little book was the description that the book is “filled with many pieces of artwork, both illustrations and full-color portraits” which made me visualize an Index Astartes type of production.

This ended up being my biggest disappointment of the book, the quality of the illustrations were more of the ’80 GW style of cartoony creations, but with hazard stripes to make them authentic Iron Warriors.

Also, half the illustrations were of Ultramarines or imperial warriors, which is great to fill in the story and space but was disappointing when I was looking forward to a book featuring, I don’t know, maybe the Iron Warriors?

The colored artwork is great looking and features an image of Honsou and most of his current lackeys. The daemon prince picture has inspired me to create something similar.

The story itself is good overall, though a bit rushed to get everything to fit into the small size. If Graham had been able to extend it, it would have been one of his better books. A good mix between the siege battles of “Storm of Iron” and the super characters of “Dead Sky, Black Sun.”

Overall review

Don’t buy the collector’s edition unless you are a big fan of signed books. Black Library has re-released this as an eBook, but still over priced. I give the story 3/5 stars, the b/w illustrations 2/5 and the color pictures in the middle 4/5, cost 1/5.

Chaos Sorcerer Done

Another step to finishing the Golden Throne challenge, my Chaos Sorcerer is not finished. I’m not completely happy with how he turned out but for now he is done, perhaps I’ll come back to him and touch him up.

Chaos Space Marine Sorcerer

Tzeentch has always been my favorite of the Chaos powers so naturally I did this sorcerer in the colors of the master of change.  The challenge is to have him still fit in with the rest of my army. I’m not sure how well this comes off in the end though.

As with Fabius, I took step-by-step pictures:

Chaos Sorcerer - Stage1

Stage1: White robe: Graveyard Earth -> Codex Grey -> Skull White

I wasn’t sure what colors I was going to paint where so I “blocked” out the main colors to get an idea of how it would fit together.

Sorcerer - Stage 2

Stage 2: Mordian Blue, Shinning Gold, Mithril Silver, Hormaguant Purple

Sorcerer - Stage 3

Stage 3: Mordian Blue -> Ice Blue -> Space Wolves Grey, armour washed with purple

Chaos Sorcerer - Stage 4

Stage 4: Metallic washes: Devlan Mud then black

Chaos Sorcerer - Stage 5

Stage 5: Purple: Hormagaunt Purple -> Liche Purple -> Ice Blue, Red: Mechrite Red -> Blood Red -> Blazing Orange -> Golden Yellow

Chaos Sorcerer - Stage 6

Stage 6: Bone: Khemri Brown -> Bleached Bone -> Skull White

Chaos Space Marine Sorcerer

Final Stage: Base: Graveyard Earth -> Bleached Bone

Next up is 3 squads of bikers for my fast attack. I’m hoping to do this much quicker than the models to date, the Golden Throne Challenge is half over and I have 2/3s of the models left to paint.

Fabius Bile

Another classic model that I’ve had since third edition, Fabius Bile used to be a potentially amazing (or horrible) character – all his stats were D6 modified!

One of my goals for this Golden Throne challenge (other than actually paint all the force org slots) is to try some different painting techniques.  For my terminators and obliterators I focused on the faces and tusks. For Fabius I wanted to try white power armor and even more practice on his face and fleshy robe. I know he is painted with a dark purple armor in the codex but I figured that since Fabius used to be the chaplain of the Emperor’s Children the traditional white armor would be fitting as well. Other than the armor and darker robe I tried to follow how the original GW Fabius looks.

For both my own records and since I have been asked before how I paint different aspects of my army I also kept notes and took stage-by-stage pictures of Fabius.

Fabius Bile - Stage 1

Stage 1: white power armor: Graveyard earth -> Codex Gray -> skull white

I added a ‘handle’ by glueing the model to a large washer and taping a magnet to an old paint bolttle

Fabius Bile - Stage Two

Stage 2: Skin Cloak: Dark Flesh -> Vomit Brown -> Bleached Bone, Lev. Purple Wash. Face: Vomit Brown -> Bleached Bone, Ogren Fleash and Lev. Purple washes

Fabius Bile - Stage Three

Stage 3: Leather: Vermin Brown -> Snakebite Leather -> Bleached Bone

Fabius Bile - Stage Four

Stage 4: Metals: Mithril Silver and Shining Gold. Both washed with Develan Mud then Badab Black

Fabius Bile - Stage 5

Stage 5: Hair: Tausept Ochre -> Bleached Bone -> Skull White, Red Vials: Scab Red -> Blood Red -> Blazing Orange -> Sunburst Yellow, Green Vials: Orkshade Green -> Goblin Green -> Scorpion Green -> Sunburst Yellow

Fabius Bile Stage 5 Back

Stage 5 From the Back

Fabius Bile Final Stage

Final Stage: Blood: Dark Flesh -> Red Gore, Base: Graveyard Earth -> Bleached Bone

Next up is a Sorcerer to finish my HQ slots and I hope to be able to post a similar step-by-step for him.  Let me know what you guys think of how I did the steps and photos.

Obliterators

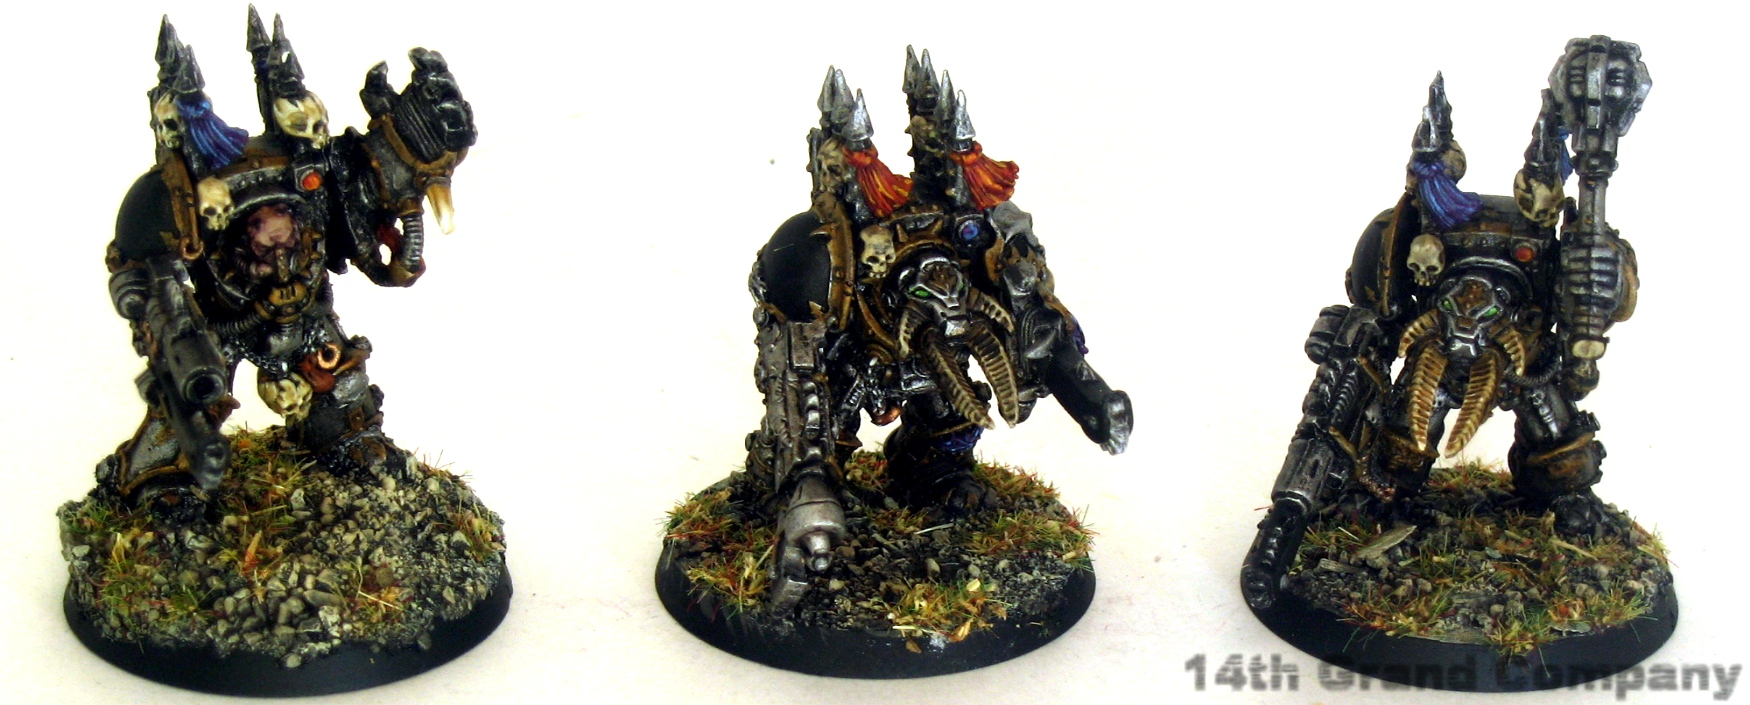
I finished my Obliterators as well, which fills my heavy support slots for the Golden Throne painting challenge. Some of you old time players may recognize these classic sculpts by Dave Andrews, for those who didn’t play 3rd edition CSM behold the glory of old school Chaos:

That’s right, these guys are so awesome they have guns out of their eyes, mouth and chest! They are smaller than the current models (they used to be on the smaller bases) but how could I pass up repainting these guys and putting them on the battlefield?

One thing I did do with both of these and my terminators I just finished is a slightly different base colors. I had been doing grays for gravel for city besieging but it seemed to make the whole model more dull and blur with the silver. Instead I tried a more organic look with browner gravel and grass.

I used graveyard earth for the base and highlighted with bleached bone added to it.  The grass is a mixture of GW’s scorched grass and used tea (I cut open the pouches and let them dry out).  It may not be as fluffy as the city rubble look but I think it helps the overall presentation of the model. What do you guys think?

More IW Terminators Finished – Golden Throne Painting and ToEMP Final

Well I was happy to continue plodding along my with my Traitor Guard army (I have a handful of guys to add and half a dozen tanks to paint) but when I happened to stop by my local GW I was told about the Golden Throne painting challenge. Basically you get 6 weeks to fully paint a full force org chart. Although I do have plenty of guard to paint the was no way I could fill up a force org without buying a great deal of new guys. Instead I pulled out my old, metal Iron Warriors (the ones I painted many years back). I had already dunked a handful of them and after adding in the ones I was planning on adding to the green tank I am short only one bike of a full chart! It wouldn’t be a very competitive list (not sure the survivability of 3 man terminators and 5 man troop squads), but it fits the bill.

The first selection filled, my Elites with three 3 man squads.

Squad 1 is armed with three combi-weapons for maximum flexibility. These are all the old metal terminators but still look very nice next to the new plastic ones. I think the longest part to paint were all the skulls and tusks, but I think they ended up looking ok.

Squad 2 has the first Reaper Autocannon (which is actually the plastic one) and another combi-weapon and two chain fists for ripping tanks open.

And squad three is a copy of squad two (but with the metal Reaper).  The ‘power fist’ on the right is one of the dreadnought close combat weapons I had added to the original guy and kept it on as a token of my previous work.

This project also completes the Final ToEMPs. Fallen73rd has decided that the time for ending the project is over and I fully understand, I know I have been neglectful to the group with updates and support so I makes sense to end it and start anew.

ToEMP points:

  • 1 pnt per foot troop: 9 pnts
  • 1 pnt for details: 9 pnts
  • Total for challenge 11: 18 points

Thanks again to Fallen73rd for starting the ToEMP and getting us all motivated to get things done. I would highly recommend keeping an eye out for his second ToEMP challenge and join in!

Next up are some old school obliterators that fill the heavy support slots followed by my HQ choices, it should be a action packed couple of weeks if I want to get everything done by March 16th!

Army Finished and Tourny Results

Perhaps the title is a bit misleading, are any of our little plastic armies ever really finished? Perhaps not, but I completed the 2,000 point army I brought to the Seattle GT  including a display board for it.

Two models that were last to be finished also completed (though very late) ToEMP #10: officer of the fleet and the company command’s chimera.

The officer of the fleet is a real help against reserved based armies such as drop pod marines. During the tournament he wasn’t a game changer as none of my opponents relied on reserves, but then again maybe they just changed their tactics in response to him?

The Chimera was used to protect my command squad with the invaluable Commander Creed. This tank was destroyed in nearly every game in the tournament but Creed was lost in only 2 of them, so I think all in all it was well worth its cost.

As for my results? I achieved my goal for my first ever GT: win 2 games. In fact I even tied a third while grabbing the secondary objective. The two I lost were both hard losses. The first was against Nidzilla and only a sole sentinel remained at turn 6. The second was the last game against a fully mechanized guard army which would have been a great deal closer if luck had been better with me.  In the end I placed 47th out of 80 some great 40k players (and cheating one who won but was later disqualified!). After spending the last few weeks getting over the hard losses and the less than I hoped painting score, I’ve started to reorganize my army composition and think hard about how I want to play this army. I may move to a more mechanized army with squads of veterans rather than the platoons, but I still want to stick to the theme I’ve started so may look at replacing the tanks altogether and build a completely foot based army. We shall see what the future holds…

A Year in Review

After reading through December’s White Dwarf article about GW’s year in review I was inspired to look back on what I had accomplished this year.

January

nestryx1

February

  • Must have slept through this month!

March

The Moirae Basilisk Tank Company of the 14th Grand Company

April

Iron Warrior Defiler (Front View)

May

Iron Warrior Troop Squad Three

June

Platoon Command Squad

July

Iron Warriors Warsmith on Juggernaut

August

Traitor Guard General Leading His Horde

September

Two traitor guard scout sentinels armed with missile launchers

October

Shas'O - Front

November

Banewolf - peak

  • I finish my side track with the Tau with another battle suite
  • Two Banewolves join the Traitor legions
  • Attend Tanksgiving at the local GW with 800 tanks, creatures and super heavies (26 from the 14th alone!)

December

Leman Russ Demolisher Front

Another Tank Swells the Ranks – ToEMP #8 Done

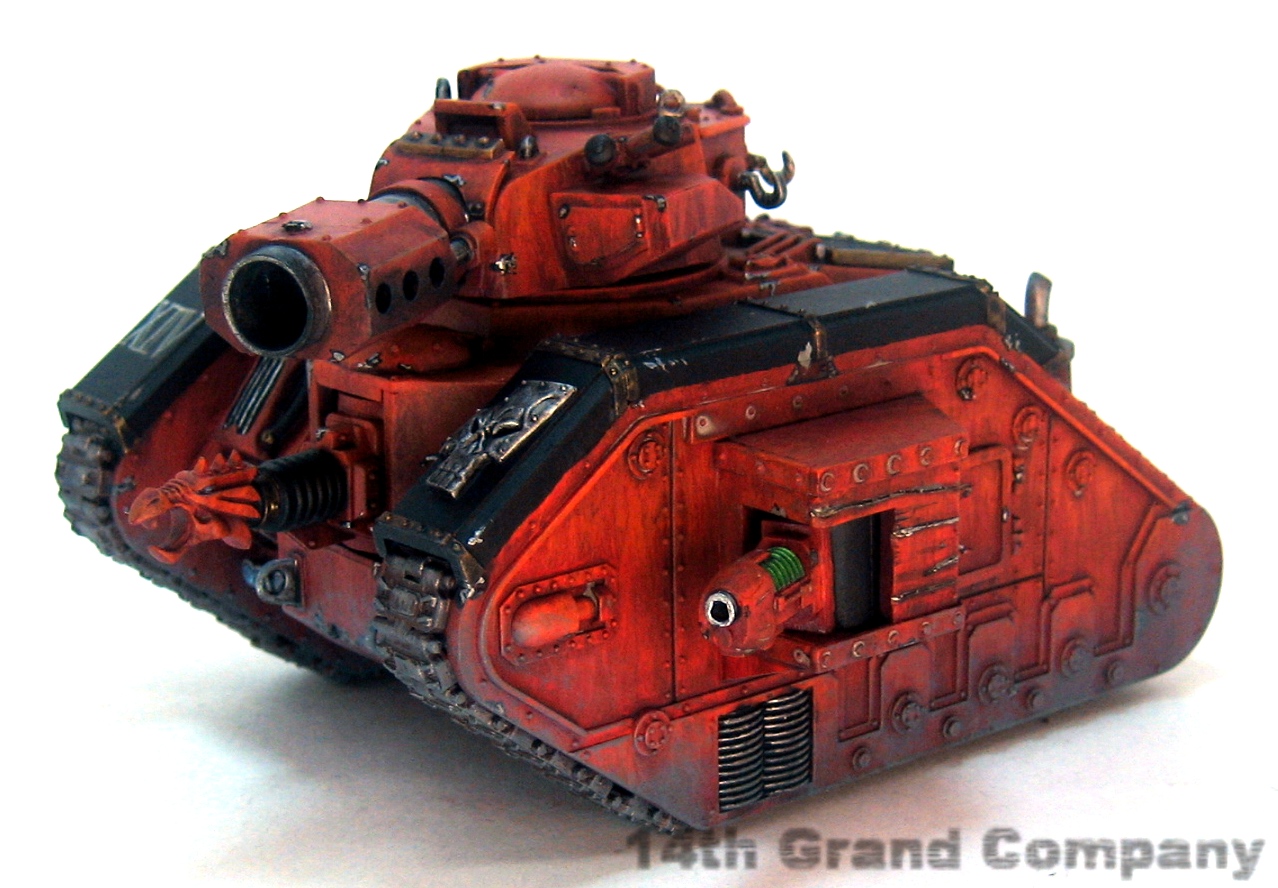
I have just finished another tank to my growing horde of traitor guard. This one is the dreaded Leman Russ Demolisher with sponsoon plasma cannons. Indeed it is a pricy tank, but when it lets loose, it is sure worth it. Thanks to the Lumbering Behemoth rule it can move 6″ and still fire off the demolisher and a plasma cannon, ensuring the destruction of any squad unlucky enough to get in its way.

Leman Russ Demolisher Front

The demolisher cannon is a kit bash using the Banehammer cannon that I didn’t use for my Baneblade. I had 4 Leman Russ kits, a built Leman Russ and an old built Leman Russ demolisher so I decided to build my own demolisher cannons to create two full squads of tanks, one of the traditional LR and another of demolishers (the other 4 tanks are built and painting has started so watch for them!)

Leman Russ Demolisher RightEvery weapon on the tank is AP2, ensuring that anything that the tank hits will not get a armor save.

Leman Russ Demolisher Back

I tried something different with the back by adding two extra barrels and placing a smoke stack on either side.

Leman Russ Demolisher Torches

I also wanted to pull in a theme I’ve used on my troops by adding gas cans and ready-to-light torches to the storage bin.

This also complete the 8th challenge of The Tale of Even More Painters:

  • Vehicle: 10 points
  • Symbol: 1 point
  • Meeting deadline: 2 points
  • Total for Challenge 8: 13 points

And here is a sneak peak of whats coming next:

Command Chimera WIP