Latest Posts

Mentor Legion 2nd Company Squad 2

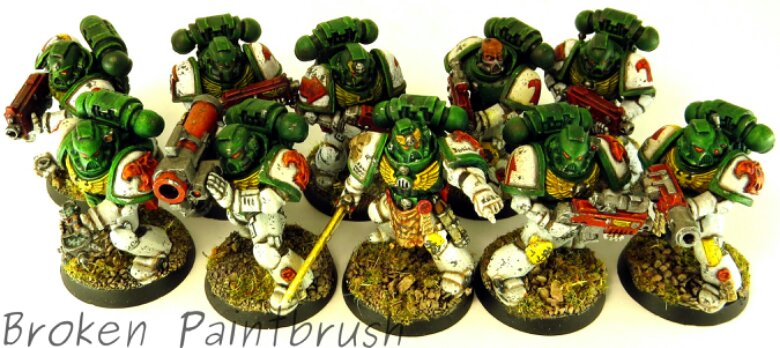
Second Company Squad Two of the Mentor Legions


Here is my second fully finished Space Marine Tactical Squad for my Mentor Legion army. The squad is built up from my collection of grey plastic from the Assault on Black Reach, Dark Vengeance, and Tactical Squad. By combining the different kits you can make them unique and change-up the static poses from the starter kit.

Mentor Legion 2nd Company Squad 2

This squad is led by Brother-Sergeant Iani Tulrosi which is from the assault on black reach set with an arm swap to give him the power axe. This helps create a unique look from the start set and more natural than the straight up sword. I also added a thin piece of plastic to his collar to create a Mark VIII look.

Mentor Legion 2nd Company Squad 2

As with squad three, many of the squad member are from the starter sets and required hand painted legion markings. You can see below on Brother Cith Cheven’s amour the final outcome of using the transfers as a starting point. I then added yellow stripes and marking to identify them as the Second Company.

Mentor Legionaire
Here again is brother Tulrosi with his power ax and pointing at the enemy (like any true leader would!). Also you can see here the gothic 2 to note them as the second squad. I used the decal sheets to get the look and started with a very light outline with watered down grey. After getting the look right, I go back with the darker grey/black.
Mentor Legion 2nd Company Squad 2 Sarg

And a close up of brother Quol Valulaith with his Plasma cannon. He is from the Dark Vengeance set with the Angel markings removed and the Mentors symbol added. This one I tried a press mold which is why it sticks out a bit more.

Mentor Legion Plasma Gun

Next up some HQ to lead these foot sloggers.

Update: replaced images with higher res versions. Seems uploading pictures from my phone automatically shrinks them!
 

Mentor Legion Tactical Squad Three of the Second Company

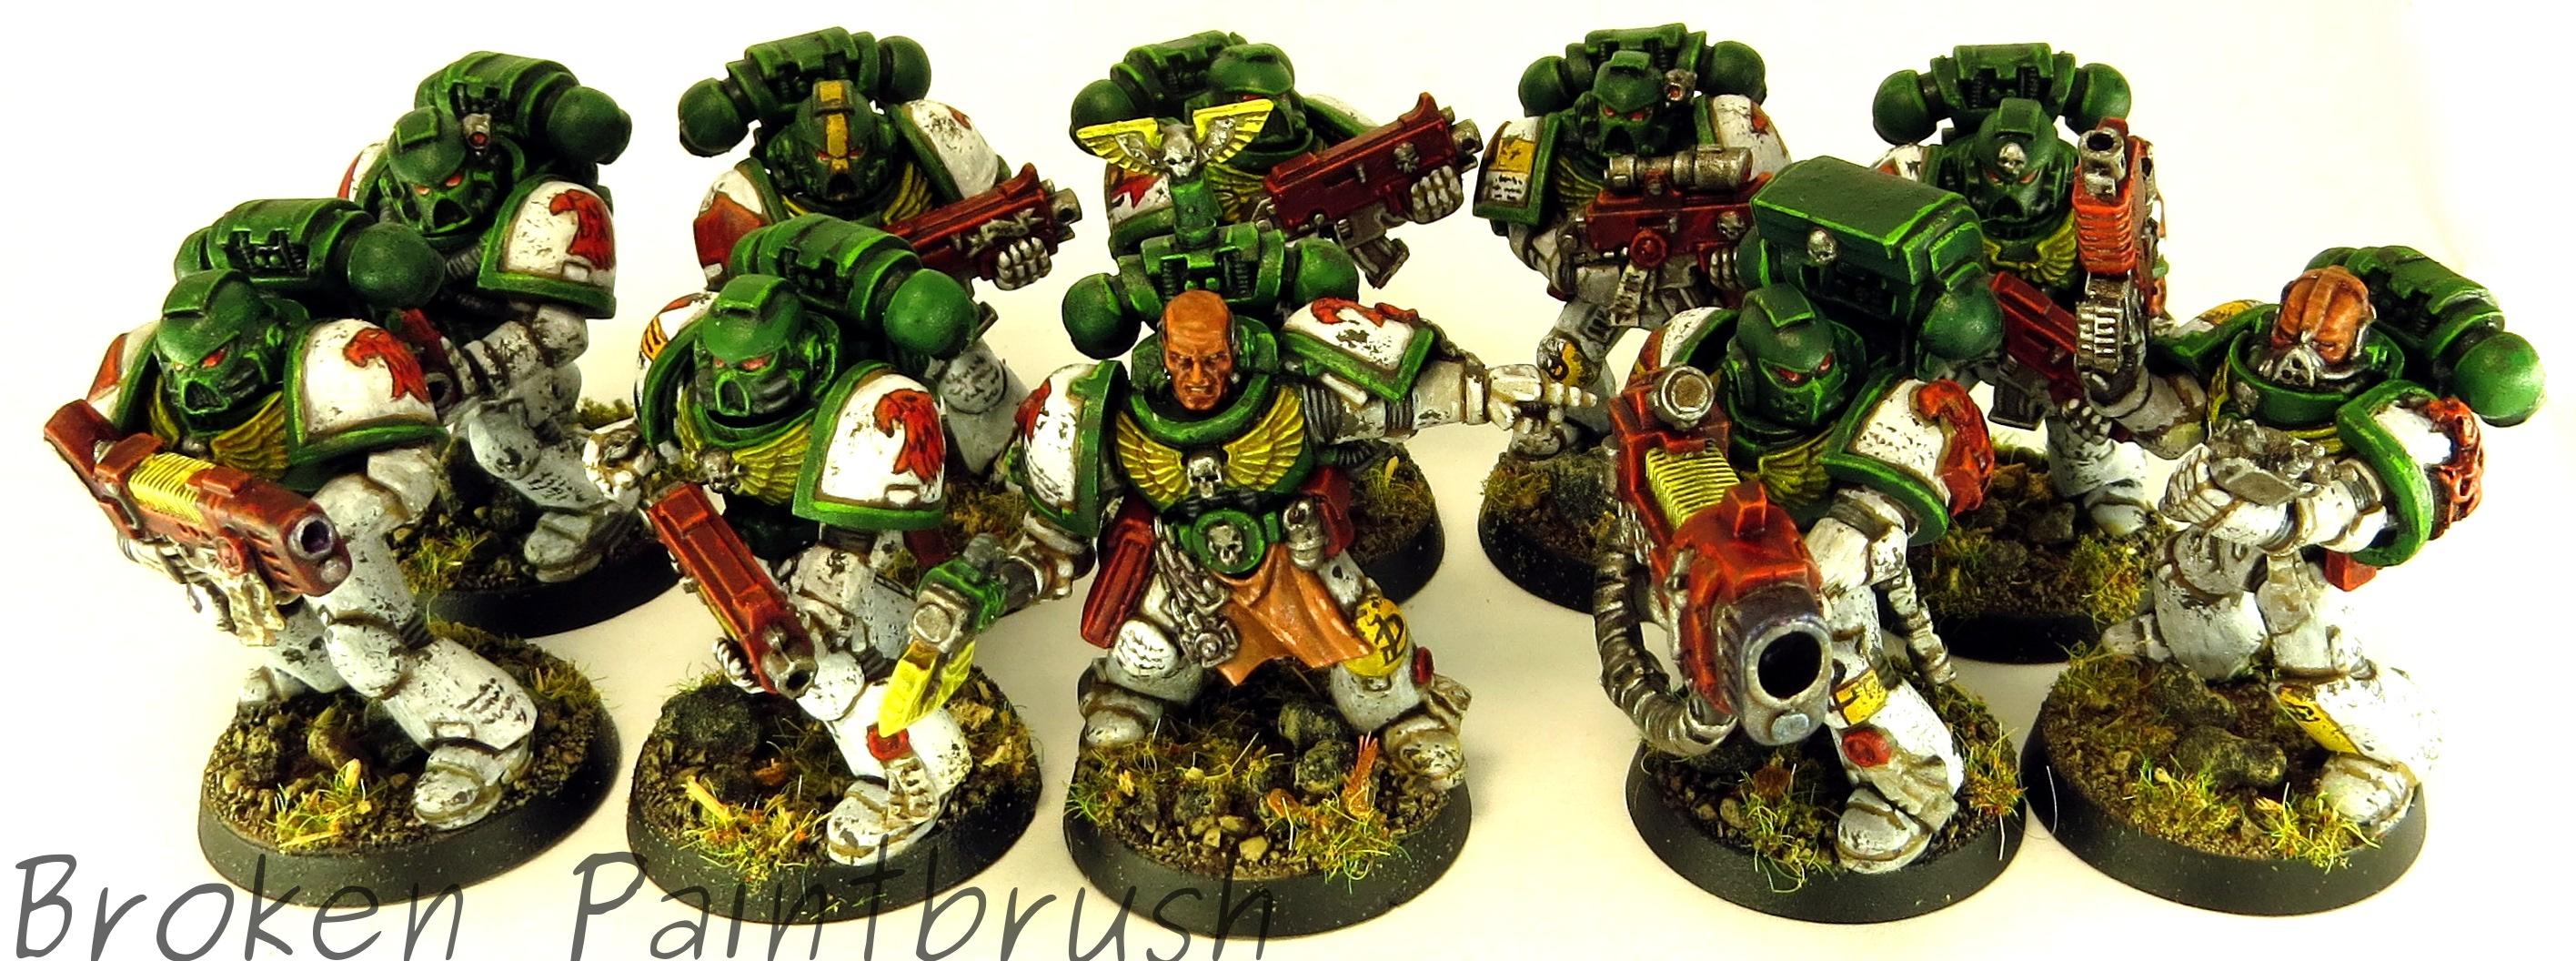
Well it’s been a while since I’ve posted but I haven’t given up on my marines. Here is Squad 3 of the 2nd Company Mentor Legion Tactical Squad led by Brother Sergeant Strel Jokin. The models are a mix of the Assault on Black Reach and the Tactical Squad box. To mark them out as second company the knee pads and shoulder pads I added yellow markings including personal markings and individualization.

image

Half of this squad was done over a year ago as a test/something new to do (here). Other than finishing the remaining five squad members, I also added battle damage to the original to make them all a bit worn. The damage was mostly done with a small sponge and dark grey to creating the chipping effect.

image

Since many of the additional troops were from the starter sets, I had to add the Mentor Legion markings by hand. I did cheat a bit though since I bought a Raptors transfer sheet from forge world (more on that in the future). After applying the decals and spraying it with a sealant, I painted over it with the red, treating it much like a stencil.

I have more of the legion finished and am working on the posts so stay tuned for more legion goodness!

Green Marines of a Different Kind – WIP Mentor Legion

Although I have been much busier as of late with grad school and health goals for the year, I am still making slow and steady progress on the Mentor Legionaries. As you can see i the pictures below, I have a good chuck of the army built and primed. The first up to receive paint were 15 tactical marines (I had the first 5 already done), and the librarian and the chaplain from the Dark Vengeance box.

Mentors WIP

At this point I have the base colors, wash, and the white are now done. First up is the chaplain, I really like this model from the limited edition set and with only a few minor modifications will make a great chaplain for any other chapter. The white base was started with Zandri Dust, followed with a wash of Earthshade. The white was built back up with the dust and finally pure white.

Mentor Legion Chaplain WIP


Next up is the librarian. A simple arm swap with one from the Chaos terminator lord, removal of a few of the dark angle markings, and a new look is achieved.

LibWIP2

And a rough shot of some of the new squad mates. Much of it is made up of dark vengeance and AoBR marines with a few kit bashes thrown in. For the foot soldiers I didn’t build up the white is an many steps, in fact I pretty much just painted the pure white back over the washed down dust. It may not give as clean of a look, but the grittiness is pretty fitting for marines anyway.
MentorsSquad1WIP


Now that the white is finally done (a rough color to paint!) I can knock out the rest in hopefully a short order.

Traitor Russ Demolisher Tank 3

Traitor Leman Russ Demolisher Squadron Finished

As I hinted in my last post, I have been working on clearing out my back log of unfinished projects. This may get a bit off with my new army, but I plan to continue working in many of these between tactical squads.

Traitor Guard Leman Russ Demolisher Squad

I had the first Leman Russ Demolisher a long while back and the other two started, but have now completed all three.

Traitor Russ Demolisher Lead Tank

The lead tank is armed with side plasma cannons to really add some umph to an already scary tank.

Traitor Russ Demolisher Lead Tank - Back

The second tank is a simple conversion by shortening a normal battle cannon and adding parts from a hunter-killer missile.

Traitor Russ Demolisher Tank 2

Traitor Russ Demolisher Tank 2 - back


The third Leman Russ Demolisher is one I ‘rescued’ from my brother’s old army but was badly damaged. I fixed the broken off sponsons with banners. This is actually the only one with a ‘real’ demolisher cannon being the old metal monster.

Traitor Russ Demolisher Tank 3


Traitor Russ Demolisher Tank 3 Banner


The banner was made from tissues soaked in glue/water. It was then pressed on the model and tweaked a bit to add some movement.

Traitor Russ Demolisher Tank Squad

All three I used the new texture paints to add mud to the treads. I just got the FW Master Class Book I and am really excited about trying some of the weathering techniques they use, though it is clear a time intensive look.

And after painting these three, I recently played a game against someone running a squad of two of Russ’s with the plasma turret and both sponsons with plamsa. With the new rules of heavy vehicles  these things could move and shoot 5 plasma blasts a turn! It may be time to get a set of the new kits to build out some of the newer variants that don’t have an ordinance on top.


Traitor Guard Tech Priest, Dark Mechanicus

Dark Mechanicus Tech Priest Joins the Traitor Legion

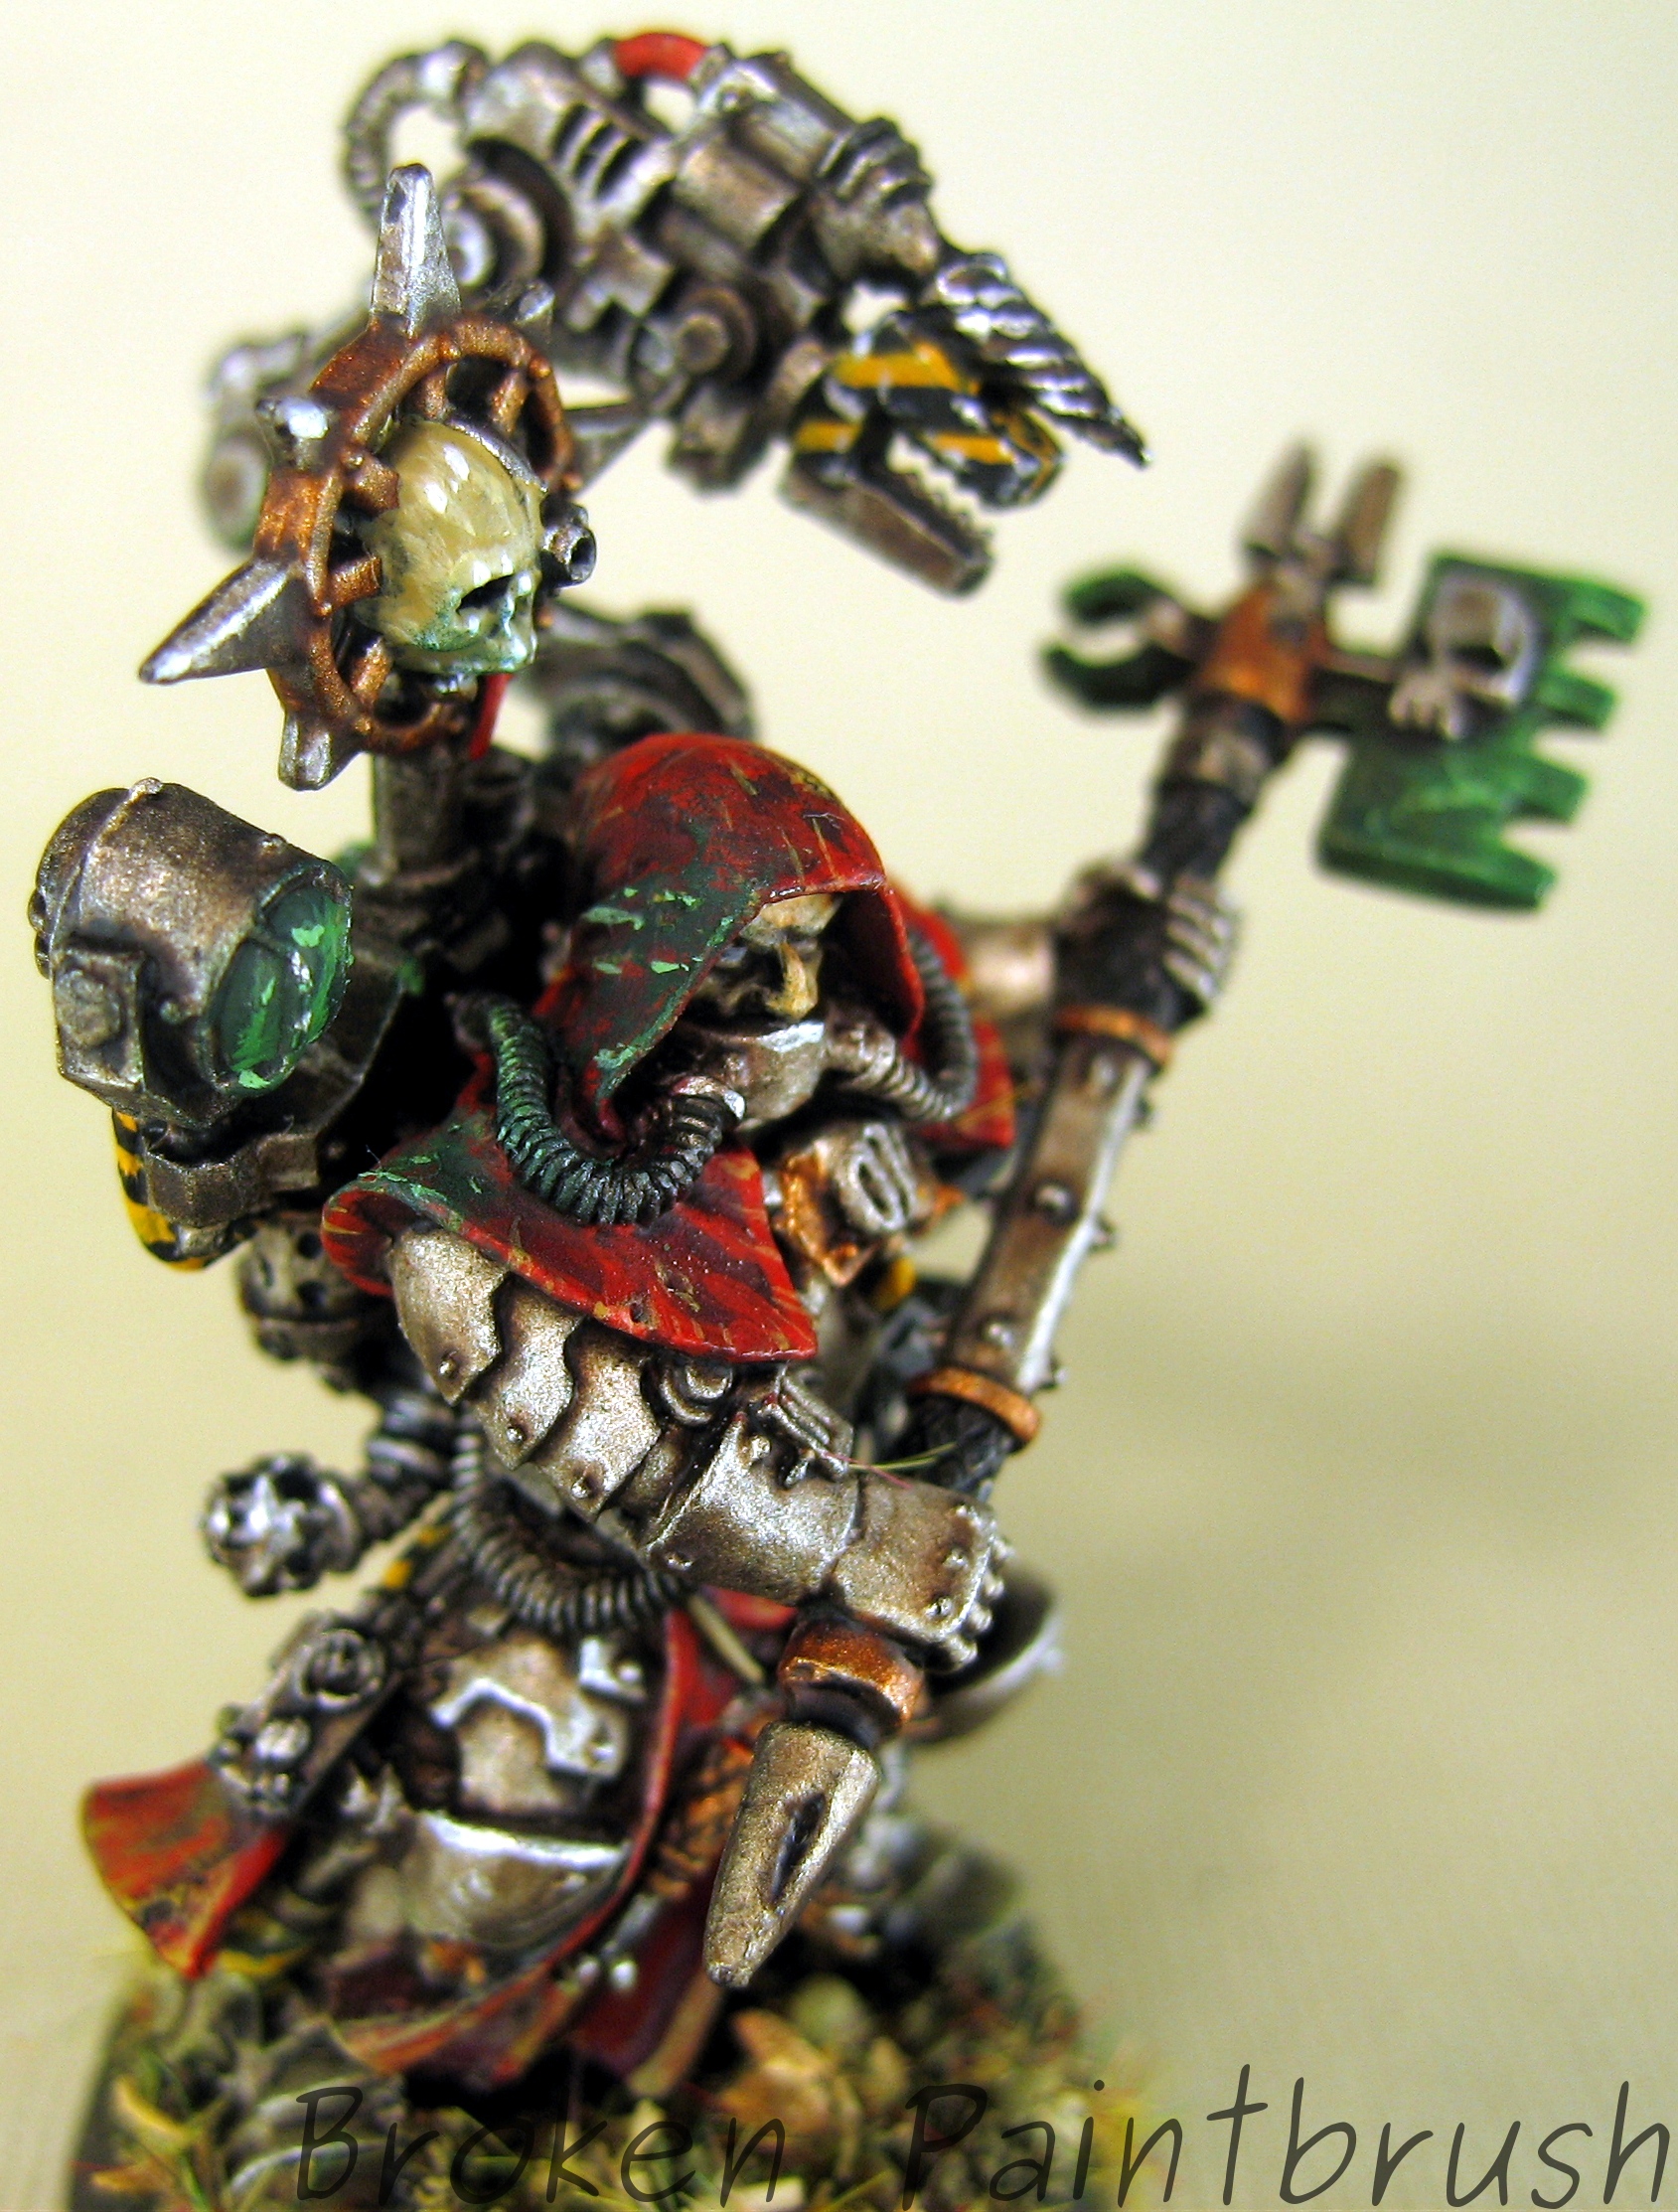
I’ve had this model sitting around for a while but had never quite finished it. So after finishing my Warpsmith I grabbed this Dark Mechanicus Tech Priest one off the shelve of never ending projects and put paint to brush.

In contrast to the rest of the Traitor Guard orange, I used the iconic Mars Red robes but used green power weapon to match the Chosen and Warp Smith.

Traitor Guard Tech Priest

Conversions were kept minimal on this model since I actually bought the model for how it looks, rather than its game play ability. With just the simple addition of the Chaos star mounted to the back pack, the rest was just paint – which goes to show how crazy the normal Mechanicus is.

Traitor Guard Tech Priest, Dark Mechanicus

I tried to continue my experimentation of source lighting with the mystical green glow from the back packs power source.  Although it could have come off a bit Christmasy, I tried toned down the red with the tan highlights. The yellow cabling also helps to break up the green and red looks.

Traitor Guard Tech Priest, Dark Mechanicus

The metal was a set of layers of Mithril Silver, Devlan Earth, and re-highlighted. Along panel edges I added some black to increase the contrast.

It is only fitting that I have a few Tech Priests and Warpsmiths around to maintains my growing number of vehicles. Speaking of which, coming soon is a WIP of my Heldrake and the Bastion is almost finished.

Warpsmith Pre-Painting Front

Warpsmith Review – and first finecast

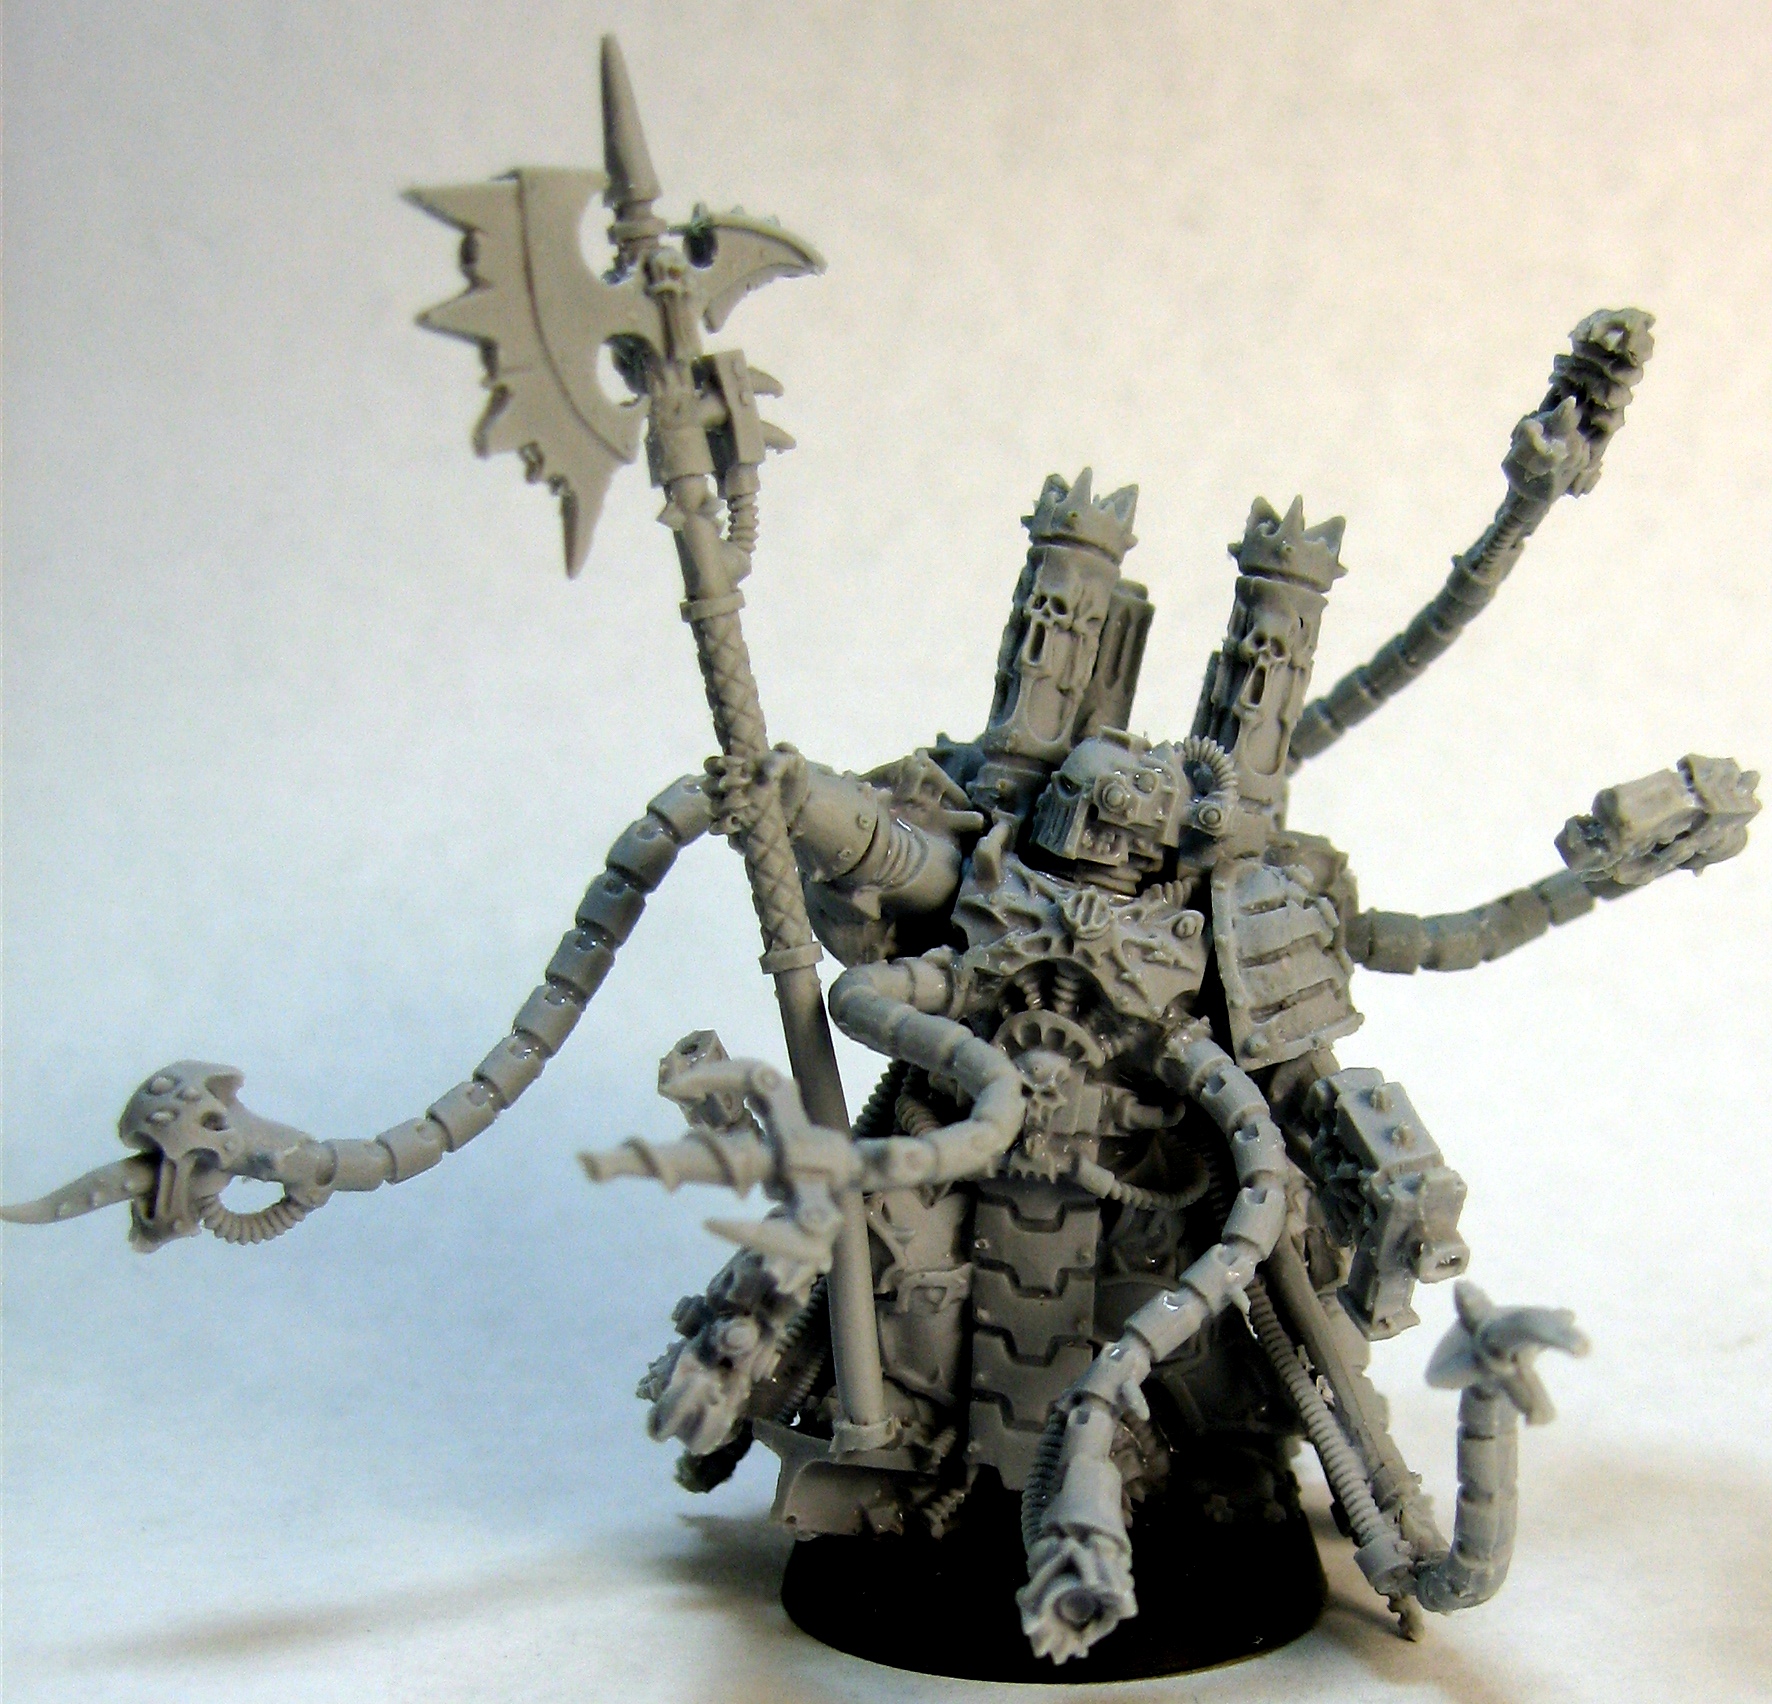
Of all the new Chaos releases, the Warpsmith caught my eye as the most exciting to paint. I was a bit hesitant though, as this would be my first Finecast. I had heard of many issues with the new medium and wasn’t sure what I would find in the box.

Man am I glad I took the leap though, the details on this model are outstanding! While I had a few bent parts that were easy to fix with the hot water bath, there was nearly no air bubble issues. About the only issue I had was cleaning all the mold lines which did seem to crop up all over the place.

The model came in 12 pieces on two sprues with the largest piece being the leg/torso combo. This piece could make an impressive lord with a bit of work to clean up the back-pack area.

Warpsmith Torso

The rest of the pieces involve the 5 longer tentacles, the head, back sections, each arm/shoulder, and the ax hand. As you can see the ax was a bit bent but I was able to fix it with hot water. I also used the hot water to add a bit more bend to the various tentacles to pull them out of the two-dimensions of the mold.

Warpsmith Parts

As I was dry fitting the pieces together, I knew I wouldn’t be able to paint this model as one piece. So I cut off the nubs for the arms and glued the back pieces together with the arm pieces. This took a bit of the hot water bath as well since the arms needed a slight bend in them to fit the back unit. To do this, I soaked the arm in hot water, placed the back unit on the model, and quickly pressed and held the arm in place until it cooled. I then added super glue where the two pieces met, keeping it off the main torso. After taking the picture, I added some green stuff between the two parts to added a bit more rigidity and fix the few air pockets that I did find. The ax hand I pinned but did not glue together either since I needed to remove it before pulling off the back/arm unit.

Warpsmith in Pieces for Painting

By building the model this way, I am able to put it back together to see how parts align for paint, but am aslo able to pull it back a part to get into what would be impossible to reach nooks.

Warpsmith Pre-Painting Front

And the back

Warpsmith Pre-Painting Back

Over all I love the look of this model and all the life/animation it has and my first adventure into finecast was an exceptional one. The down side to this model is that, other than the torso, this model would be difficult to use for conversions as each piece overlaps with another.

The 14th Grand Company continues to build! Check out the painted miniatures and see what I did with all that resin.

Traitor Guard Veteran

Traitor Guard Veteran Squad

These have been done for a while but it has taken a bit to put the pictures and this post together. In my crazy attempt to build a full foot guard army I built up a squad of Traitor Guard Veteran Squad to provide some anti-infantry support as well as additional color to the army.

Traitor Guard Veteren Squad


I started with three snipers to increase chances of taking out special troopers. A heavy bolter gives a multi-shot, medium strength to the unit, and I topped it with Harker with a second heavy bolter.
I liked the way Santa Cruz Warhammer  took before and after pictures of each model so I’m copying the idea here.

First up is the Sargent, count as Harker. The torso is from the warriors of Chaos, the Heavy Bolter is from the CSM kit, with the remaining bits are from various guard kits. I wanted the dress robes on the legs to match up to something on the bear-chested torso so I added a over-the-shoulder sash/robe.

Traitor Veteran Sargent Harker

Next up is the first sniper. I wanted to give the squad a bit of chaos mutations, but not to the extent that they are becoming spawn. Besides the all-seeing eye, the only other work was shortening the plastic cape to allow him to knell and then adding green stuff to reflow it. The ‘camo ‘ is various chaos stars to add interest to the mangled cape.

Traitor Guard Sniper

The next sniper has little conversion work, but a few hints at the mutation forming.

Traitor Guard Sniper

The third sniper also doesn’t include that much conversion, but has the cool ‘doc’ head from the Catachan command squad and an added strap to the gun from thin plastic strip.

Traitor Guard Sniper

The heavy bolter “team” was the most extensive conversion, and the furthest along the path of mutation. I figured since HWTs were just a single model with two wounds, it would be fitting to use a mutant. The parts were all “extras” from other HWTs and a tank commander torso with the turret bit cut off.

Traitor Guard Heavy Bolter Mutant

Most of the models in the squad have backpacks from the Catachan kit with the large knives/swords. I wanted to have at least one of the guys holding his sword but didn’t like the look of any of the arms. So he got the mutation treatment too. The whole left arm was sculpted with the upper section reforming into a normal arm. I wanted the mutations to be almost under the skin, pulling the flesh apart.

Traitor Guard Veteran

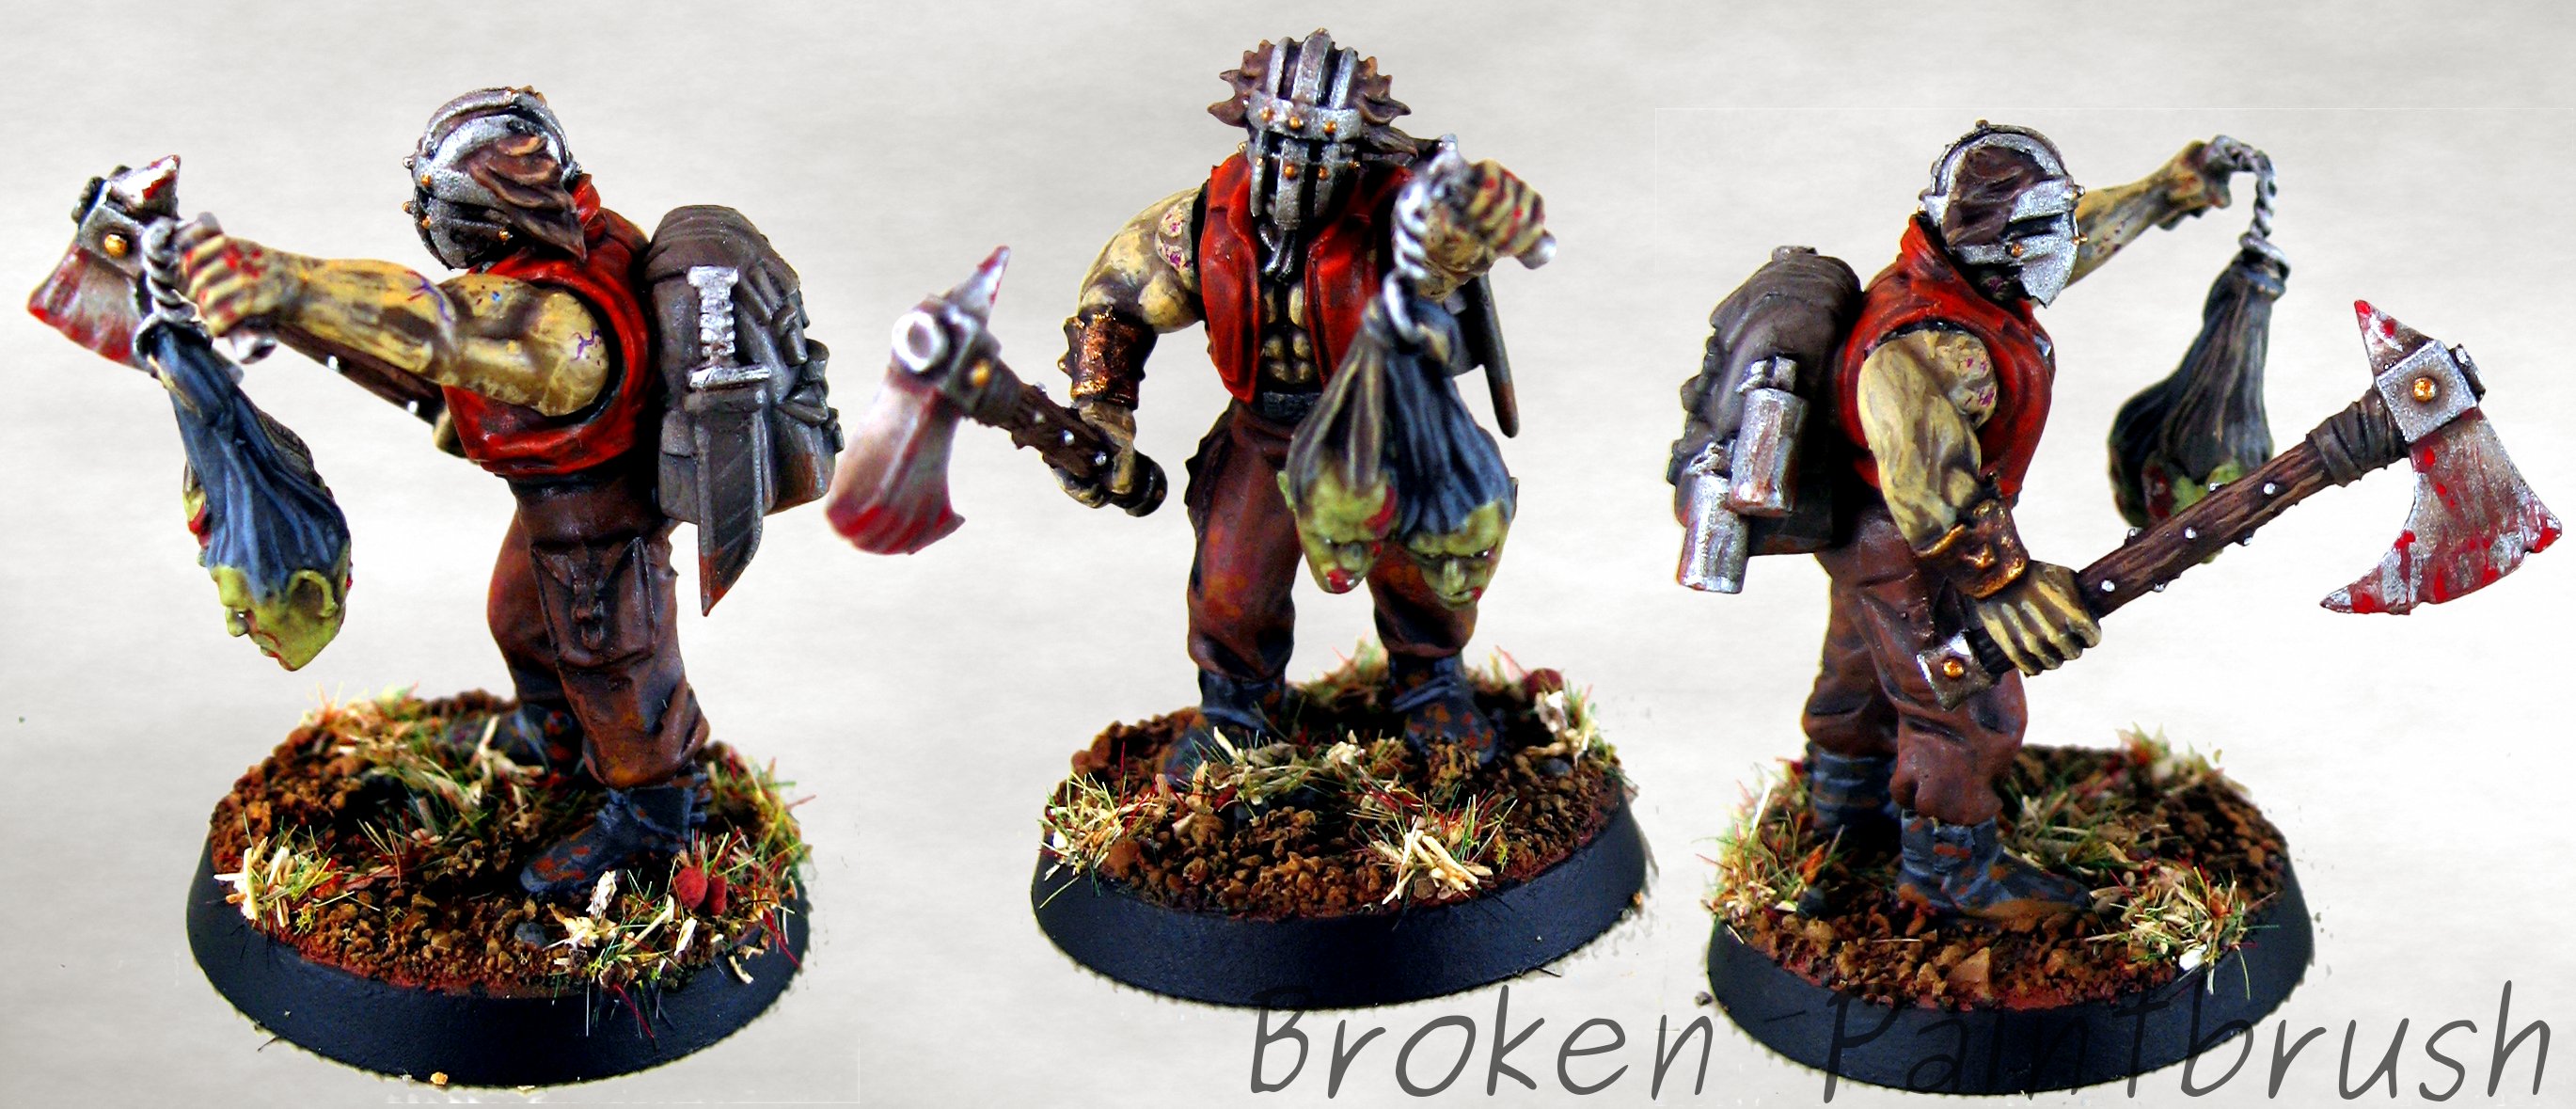
Not all of the models have mutations. This one is just proving his brutality with heads from the Zombie kit. The head is from the Flagellate kit, one of my favorite kits for bits.

Traitor Guard Veteran

My favorite model in the unit is the banner bearer. While he has no effect on the game, I like the look of my units flying their colors on the table top. The banner is also from the flagellant kit and the right hand is from the zombie kit, but rather then have it reaching for brains, he is resting it on his sword pommel.

Traitor Guard Veteran Banner Bearer

The comms man is simple enough, with the biggest change removing the aerial and adding a bent over wire and a strap to the gun.

Traitor Guard Veteran Comm

While these guys got the paint treatment before the conscripts/zombie squad, they are still in the queue. Well… that was until the new Chaos Codex came out. Stay tuned for an Iron Warriors review of the codex and some new models!

Chaos Conscripts WIP

Traitor Conscripts: The zombie slaves start to assemble

Traitor Conscripts - Zombie Slaves for the Traitor Guard

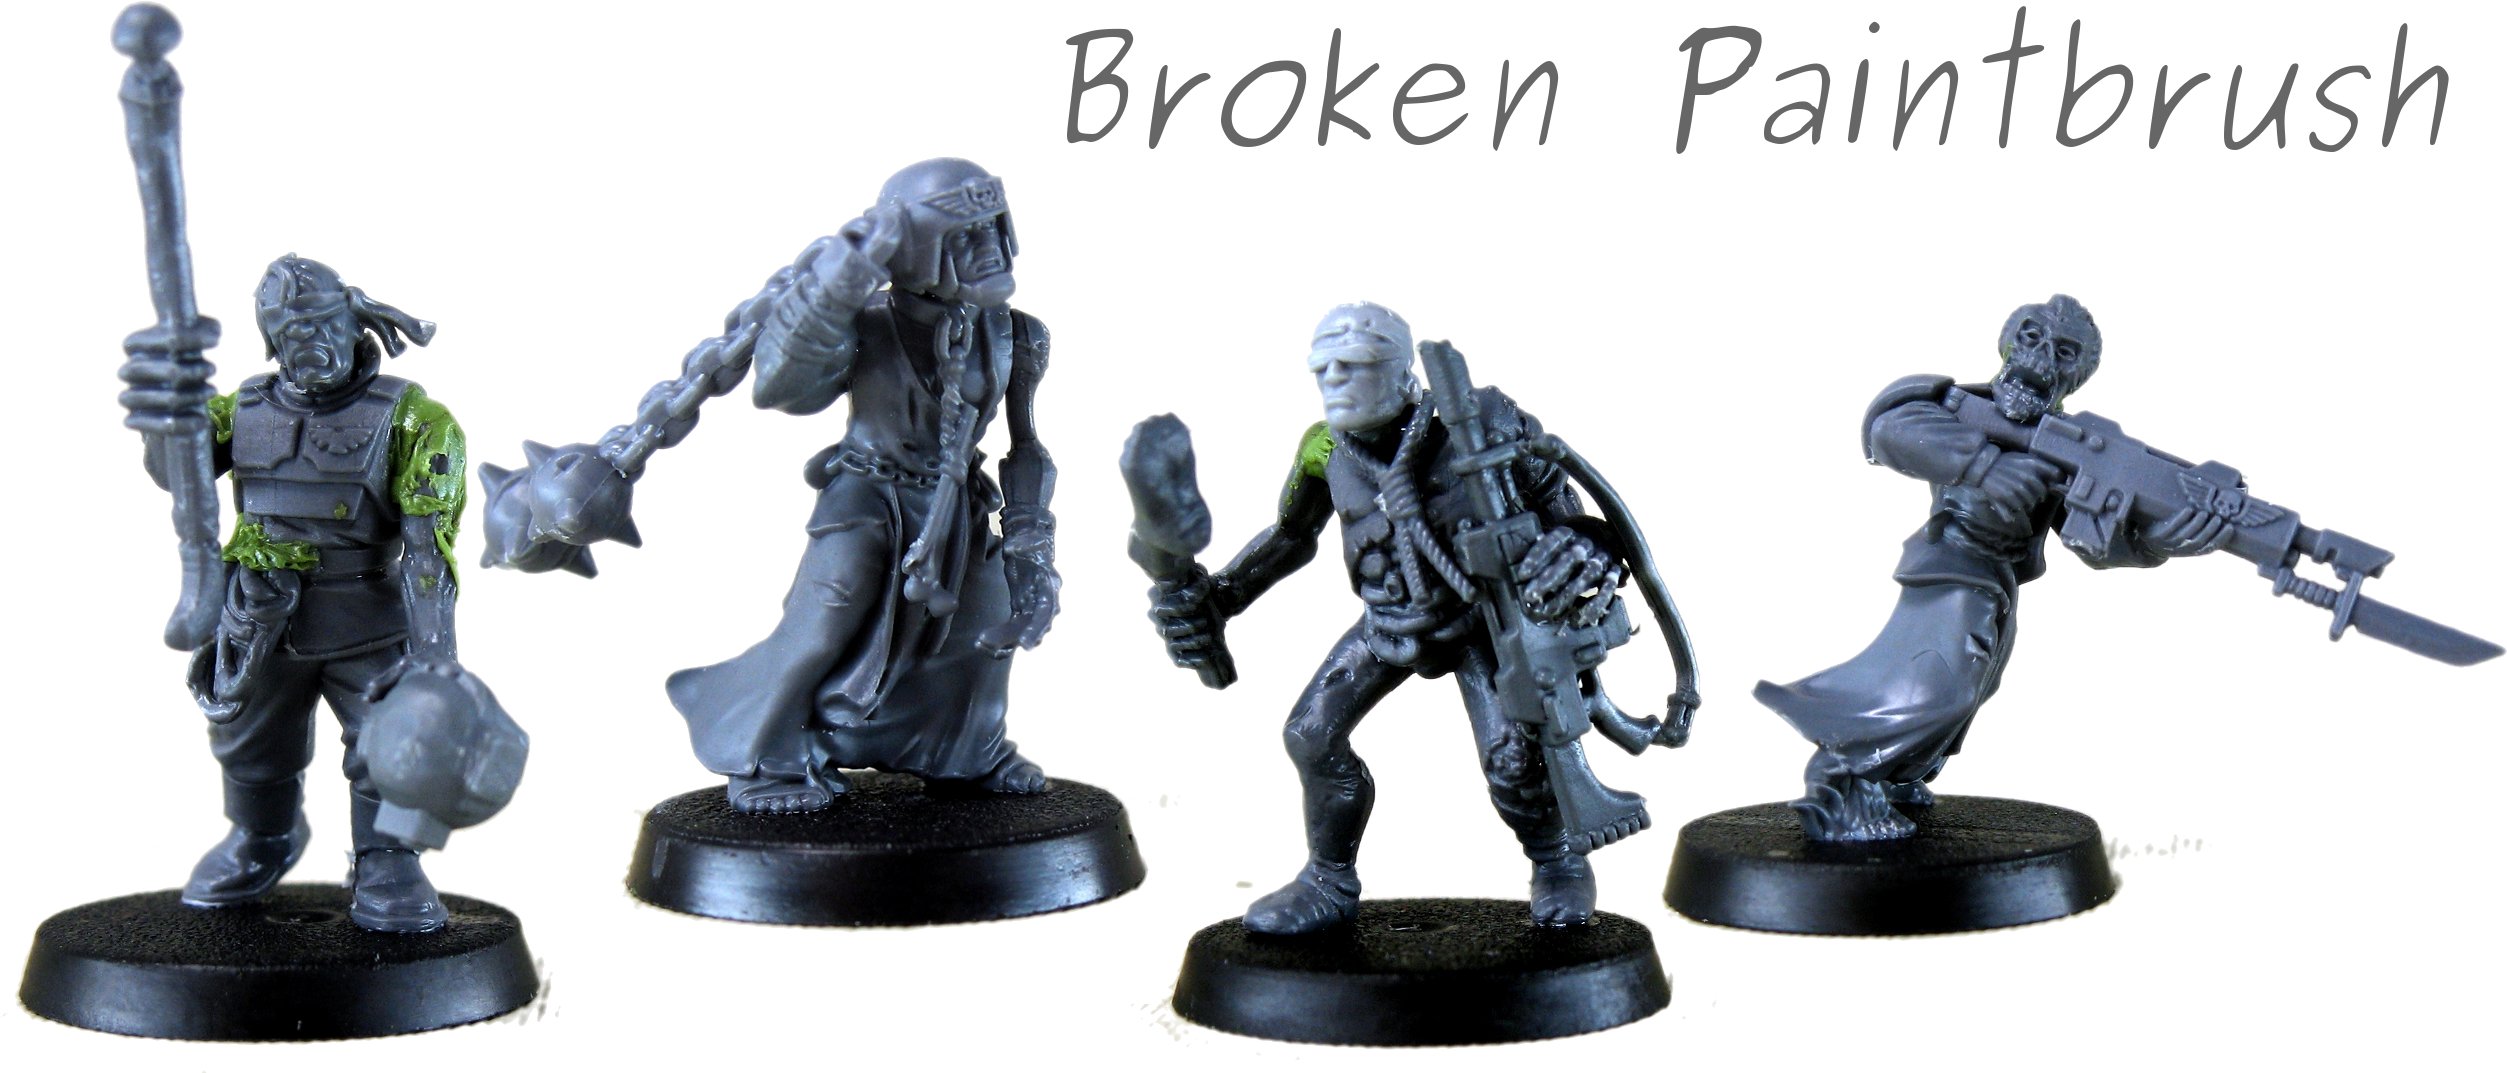
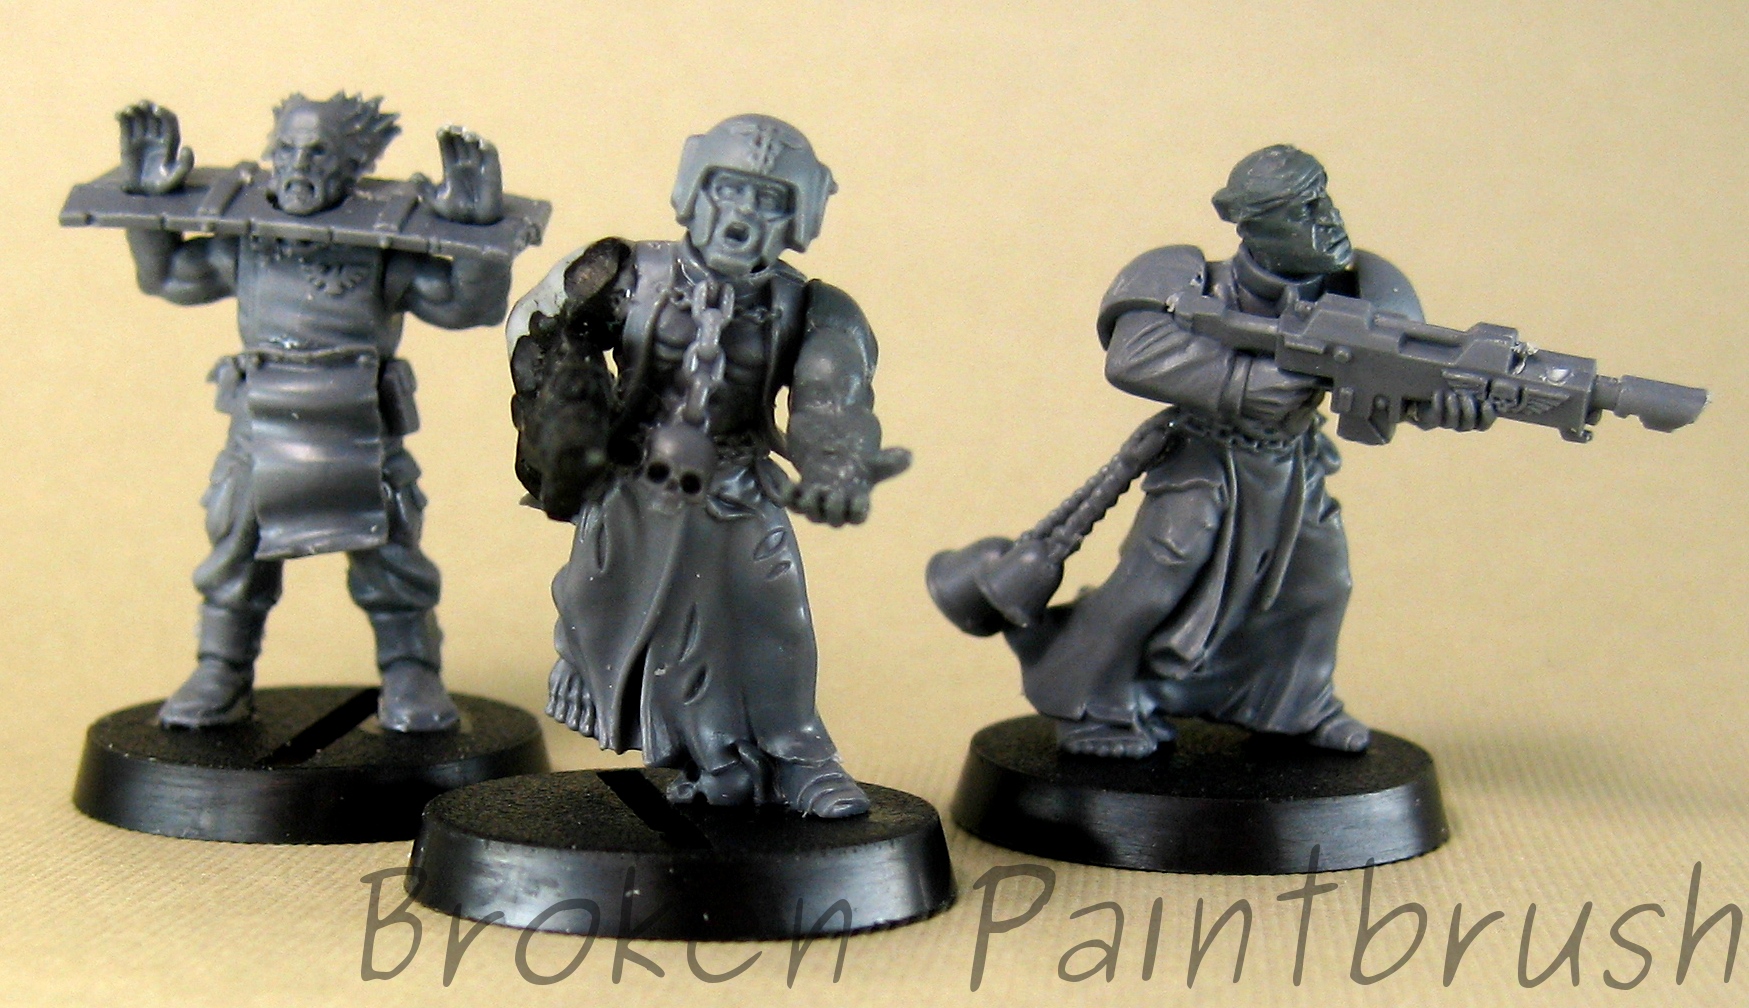
In between painting sessions, I’ve slowly been building up the legion of conscripts for Traitor Guard. Using a mix of Zombies, Flagellents,  Cadian troopers, and various bitz I’ve picked up along the way, the unit has started to come together. Current tally is 20/50 built. Why so many conscripts? Well it seems 6th edition has turned into a troopers game and there is no cheaper trooper than a pack of conscripts with “Send in the Next Wave!” For 270 points I can field 50 models, take them off at any point, and bring them back on the next turn!

Combining the various kits has been a challenge of patience and creativity. The various bodies don’t line up with the different arms, and the heads are made for completely different sockets. This has led to green stuff magic to hide defects and tie pieces together as you can see in some of the individual shots below.

Chaos Conscripts WIP

I particularly like the second from the right above, he is my zombified Rambo. But you can see the small amounts of green stuff to tie pieces together should go a long ways.

Chaos Conscripts WIP

The bell boy above and the flail hand two up hint at the craziness of chaos while the officer in the stocks hints at the unwilling prisoners.

The theme I’m going for is a mix of enslaved loyalists who haven’t yet broken, zombie guard, and chaos fanatics who have become depraved and decayed beyond normal use. The Chaos Overlords herd them all together and send them off as a noisy meat shield.

Paint should be coming to these guys shortly, once I finish the bastion and defensive lines.

[amazonify]B0009JJZ4Y[/amazonify]

Chaos Bastion WIP

Bastion Progress: Nearly There

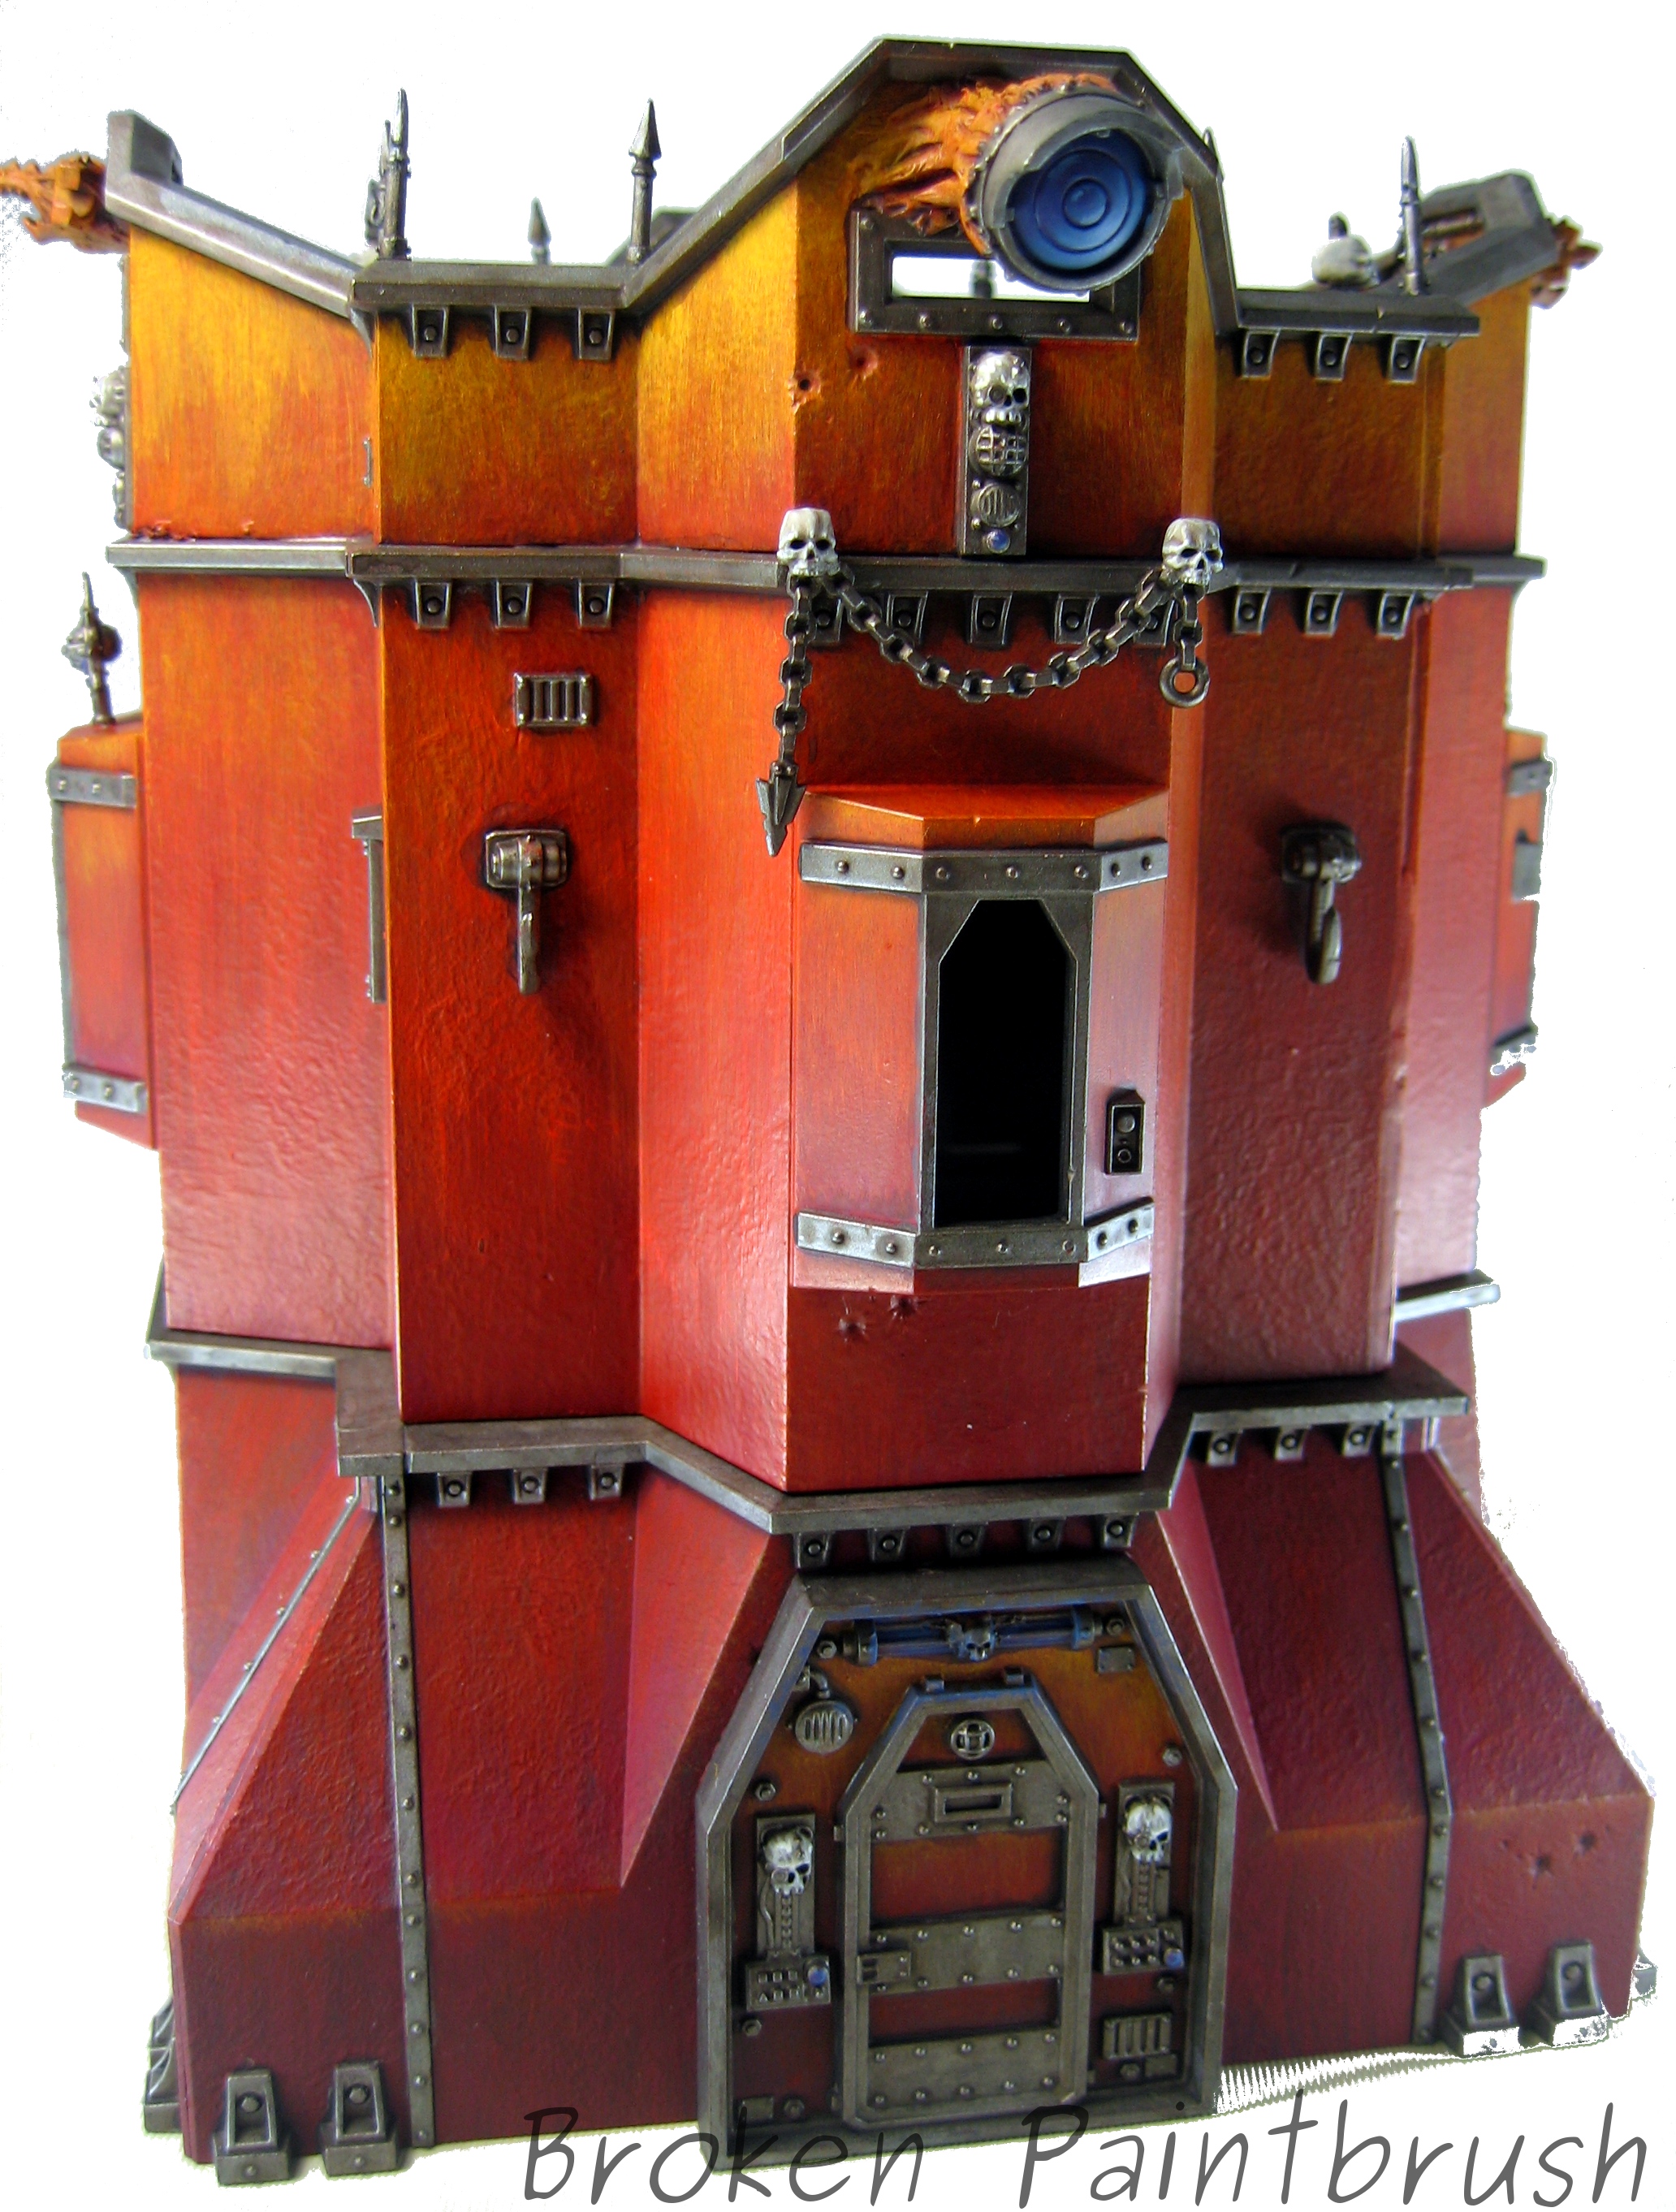
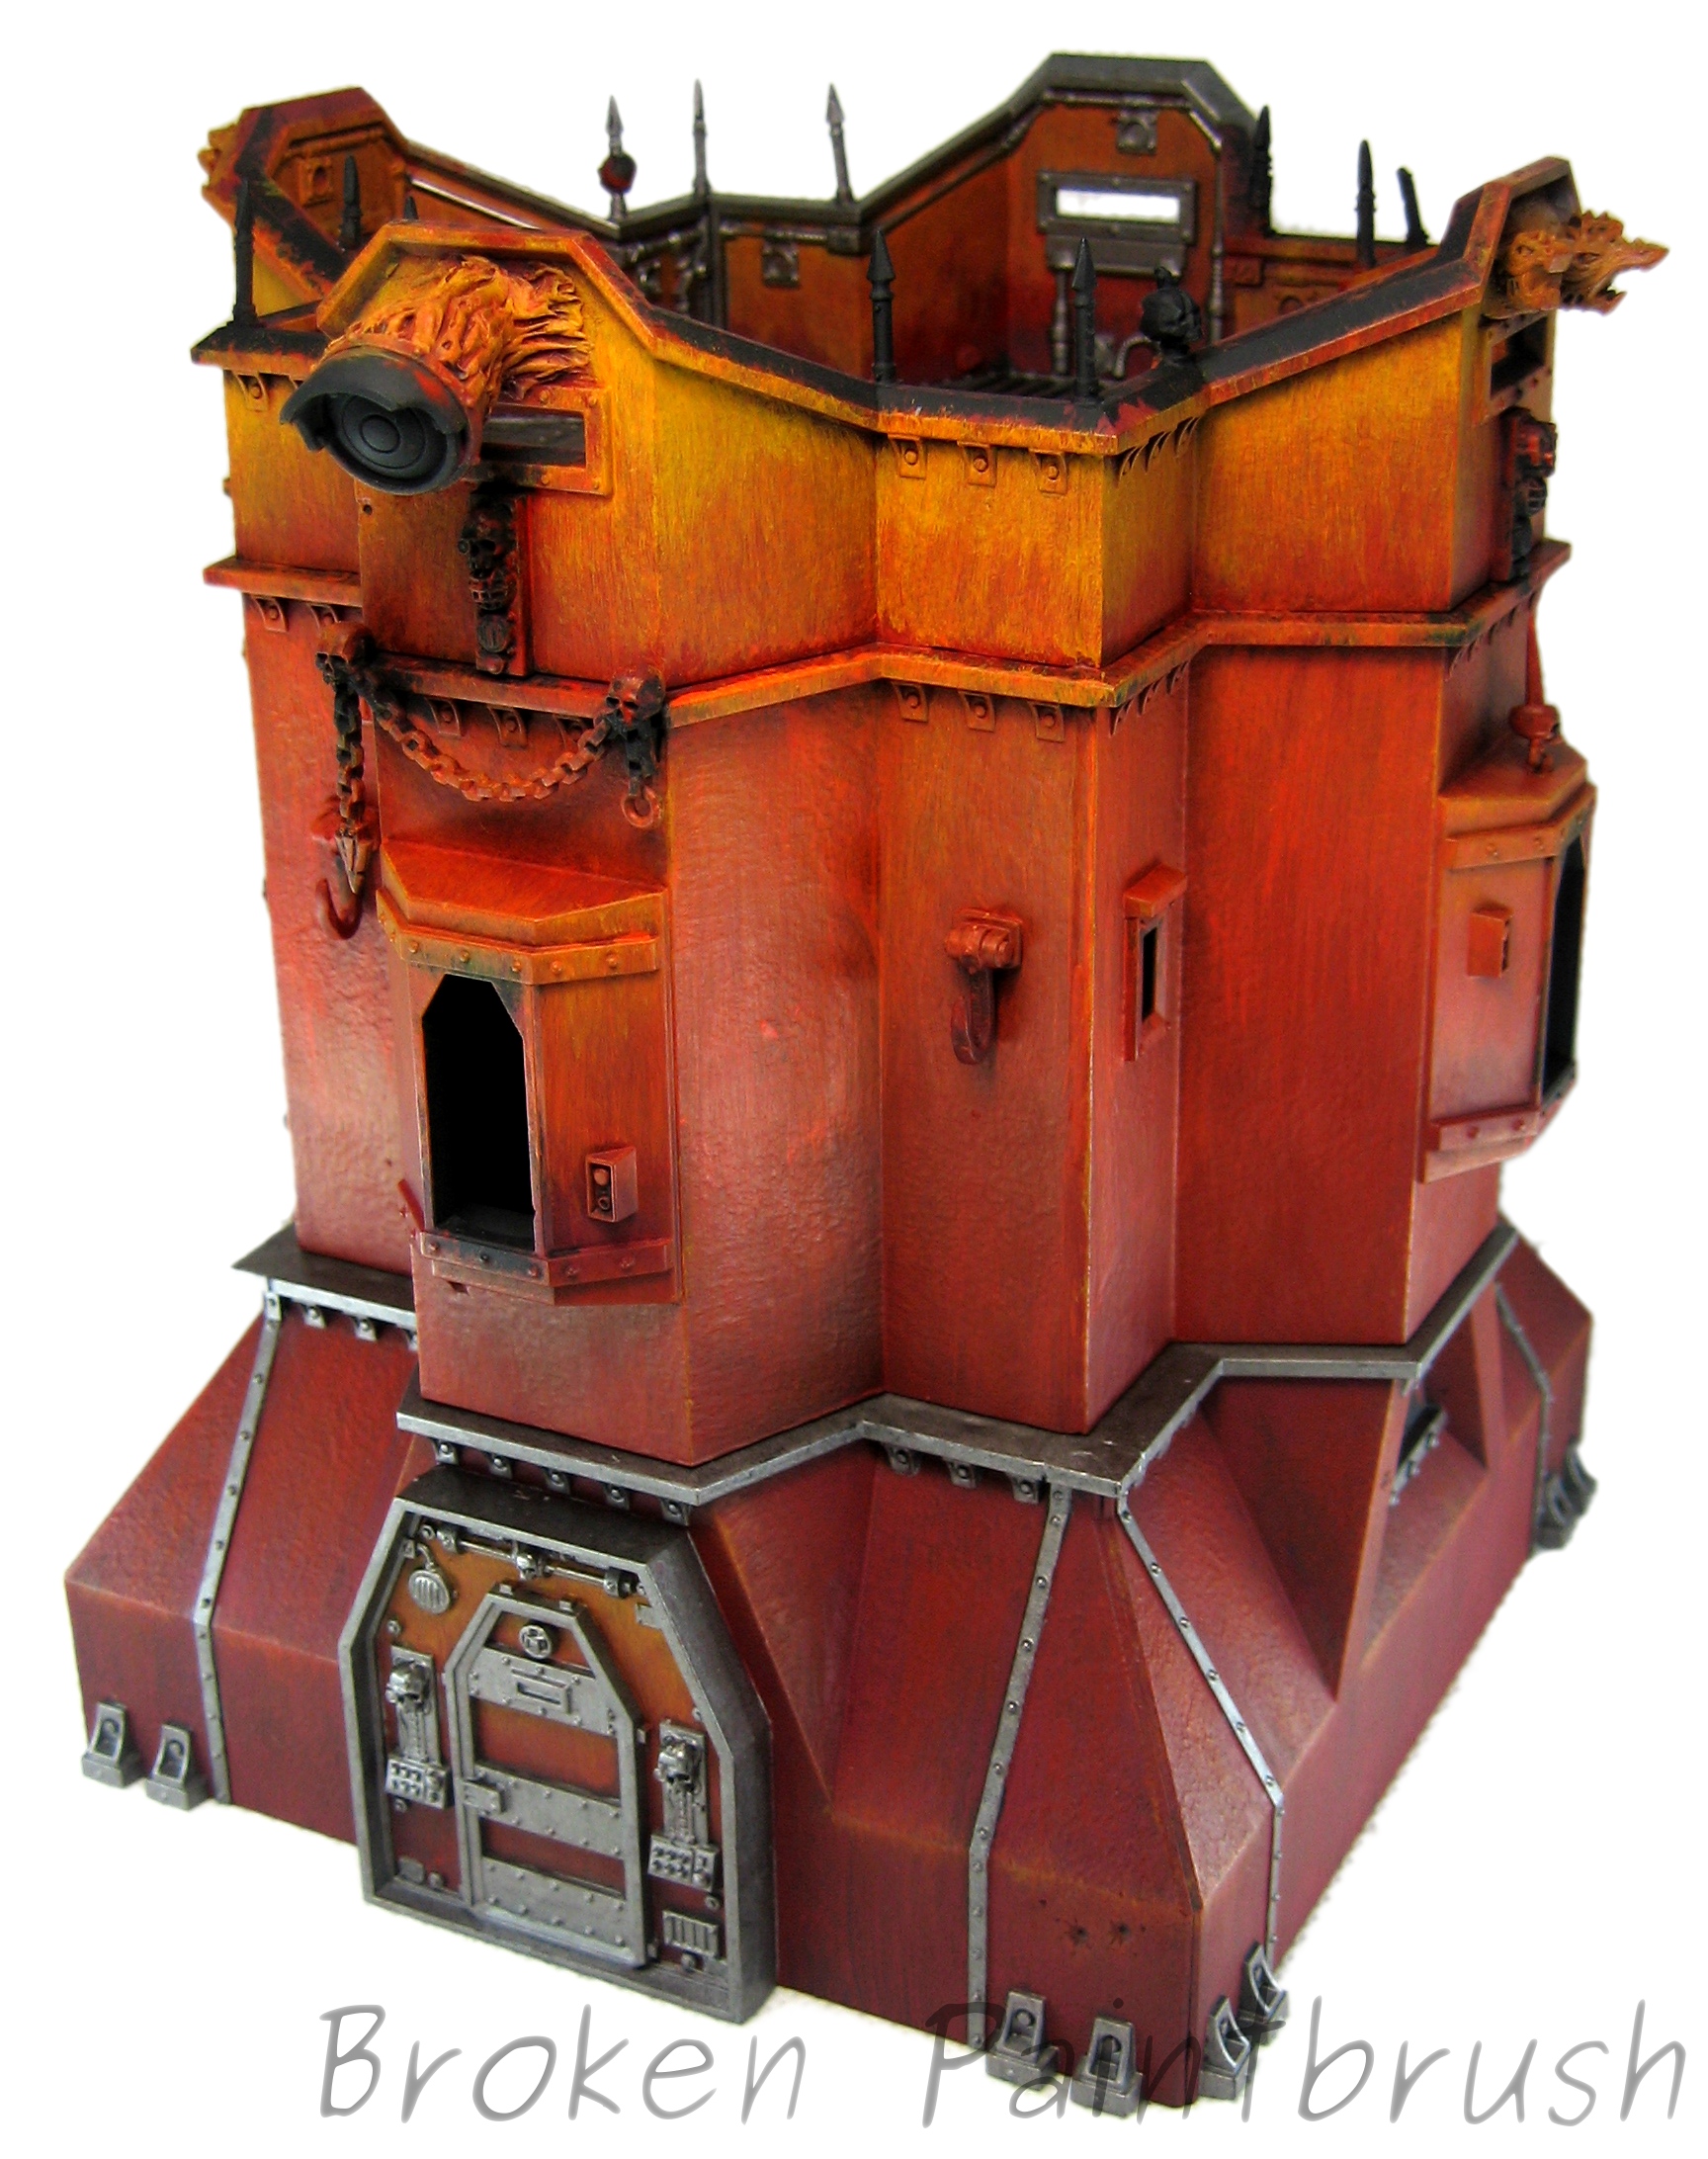
I have made a bit more progress on the Chaos Bastion of the few weeks. I started to regret painting the brackets supporting the horizontal trims metal as they seemed to take forever, but I like how it turned out in the end. The gun emplacements are still separated but are already painted the metallic.

Chaos Bastion WIP

Still left to do is the weathering and chaos stars similar to the Russes. The stars will be interesting as they will most likely cover multiple sides so it may be a bit of a change to balance the number and size of them.

Chaos Bastion WIP

The defensive walls are also in progress and I actually used the spray gun to paint the red/orange on some. I will post them up soon with notes on the air brush.


[amazonify]B002G21PC2[/amazonify]

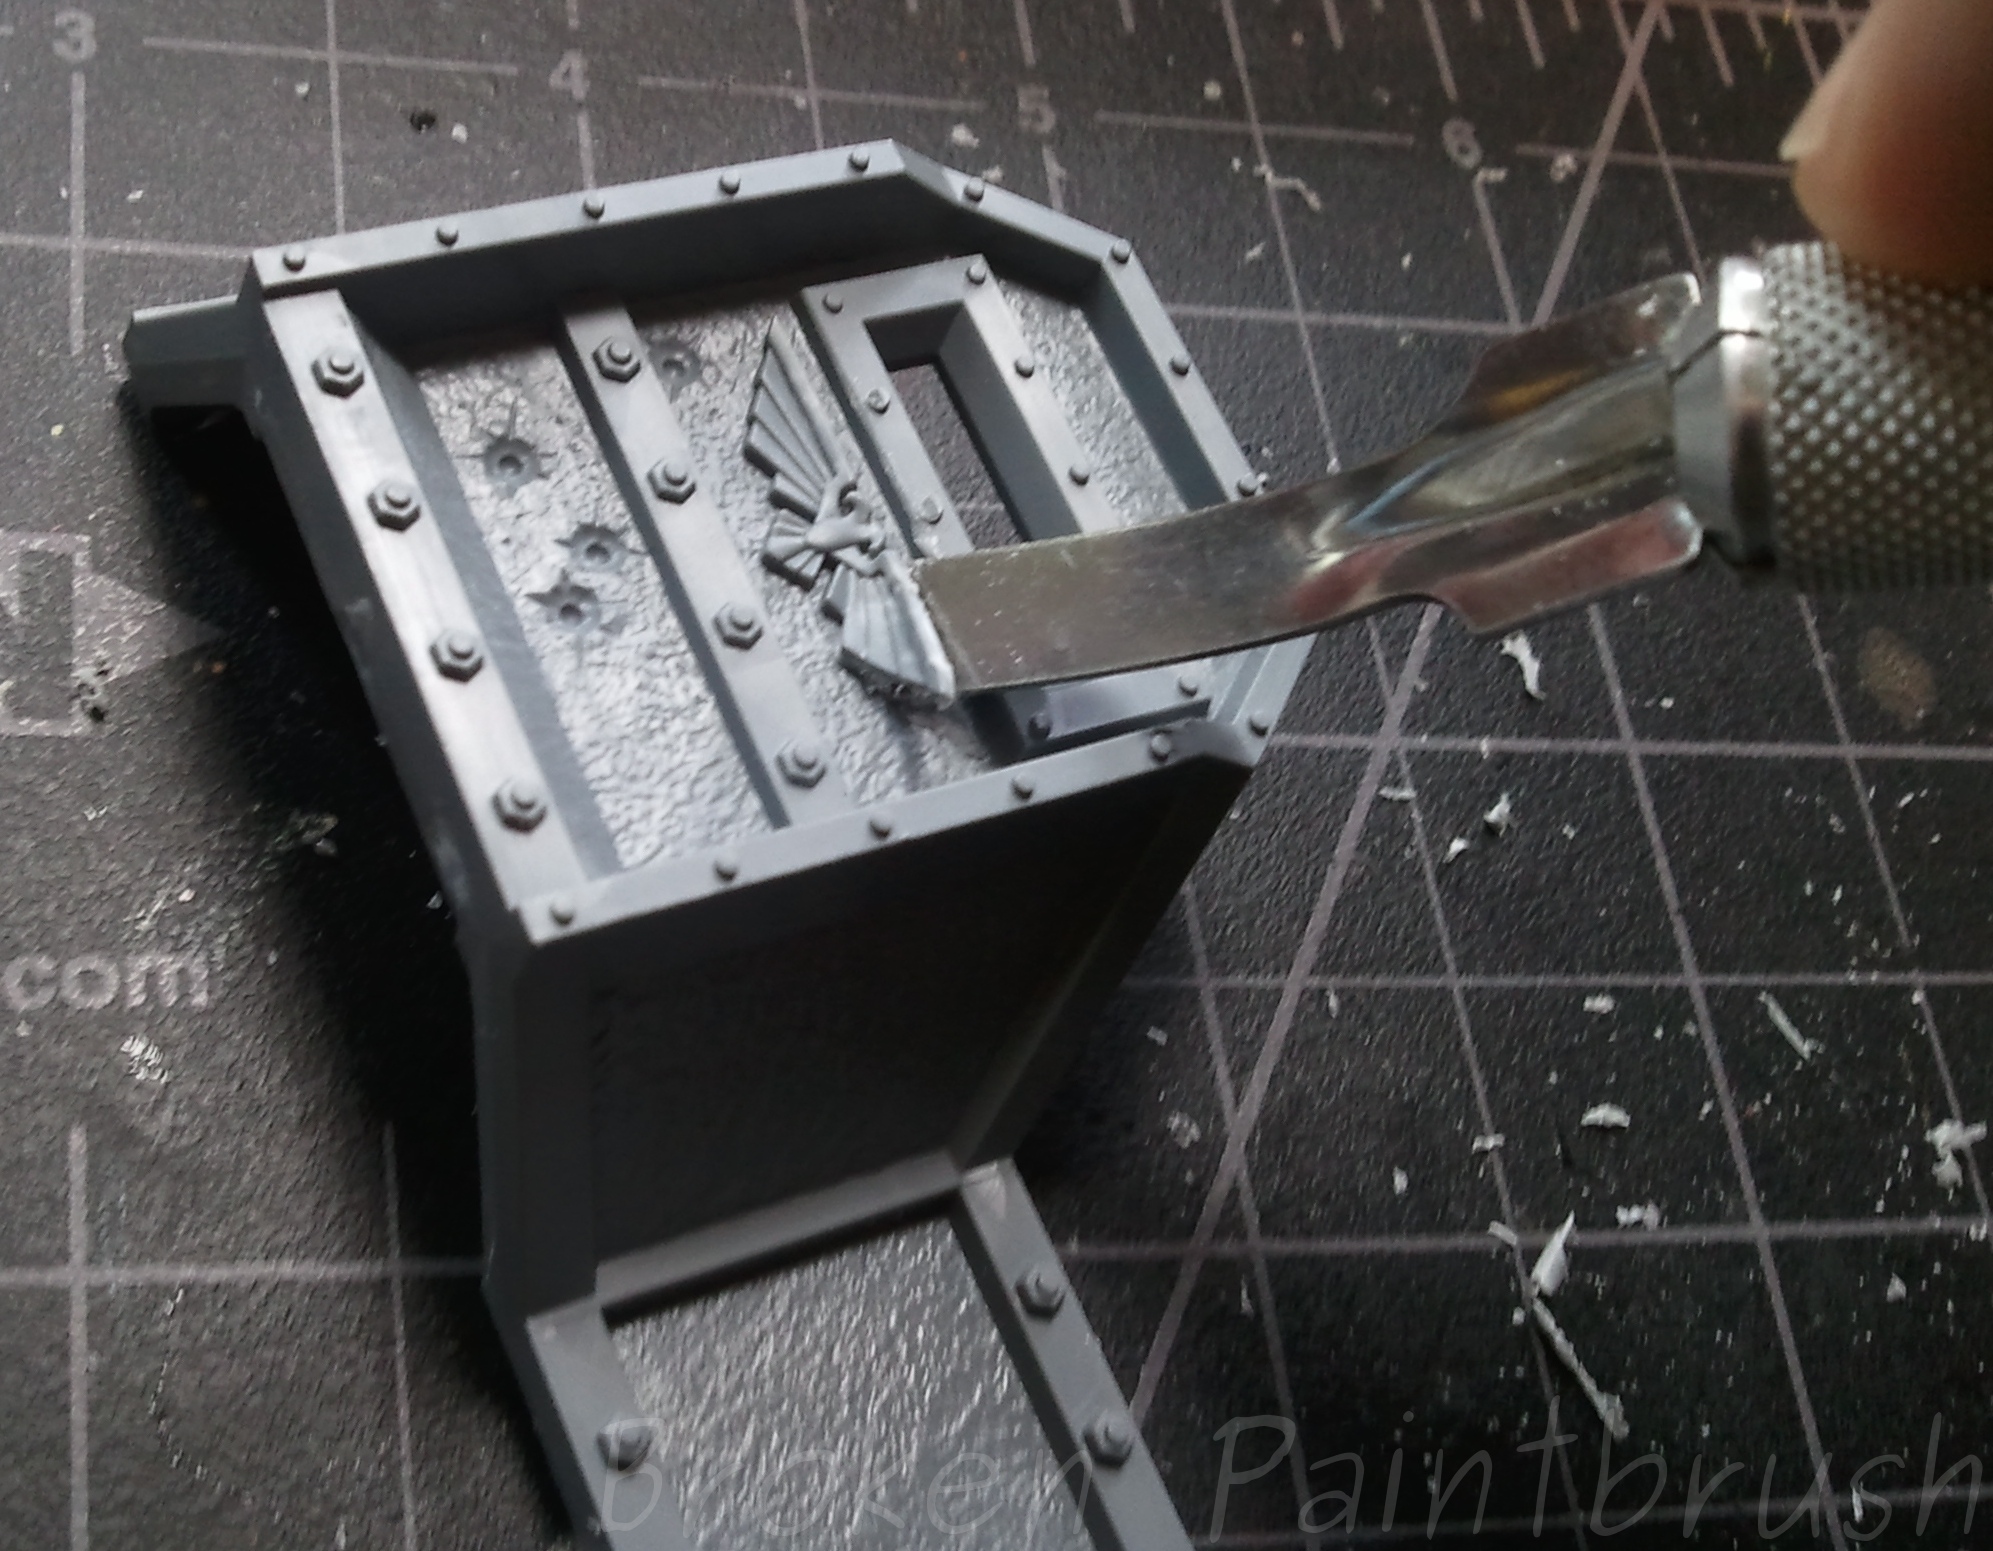
Using an X-Acto Chisel blade to remove Aquila

Removing Aquilas – Creating a Chaos Bastion and Defense Lines

Often the first step in converting, removing Aquilas and other details can help transform your miniature into other factions.

When the Bastion and Aegis Defense Lines were released, I was excited that they had a Chaos Bastion kit as well. I’m sure I was not the only one sorely disappointed, and a bit embarrassed for GW when I realized the “Chaos” bastion was just the usual one with the accessory sprue added in (at an extra cost of course).

Being in product development myself, it just baffled me why GW molded the Aquilas into the kits rather than having it as a glue on piece. They could have then sold Chaos, Ork, or even Tau accessory bits to glue on instead.

But alas, if you want to use these kits for non-zombie worshiping factions, here is how I removed those pesky mutant eagles.

The Tools

First you need the right tool: the chisel Xacto blade! (more info on X-Acto knife here)

I’m not sure what the blade number is for this guy but the key is the flat blade at the tip rather than the edge. The blade is also curved slightly which allows it to reach where we need to go. Picking up a new blade, I would go with the #18 heavy chisel or the #17 smaller chisel for finer details.

The Steps

To remove the Aquila, press the flat of the blade against the edge of the emblem while keeping the flat of the blade as close to parallel with the surface as possible. In a highly scientific maneuver, do a press-wiggle-press motion with the blade until the emblem begins to peel away.

You will be left with a mostly removed bird and bystander casualties, but as you were not pressing the knife directly at your own hand I hope, it should only be neighboring rivets.

Now continuing the press-wiggle-press motion from various directions, the remainder of the carcass can be cleaned up.  A final smoothing can be done by dragging the blade perpendicular to the surface, similar to removing a mold line.

The End Result

Granted, it is not the most beautiful defense line wall anymore, it is aquila free and with a bit of paint, and a touch of ignore the odd blemish, we can move on.

And now you have a dead Aquila to abuse as you wish. I plan on using a couple on my bases as my soldiers march forward.

Chaos Bastion WIP - Front

New Models for 6th Edition

I’ve been pouring over the 6th edition rules the last couple of weeks now, and overall I’m excited for the changes. I especially like the idea of over-watch giving my pour renegade guardsmen some protection against assaults. All the minor changes are going to take some time I think to settle out their benefit/cost to the game. From a hobby standpoint and someone who isn’t into the competitive side, I like the idea of the new army structure including allies and structures. Will it get abused? of course, but so will any rule set put out. I’m working on more posts about my guard and Iron Warriors in 6th but as I was reading the rulebook I remembered I had this in the closet of doom (tm mordian 7th):

Chaos Bastion WIP - FrontI had bought one of these when they had come out thinking of actually playing a planet strike game with it (anyone actually plan that expansion?). After hours of scrapping off those blasted Aquillas and gluing the upper walls together wrong, I started painting the Bastion of Fear in corresponding colors to my traitor guard (see my Russes for an example of the finished look). I’ve obviously have much to go, but I like the look on the larger structure.

Chaos Bastion WIP - backThe heavy bolters and lascannon are currently just the black primmer, but they will be a quick addition.

I also had bought the defensive lines to use as well. I have only started on 1 long piece and 2 short pieces because it takes so long to remove the blasted eagle! Anyone know of a better way to cover up the mark of the corpse?

Chaos Defensive Lines

I’m working on making a habit of posting at least once a week, even if it is just WIP or thoughts on new models. So as always, comments, criticisms, and praise are always welcome.

[amazonify]B002G21PC2[/amazonify]