Latest Posts

Death Skull Ork Trukk Boyz

Second Death Skull Trukk

Here is the second Ork Trukk I painted for my Death Skulls. I built and painted this at the same time as my first trukk, which gave me a chance to not only keep the scheme similar, but also maximize the build to be as different as possible with the kit – which mostly involved switching the driver and gunner.

Death Skull Ork Trukk

The bed of the trukk featured the same blue paint splatters from the Boyz gearing up for the fight. I did this by splashing the blue paint about and then taking my finger to wipe off the raised areas. This gave the look of spilled paint with worn metal tread showing through.

Ork Trukk Bed

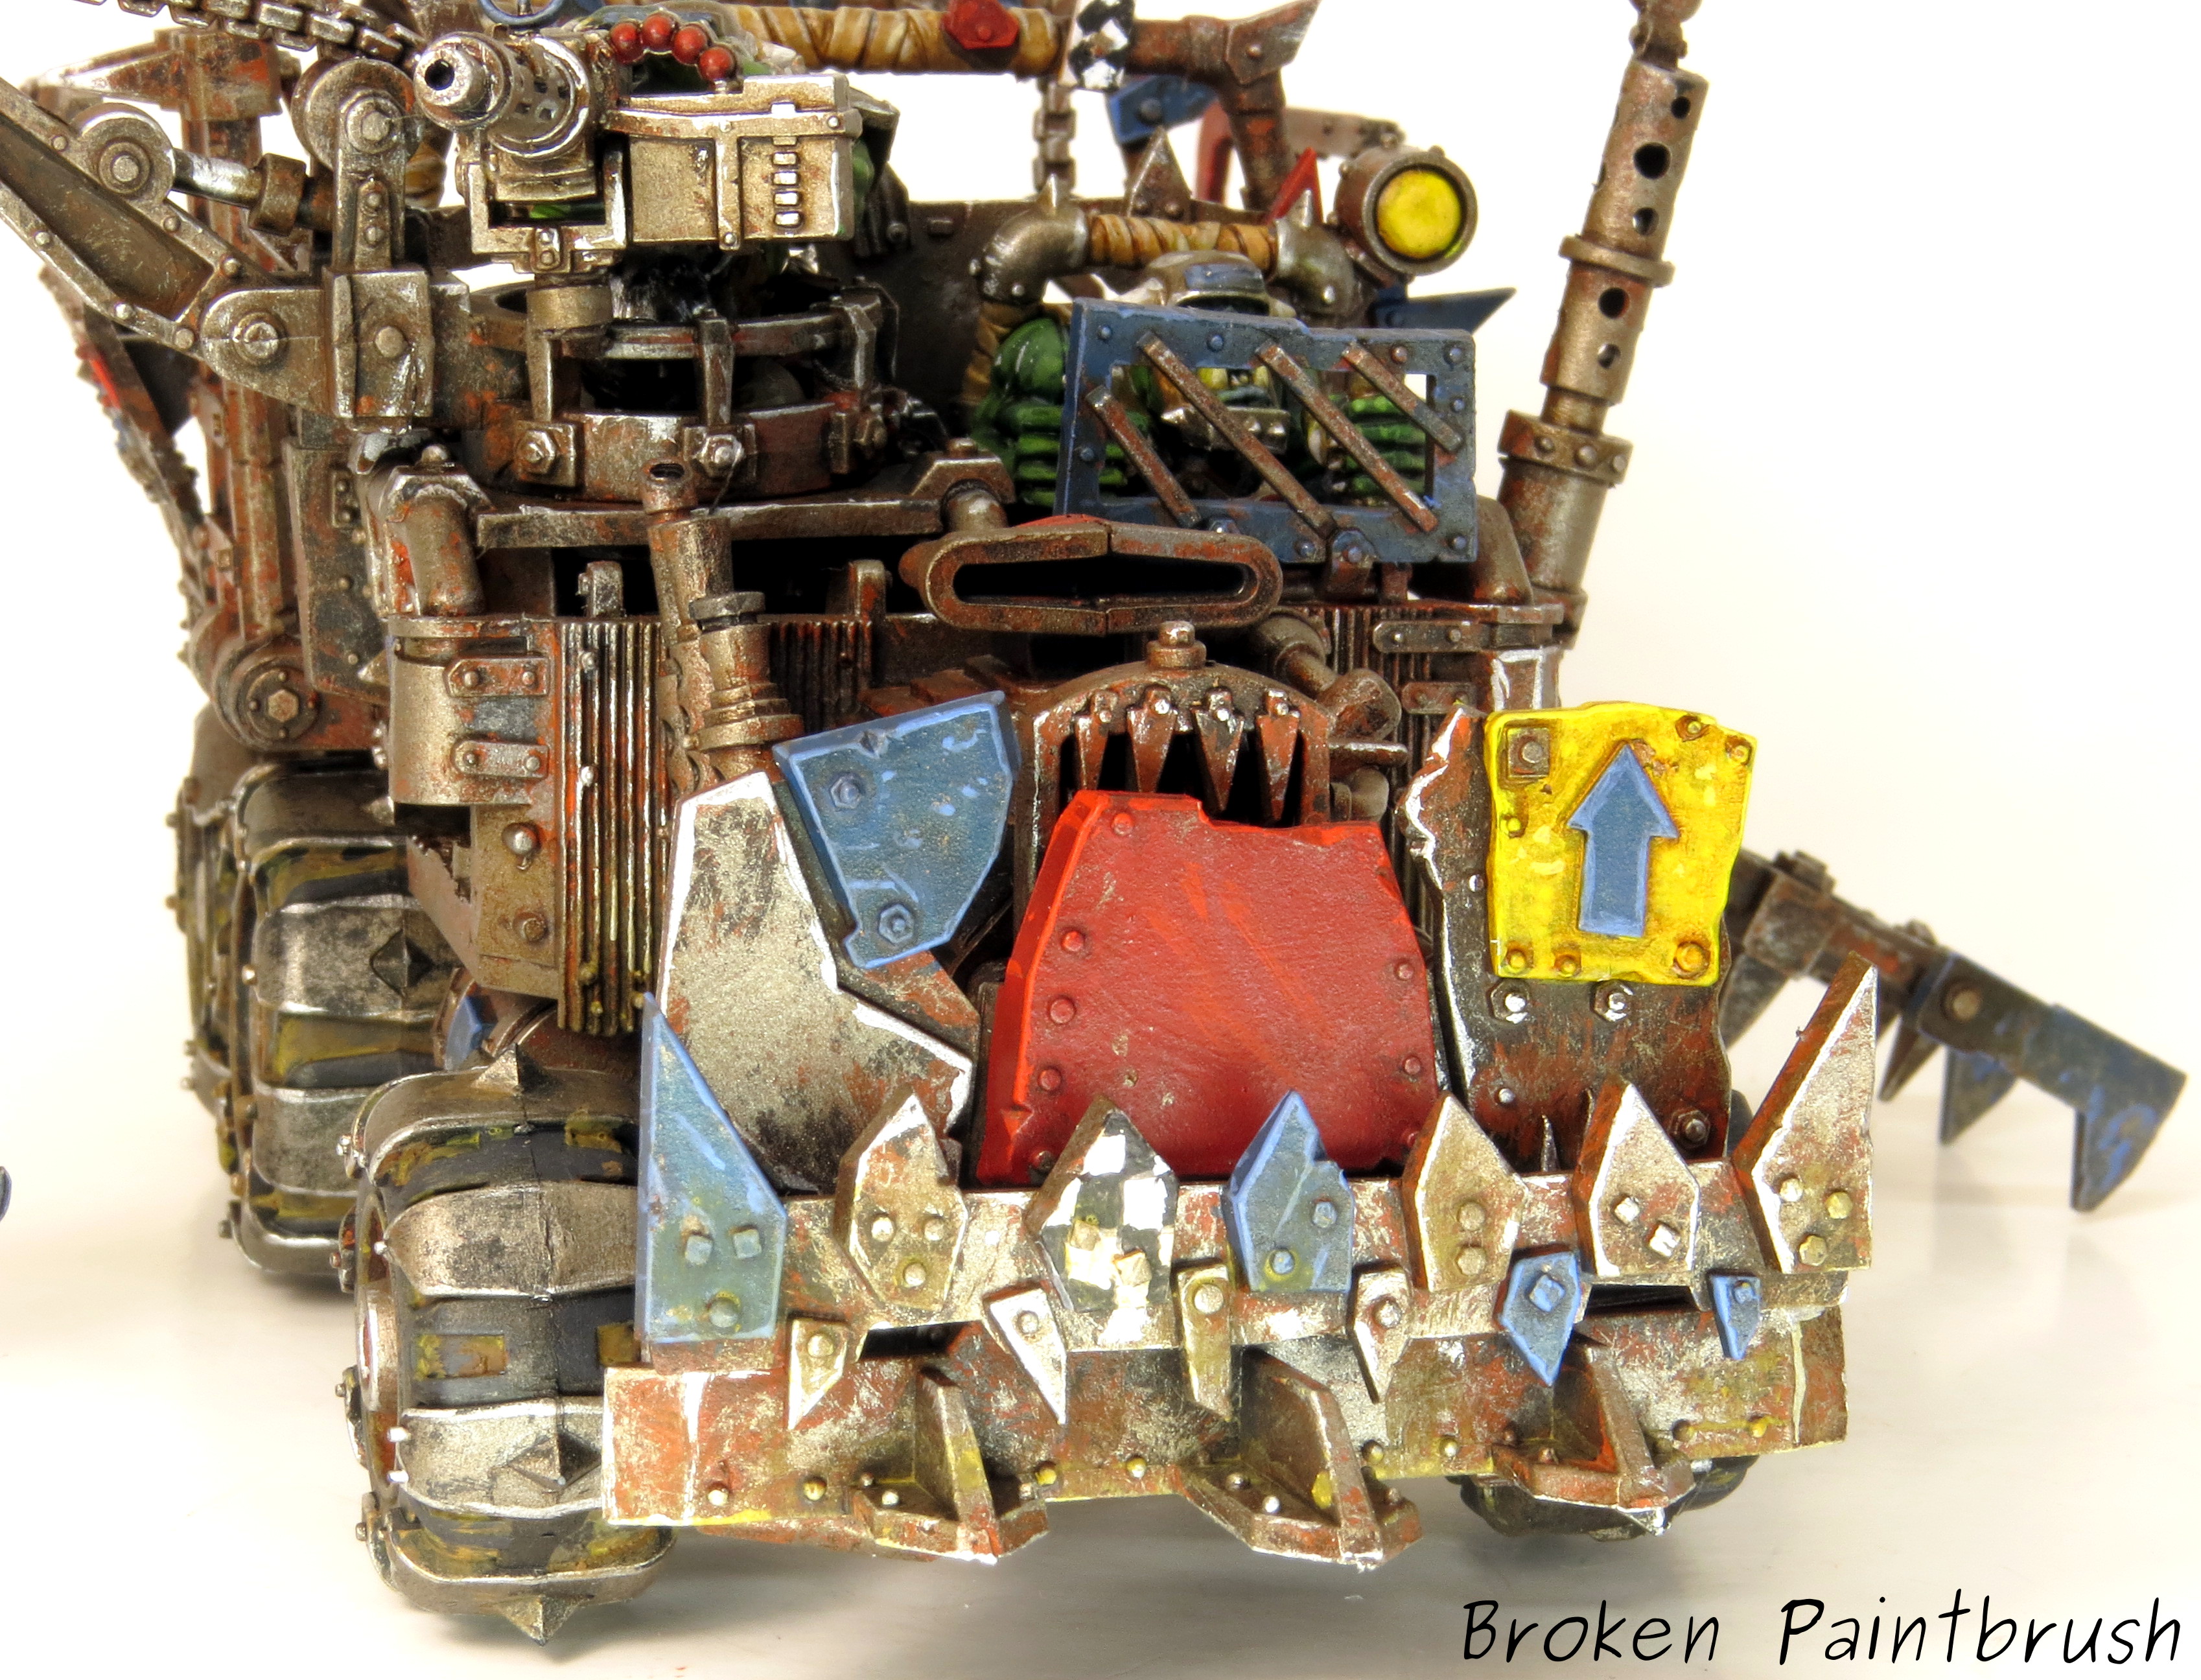
The front grill probably shows the most colorful arrangement of looted piece but still predominately blue. The challenge I was working on was using the other clan colors, but make sure that the Death Skull blue was still predominate and clear where it came from.

Death Skull Ork Trukk Front Grill

The top view not only shows how ramshackle the kit is, but how squeezed in the crew are to their section. Since I painted them separate I had only done a quick fitting before getting started. After finishing the paint and trying to reassemble I realized that the driver doesn’t really fit on this side of the cab – odd for being a UK product. After a bit of trimming and finagling I was finally able to squeeze them both in.

Top of a Death Skulls Ork Trukk

While I think the wrecking ball isn’t worth the points – trukks are to get the boyz in to the fightin’! – it does look very characterful and fun so it had to be added. Also notice the red NOS canister attached to the engine to help it go faster.

Death Skull Ork Trukk

Again, on the side panels I wanted a mix of looted material such as the Goff checks, but still be predominately blue, well at least the sections that weren’t worn metal to be blue.

Right Side of Ork Trukk

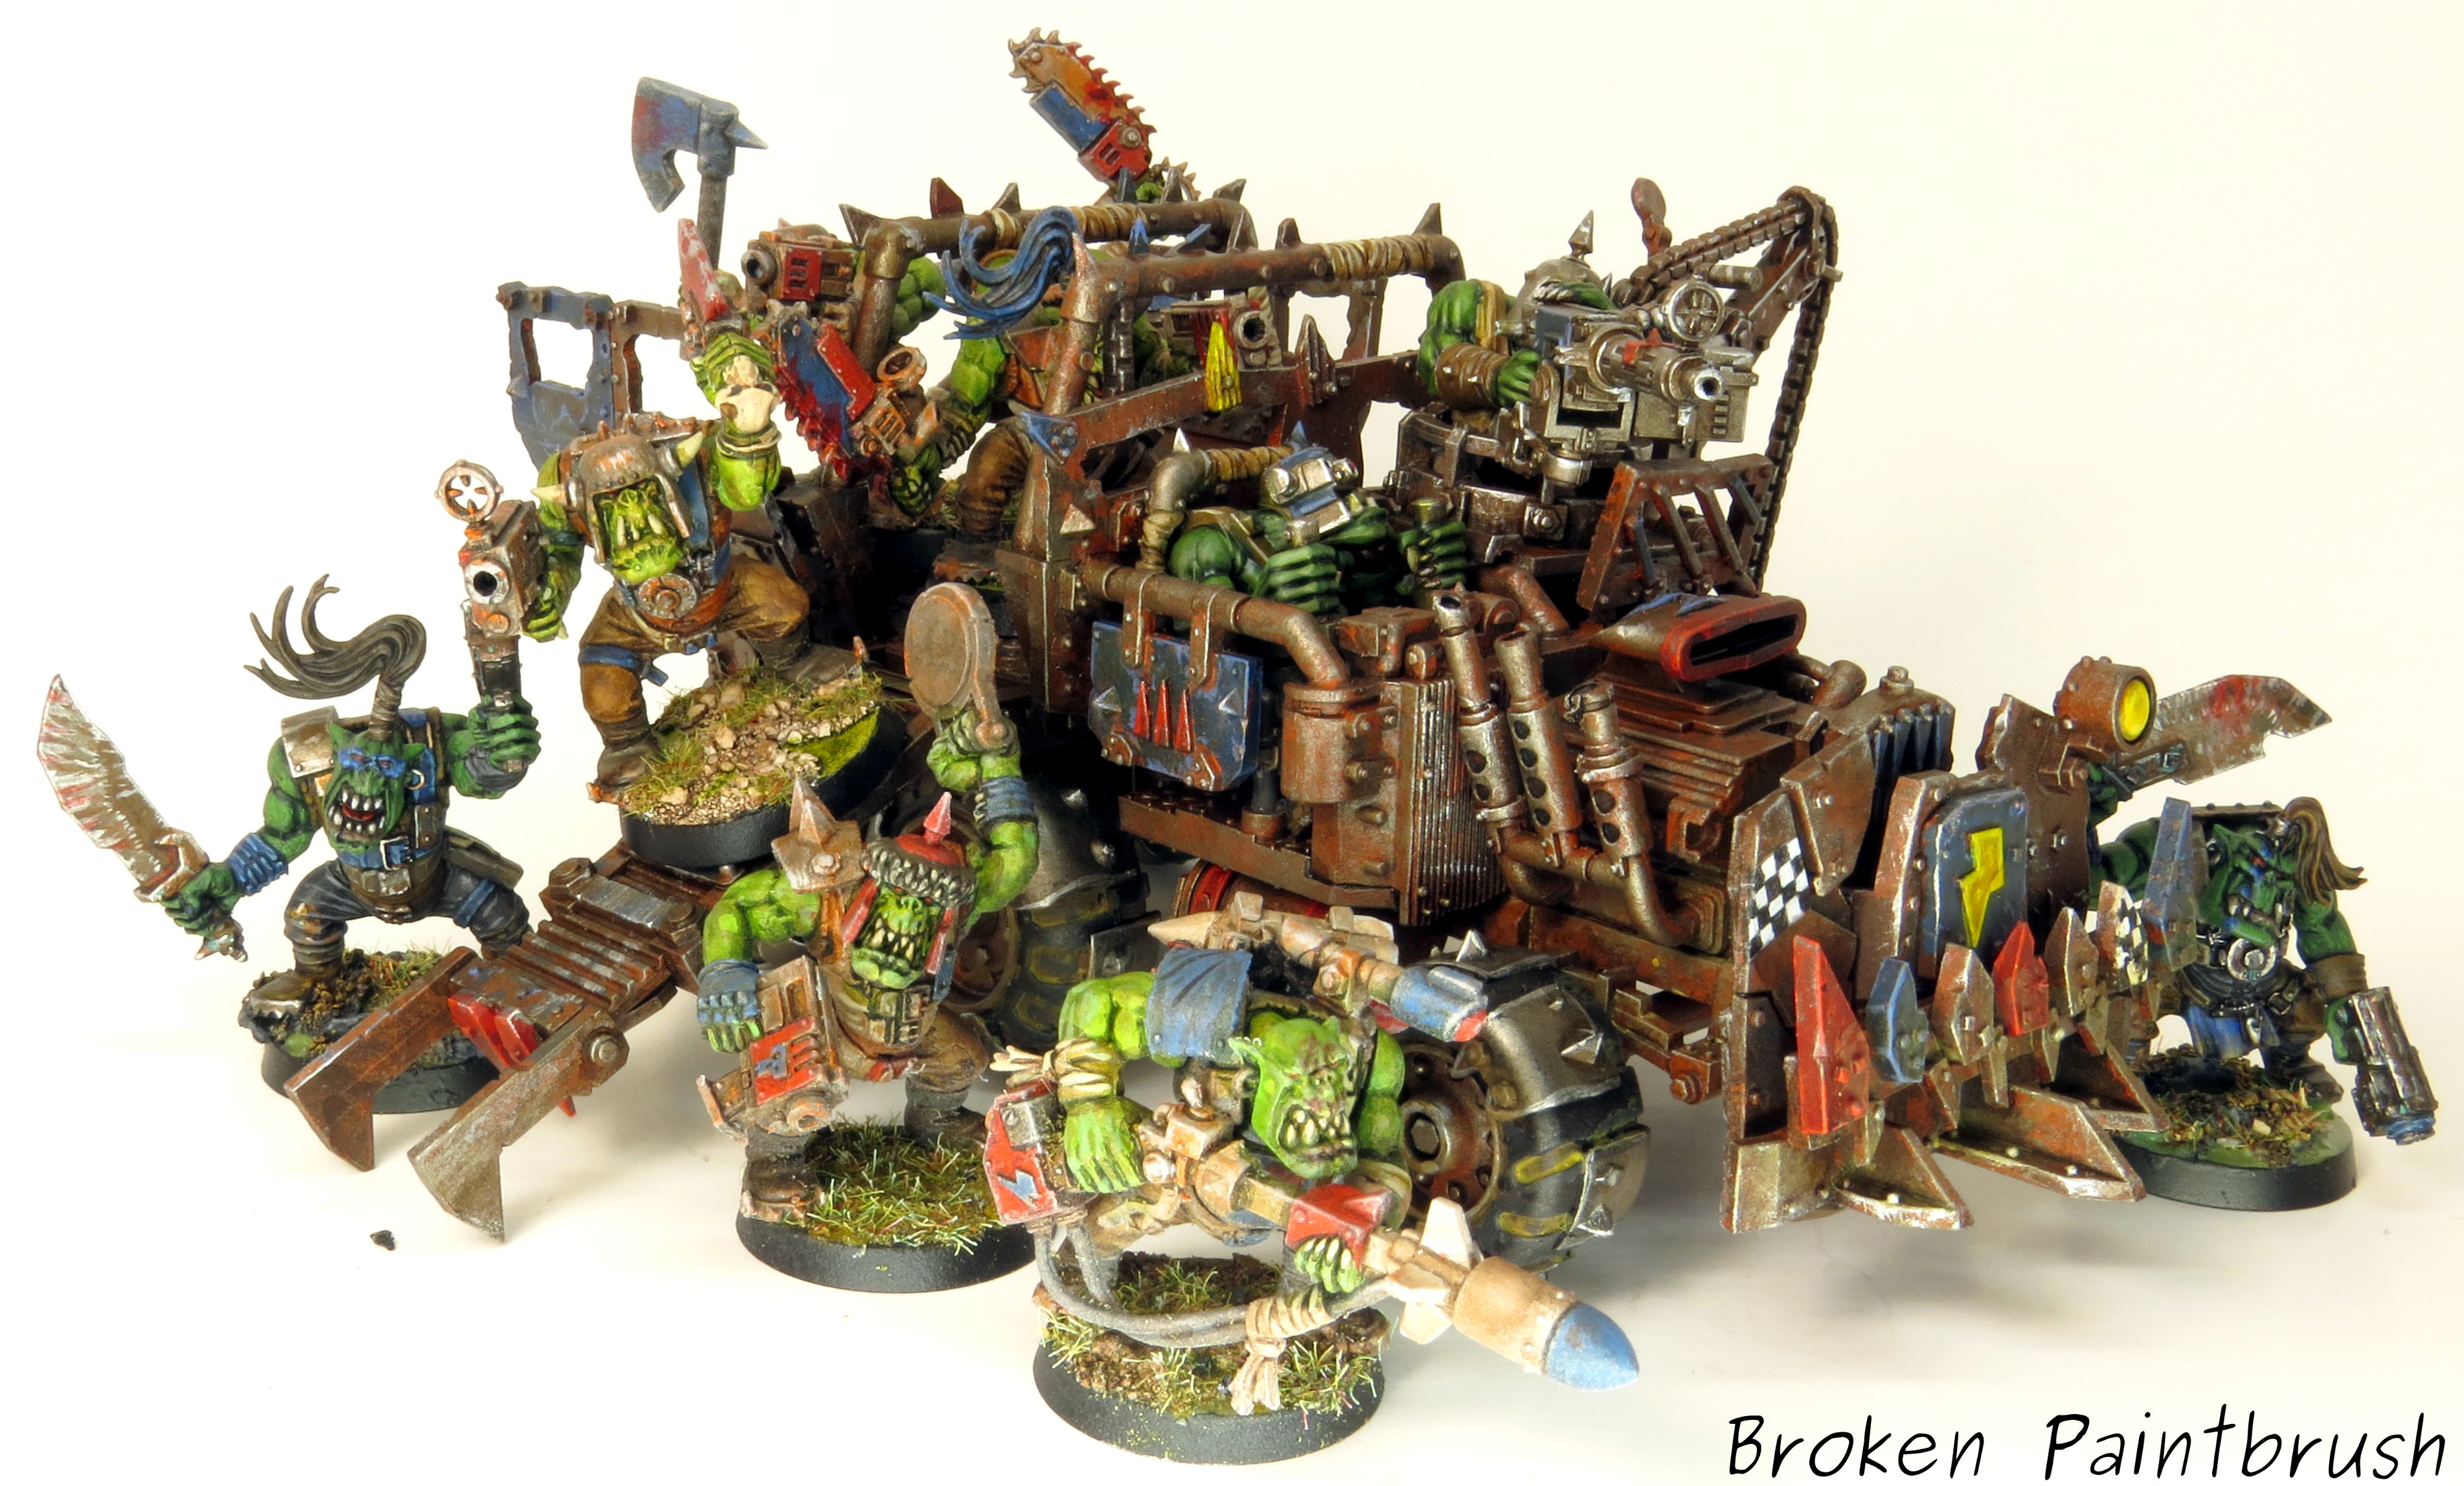
And finally a group shot with some of the boyz! While it makes sense that GW doesn’t do true scale (think of how big a Land Raider would really be!) – when the orks are piled onto the trukk it really shows how small it is. I think even removing the bases I could only fit 5 or so orks into the bed, but then I guess I’m not using Ork ‘ngineerin’


Death Skull Ork Trukk Boyz

For the moment this wraps up my finished orks as I am trying to get a couple of Tyranids done, but fear not – as another squad of killa kans, a gorkanaught, and even a Stompa are in the process of being built! I’m also trying to figure out a setup to take pictures of larger groups now that I got better lights.
How to Weather Wheels and Tires

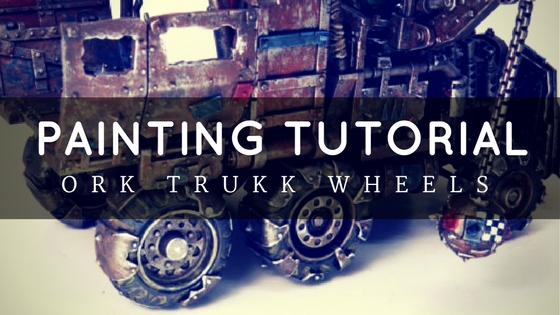
How to Paint Ork Trukk Wheels

Over the years I have been painting, I love coming across a tutorial on something I haven’t done yet and gleaning just a little bit of information off of it. So here is my second how-to of the year – following up on my Ork Warboss – and a chance to give a little something back t0 the community.

How to Weather Wheels and Tires

I have another tutorial on the rest of the Trukk, but here I want to focus on the wheels.

As you can see below, I kept the wheels, crew, and wrecking ball separate from the main truck body to make it easier to paint. The crew and wrecking ball were lightly glued to scrap bases, and I found the wheels hubs were the perfect fit for the penny nails I use for pinning. Using some old corks I could paint the wheels and allow them to dry without touching any painted surface.

Painting the Trukk Wheels Step 1: The Metal

The wheel was left black from the primer, and all the metal areas were coated with Leadbelcher. Ryza rust was liberally applied to the hub. I followed this with a dry brush of Rune Fang and a final wash of Earthshade.

40k-ork-truck-wheels-how-to-paint-1


Step 2: Mud Base

I wanted the tires to be dusty, but not full on muddy, so I washed the inner treads with  Skrag Brown mixed with various weather powders. The idea was to get the darker brown down first. I wasn’t too careful about keeping it off the tire surface at this point.

40k-ork-truck-wheels-how-to-paint-2

Step 3: Lighter Dust

Using thin downed Zandri Dust mixed with lighter colored powders, I washed the recesses of the treads. While this may seem backward to wash the crevices with the lighter color, looking at dusty, dried mud-filled tires, the recesses kept most of the lighter colors.

40k-ork-truck-wheels-how-to-paint-3

Step 4: Tire Cleanup

The tires were then touched up with Dawnstone and even dry brushed in the middle of the treads. This helped to ‘wear’ down the dust in the center of the grooves where it might have been knocked out.

40k-ork-truck-wheels-how-to-paint-4

Final Step: Attach

After attaching the wheels to the main truck, you can see how the metals tie back together, and the dark tires give a good contrast to the main metal body.

40k-ork-truck-wheels-how-to-paint-5

I hope that you found this helpful is some small way, even if you aren’t painting a convoy of trukks anytime soon. I would always appreciate feedback below and any suggestions on improving my articles.

Close up of Ork Trukk Grill

Ork Death Skulls Trukk Number 1

With all those Ork Walkers mucking about, the Boyz needed some upgrades of their own to get them to the fray. Fortunately, I had two trucks (or Trukks) sitting in the closet of doom. While being a bit fiddly to assemble (I knocked the side panels off constantly!), I left the wheels, crew, and the wrecking ball separate to allow simpler painting.

Ork Truck right side

Following in the junkyard look of my walkers, I painted the trucks to look like they had just been cobbled together and covered in just enough blue paint to get them to the fighting. I mix of the dark Gothic rust mixed with the Ork comically bright colors.
40k Ork Trukk Front

Among the blue panels, you can see segments of other Ork clans like the yellow Flash Gitz, red Speed Freaks, and checkered Goffs.

Close up of Ork Trukk Grill

Because there are so many great tidbits all over the truck, I felt the need to highlight them in different colors, patterns, and chipping.

40k Ork Trukk left side

Take for instance the side panels here; you’ve got little dags bolted on the top, arrows and lighting decorations, and custom windows!

Ork Trukk left side closeup

Since the boys would be busy painting themselves up with the lucky blue, I figured they wouldn’t be too neat about it. So in the truck bed, I slobbered plenty of blue about the place.


40k Ork Truck Bed

Overall I am happy with how the truck turned out (other than that nice gap in the air intake below! gah!) and my Ork fever is ever growing. I even painted the big shotta’s bullets red to make them go faster 🙂

40k Ork Trukk top view

Make sure to check out the painting tutorial for the Trukks as well as the second Ork Trukk as well.

Killa Kan with big shoota - front

Little Stompies: Killa Kans

Adding some numbers to my growing ork machines are a rag-tag squad of Killa Kans from the Sanctus Reach box set. Say hello to Hickory, Dickory, and Doc! (names via my very supportive wife)

Killa Kan Squad

These are in line with my Deffdread: lots of rusty armor, sections of ‘lucky’ blue and the odd section of stolen icons here and there. I put together a painting guide with my second squad of Killa Kans if you want to see how I did the colors.

Killa Kan with big shoota - right

First up is Hickory with this big shoota and buzz saw. Probably the worst choice of weapons in the box and someday will need to switch it to a missile launch or something.Killa Kan with big shoota - left

I built all three models without their base so I could paint it separate. After finishing the Killa Kans, I found a base that matched best with each model. Hickory got a base with a large step that matched well with his gait.

Killa Kan with big shoota - front

The bases are from Secret Weapon Miniatures‘ Iron Deck series.

Killa Kan with big shoota - back

The Killa Kans have such great, cobbled together look, they were fun to build and paint. While not as flexible as some of GW’s newer kits, the customization (or Kustom’) you can do on each is impressive even without resorting to plasticard.

Killa Kan with missiles - right

Next up is Dickory with a rocket launcher and nice buzz-pinchers.

Killa Kan with missiles - left

He is also on an Iron Deck base, this time with the step to the side. His legs were off just enough to make it look convincing.

Killa Kan with missiles - back

Notice the Goff markings on his pincer hand. I wanted to pull in some of the loota’ aspect of the Death Skulls as well as give some interesting bits throughout the model.

Killa Kan with Grot Blaster - right

Last up is Dok with the ever famous Grot Kannon and buzzsaw. The idea of the grot stuffing whatever he can find into the launch barrel more than makes up for the down side of this gun (short range with scattering is never a good thing!).

Killa Kan with Grot Blaster - left

Dok’s base is from the scrap yard set with lots of odds and ends to paint up. I feel that I tied in the different lines well with the rusty metal look throughout.

Killa Kan with Grot Blaster - back

And now a family shot!

A humble start to a dread mob

Not too bad of a start to a dread mob, though if I remember right, I need six more Killa Kans, two more Deffdreads, and two Gorkanoughts. But fear not Ork fans, for another box of Killa Kans, and Gorkanough, and a Stompa are in progress.
Update: I’ve made more progress on the Dreadmob!

Deffskullz Ork Deffdread

Ork Deffdread

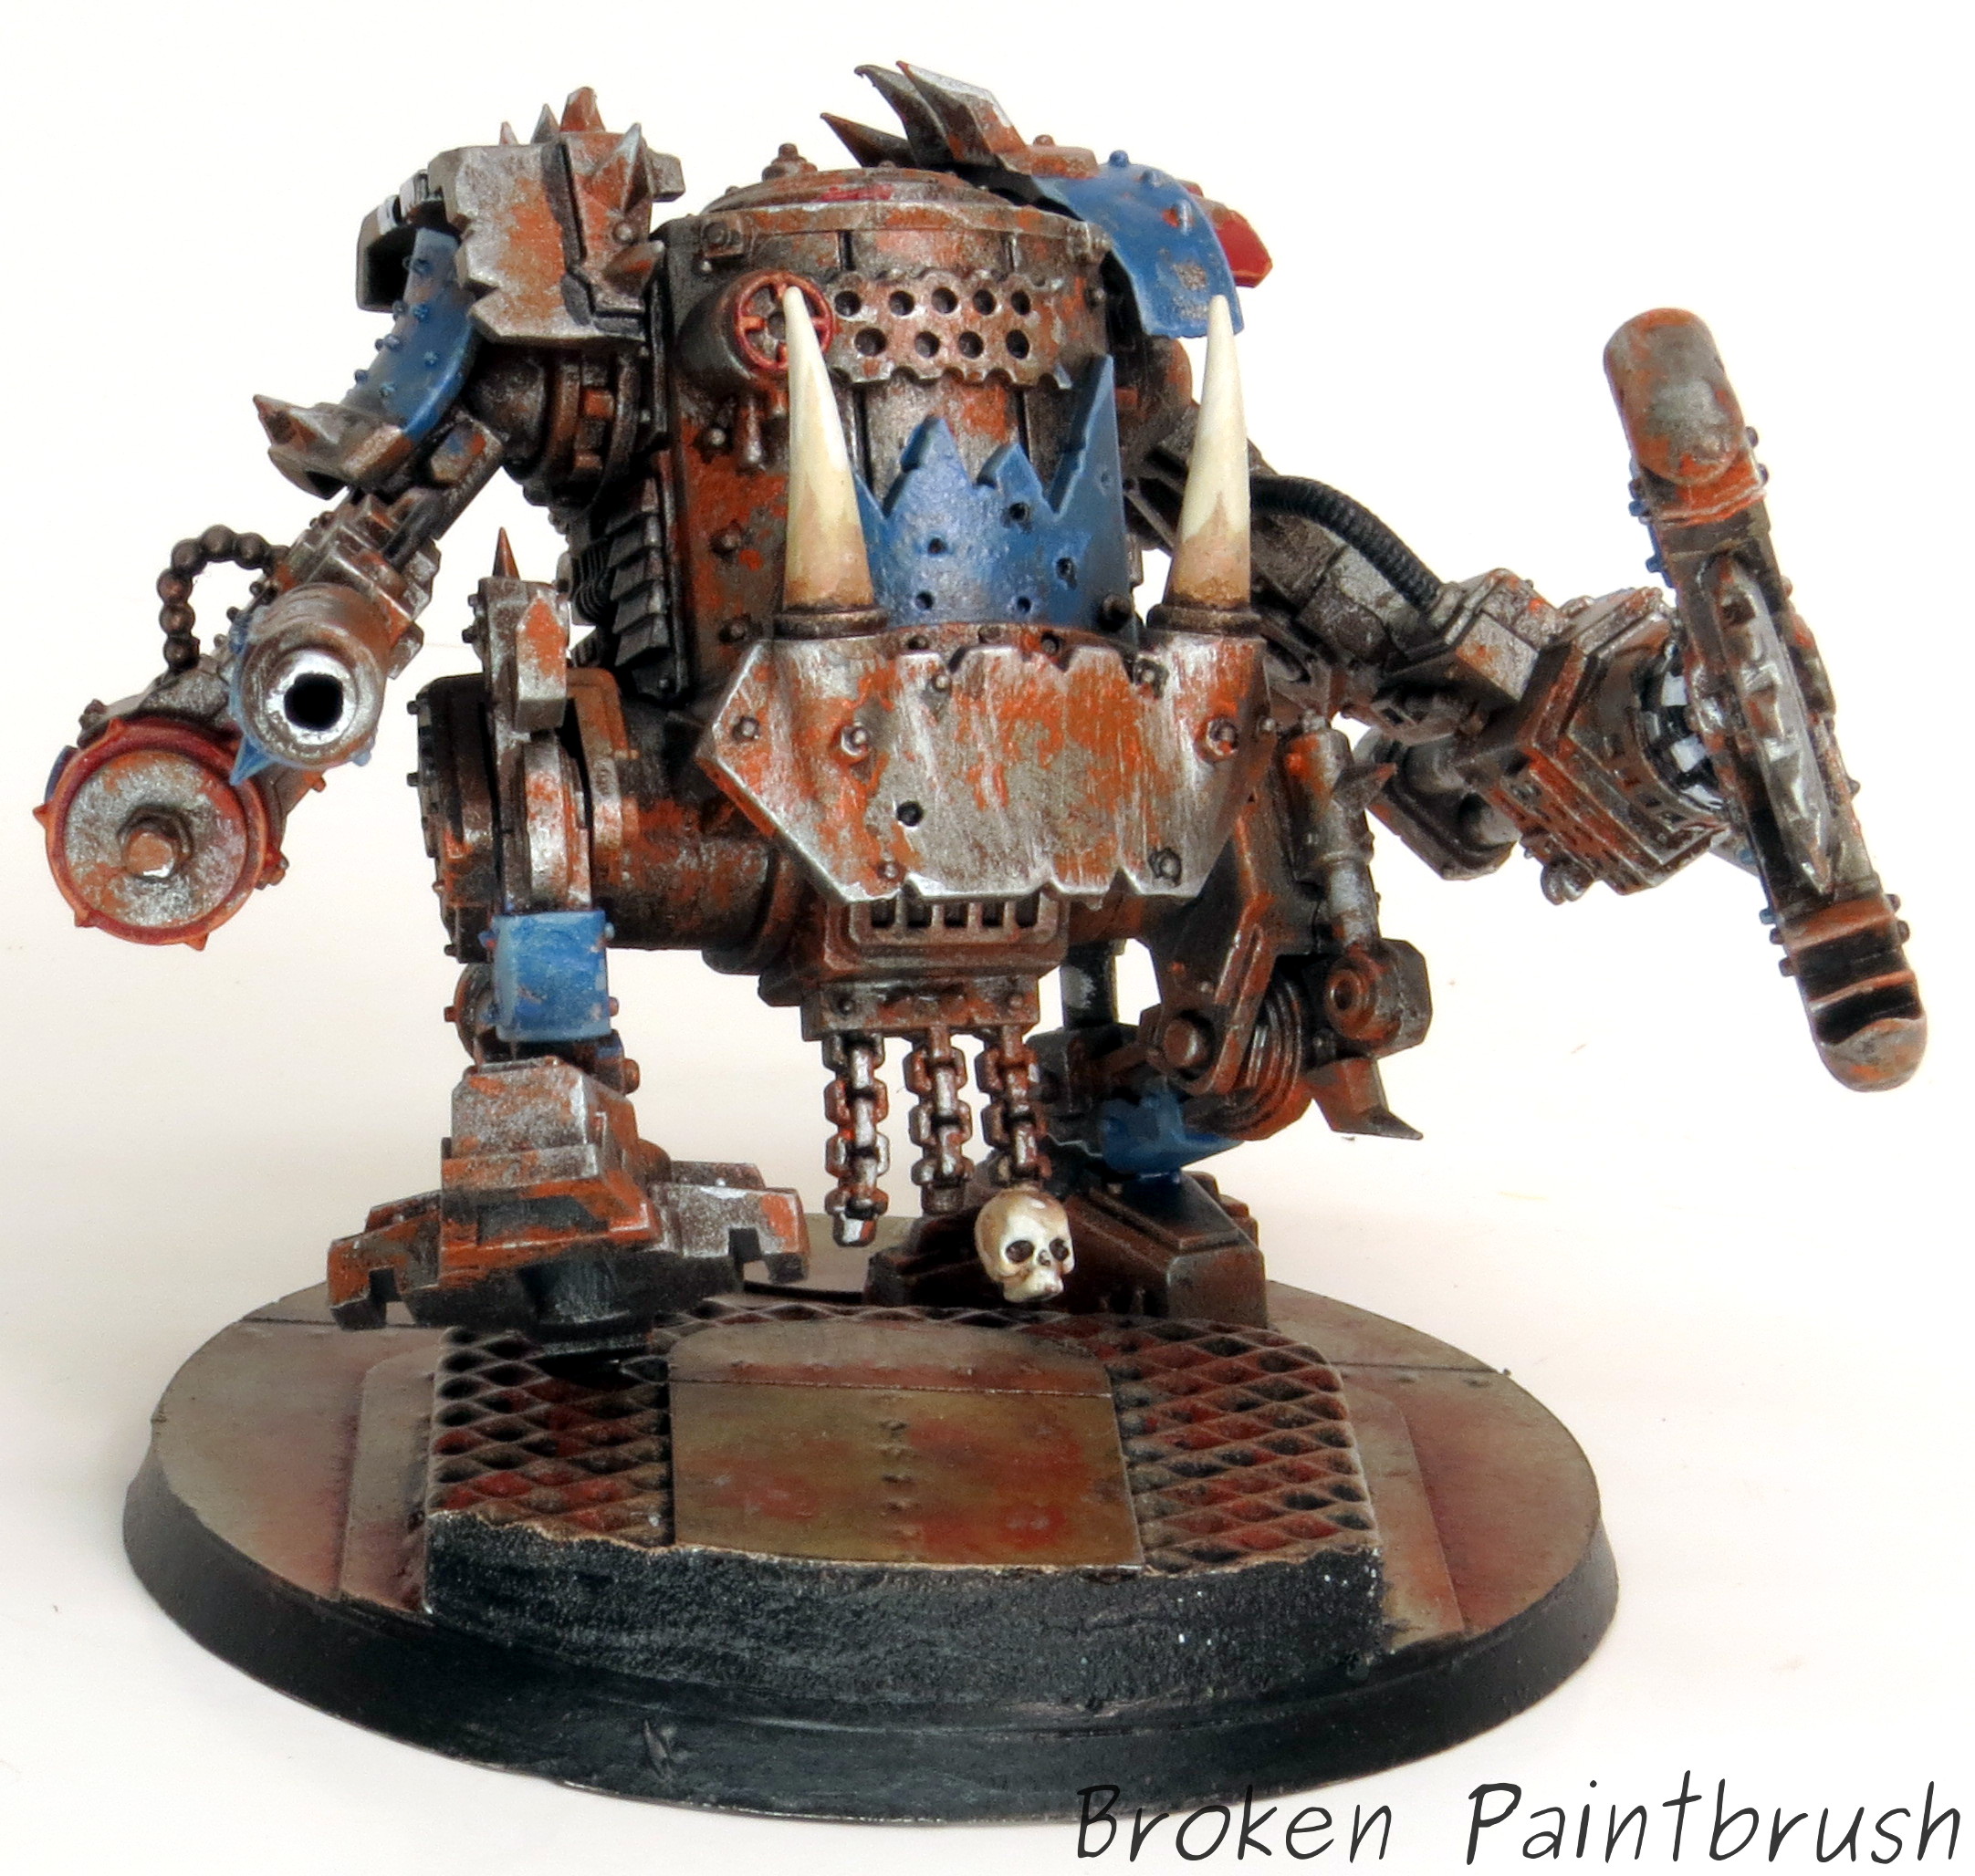
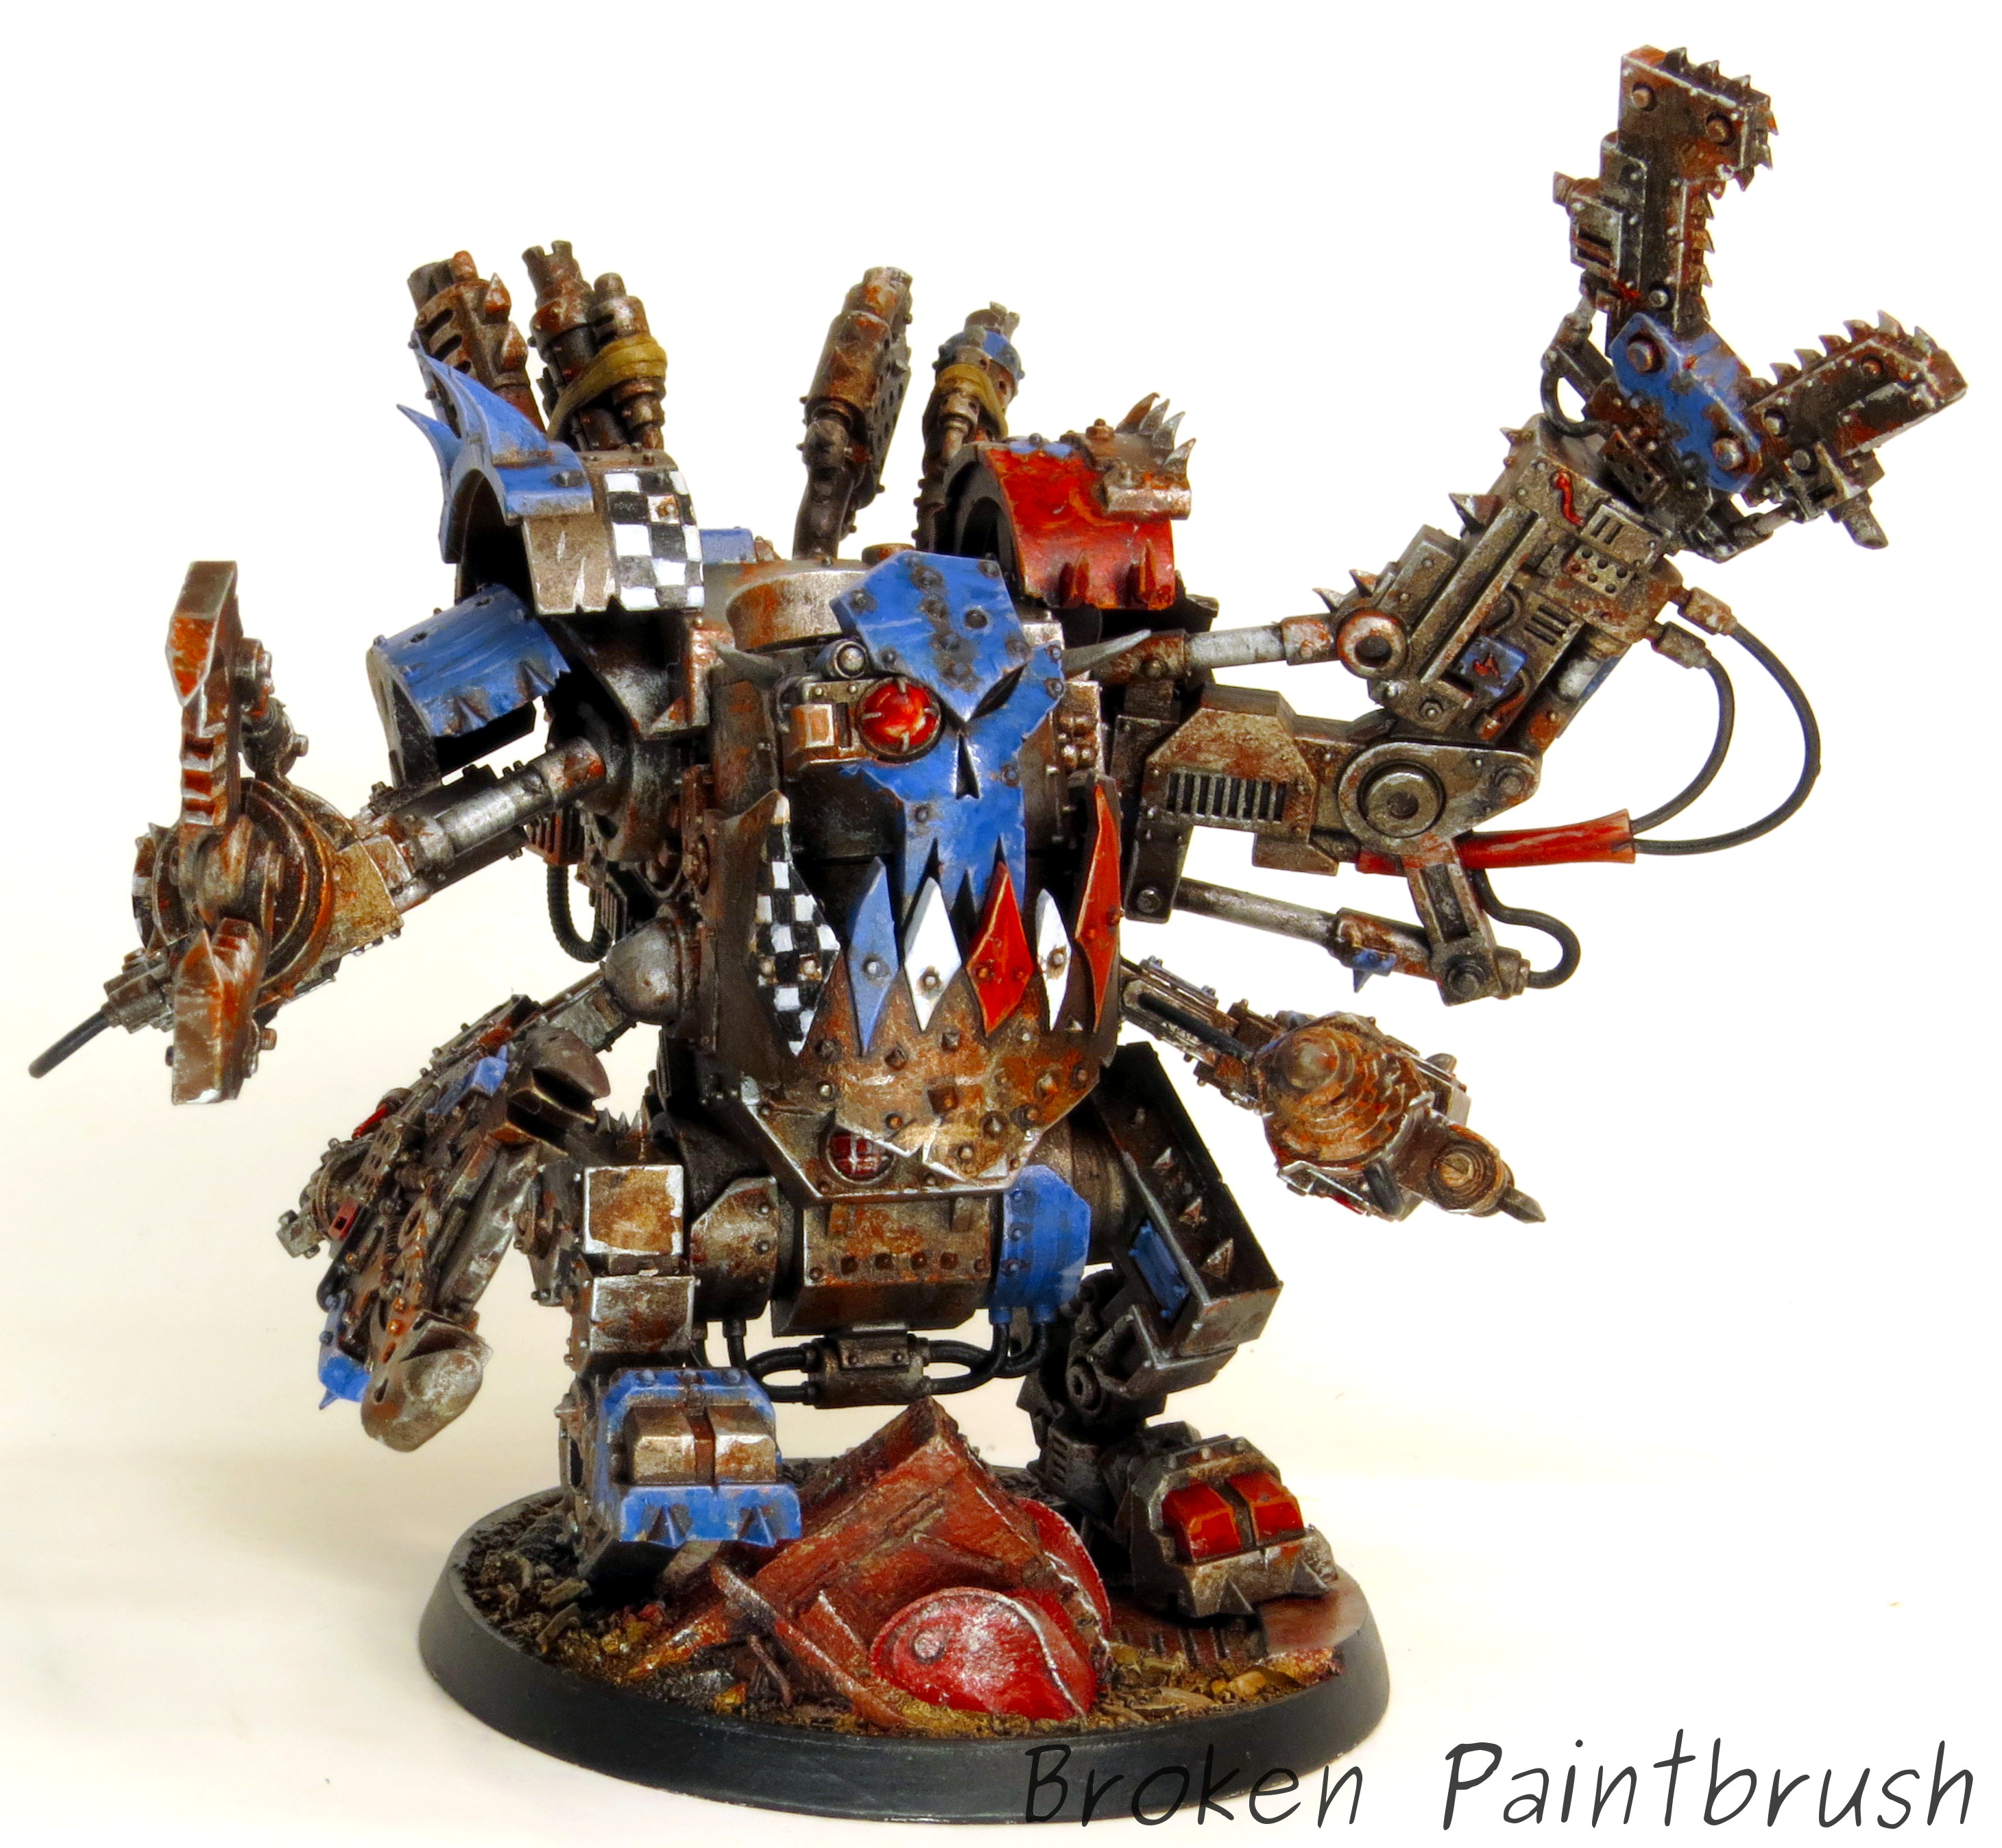
Adding some beef to my ork hoard is a nice, choppy, Deffdread with lots of buzzing, hacking, and drilling. I love the comical look of all those arms full of wacky weapons and hacked on plates.Deffskullz Ork Deffdread

I’m keeping with the theme of the Death Skulls being scrapers that slap blue on everything and hammer it together. Throughout the model I have Evil Sunz red, and Goff black and whites.Deffskullz Ork Deffdread

Painting Rusty Metal

The rest of the model is a nice rusty metal which was done in a number of layers:

  1. Black primer with a quick white over spray
  2. Brown spray
  3. Dry brush of Lead Belcher
  4. Orange with rust pigment stippled
  5. Dry brush with silver

Deffskullz Ork Deffdread

The crazy, cobbled together look of the Deffdread made it so much fun to paint and highlight specific panels with the blues and reds.Deffskullz Ork Deffdread

The base is another Secret Weapon Miniature from their Junk Yard line. They have a fantastic range of bases, and I have decided to move towards pre-made bases for the simplicity and time. I get so little hobby time nowadays that I would rather slap paint on the next model rather than build a base.Deffskullz Ork DeffdreadEven though most of the model is metal, I attempted to add different textures by varying the amount of rust and bright silver.
Deffskullz Ork Deffdread
Obviously the skull plate was painted blue, but all those big teef were made to stand out with bright reds and sharp whites.

Deffskullz Ork Deffdread

Stompy here is only the first of a growing Dread mob both on my desk and in my own Mek dreams!

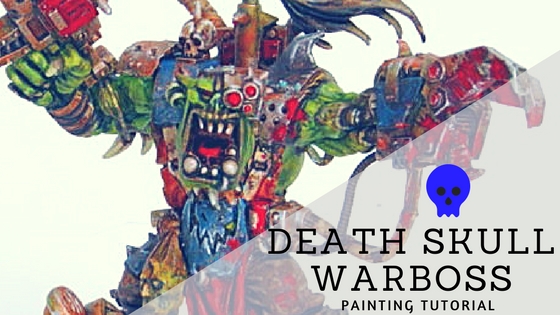
Painting Death Skull Warboss

Painting the Ork Warboss

For my recently posted Ork Warboss, I took a few in progress shots to provide some how-to content. I hope this post on painting a Death Skull Warboss helps get your Wagghh! going.

Painting the Death Skull Warboss Tutorial and Painting Guide

Step 1 – White Base Coat

First up is a nice, white base coat. White is nice for creating those bright blues and gory reds. The problem with a full white undercoat is that you need to paint EVERY thing, otherwise it is very stark and apparent, black base coats are able to hide this by making ‘shadows’

Deff Skulls Ork Warboss WIP

Step 2 – Green Skin

Next up is painting the various base coats such as the Warboss Green for the skin. All the colors are kept fairly bright at this point to allow for shades that will darken the look.

Deff Skulls Ork Warboss WIP

Step 3 – Blue Base Coat

The blues were also blocked in with Alaitoc Blue, it doesn’t need to be tidy as the shades and highlights will clean up the mess.

Deff Skulls Ork Warboss WIP

Step 4-10: More Base Coats and Wash

This is where I must apologize, I skipped a few steps between layers. The reds were done with Mephiston Red, brown was down with Mournfang Brown and the silvers with Runefang Steel. Finally, the model was washed with the first brown wash.

Deff Skulls Ork Warboss WIP

Step 11 – Rust and Skin Highlights

After a few more washes I then used a rust pigment on the metal areas. The rust pigment was mixed with medium and dabbed on, after it all dried, it was sprayed with a clear coat to keep it in place. Also, the green was highlighted back up to Skarsnick Green before a green wash brought it back together.

Painting the Death Skulls Warboss Rust Layer

Step 12 – High Lights and Gore

The blues were edge highlighted with Lothren Blue. The metals re-highlighted. The blood was done using Clear Red, first with black washed added to make it dark, and then blob in with bright, clear red. The lips and veins were washed with flesh tone and re-highlighted.Death Skulls Ork Warboss from Assault on Black Reach

Step 13 – Base

The final step was to finish up the base with Balor Brown followed up with a Zandri Dust drybrush. The putrid green water was done with moot green followed up with clear coats and brown washes. Hope this helps you paint your own WAAGHH!

Again, check out the finished model here.

Deff Skulls Ork Warboss

Death Skull Warboss

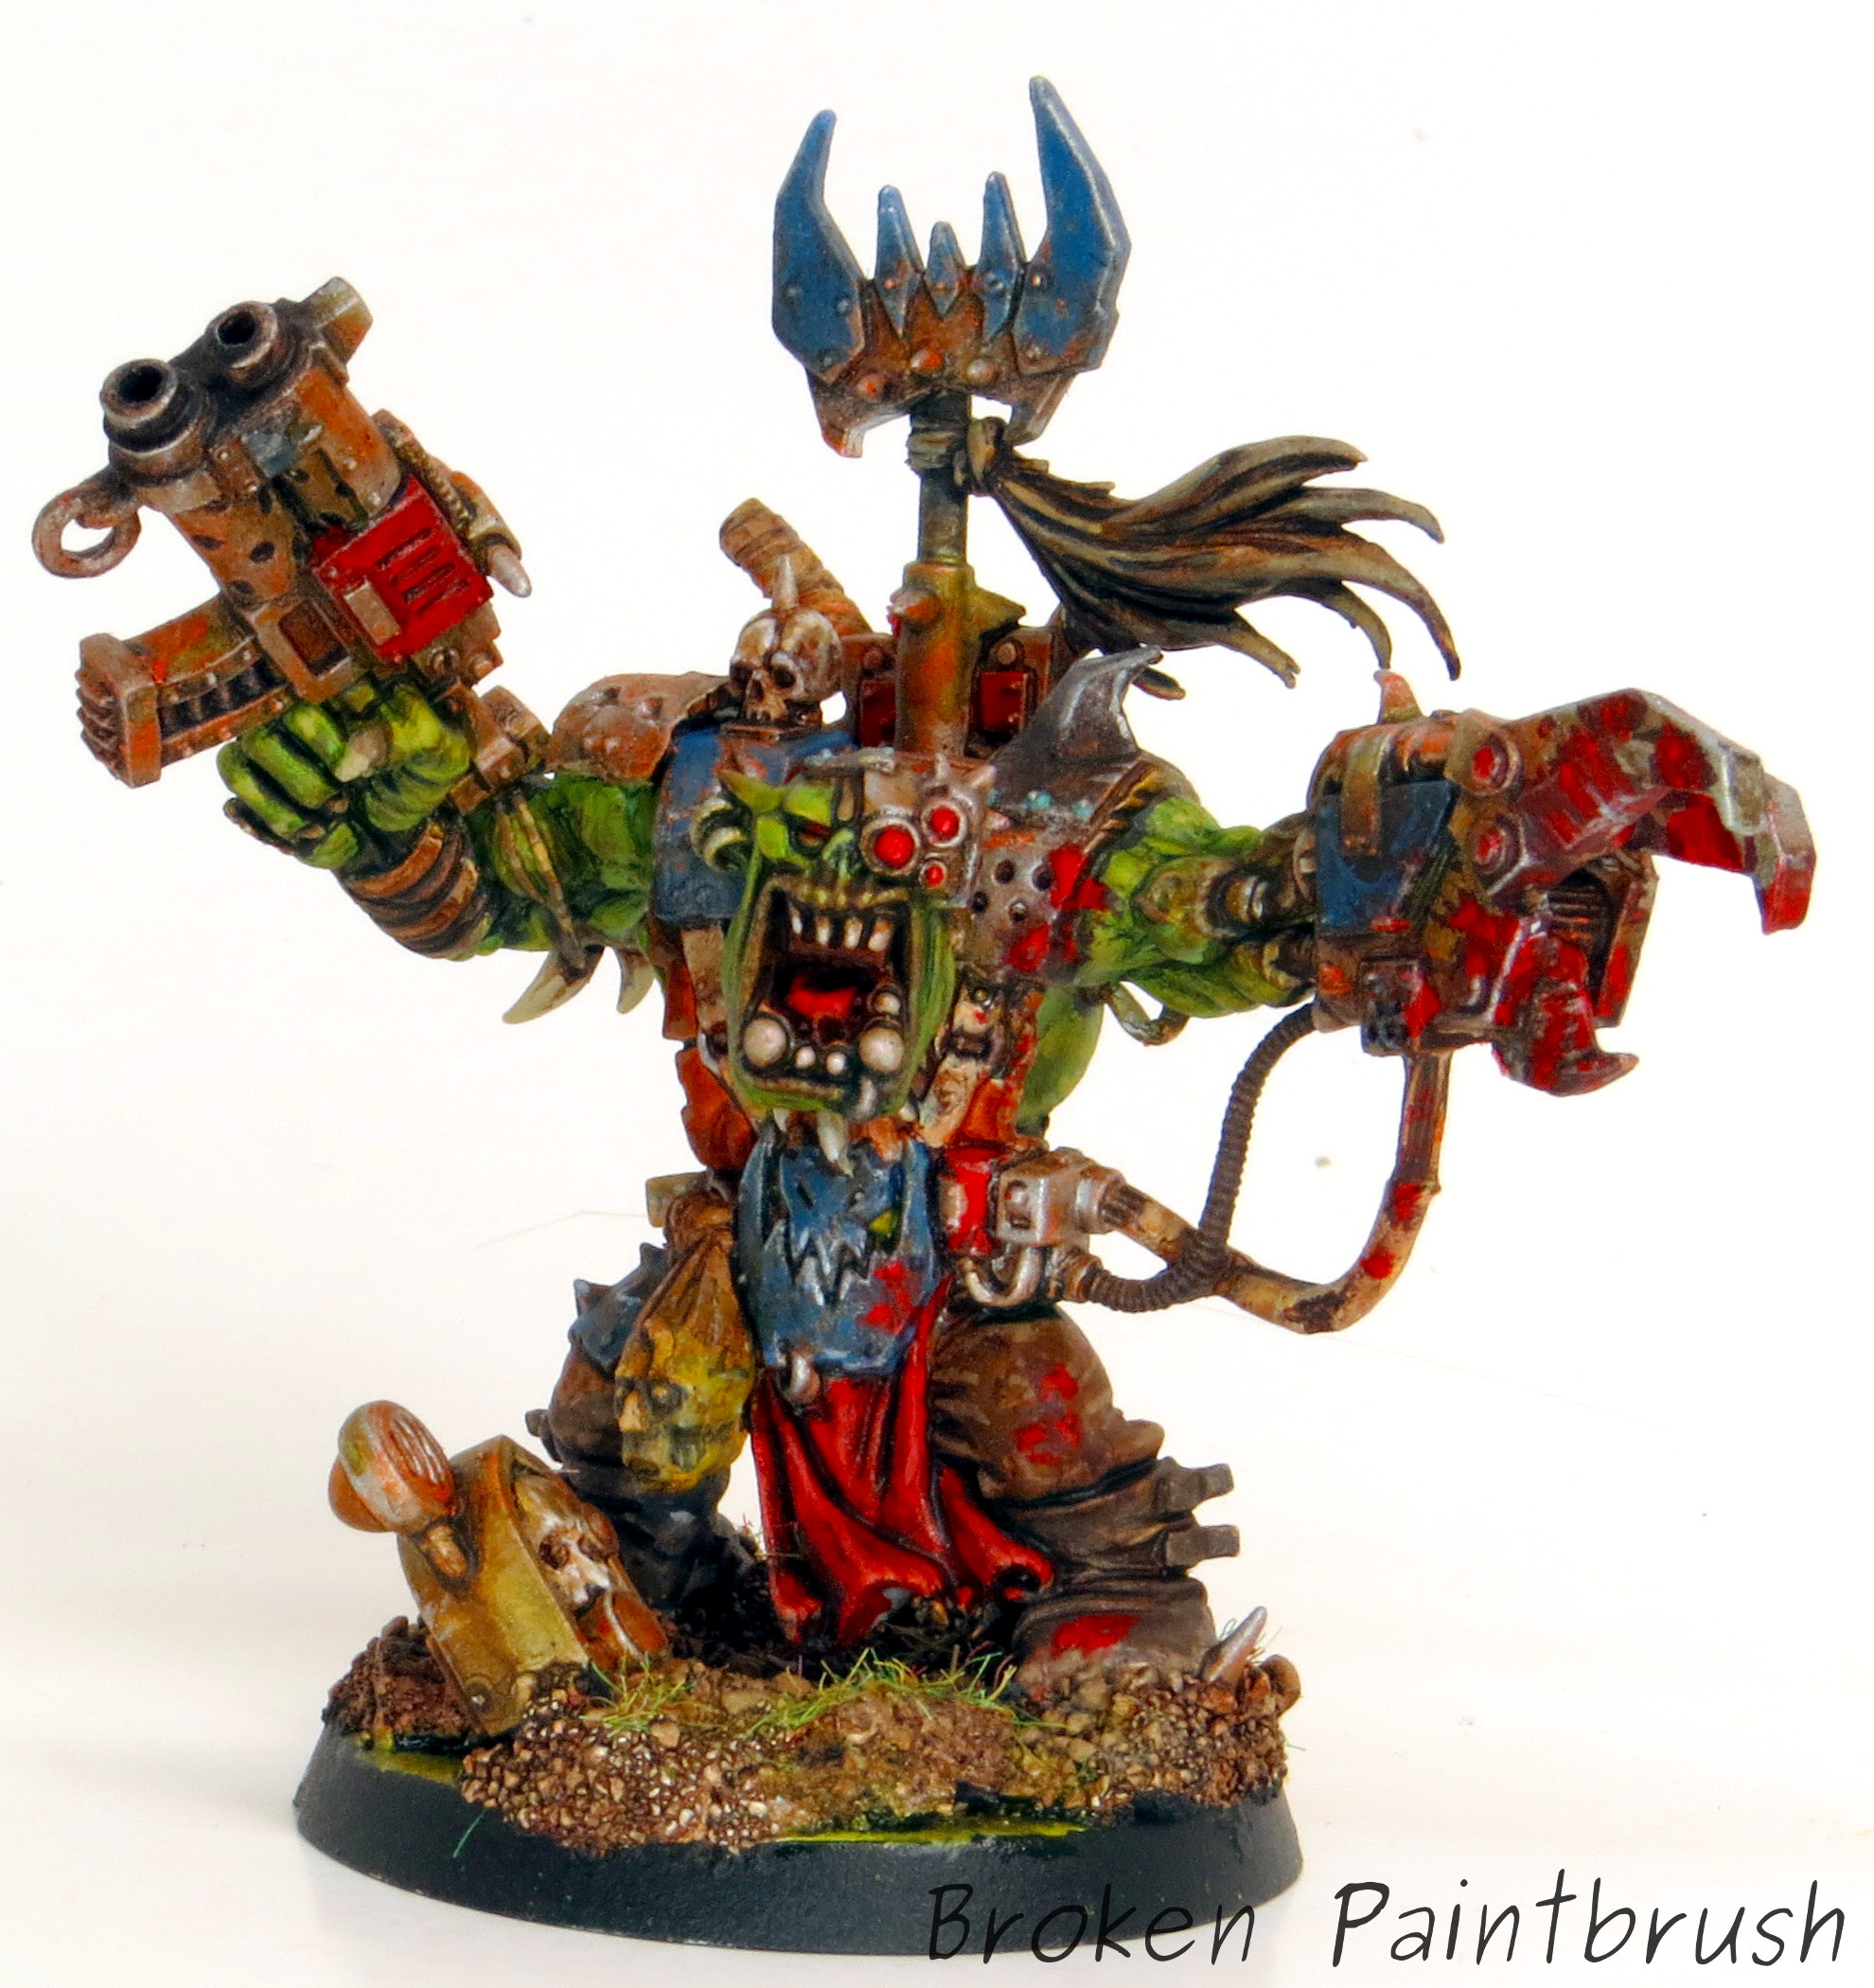
To lead my growing Ork hoard, it needed a good Warboss to knock some heads around. Enter the Death Skull Warboss from Assault on Black Reach, which is very suitable for a head-crunchin’.

Deff Skulls Ork Warboss

With a simple adjustment to the right arm, I tipped it out a bit and opened up the model. The gap was filled with green stuff, and I added an extra shoulder guard from the Nobz kit.

Deff Skulls Ork Warboss

I figured the power klaw should be suitably messy and covered in gore. The rest of the metal is suitably rusted up and worn out.Deff Skulls Ork Warboss

I also added a nasty looking trophy head and slightly tilted the head towards the Klaw. The missing neck was also filled in with some green stuff and smoothed into place.Deff Skulls Ork Warboss

The blues add a nice contrast to the green skin and the bloody red.Deff Skulls Ork Warboss

Want to paint an Ork just like him? I’ve got you covered with a painting tutorial! The tutorial has the step-by-steps I used for this guy, including the skin and bloody mess.
Deff Skulls Ork Warboss

He has so many little details it was a blast to paint up. And the Death Skulls Warboss completes the models from AoBR. You can see the Deffkopters here, and the Boyz here, though I’ve gone to a much lighter skin tone now.

To the WAAGGGHHHH!

Mentor Legion Stormtalon

Mentor Legion Stormtalon

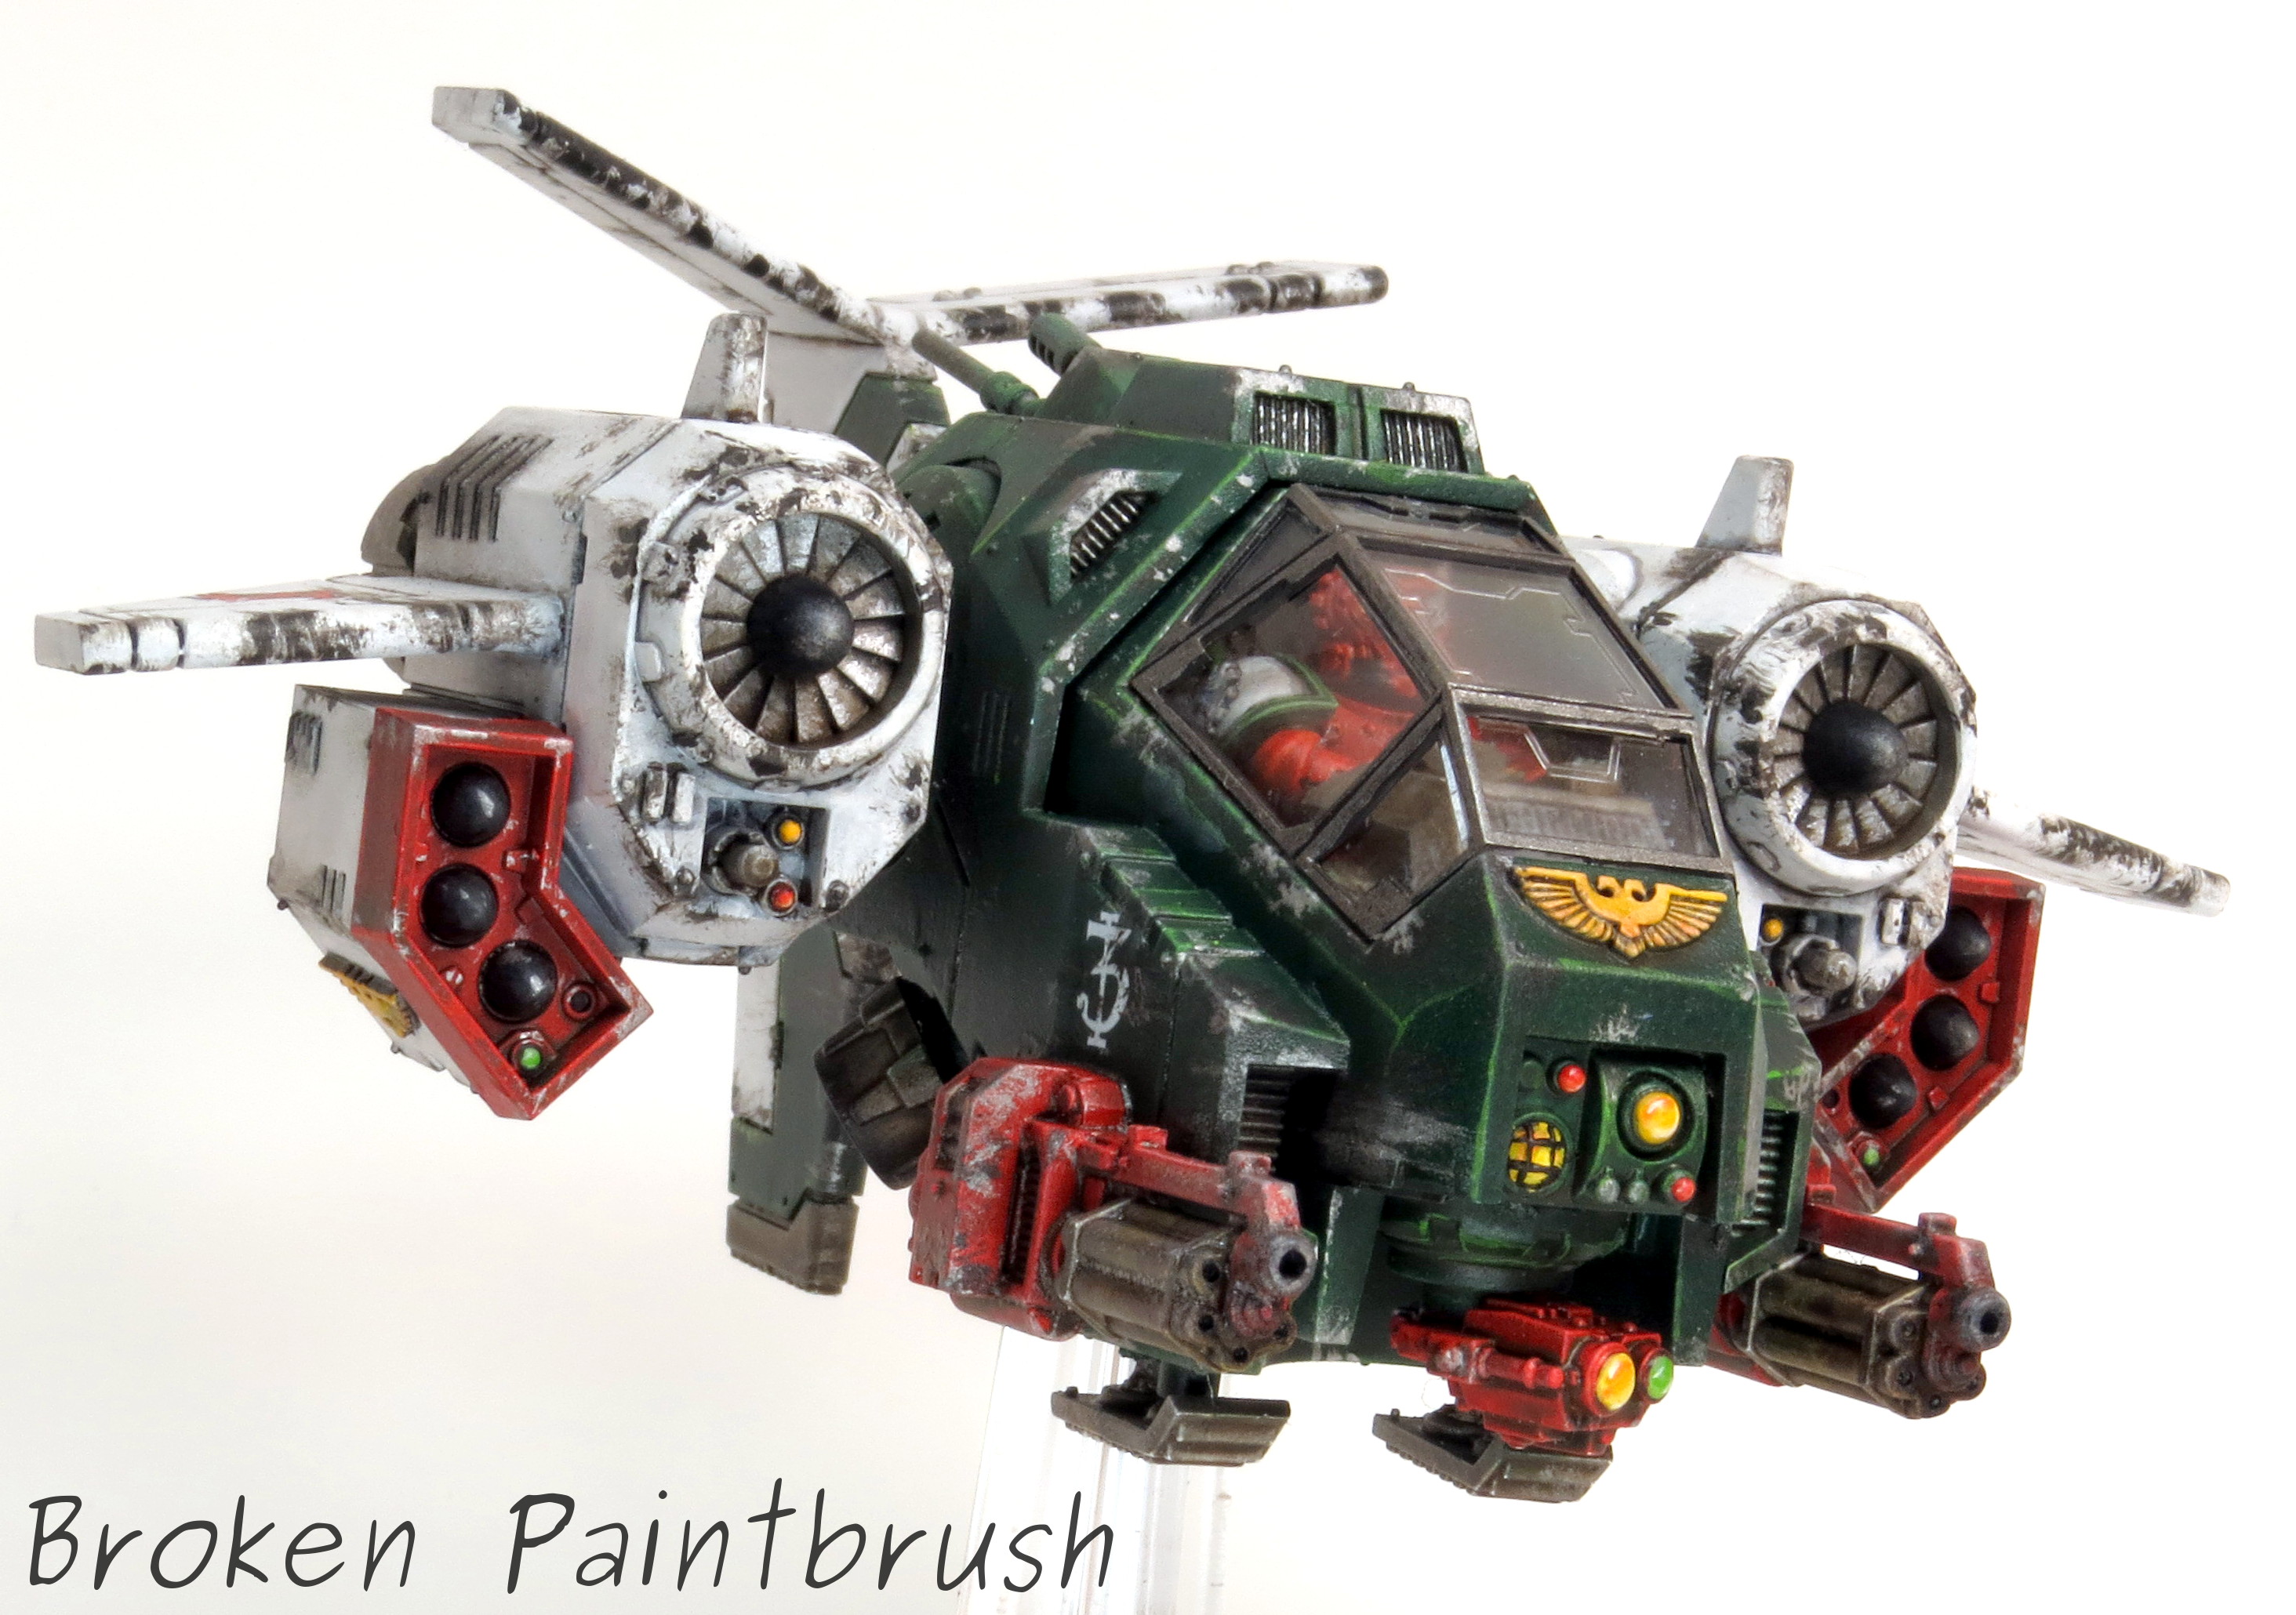
Another model sitting on my shelf for way too long. Last year when flyers were the big hot thing, GW had a air force kit for the Space Marines with two Stormtalons and a Stormraven, I quickly built them up and started painting but got distracted with so many things in life. So here is my Mentor Legion Stormtalon.

Mentor Legion Stormtalon

I also got a set of bases from Secret Weapon Miniatures Secret Weapon Miniatures to add interest on the large, nearly empty base. The junkyard base had a downed plane reckage that I painted up to look like a Ork flyer, a bit of internal competition.
Mentor Legion Stormtalon

The base colors were done using an airbrush and painters tape to mask the other areas. Mentor Legion Stormtalon

I then used washes to mark the panel lines and shade the green areas. The green was then highlighted and weathering done.Mentor Legion Stormtalon

The biggest issue I had with the original model was the nose weapon, so before building I did a search for other conversions and found Hand of Junk and Excommunicate Traitoris that both had fantastic solutions. So moved the missile pods to the under wings and the cannons to the sides. Where the nose cannon should have gone, I added a weapon site from a Land Raider.Mentor Legion Stormtalon

I had kept the model in a few sub-assemblies to allow painting of the interior possible, a nice Techmarine look for the pilot.

Mentor Legion Stormtalon

Mentor Legion Stormtalon

The control panels received a bit of color as well.

Mentor Legion Stormtalon

Overall I’m happy with the end result, and have the second Stormtalon base coated. The Stormraven is only primed and may be sitting on the shelf for a while yet.Mentor Legion Stormtalon Mentor Legion StormtalonHappy flying!


Hacking Custom Decals

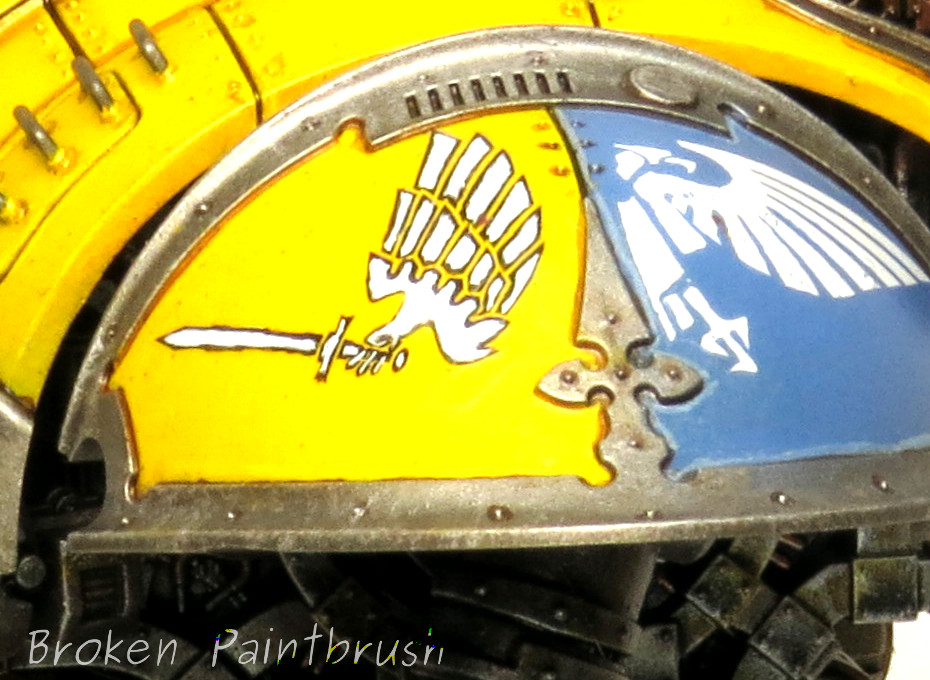
So on my Knight Titan I had decided to create my own house, which meant custom house insignia. Now, I’m not a great free hand painter (yet), and since the pattern would need to be repeated multiple times over the model, I needed to turn to water transfers. While I haven’t tried it yet, I have heard that Testors Decal Paper can work really well if you have a design in mind. After searching through my pile of transfers from Space Marines, Chaos, IG, tanks, the knight titan, and even the Ork and Eldar sheets that I had, I finally settled on the winged sword from the Baneblade to create my custom decal.

WingedSword

The only problem was that the two transfers on the Baneblade sheet were only big enough for the shins and as i wasn’t confidant that I could hand paint a larger version for the shoulder, I turned back to the decals at hand. Looking at the Hawkshroud icon, it would give me a great wing once the head was removed and the wing turned 180, the Cadmus house would provide a great sword once the goat was removed.
KnightDecal0

Here you can see I also nabbed a fist from the Chaos Space Marine transfer sheet and trimmed the sword.KnightDecal1

These were carefully transferred over to the shoulder guard into their relative positions. Notice that the Hawkshroud icon was also flipped to the reversed side to achieve the desired direction. While the transfer’s adhesive is now on the wrong side, it will still dry into position, and once set I covered the whole area in ‘Ard coat to provide a nice covering to make sure.

Also make sure you check out my post on Custom Space Marine Banners, where I follow the same method and talk about using Micro Sol. KnightDecal2

The final step was to connect the fist and wing with black lines and fill in the areas with white paint. The white took a few coats to get a good coverage and a few back and fourths with the black were required to get the some-what neat look below. It may not be a Golden Daemon winner, but it creates a simple, and repeatable house icon for me and I hope it inspires you to hack and slash your own icons!

KnightDecal3

Also note it doesn’t require hacking transfers together to get a new look, sometimes just a touch of paint will change the original to your need. The full house shields provided are great if you use one of the three houses on the sheet, but what about all the rest? Well I just took the House Cadmus transfer since I liked the helmet the best, and painted over the goat side with yellow and the red side with the blue. The half-aquila was also originally black, but a quick touch of white changed it to match my theme. After trying to fit the winged sword on the yellow half, I decided to go with just the sword.

Tilting shield of Imperial KnightOnce I pick a house name I plan to return to these transfers and fill in the bottom scroll.

On a final note about the transfers, I found it is also helpful to use the base color to cover the clear, outer area of the transfers to help them blend in, even after a covering of ‘Ard Coat, the edges can stick out, but a quick layer of the under color will make the seam disappear.

Hope this helps you in creating your own look with the help of the might transfer sheets!

Imperial Knight Titan

Imperial Knight Titan

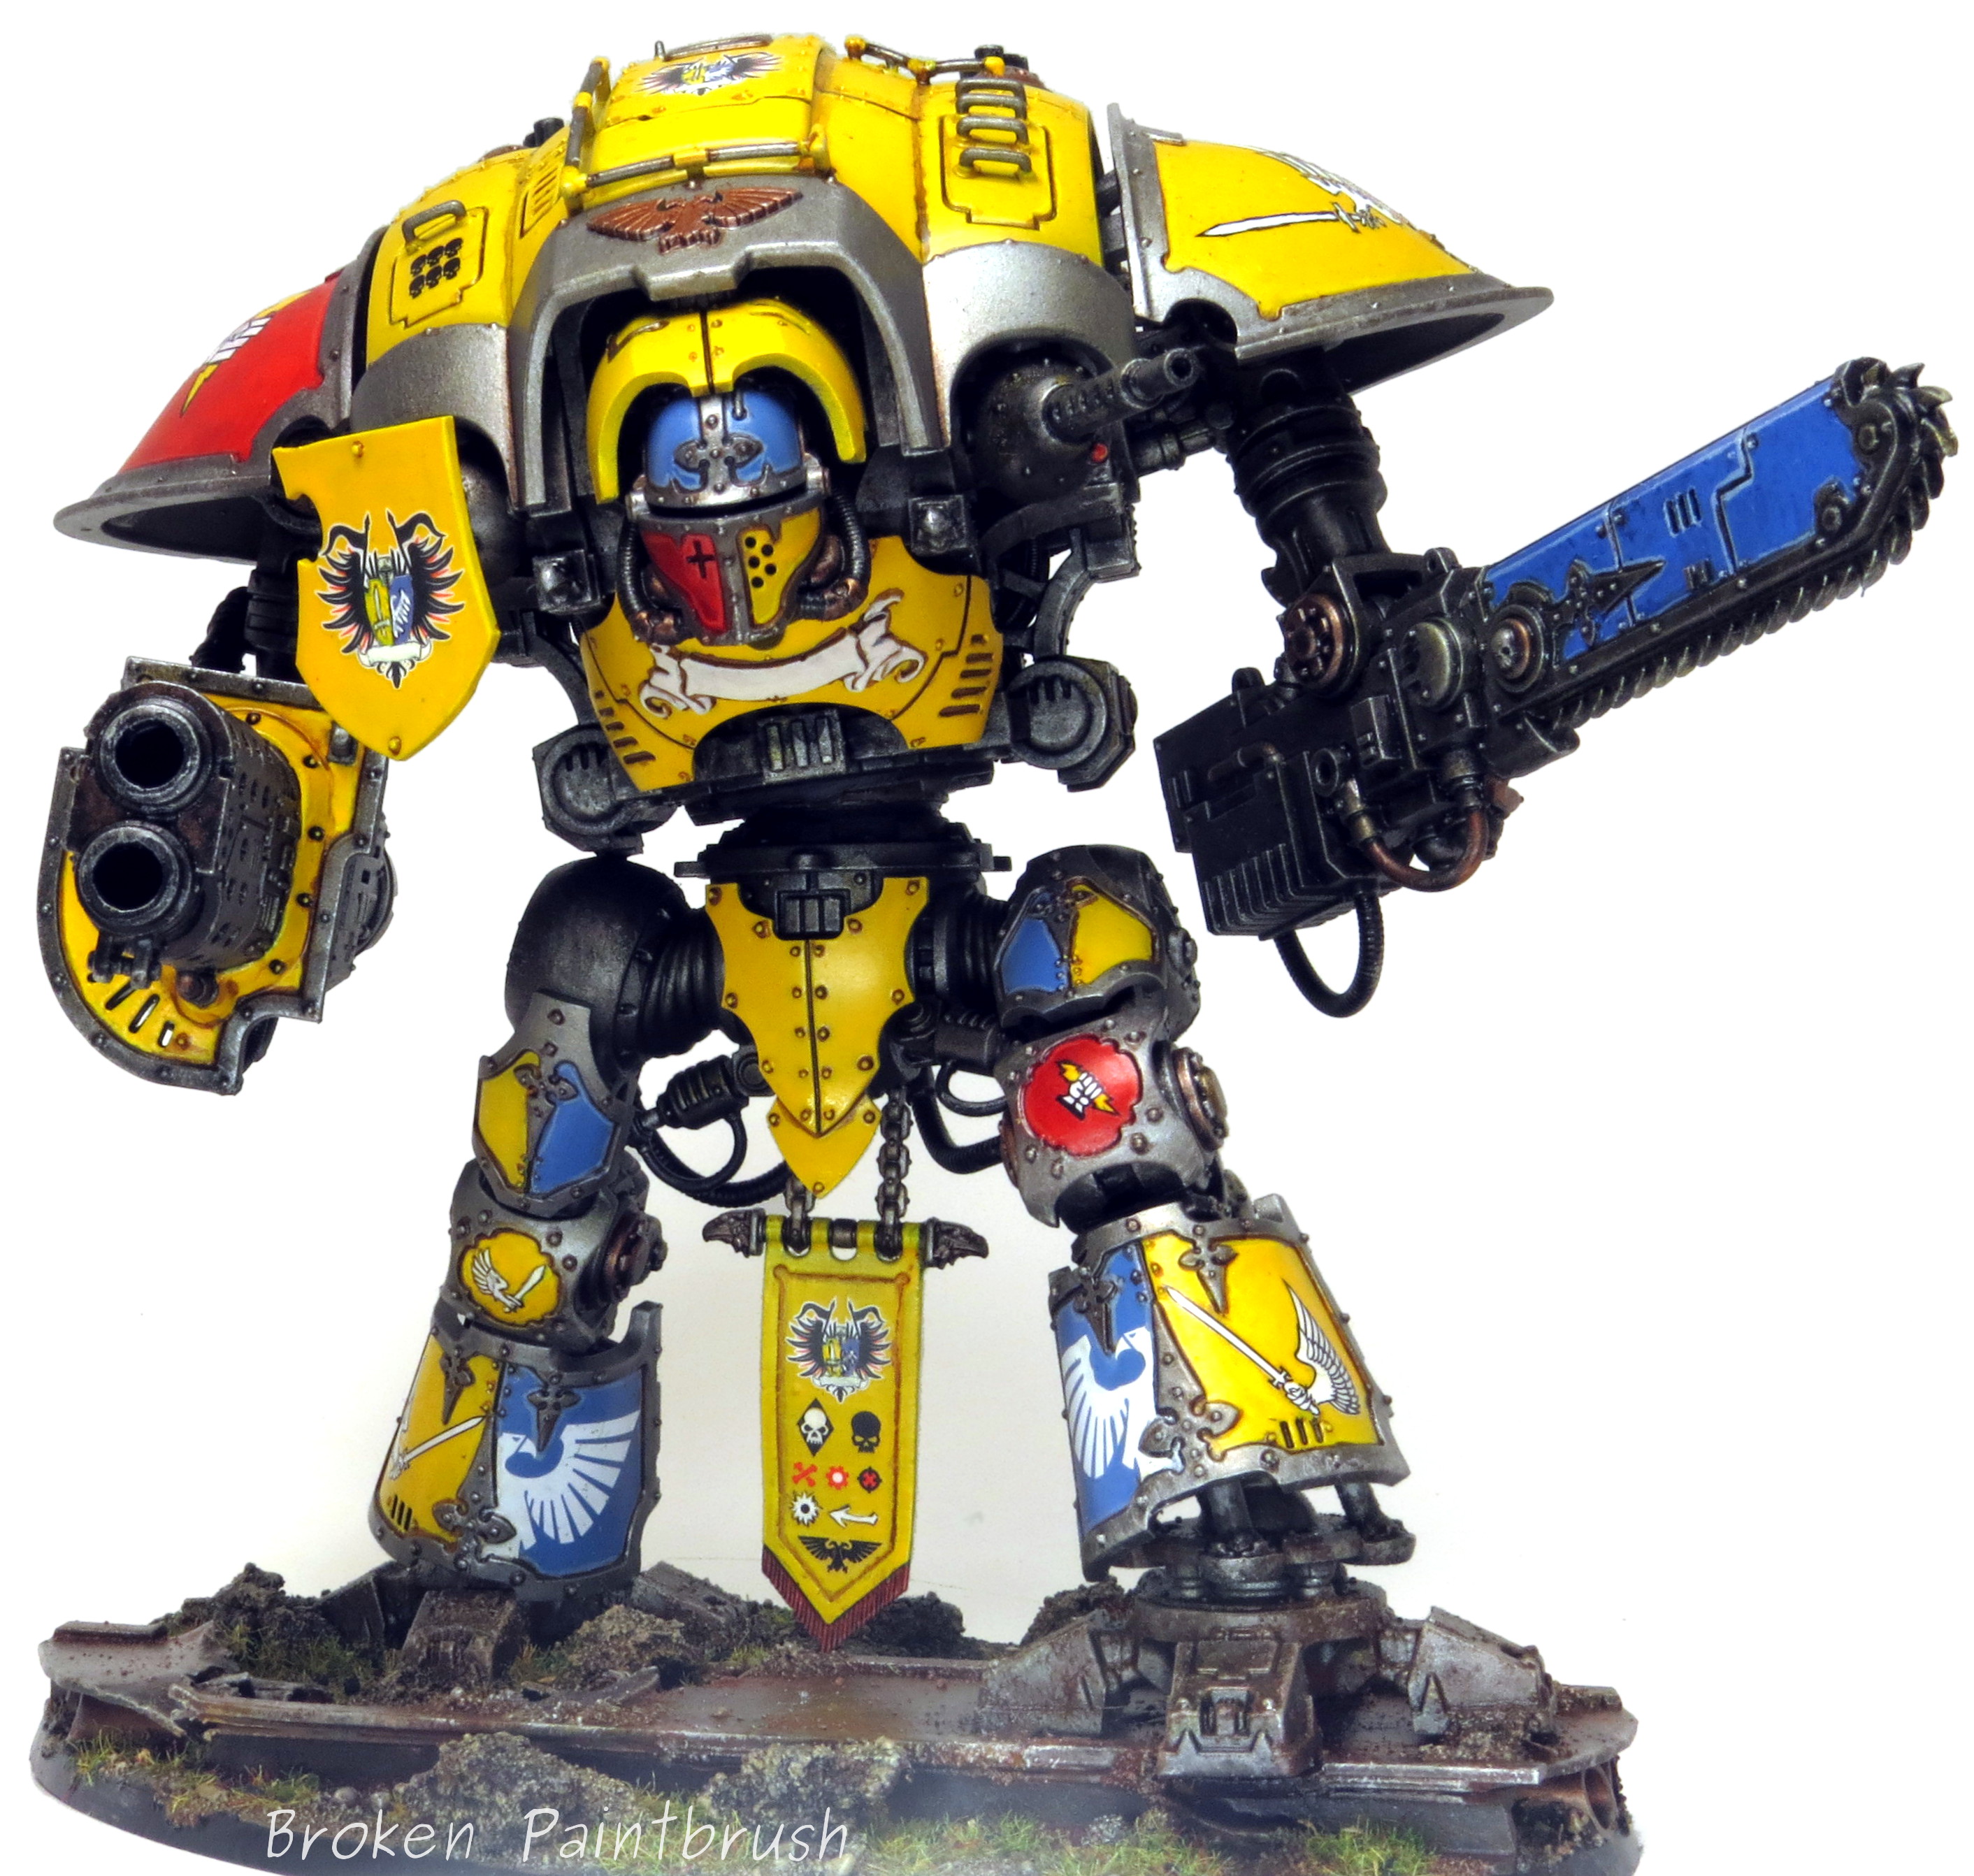
My first picture post of the year should be epic right? Well here is my first Imperial Knight Titan for my yet unnamed house.Imperial Knight Titan


My wonderful wife bought me this Knight Titan [get it at Amazon] last Father’s Day and it has been a slow process to build and paint this beast. In the end, I can’t get over how amazing this model is in person – any one that has finished one knows what I am talking about I’m sure.Imperial Knight Titan

I decided to create my own, as yet unnamed house, and since my wife’s favorite color is yellow, it was only fitting that it would be the primary color.


Imperial Knight Titan

The amour plates were left separate and I glued them to penny nails to act as handles to paint and I could stab them into corks to dry. The main colors were all done using an airbrush and my meager skills allowed for very little highlighting – but a good dose of painters tape allowed the pauldrons to be painted both colors.Imperial Knight Titan

The family crest of the winged sword was taken from the Baneblade transfer sheet that fits the shin guards perfectly. The version for the knee was from the Space Marine sheet and the large version for the shoulder was a combination of the wings from Hawkshroud, the sword from Cadmus and the fist from the Chaos Space Marine sheet. I will be posting how I went about this shortly. Check out how I made my custom decals.

Tilting shield of Imperial Knight

The full house emblem was also taken from Cadmus. I painted over both halves while leaving the half-aquila in place. I couldn’t get the full winged sword to fit, so I left it as just the sword. The half-aquila was then painted white to match the shoulders.Imperial Knight Titan

His personal icon of the fist and lightning was also taken from the Baneblade kit and smaller versions from the Imperial Guard Tank sheets (I have lots of decal sheets!). The original lightning was red, which didn’t go well with the red field, so this was painted over with the yellow.Imperial Knight Titan

Unseen in these pictures is the LEDs placed in the meltacannon and the face mask as they are not yet wired up. The top plate is left unglued to allow access to the main center chamber and the arm LEDs are wired through his arm. The face hasn’t been wired yet as I need to get smaller wire to allow all four LEDs to be wired in (1mm LEDs are tiny!). The LEDs were inspired in part by this guy at The Dice Abide, though I’m still waiting to see his finished work.Imperial Knight Titan

Since I had left the plates off the main body and glued to nails, I never had a chance to see the full model put together until the end. It is a very impressive kit that combines the arcane look of a knight, with the ridiculous mechanics of 40k.Imperial Knight Titan

At this point I am still trying to figure out a name for the house and this knight which is why all the scrolls are left blank and unfinished. Any suggestions?Imperial Knight Titan

For the base I used sheets of plastic and I-beams to create an old, worn walkway that has seen a bit of war. The rust and mud were done using weathering powders in multiple layers, sprayed with clear coat, and high lighted with silver.Imperial Knight TitanI really enjoyed building and painting such a bit and complicated model, and while I still think the Reaper Chainsword arm is a bit stubby (check out the Forgeworld’s Castigator for a MUCH better weapon arm), the overall look is still amazing. While it took me nearly a year to finish this model, I still have plans on adding at least two more to run as a full army with the Magaera a highly possible addition because it looks so cool.

Iron Warriors Helbrute Red Background

A Little Chaos to the mix: Iron Warriors Helbrute

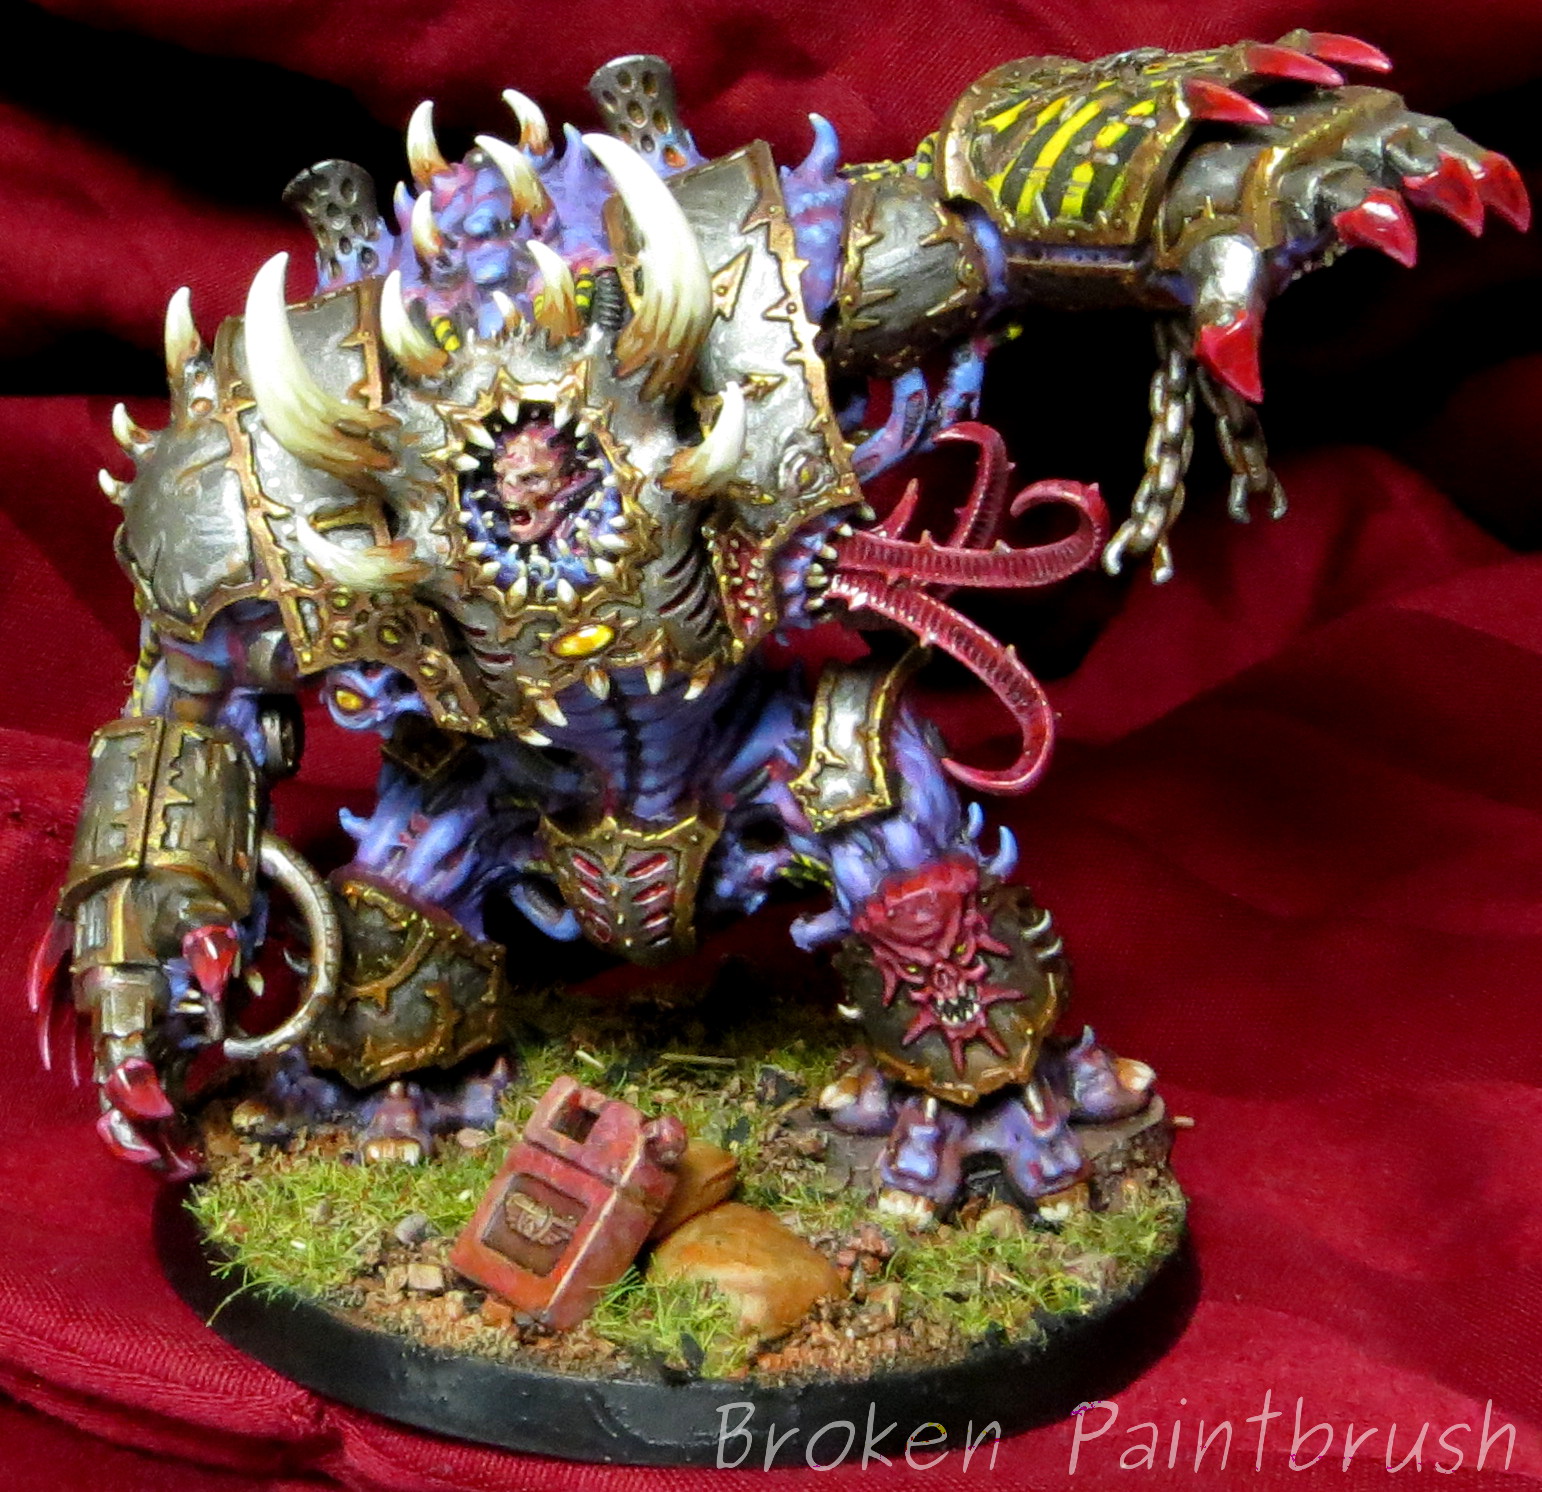
So to break up the aliens a bit, I got a bit excited that the Helbrute kit finally came out for Chaos. I had been holding on to the Dark Vengeance model – which I think is a fantastic model (especially for a starter kit!) but I was waiting for a multi-part kit to customize it. For me the stubby Multi-Melta looked a bit off, so that’s what I fixed!

Iron Warriors Helbrute

To contrast the silver and yellows of my Iron Warriors, I figured purple would do just nicely so I went with purple-blue skin and red-purple red accents.

Iron Warriors Helbrute

The skin is worked up from Xereus Purple to Calgar blue (with some Lothern blue on the tubing). I used washes of Khorne Red, Leviathan Purple, and Earthshade to add the bruising and shadows.

Iron Warriors Helbrute

The red was built up over a few shades of red and purple wash used on the daemon face and tentacles. Hard coat was later added to the claws to make them blood-glossy.

Iron Warriors Helbrute

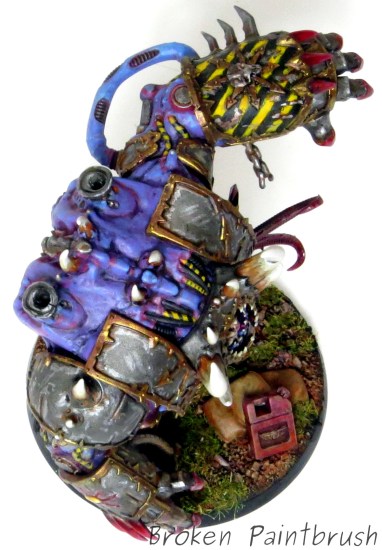
From the top you can see the nice contrast between purple flesh, hard metal, and the yellow stripes. The Iron Warriors skull on the hand was an attempt at sculpting a custom badge. I carefully scrapped off the eye that was there and built up the skull shape with greenstuff.

Iron Warriors Helbrute

Here is the action shot! I choose the new right arm to make him look like he was shoulder checking with a massive left hook coming after.

Iron Warriors Helbrute Red Background

Final parting shot, decided to try a colored background ala GW style (all red and hip). It does help the horns stand out a bit more.

Somewhere in the queue is the actual Helbrute from the new kit as well as a kit bashed version use the old metal dread! Both are based coated and just waiting all the yummy details.

Behemoth Zoanthrope

Tyranid Zoanthrope

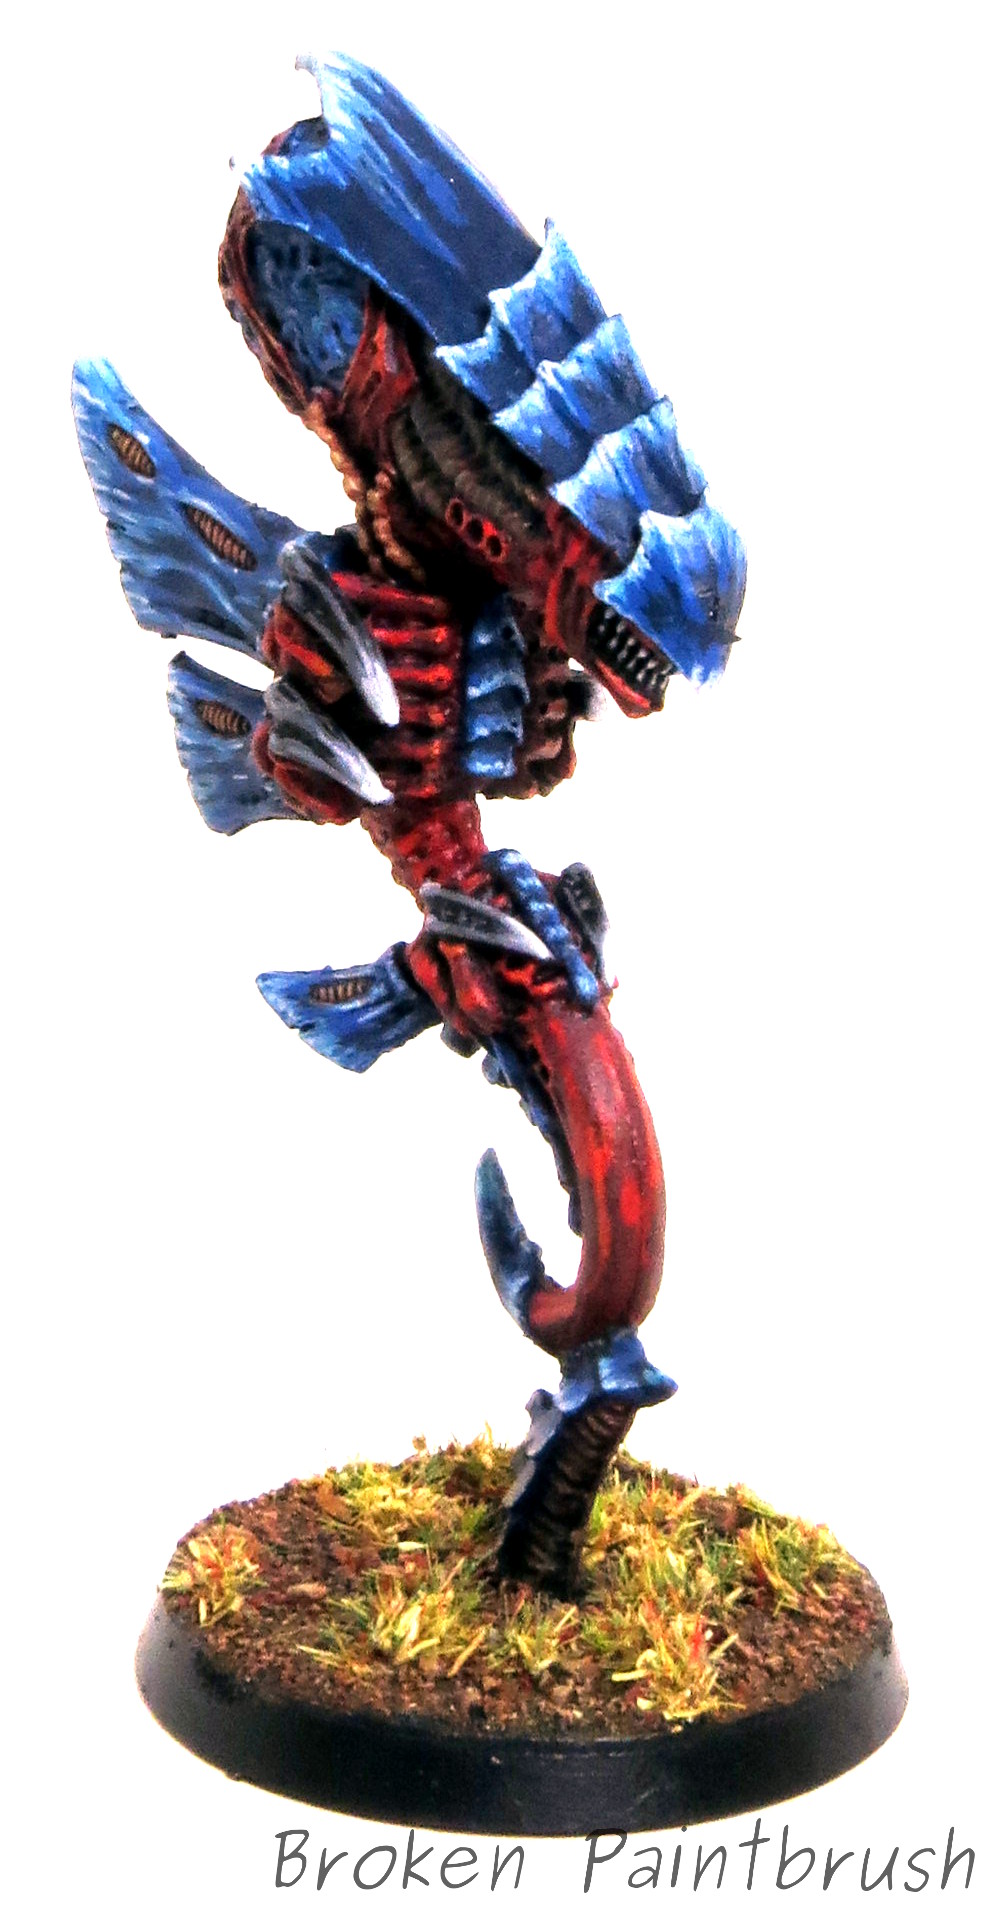
Because what is cooler than a floating brain with iity-bitty claws? How about add a row of menacing teeth in a snear? And with that, I present the Tyranid Zoanthrope from Hive Fleet Behemoth!

Behemoth Zoanthrope


This is the ‘old’ Finecast model that was at least an upgrade for the extremely top heavy metal version, but that little point between the tail and the ground spike is a point that keeps breaking. To prevent this I have added a small pin so we will see how that holds up.

Behemoth Zoanthrope

The biggest question for the colors on this guy was what to paint the brain. I decided to keep it blue but reverse the highlights from the carapace so the depths were the white and dark blue on the ridges. This helps give a glowing, alien look to it and contrasts to the hard plates.

Behemoth Zoanthrope

I love the skin stretched over the brain. If GW ever asks my opinion for the greatest sculpt, this may be among my top 10, though the new plastic version is pretty cool too.

Behemoth Zoanthrope

The only issue I had with this is the finecast does not hold up too well at that little bit that connects the top-heavy brain beast to the rising spire. So while the metal version may have had a tendency tip over and crush models under its cranium, it would not have had this same failure point.

Behemoth Zoanthrope

With the snarling teeth and giant head crest, this is one awesome looking alien. It is a concern that a single Zoanthrope may not last long in a game, so the plastic kit maybe a necessity at some point.