Latest Posts

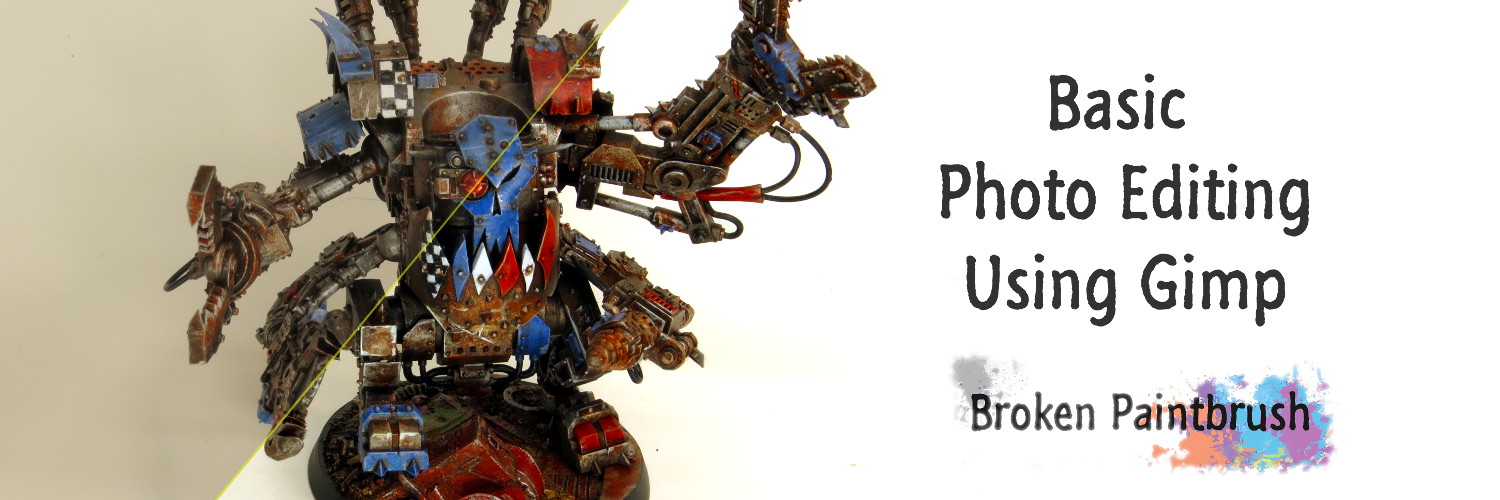
Basic Photo Editing using GIMP - Header

Basic Photo Editing with GIMP

Today’s tutorial is a bit more technical in nature in that I am stepping away from the brushes and showing how basic photo editing can help show off the best your model has to bring.

Basic Photo Editing using GIMP - Header

First off, this isn’t photo-manipulation to make your model ‘look better.’ But rather I will show you how I adjust the result of my point-and-shoot camera to make up for its limited abilities.

Why Bother?

Think of how many hours you spent applying careful layers and details to your latest model masterpiece. OK, maybe it was just a quick drybrush and Quickshade dip. Either way, you want to snap a few pictures to share with the online community, get featured in a hobby magazine, or be featured on Games Workshop’s Flickr feed.

Here is an example from my archive of an Iron Warriors Warpsmith. Notice how he only fills about 20% of the image (forget about the darkness of it for a minute).

Example of Bad Cropping

Ok, so the Ork Deffdread below is a bigger model and able to fill in more of the image, but notice how the background is a funny off-white (not as bad as the Warpsmith, but pretty bad). The colors are also a bit muted due to the lighting.

Example of bad white balance

Both of the pictures above could be improved with better equipment (DSLR with macro lens and a nice photo box), but you can make a big step forward with a few minutes of free software editing. Below I took those same pictures above and did about 3 minutes of basic photo editing.

Not ‘Eavy Metal quality, but a big step forward. This tutorial will get you there.

Example of how Basic Photo Editing can Improve Picture

Why GIMP?

My software of choice for editing pictures is GIMP, an open source tool that is similar to Photoshop, well maybe an older version of Photoshop. It’s a free download with no crapware pushed (unlike Adobe). And while it is overkill for nearly anything I do (I only use about 10% of the tools) it does them well.

In this walkthrough, I focus on editing your photographs of miniatures, but to get a full tutorial on GIMP, check out their impressive tutorial page.

There are a bunch of other tools out there that can do most of the editing I’m going to walk through, but I’m not familiar with how to use them. Have one already? Great, take what I’m doing here and find the commands in your tool to make the changes.

Other Recommendations from the Comments

Some of the readers have left their personal favorite photo editors:

  • Camera + ($2.99 USD) for the iPhone, improve the already excellent camera and edit right there
  • Paint.net is another free open source tool, only runs on Windows
  • Have others? Leave them in the comments below and let me know what you use

Basic Photo Editing

For the most basic editing, nearly any editor could work. These are the fundamental editing techniques but can make a big difference when trying to show your finished piece.

Crop

The term crop is taking the scissors to your picture and cutting out the non-important stuff.

Most cameras can only zoom so far while maintaining a good focus on all parts of your model. This often leaves the actual model in an ocean of background – sometimes with distracting detritus in the background.

If you are showing off your painting desk and work in progress (WIP) paintings, this may be appropriate. But if you are showing us your model, get rid of the noise.

In GIMP, you start with using the rectangle select tool and drag it around the model. Don’t worry if you make it too big or small as you can then grab any edge of the selected box and adjust its size.

Basic Photo Editing - Select area to crop

If you are looking for a particular aspect ratio (height vs. width) – something I do with my post banners, you can set that in the options box before making your selection.

Selecting a fixed aspect ratio

And finally, to perform the actual crop, select Image -> Crop to Selection.

crop-to-selection

The picture is now reduced to the new size, and everyone can now see your model better without forcing them to zoom.

Autocorrect

Notice something about that nicely cropped image above? The background looks a bit gray, and the colors are a bit, meh. This is due to an incorrect white balance.

Digital cameras don’t have a good way of telling what is white, gray, or true black. As the camera attempts to auto-adjust the image, one of the nobs it tweaks is the absolute value of white and black. Unfortunately for our models, this tends to be a bit off, causing the colors to be muted and the whites to be not very crisp.

Editing tools that have ‘auto adjust’ or ‘magic fix’ tend to make a simple white balance adjustment that makes the whites lighter, the blacks darker, and all the color values tend to pop more.

In GIMP, this is under Colors->Auto->White Balance.

Basic Photo Editing - Using Auto White Balance

This simple adjustment can make a huge improvement with a single click. As we will get into in the advanced section, auto-balance is great, but it isn’t always what you want. It is another tool attempting to automatically ‘fix’ your picture, not necessarily how you would like it fixed.

Saving and File Types

You’ve made your changes; now it’s time to save. Before you do, the type of file you save the image as can have a significant impact on its look and file size. There are a bunch of file types, but I will only focus on two here: jpg and png.

All the image types GIMP can export

JPG

The JPG file type is meant for pictures on the web in that it compresses the file as small as possible, even to the point it starts to ‘lose’ some information. What this means is that jpg files aren’t intended for large, beautiful images like background wallpapers but work perfectly for our typical blog post or Twitter feed.

Nearly every photograph on Broken Paintbrush is a jpg. Take for example the White Balance example above. As a png it would have been 230KB, as a jpg, it is only 61KB, almost 1/4 the size – with zero difference in looks, at least to me. The image size is important for how fast your page loads, or if you are on a shared server, how often it may freeze due to RAM limitations.

PNG

The PNG file extension is defined as a ‘lossless’ file type, meaning that the software will try to make it as small as possible without losing information. Web icons are often png as it allows them to scale much easier and it can compress them more than jpg if they are a constant color (part of the algorithm difference).

The only cases where I could think of that it made sense for your miniatures to be in png was to post to CoolMiniOrNot or Putty & Paint, but even their guidelines recommend .jgp files. So leave the png files for banners and icons, and save your minis as jpg.

Exporting

So when you are ready to save your GIMP file, you will do an ‘export’ which allows you to save the file type. Doing a save or save as will typically attempt to save it as an xcf file which is GIMP’s version of a native file, similar to a .psd file for Photoshop.

Select File->Export or File->Export As which will pop up a window that allows you to save by extension type. Select JEPG image (*.jpg, *.jpeg, *.jpe) – all the same thing - change the file name to be more human readable and make sure it ends with .jpg.

jpeg-export-settings

The export JPEG settings box will pop up, but I almost never change anything in there. If you want a small file you can reduce the quality which will add more pixel noise to the image, or if you are posting to one of the show-off picture sites above, increase the quality to get a larger, but better output.

Getting to the Advanced Level

I hope the basics above help you improve your pictures, and maybe that’s all the more you needed to take your pictures to a level you are happy. For me, the basics above get me about 90% of what I end up editing – so nearly everything is simply a crop and auto white balance.

In part two of this series will go into more advanced tools of GIMP that can correct mistakes or fine tune the white balance and color correction. I will also show how I add the Broken Paintbrush water mark. Stay tuned for that!

Stay tuned for that!

Your Thoughts

What are your thoughts on the photo editing tips above? Do you have a favorite tool you like to use? Hit up the comments below to share with the rest of the community. As said earlier, I use GIMP because I know it (and it’s free), but if you have one you like, I would love to add some options to anyone reading this. It’s not the tool, but the results that matter.
Golden D6 Review - Quality Content

Golden D6 Review Issue 3

How many of you remember a time of big White Dwarf magazines chock full of tutorials, battle reports, and jaw-dropping conversions? Not that I’m bashing on the new iteration of the WD (the weekly hit is nice), but over the years, the community spirit has been substantially depleted. This is why I’m so excited for what Adam from SprueGrey is doing and why I put together a Golden D6 review.

For those who haven’t seen, The Golden D6 is a hobby magazine written by bloggers and pulled together by Adam Jones with the help of ex-White Dwarf Matt Weaver. This is his third issue and packed full of goodies.

A bit of a disclaimer: Adam has been kind enough to feature me in his magazine, including this one. Also, if you buy a copy of The Golden D6 through my link Adam also pays me a portion of the sale. So if you buy a copy, you get an awesome hobby magazine, Adam get a sale and can continue his mad plan to build a media empire, and I get to buy a cup of coffee 🙂

The Cover of The Golden D6 Issue 3

Overview

As you can see from the cover, Issue #3 features Jeff Tibbetts’ fantastic Queen Bee – a truly epic knight, but in the 60-page ezine, Adam packs in 9 other articles – and not a product add to be seen.

Included in this edition is:

  1. Two battle reports: 40k between Iron Fists and Imperial Guard, and an epic narrative between elves and humans
  2. Five tutorials:
    1. Two terrains: building a pill box and a landing pad
    2. Two painting tutorials: carnifex (mine) and a dwarf slayer
    3. And how to pin models
  3. Picture galleries: Frozenbears fantasy monsters, Tibb’s Queen Bee
  4. Review of AFV Acrylic Techniques DVD

While most of the articles started off as blog posts from each of the writers, Adam and Matt have transformed them into full page spreads that highlight the pictures and text in a way that most of us can’t do well on a blog page. For example, you can read my article on how to paint a carnifex right here on my site, but where you compare that to how it looks in The Golden D6:

Golden D6 Review of How to Paint a Carnifex

It becomes apparent that I need to up my game! All 60 pages are fantastically laid out from full page shots of Queen Bee to detail shots of painting the Slayer.

Content Quality

So what about the actual content?Again, all the articles are written by hobby bloggers, and most of the articles were written as blog posts. With that said, Adam has done a great job of picking the best materials to fill his magazine and going through an editing process on each as well. This means that the content inside is often better polished than our original pieces.

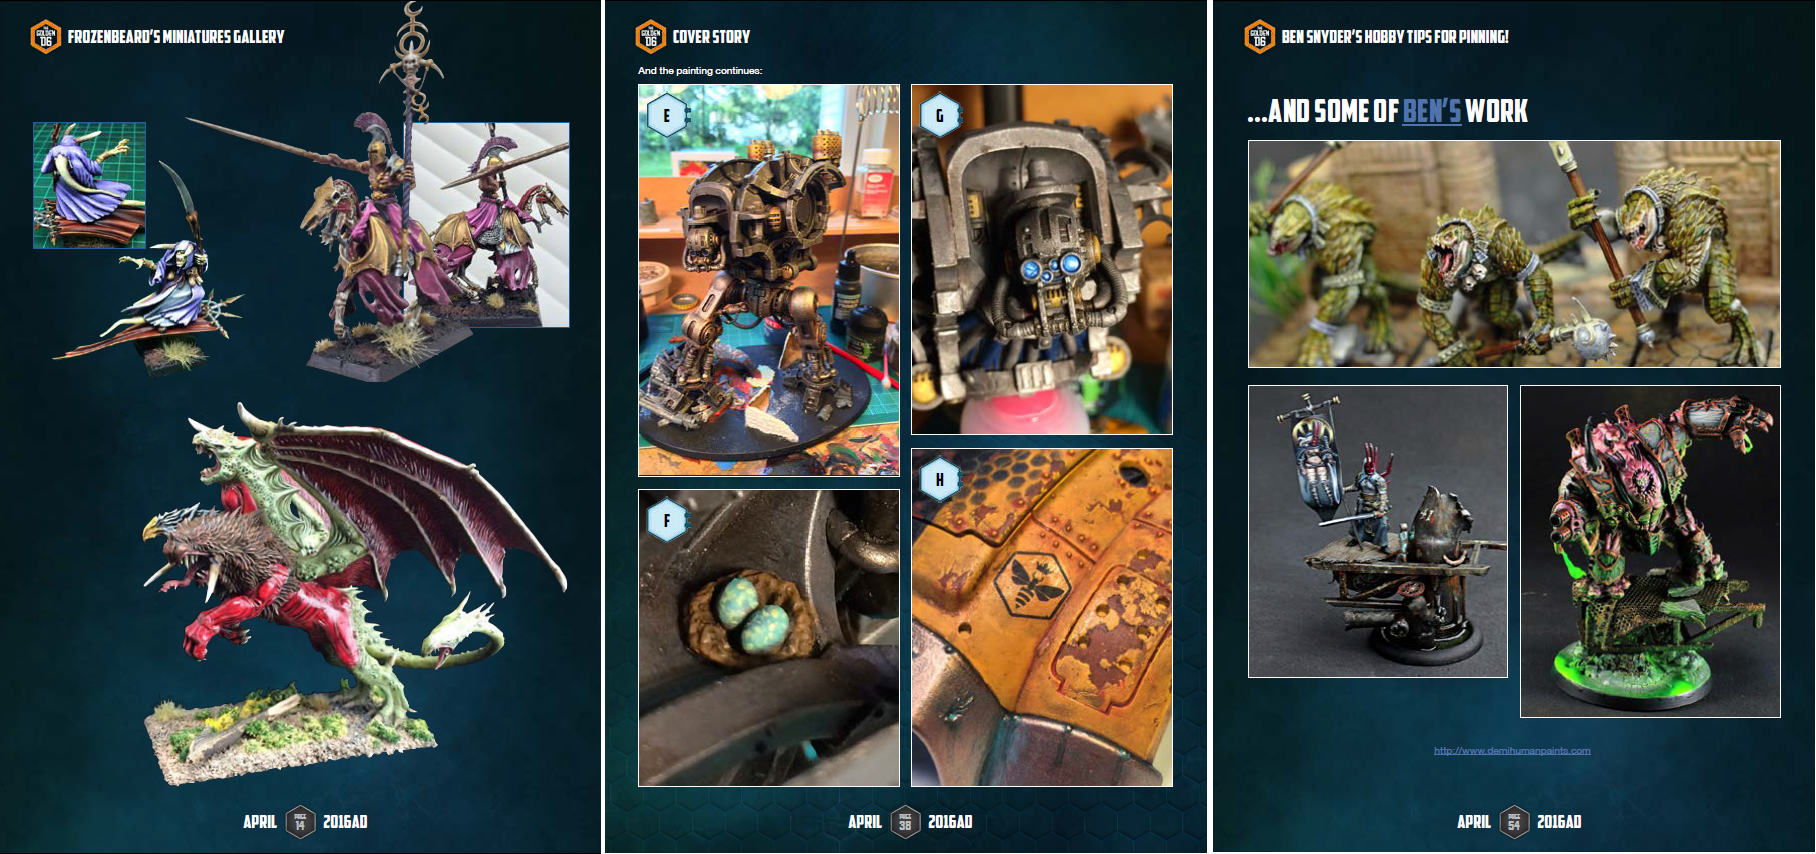
Golden D6 Review - Quality Content

The quality also shines through the pictures Adam selected and Matt’s magic with the publishing tools. Just check out the image above that I snipped from a few pages.

Variety

As I started this whole post with, I miss the days of the old White Dwarfs and their variety of articles. From the Standard Bearer to Tactica to Battle Reports, it had a bit of something for everyone.

The Golden D6 is a through back to this era with a great mix of article topics, writing styles, and even miniature manufacturers. Some of this comes to the purpose of the White Dwarf vs. the Golden D6. Games Workshop changed the WD to sell more of their miniatures, selling the WD is just an extra bonus. Adam’s goal with the Golden D6 is to make it such a great hobby magazine that you buy it for the content.

And while this is only issue #3, Adam has also done a great job of mixing it up in each issue as well. Issue #2 had nine articles on a host of other topics. This included a battle report for the Hordes game, an interview with Andy Chambers, and a painting tutorial for Bolt Action.

Value

The value of a product is always hard to judge as it is almost never empirical. Right now the Golden D6 Issue #3 (60 pages) is $5.95 USD whereas the White Dwarf (30 pages) is $4. So price wise, you are getting a hefty magazine for the cost.

Another thing that shouldn’t be understated here is that Adam is a hobby fan, building a magazine for hobby fans, which in of itself adds a good deal of value to this magazine.

Pick It Up

So if my Golden D6 review has convinced you of how awesome this issue is, buy a copy, enjoy the read and help Adam keep going. (and if you use my link, he’ll buy my next coffee!).

Good Reads 2016 Week 16

A few months back I had debated on stopping the Good Reads series as it is surprisingly time intensive to gather the articles and write this up. But as I was planning the future articles of Broken Paintbrush, I couldn’t imagine really stopping.

There are just so many amazing bloggers out there sharing their hobby journey. So onwards the Good Reads go!

Dark Eldar Incubi Conversions

Dark Eldar Incubi Conversion

Dark Eldar Carnival Incubi Conversions by NafNaf

The clever and amazing NafNaf has put together yet another crazy cool unit for his Dark Eldar, a carnival themed army of creepy clowns and circus monsters. The new unit is a fantastic conversion of Incubi with top hats.

In fact, NafNaf is making such creating stuff, that Thor from Creative Twilight also featured his Incubi in today’s Blogger Showcase.

Prepping for Competition

A collection from MassiveVoodoo

A collection from MassiveVoodoo

While I have yet to travel for any painting competition, I can appreciate the massive amount of work that it would take to pack everything up and keep it all organized. The guys at Massive Voodoo are no strangers to traveling with amazing models, and thankfully they put together a checklist they go through to prepare.

Thousand Sons Jetbikes

Thousand Sons Jetbike conversions

Thousand Sons Jetbikes by Mordian 7th

Modian is a machine when it comes to building and painting armies. This time, he is back to his Thousand Sons (third take now?) and included clever jet bike conversions using High Elf chariots.

They Pilgryms of Iron Sleet

Converted Pilgrym

Pilgrym by Kari on Iron Sleet

The team at Iron Sleet are constantly putting some amazing Inquisitor conversions so it is hard to pick any one post to highlight here. Kari’s Pilgrym Adsum Levit Aaronic is an incredible example of the conversions and painting going on with their Pilgrym project.

##Good Reads 25 Wrapup

That’s it for this week, I hope you enjoyed the collection of articles and if you have a few of your own to share, leave them in the comments below for others.

If you want even more Good Reads and be kept up to date on Broken Paintbrush posts, sign up for my weekly newsletter.

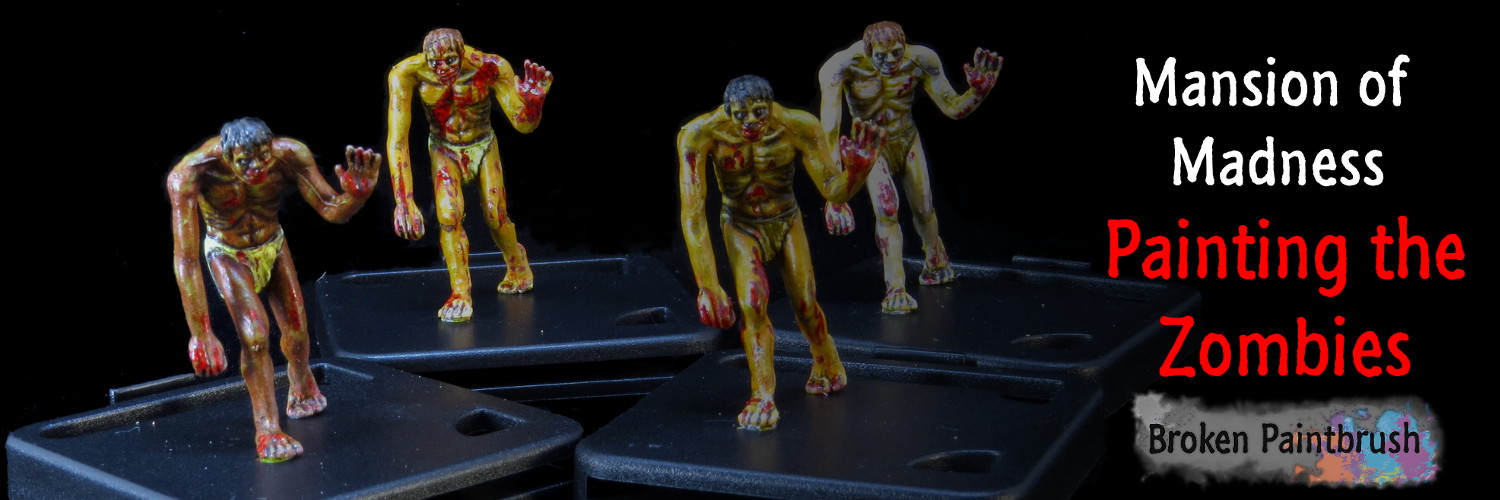
Tutorial on how to paint zombies from Mansion of Madness

How to Paint Zombies Tutorial – Mansion of Madness

This how to paint zombies tutorial start with a Christmas visit where my brother-in-law brought over Mansions of Madness, a Cthulhu-based game from Fantasy Flight Games. I enjoyed the game so much I convinced my wife to get it for my birthday. This led me into deciding to paint the miniatures.

As I do, I figured I would provide tutorials along the way, not just how to paint the MoM minis, but hopefully keep them broad enough for other ranges as well.

Tutorial on how to paint zombies from Mansion of Madness

I started off with the Zombies as I also received the Vallejo Skin Set and wanted to try them out. With that said, nearly every step uses paints from the set.

If you want to save this tutorial for later reference, I created a downloadable PDF version that includes a bit more information on the paints used. If you want to get the PDF, fill in the form at the bottom of the post and I’ll email you a link.

How to Paint Zombies – Mansion of Madness Tutorial

Step 0: Prime

The first step was to clean up the mold lines (yes a missed a few as you will see below). The miniatures were in fairly good condition overall so most were fairly easy to prep. I added a pin in the foot and attached them to a cork.

A white primer was used to provide a base to apply the paints.

Step 0: Prime the Zombies

Step 1: Skin Base Coat

I then laid down the basecoat of the skin tones. As I wanted to test different skin colors I had separated out the MoM kit into three main sets: light skin, medium skin, and dark skin.

For the zombies, I used Vallejo’s Medium Fleshtone for the light skin, Light Brown for the medium skin, and Mahogany Brown for the dark tones.

Step 1: Apply Skin base coat to zombies

Step 2: Cloth Base Coat

The skimpy loin cloths were then base coated. Two with pure White and two with English Uniform.

Step 2: Apply cloth base coat to zombies

Step 3: Hair Base Coat

The hair was then base coated. The dark hair with Black and light hair with Mahogany Brown.

Step 3: Apply hair base coat to zombies

Step 4: Green/Brown Wash

This step is where the magic happens. Created a green/brown wash from Vallejo Oiled Earth and Dark Green Washes. The green helps create the rotted look while the brown creates the skin shade.

At this point, the models could be called done as they are a good improvement over the bare gray.

Step 4: Apply Green/Brown Wash to zombies

Step 5: Flesh First Highlight

Once the wash dried, the skin was highlighted. For each of the skin highlights, a tiny amount of light blue was added to cool down the flesh tones and make them a bit more gray.

For the first layer, the light flesh was highlighted with Light Flesh, the medium skin with Japan Uniform WWII (greenish yellow-brown), and the dark skin with English Uniform.

Step 5: Apply flesh highlight to zombies

Step 6: Second Flesh Highlight

The top highlight for the skin included White mixed the previous shade for the light skin, Dark Flesh for the medium skin (actually fairly light color), and Japan Uniform WWII for the dark skin.

Step 6: Apply flesh second highlight to zombies

Step 7: Cloth Highlight

The loin cloths were then highlighted. The light robes with Japan Uniform and White, the dark robes with Japan Uniform.

Step 7: Apply cloth highlight to zombies

Step 8: Hair Highlight

To finish the highlighting, the dark hair had Burnt Umber and the light hair with Light Brown. Some of the highlights were lines added to the flat top to create additional interest.

Step 8: Apply hair highlight to zombies

Step 9: Purple Wash

Now to make the zombies even more rotten looking and dead, a purple wash was used. I used a mix of 4 parts Blue Gray Wash, 1 part Dark Prussian Blue, and 1 part Red with some additional Airbrush Medium added to thin it down.

This was applied more as a pin wash rather than an over-everything wash. The purple color adds a bruised look while also providing an even dark tone for the recesses.

Step 9: Apply purple wash to zombies

The bruising even prominent along the rib cage on the back and along the spine.

Step 9: Apply purple wash to zombies - back side

Step 10: Blood Base

And where would zombies be without blood? To get a good blood look it is painted in two parts. The bright red was Vermillion, a fairly bright, vibrant red. This was splashed about, mostly the hands, face, and chest. To add a bit more realism, the splatters have thin lines pulled downwards as if gravity pulling on the blood.

Step 10: Apply blood base to zombies

Step 11: Dark Blood

The second step of the blood was to add darker red as if dried blood. The Vallejo Red is a fairly dark shade so works great on top of the Vermillion. The dark red was dotted inside the light red.

Step 11: Apply dark blood to zombies

As you can see from the back, most of the blood is on the front – the business end of the zombies.

Step 11: Apply dark blood to zombies - back side

Step 12: Base, Gloss, and Finish

It’s time to do the finishing touches on the zombies. First was a couple of coats of clear matte spray. I’ve seen a bunch of MoM monsters sprayed in gloss to give them a slimy look, but I found that matte finish looks nicer with specific applications of clear gloss.

Once the matte spray was dry, I used the clear gloss on the bloody areas to give them a fresh look.

Step 12: Zombies from Mansion of Madness are Finished

They were then removed from the corks and stuck to their bases. I haven’t glued them in place because I haven’t yet decided if I’m going to paint the bases or leave them black – the game has inside areas as well as outside/cave areas so it will be hard to decided.

Step 12: Zombies from Mansion of Madness are Finished - back

While the pose is still a bit dopey, the painted zombies will give a new sense of horror to the game than abstract gray pieces moving about.

Painted the Mansion of Madness Zombies

I hope you enjoyed the tutorial on how to paint zombies and if you have any questions hit up the comments below.

Again, I put together this tutorial as a downloadable PDF as well, so if you want to save it for later reference, fill in the form below and I will email you a link. I’ll be doing a tutorial for the rest of the monsters and heroes as well so if you want to stay updated with new posts, the form below will also add you to the newsletter and I’ll keep you updated.

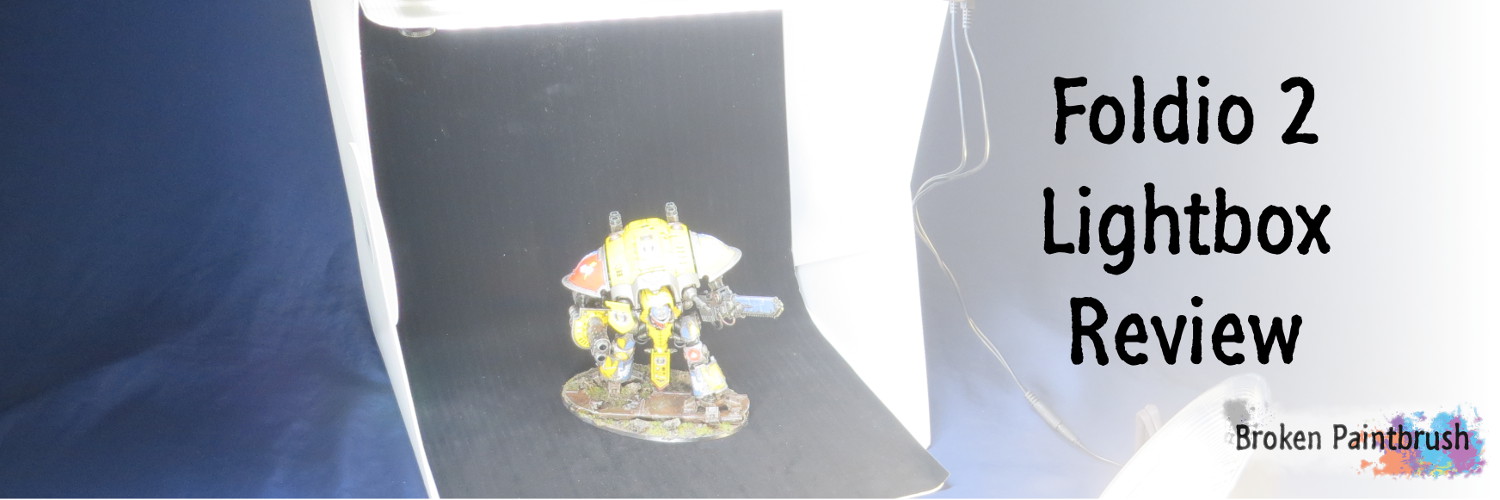
Review of the Foldio 2 Photobox

Foldio Unboxing Review

I’ve been struggling with a lightbox setup for quite some time now, and after reading a review from Greggles on the Foldio Lightbox, I recently took the dive and picked one up. I’ve put together my review and a couple of tips I have already found with it.

Review of the Foldio 2 Photobox

The Foldio was a recent Kickstarter success, with this lightbox being their second, and larger, version. They’ve even got to the point that I was able to pick mine up from Amazon and get it in just two days.

The biggest things I was looking for from a lightbox was to be able to break it down and store it between projects. I share my painting/hobby space with my other work projects, so being able to clear out table top room was a must.

I had previously built a crude lightbox from an Ikea records box that closed nicely to put on a shelf but took over a whole shelf just to store. It was time to shrink the footprint while getting a larger lightbox – a solution provided by the Foldio.

Foldio Contents

Contents of Foldio 2

The box was well packed and includes nearly everything you would need (see below for a couple of extras I added). Included is the light box itself, felt/cloth/paper backgrounds, storage bags, and a box of electronics with two LED light strips, power cable, and plug converters for worldwide power support.

LED Light on Foldio 2

The two LEDs are super bright with built-in diffusion on the strip and double stick tape on the back. The plug includes a splitter that connects to each strip rather than needing two power bricks – a nice little touch. The power plug adapters just snap right in and are easy enough to swap out for anyone traveling with the Foldio.

Lighting

foldio-unbox-install-led

Again, the LEDs have double stick tape on the back that makes installation a snap, peel the tape and slap it to the top-front section (the double ridge section on the left there).

foldio-unbox-leds-installed

Both strips attach to the top front lip which provides a bunch of light below, but I wish it included lights for the bottom or sides as well, which I’ll point out below.

Backgrounds

Background in Foldio 2 kit

The kit includes four colors of background: white, medium gray, black, and greenscreen-green. It’s hard to describe what they are made out of as the top is felt/fabric feel but on semi-rigid paper/plastic. They bend nicely when setup but are sturdy enough that they seem like they will last a long time.

Foldio Lightbox background holder clip

To attach the backdrop to the Foldio, a small extra piece uses magnets to sandwiches the backdrop between it and the top. This provides the whole height of the lightbox to be usable and makes swapping out backgrounds a breeze.

Setup

Foldio Lightbox assembly

The case itself is made of corrugated plastic, making it super light but very sturdy. The various panels have large magnets that allow the lightbox to be set up in literal seconds. The two magnets on the front that you can see not connected to anything snap to the two that hold the background in place when you put the Foldio into storage mode, helping it stay shut – another nice little touch.

Foldio lightbox snaps together

Fully set up the LEDs provide a nice bright light to the whole box, and the black background fits from top edge to front edge with a gentle bend at the back.

Examples

foldio-unbox-with-knight

To get a full sense of the size of the Foldio, I placed my Knight Titan for scale. You can see that he easily fits with plenty of room to either side and above so that even larger models could fit as well.

Notice something about his legs and base though?

foldio-unbox-added-lights

Those bright LEDs on top provide a shadow below, so I broke out my cheap can lights (~$5 each from Home Depot) with daylight bulbs and added some additional up-lighting. This is where I wish the Foldio had a few extra strips on the bottom or along the side edges, but for now the cans are easy to set up.

foldio-unbox-knight

The picture above is the result with zero photo corrections! Compare that with the original images of the Knight Titan and you can see why I’m excited about the box.

Foldio 2 with foam spacers

Another tip that I found is that the box is so big that individual models are too small to be fully lit by the top LEDs. To solve this problem, I grabbed a couple of foam blocks left over from a pick-and-pull tray and stacked them under the backdrop.

By folding the background over the blocks, I can add the model and provide better lighting.

foldio-unbox-raised-mini

One thing I learned after taking the picture above is that the background needs not to dip behind the blocks or it shows up a bit in the final photograph. So next time I will pull it tighter before placing the model.

foldio-unbox-warboss

Again, the result is fantastic with the only editing required was to remove that dip in the background.

The simple black background shows a huge improvement over my previous takes on the Ork Warboss.

Storage

Storing the Foldio 2 in the cloth bag

Back to the storage, the Foldio snaps back shut, and I simply folded the backgrounds around it before slipping them into the provided cloth case. The power plug has its own cloth bag. Both can now slide away until needed again.

I hope you enjoyed my review, and if you want to check out more about the Foldio, they are made by OrangeMonkey. Or you can pick on up on Amazon for $75.

Broken Paintbrush 2015 Year in Review

Despite most of the year living out of boxes, 2015 has probably been the best year for Broken Paintbrush. This post makes for the 70th one published this year, and the community involvement has been great, with 54 comments with over 19 of you amazing hobby addicts joining in on the discussion.

Broken Paintbrush 2015 Year in Review

On the Hobby Front

As I’m not much a gamer any more, my hobby time has started to diverge. For me this mix of armies has been a great motivation so I’m not stuck painting endless amounts of the same colors. Its also given me a chance to a wider range of tutorials (down below).

Coming into 2016 (as mentioned in my previous post) I am embracing this method even more so.

Mentor Legion

Mentor Legion Librarius

The Mentor Legion project has been a true labor of love as I have found they are a rather difficult color scheme to paint (part of my original decision to choose them – to my continued pain!). This year I was able to bring them from the original troop squads to fill in a complete army, and almost a Demi-company.

  • Storm Talon – part of a Storm Wing box from way back
  • Captain Rothn Ryn and his Command Squad. A really fun unit to build as I create each as a mini-character
  • Librarius – I already had one Librarian from the Dark Vengence box, but I custom built three more from various bits (and two captains) to create a full Librarius squad
  • Scout Squad – not a terribly exciting squad, but it helps in creating a scout detachment for the new Space Marine codex

Knight Titan

knight-titan-banner

My still-yet-unnamed Knight Titan was finally finished this year. It was an awesome project, and an epic model. While he is painted, I haven’t yet crossed him off my done box as he is waiting for a name, honor markings, and LEDs! I had wired LED lights into his thermal cannon and eye lenses with the purpose of combining my hobby with my embedded skills.

Tyranids

behemoth-carnifex-barbed-strangler-banner

With the release of the Shield of Baal campaign the Tyranids got some love with some new models, and finally getting pictures taken of previously finished ones.

  • Hormagaunt Brood – a veritable crap ton of the little guys that I had painted while watching last years super bowel
  • Broodlord  – this monster was a limited edition to the Shield of Baal box and is truly epic in size
  • Warriors – the new box kit, bringing the total warrior count up to 6
  • Hive Tyrant – the older metal guy of death. I am pretty sure this is the last large metal model I will paint as my hands hurt just remembering holding him while I painted
  • Carnifex – the second such beast in the army and so much fun to paint I used him for two tutorials!

Orks

Ork Army Banner

The Ork Boyz received a boost in the start of a Dread Mob.  Orks have become among my favorite armies to paint. They have character, you can be really messy (actually you HAVE to be), and they are just so wacky!

  • Killa Kans – I couldn’t image they would be any good (or from Greggles‘ experience!) but they are such cool little guys
  • Deff Dread – The little guys big brother, so many little pieces of character dripping from this model
  • Warboss – The boss from Assault on Black Reach, some one has to lead the mob!
  • Trukks – Finished two trucks for the boyz to cruise in, mad idea to create a fully mechanized Ork army

Iron Warriors and Traitor Guard

I retook and posted a bunch of pictures of my original armies, but nothing new was finished. 2016 is gonig to be a different story though!

Tutorials and Cool Tools

I had wanted to up my game in 2015 on tutorials and other tips & tricks for my fellow hobbyists. With 8 tutorials and 9 Cool Tools articles, I am pretty happy with my results. But even better is that I had a number of comments from readers who found something to bring into their own painting.

Tutorials

Painting Space Marine Banner Tutorial

  • Custom Banners – Not only did I have a great time creating this tutorial, but Adam from SpueGrey published in is Golden D6 eZine, if you haven’t picked up a copy yet, you should its awesome!
  • Painting the Carnifex - The first of my Tyranid tutorials
  • Painting Large Bases – I had so much fun with the Carnifex that that I did a tutorial on his base as well
  • Painting the Broodlord – The Broodlord took what I did for the Carnifex and up’d it a bit for this character
  • Ork Warboss – The Orks got some love as well with a step-by-step on the warboss
  • Painting an Ork Trukk – The Trukks were used as my tutorial for Ork vehicles as they have so much going on
  • Trukk Wheels – I even broke out the wheels as a separate article to show how I did the muck and grime

Cool Tools

Cool Tools Airbrush Medium

I started the Cool Tools to showcase some of my favorite tools or software apps, things beyond the normal sales cycle of GW’s expansion into the hobby tool market.

Ready for 2016

As Broken Paintbrush continues to evolve and I figure out what I want to do when I grow up (ha!), 2016 is looking to be an even better year. Not only for what I’m trying to do, but I hope, also for you, my readers.

2016 is going to have a lot more tutorials, reviews, and resources. I’m going to be focusing more on the process of the building and painting rather than completing armies.

Cool Tools: Feedly – Feed Reader Review

Today I bring a review of a non-hobby product, but one I use every day to keep up with my favorite blogs: Feedly – an awesome feed reader.

This free tools pulls in the latest posts from all the blogs I follow and keeps track of which articles haven’t been read – which saves me a bunch of time from opening each site up just to see if anything is new.

What are RSS Feeds

The magic behind feed readers is tech almost as dated as emails: Rich Site Summary, or just RSS.

Blogs use RSS to publish a simple text descriptor of each post and push it into a feed that other sites can subscribe to. Many sites include the icon like the screen shot below which has become the universal icon for RSS.

broken paintbrush rss feed

The link itself will often take you to a page full of text that isn’t very pretty, but others, such as this blog’s feed at https://www.brokenpaintbrush.com/feed/rss/ use tools to help you subscribe using feed readers.

What a Feed Reader Does

Back in the day, Google basically created the feed reader tool which made it simple to take these RSS feeds and consume them in an easy to use form.

Basically you would add each blog’s RSS feed to it, much like a bookmark, and the tool would pull in the post’s text and pictures and create a news feed for you.

When your favorite blogger finally posts something, it gets automatically pulled into the feed reader, and Boom! their article shows up in your feed.

When you read through the article, it is marked as ready by the tool and doesn’t show up again unless you specifically look for it or go back through your history.

Doesn’t it Hurt the Blogger?

So since you are consuming the feed in a third party tool, wouldn’t this hurt the blogger’s traffic and web cred?

I actually think a blogger can get more, and better, visitors if you use a feed reader. If you are just hitting up their site on a regular basis to see if they have more content, it does drive their ‘traffic’ numbers up, but what do you do if there is nothing new? You bounce and check again next week, and perhaps after some time you forget to ever come back.

Now, if you use a feed reader you will automatically get notified if they post something new, which both reduces their bounce rate and, if they haven’t posted in a while, reminds you that they still exist.

If you like the article you can always click through to their site and leave a comment, share on twitter, or save it for later.

How I use Feedly

This brings me to how I use Feedly, my feed reader of choice. I like it it because: its free (with paid plans for power users), it has a nice interface, and good phone apps.

Each post looks great in their reader and they include a number of tools which makes it easy to use which I will get into below.

feedly-using

Saving for Later

The first tool I love about it, is being able to save posts for later.

On each post they include a tool bar that has social sharing buttons, but also a nice little bookmark icon that tells Feedly to hold on to this post in the ‘Saved for Later’ section.

feedly-save-for-later

I use this all the time because I don’t always have time to leave comments on posts or want to save them until I can pull them into a Good Reads article.

On the weekends or lunch break at work, I will go back through the saved articles, click through to the sites and leave comments. I can then ‘un-save’ the article, marking it as done.

Adding New Feeds

Adding new feeds is really simple in Feedly as well, you don’t even need to know the site’s RSS feed.

feedly-add

You click on the big ‘Add Content’ button which opens a simple text box. If you paste in the blog URL, such as Greg’s awesome blog (http://www.feedyournerd.com/greggles-tabletop) Feedly will automatically find the feed and show the options below the text box.

Clicking on the green ‘+feedly’ give you the option to add it to a collection, such as Warhammer, 40k, what ever. The collection allows you to subscribe to all sorts of things like tech, news, and the like and have them separated out for you.

Getting Started

Getting started is supper simple, you can use Google, Twitter, Facebook, or a few others to sign in using their authentication, and just start adding feeds. They will even have collections pre-assembled for you depending on your interests.

I wish I could share my Warhammer collection, but that’s a paid feature. Instead click through your blog rolls and add each site into your feedly to keep up to date on their posts – and make sure to add Broken Paintbrush to you feed as well 🙂

Happy Reading,

Joe B.

Making Some Updates – Why and Whats Next

For you loyal readers, you may notice that things have been cleaned up here on Broken Paintbrush.

introspection-review

The Why

Since I haven’t been able to put paint to brush for a few weeks (or a few more weeks to come) I have been thinking of what’s the point of this site – a sort of personal retrospection.

I started this blog nearly 6 years ago to showcase my growing Iron Warriors army, and while I haven’t posted consistently (only 210 posts over those 6 years), I have been trying to improve the quality with each iteration.

This year I have been working on the user experience on the site – loading time, quality pictures, and page navigation. While I liked the previous theme and its focus on images, it just took way too long to load and I kept having issues with sections not loading at all.

The new theme is more minimal and has more focus on loading speeds, in part because I removed all the side bar widgets as well.

But the blog rolls?

Among the items I removed from the side bar was all the blog rolls and other awesome sites. This isn’t because I don’t like blog rolls, I think they are awesome – but mine were completely disorganized and cluttered.

So while I have removed them for now, I am researching tools and widgets that can create nice looking, and helpful blog rolls that showcase all the sites I really enjoy.

The Ads

Hello, my name is Joe B. and I used ads on my site.

To be honest I never expected to make millions on ads, but I had the delusion that everyone would love ads on my site and I could pay for a few models now and then.

This was a fail-fail. Over the last year I earned a grand total of $7.37 from ads, which could get what, a White Dwarf or two? In the mean time I have contributed to the horribleness that is the ad-covered internet.

Made no money and alienated potential readers. I lost sight of why I made this blog and nobody won. So part of my cleanup is the removal of all adds.

What’s Next

For the future of Broken Paintbrush, I am asking for your help. I am committing the next year of this site to giving back to the hobby community in the following ways:

  1. Tutorials – I am planning on many more tutorials over the next year, including breaking out some videos. From planning, building, and painting models (end-to-end), specific round ups (like rust, bone, jewels), and painting basics. I’m not doing this because I’m an expert (far from it), but because the best way to learn is by teaching.
  2. Show Case – This used to be for me to do virtual bragging of what I’ve accomplished. While this won’t change much (we all like to be proud of our work) I hope to focus on inspiring others and giving ideas for their own models.
  3. Cool Tools – I will continue this series, but am going to improve the format to include tutorials on how I use the tools, what problem they can solve, and various alternatives. The right tool can help us improve our painting and hobby experience so I hope to find the best ones and share them with you.
  4. Good Reads – I like the concept of this series (sharing awesome articles from other bloggers) but it is very difficult to keep up on a regular basis. I will be doing some thinking and research on how to make this easier for me and more beneficial for you. I may change it to something like a blog of the week, or just move it to twitter as I find things.

So as I get set back up and start painting again, I am asking for some accountability from you – help keep me honest as to why I am doing this blog. If you see me doing something sketch, dishonest, or just plain not cool, call me out on it – I would rather have my feelings hurt by some honest feedback than quietly lose readers.

Thank you and here is to another new age of Broken Paintbrush,

Joe B.

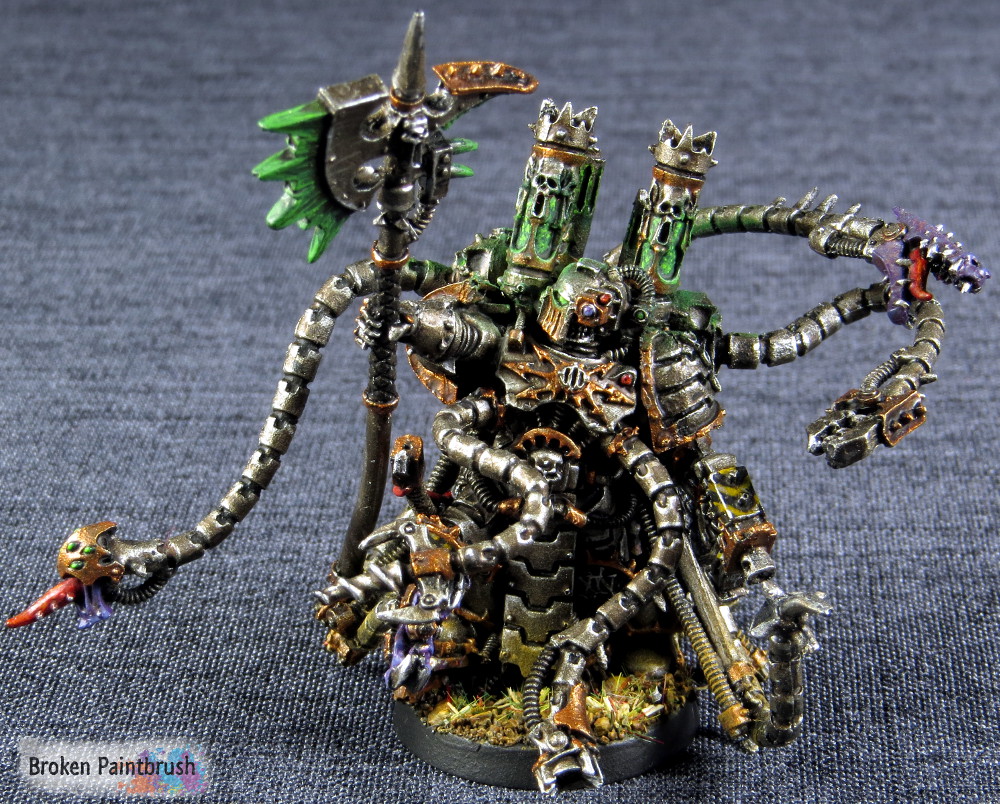
Iron Warriors Warpsmith

Iron Warriors Warpsmith

Another of my photo updates, this time, my Iron Warriors Warpsmith. I had posted an original review of the Finecast model here, as this was my first experience with the experiment by GW. When the Warpsmith was released, I loved the new look of the Chaos Space Marines and the demon engines – though they are a bit dino-ie.

Iron Warriors Warpsmith

One of the things I like about the Warpsmith is the motion and three dimensions the tentacles give the model. It is something that many of the older Techmarine models lacked due to the metal bits and old processes requiring the pieces be thicker and clunkier.

Iron Warriors Warpsmith left

Even the back of the model is full of cool little bits such as the different types of tubing and connections. You can just imagine this guy sitting is some crazy throne controlling his demon engine minions. It also gave me a spot to add some of the iconic yellow chevrons and even a bit of the purple demon flesh.

Iron Warriors Warpsmith back

The inner glow on the smoke stack and skulls was a similar effect done on some of the demon engine models in red, and I carried it through in green to match my power weapons. While I am still working on my object source lighting techniques, I feel this one went ok.

Iron Warriors Warpsmith right side
While I am glad GW has stopped making new models in Finecast, it was a significant step forward from the metal models and just showcased what is possible for their model makers to do. I hope as they make more characters in plastic, they go back and give all these great miniatures a fresh life in plastic.

Let me know what you think of my Iron Warriors Warpsmith and any other comments below,

Joe B.

Mentor Legion Ironclad Dreadnought

The Interment of Brother Gud Kaninkarr – A Dreadnought Short Story

With all this awesome Dreadtober action going on I couldn’t help but get caught up in the spirit. With all my paints and models packed away I decided to get involved another way, by writing a short story of newly fallen brother being interred into a Dreadnought.

I based the dreadnought short story off of my own Mentor Legion Dreadnought and Command Squad and have been inspired by many of the other hobbyists who write bios for their Inq28 characters.

As this is my first ever public short story I really hope for some feedback and if you like it, I have a few more story ideas floating through my head.


The thick, acrid smoke clung to the walls like bloated slugs. Brother Tons re-adjusted his optical augurs to compensate, the lenses straining to focus on the intricate work. The flickering candles were drowned out by the surgical light but still managed to create an irritating motion in the peripheral.

As the next binaric chant began, his gloved hands paused briefly before the autosenses re-calibrated to block out the frequencies. Reflexes honed by training reminded him of the importance of the chanting to appease the machine spirit, but it did not mean he had to listen to it.

“Lateral capillaries inserted,” the words coming out in an almost intentional cacophony with the chanting. Brother Dral’s intricate mechandrites stuttered at the interruption before quickly realigning the amniotic fluid flow.

Brother-Captain Rothn made a barely noticeable twitch with his otherwise statuesque head. The honor guard standing next to him taking no notice as they silently observed their brother’s transformation. If only they could do so elsewhere.

“Vitals maintaining acceptable levels,” adept Aoldi’s voice was soft, almost meek. Rothn scowl lessened only slightly, he knew the most critical connections were yet to come.

Dral’s armor reflected a bright crimson in the operating light as he moved around to the top of the sarcophagus. Images of the wounded brother as he lay upon the battlefield flashed through Tons’ mind.

So much blood, Astartes were not supposed to bleed that much before the clotting stopped the flow. Tons forced the thoughts of the rent armor out of his mind and back to the operating table.

As Dral incanted the initialization hymn for the spinal interface, Tons made the incisions for the bio-mechanical interfaces. Fresh blood spilled over his white gauntlets before turning black. Many of the wounds at the neck were still raw from field surgery and Tons thought again of the horrific battle that nearly took his brother’s life.

The xenos bodies had been piled around Brother Gud, his honor blade thick with gore and ichor. Tons had already removed his helm and about to administer The Emperor’s Peace when Brother-Captain had ordered the internment.

While Tons knew Brother Gud would be able to continue to serve the chapter honorably, he could not help but to feel pity, and a bit of guilt as he attached the living prison around Gud’s mutilation.

Thoughts were interrupted with penetrating beeps and the Brother-Captain’s heavy footfall as he took an impulsive step forward.

“Increase the flow rate of pychoadrenaline and add 200cc of perralastic.” As the silence returned, Tons nodded to Rothn, his white helm providing little comfort, but Rothn returned to continue his vigil.

Fresh incense and candles were brought in by the serfs as another hour passed with the silenced chanting. Incision, bionic implant attached, hymn of activation, sutures, and verification of successful interface were repeated 173 times. Each with greater risk while Tons’ hands stiffened under the strain.

“The Mind Impulse Unit is receiving clear signals,” the static in Dral’s voice was grating in the silence. “activating the power plant.”

The chanting increased in intensity, causing Tons to re-calibrate the autosenses again to block it out. Even his genetic enhancements were being tried with the constant focus and he glared through his lenses at the unaware serfs.

As the power plant spun up, the internal life support systems activated sequentially. Green lights flickered inside the sarcophagus and Tons’ medical readouts showed increased heart rate and brain activity.

A scream enhanced by physco-activated speakers reverberated through the room. Many of the serfs covered their faces in terror and Tons could smell that a few had soiled themselves. Even the honor guard reflexively grasped their side arms.

“Peace brother, your continued service to the emperor is required.” They were not the words Tons had wished to speak but he continued the tradition as the scream abated. “Honored Brother Gud Kaninkarr, state your condition.”

Muffled footsteps had replaced the chanting as the spent serfs were removed. Cognators spun and data links were abuzz as Gud’s mind awoke to its new situation. Tons could see the adrenaline spike and subside as years of training fought off the fear and dissolution.

“Brother Gud Kaninkarr, Ironclad class dreadnought, designation two-four-two, second company of the Mentor Legion chapter. My service is to the emperor and the chapter, I am honored to continue this service.”

Brother-Captain Rothn continued the ceremony by stepping forward. “Honored Brother Kaninkarr, your service to the emperor and to this chapter has been recorded in the Book of Deeds and your honored sacrifice to protect your captain upon Tharinor will be remembered. Your continued service is yet required to continue our chapter’s mission.”

“By your command Brother-Captain.”

Iron Warriors Banebade Front

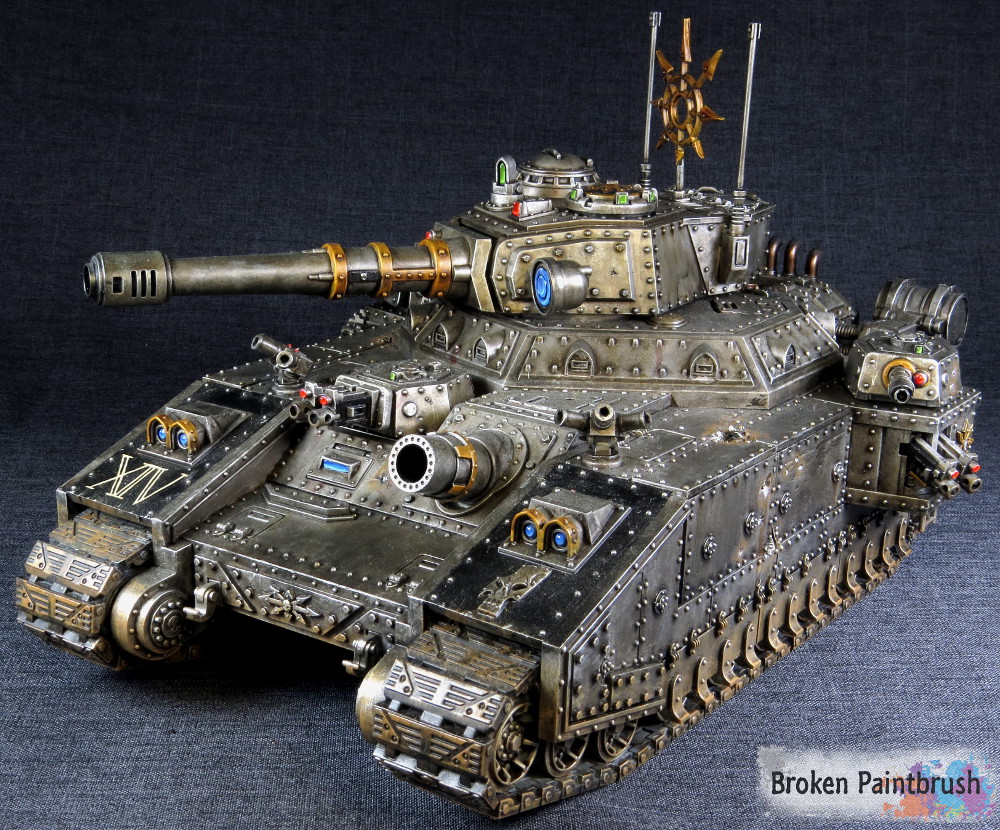
Iron Warriors Baneblade

Editor’s Note: I painted the Baneblade a few years back but didn’t have great pictures for it, so while I am busy packing and moving, its a great time to finally get him a new post.

Now a days every 40k army needs a super heavy to bring to the table. An Ork Stompa, a Knight Titan, or in this case, an Iron Warriors Baneblade super heavy tank.

Iron Warriors Banebade Front

I built this tank nearly 4 years ago shortly after it came out, at the time it was the largest, and most amazing kit Games Workshop produced and part of the launch of Apocalypse. At the time I didn’t have any loyalist army so I clearly needed to build an Iron Warriors Baneblade for the 14th Grand Company.

Iron Warriors Banebade back

In keeping with my other Iron Warrior tanks, the Chaos icons are kept to a minimum and the tank is mostly the typical iron and gold trim. I did spend a good deal of time scraping away the Imperial Iconography that decorates the standard build, but a good chisel blade on the X-Acto made short work of it (I did a post on how I removed it from the Aegis Defense Lines).

Iron Warriors Banebade right

A few chaos stars on the sponsoons, and the large icon I believe is from the Defiler kit. The only other markings are the 14th Grand Company and the army badge skull from the old Dark Elf kit. A few of the armor plates were judiciously damaged – something the Baneblade kit made easy to do with all the pieces.

Iron Warriors Banebade Left

Unfortunately she hasn’t seen a lot of combat over the years, but on the occasions I have fielded this beast, it has made a impact – about a 12″ impact on each shot in fact!

Hit me up with any comments, criticisms, or remarks, I always appreciate feedback.

Mentor Legion Scout Squad for Combat

Mentor Legion Combat Scout Squad

Mentor Legion Scout Squad Banner

So the scout squad has been sitting around waiting for pictures for a few weeks now, so its about time I post them up here.

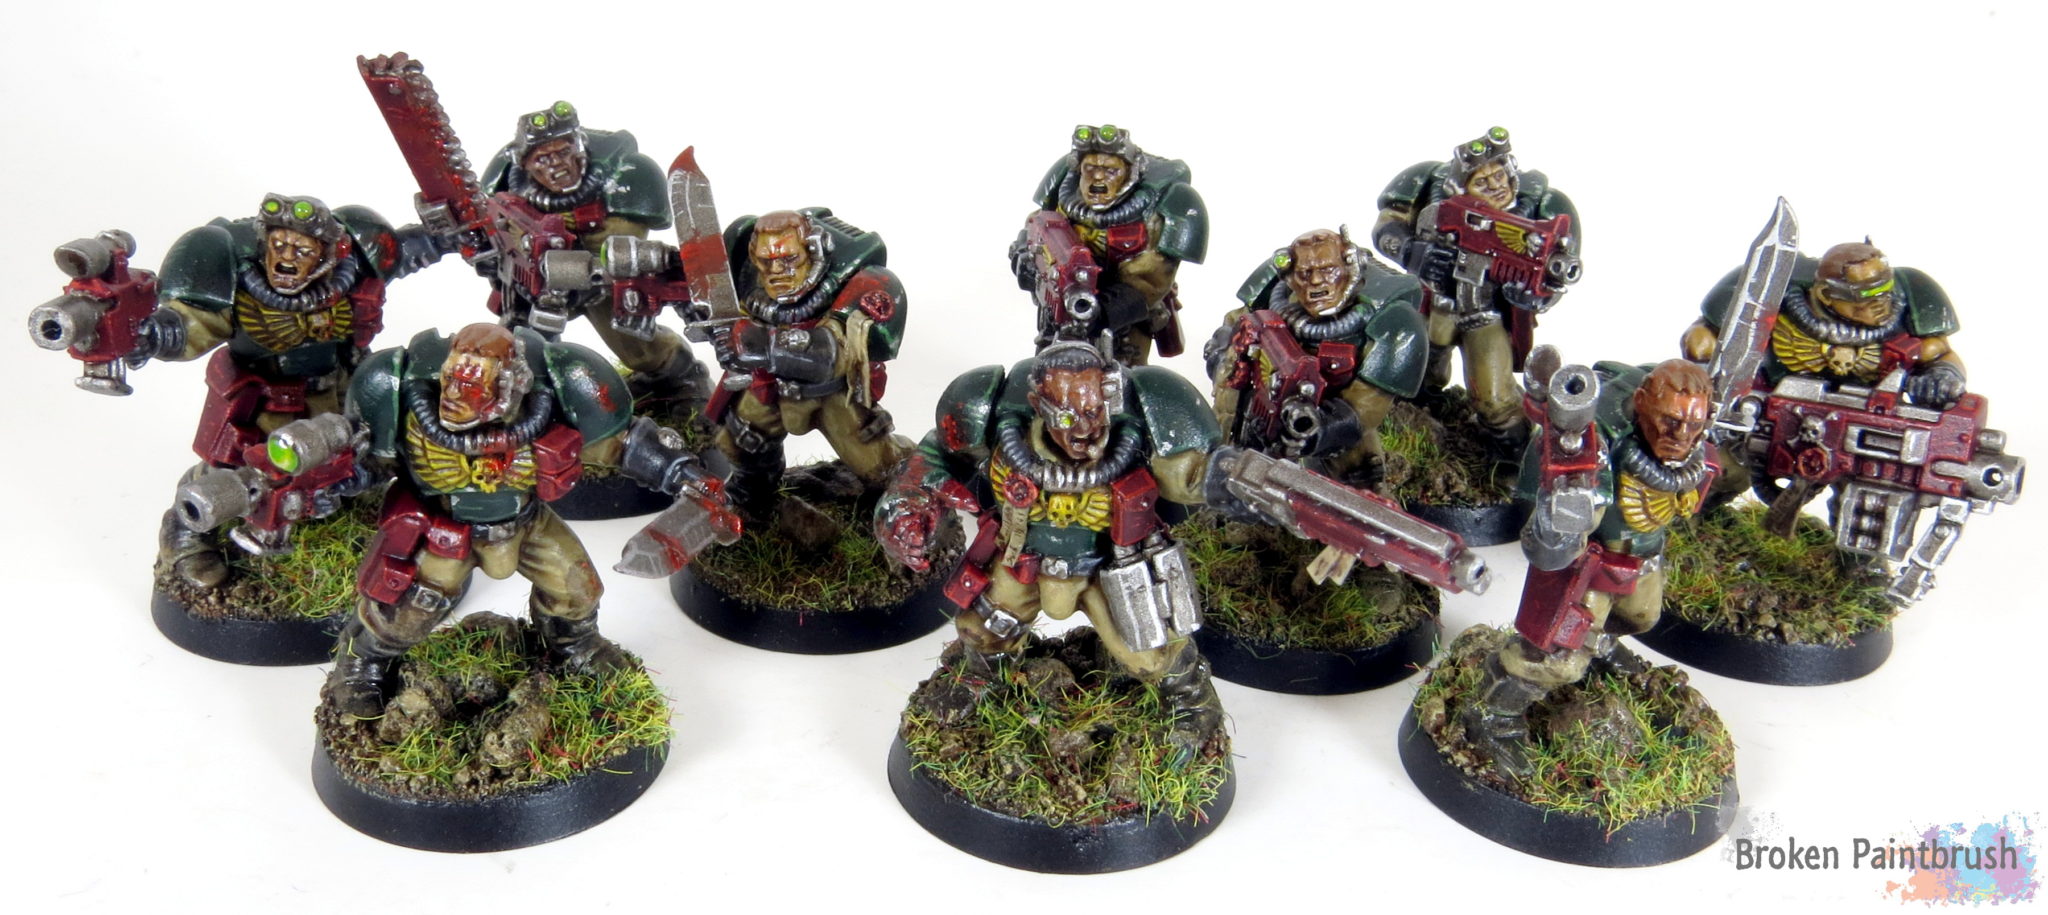
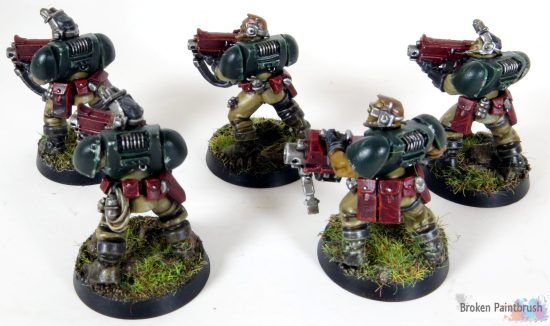
I present the finished combat scout squad for my Mentor Legion, armed with bolters, bolt pistols, and of course a big-arse heavy bolter. The are meant to support the sniper squad and provide a bit more mass to an otherwise small Mentors army.

Mentor Legion Scout Squad for Combat

You can check out the WIP shots here if you like, but since then I have managed to finish the highlights, weathering, and a good deal of gore – well more so on the combat guys further down.

The first half of the squad is to add a bit of mobile fire power with their bolters and the infernal bolts blasted out by the heavy bolter.

Mentor Legion Scout Squad for Combat

Plenty of gear for these guys, and a couple of extra ammo packs for the heavy.

Mentor Legion Scout Squad for Combat

The combat squad received an extra bit of gore as I figured these guys would be the midst of it and haven’t showered in a few months. A few layers of thined down red and black wash, then drops of bright red, and a final coat of gloss to give it a nice shiny look. I struggled a bit with the lens color as they are already a bit busy with the red, green, and yellow so I settled on a brighter shade of green – like a night vision look.

Mentor Legion Scout Squad for Combat

The Sargent is truly bossin’ with his one handed shotgun and carrying extra gear for his squad.

Mentor Legion Scout Squad for Combat

Let me know what you guys think in the comments below. One thing the squad is missing is any army or squad markings. I wasn’t sure where or how I wanted to add these as the normal Mentors decal is too big for the shoulders. So any thoughts would be appreciated.

On another note, this will be the last newly painted post in a few months as the Mrs and I bought a house. As I am busy signing piles of paper work, packing boxes, re-packing boxes as my 2 year old son helps unpack a bit early, and finally moving I won’t be doing any painting. On the plus side, I did get permission to set up part of the garage as my hobby zone, giving me a bit more room to make a mess with the little army men, and hopefully set up a better photo studio for some of the great projects I have planned ahead.

All is not lost though as I still have a few more posts lingering in the draft folder of previous work that hasn’t been posted as well as a few other articles on my mind.