Latest Posts

Painting Black Faces

Painting Dark Skin Tutorial

So as I’ve been painting the Mansions of Madness set lately, I’ve decided to add some diversity to the set. About a third of the humans were painted to look African American (the others were light skin and yellow-brown skin tones). In doing so, I decided to put together a painting dark skin tutorial.

I also have a light skin version availible as well.

When I started, I looked for some other tutorials and found an interesting one on the CoolMiniOrNot forums where Chrispy looked at different ethnic groups and created a color palette for each.

African American Skin tones palette

African American Color Pallet by Chrispy

The Thing to notice about the color pallet is there is no black in the skin, and it even gets up to a relatively pale color for the highlights. Even the pallet for the dark skinned Africans in his example are at most Black Brown color and still highlight up to the same pink/brown color.

Alternatively, I found an article on Perry Miniatures where he painted up a Sudanese warrior. Instead of going the light brown routes, he highlighted with additions Fortress Grey until finally washing with Devlan Mud and Gryphonne Sepia to warm it back up.

Quick Methods

I wanted to start with a couple of quick methods to painting dark skin. The first was using a few layers of drybrush (yup still a viable option) and the second two were using washes only over a white primer.

Other than the drying time for the wash, both are quick and provide a nice looking finish.

Dry Brush Dark Skin

In the competitive painting world, dry brushing has become a dirty word. This is too bad since it is such an easy and quick way to add highlights to a model, perfect for beginners and average painters or those who want to get armies done quickly.

The idea is to add paint to a stiff brush (GW makes Dry Brush brushes) and wipe most of the paint off with a paper towel. Then rub it against the raised edges of the model which collect just a bit of the paint still on the brush, leaving the recesses the darker shade.

Dry brush method for painting dark skin

So the first step isn’t dry brushing, though you could probably do this over a black primer. Instead, I base coated the face Burnt Umber along with the other details. Mahogany Brown and then Parasite Brown were dry brushed on the face.

The next layers were kept lighter and only on the raised edges. This face works well with this method because of the exaggerated features.

Dry brush method for painting dark skin

To bring it back together, I added Dark Brown Wash. This not only shaded the recesses a bit more but also tied all the browns back together. Finally, Light Brown was lightly dry brushed on his face to bring back some of the highlights.

Wash Dark Skin

The second quick style is using only washes. The idea here is to build up layers of color and slowly shade it back down. The hard part is keeping the wash smooth, so it doesn’t puddle. The trick is to do multiple, thin layers.

Painting dark Faces using washes

To do the wash method, the model needs to be primed white first to allow the rest of the colors to take. I then washed it with Dark Brown Wash. The rest of the details were painted in, being very careful no keep them off the face.

Once dry, a layer of Flesh Shade was added to give him a warmer look.

Painting dark Faces using washes

To make him darker, I added a layer of Black Wash. Layers of Purple and Red were added under the eyes, lower lip, and tongue.  The color adds a bit more life into the face as well as pulls interest to the main face. A final wash of Dark Brown was added both to tone down the purple and add additional brown to his face.

Adding Some Color

So what about a more macabre face with dark skin? On this one, I pretty much followed the same wash steps as the guy above, but with more purple and red around his scars.

Painting Black Faces using washes

Again, the face was primed white before two layers of brown wash. The extra brown wash helps bring in in line with the dark flesh I’m going for.

Painting Black Faces using washes

To make him even darker, I added a layer of Black Wash. Now for the fun part. Purple Wash was applied in and around his scars. Small lines of purple were also pulled away from the scars and top of his ears to look like veins. Red was added to his tongue and lips. I also added some red to the scars.

Finally, another layer of brown wash was added. The added brown make the purple

Layers and Glazes

To get a bit more ‘advanced’ I tried another model with using multiple layers and select glazes to build up a smooth skin tone. The model uses nearly the same color combination as the dry brush and includes a Dark Brown wash, but the paints are added in a more controlled manner.

Layering takes longer to do (it’s a ton of brush strokes) but can add detail and highlights where the physical sculpt doesn’t have them. This can include making the cheekbones more prominent or adding wrinkles to the forehead to make the face look older.

Painting Black Faces using layers

When using layers, you need to start with a darker base, so this guy had Charred Brown painted for the base color. I painted Burnt Umber on most of the model except the lowest areas. In this way, we are creating layers of lighter color (thus the term layer painting). Mahogany Brown was then layered on.

Painting Black Faces using layers

For the final highlights, he received layers of Parasite Brown then Light Brown only to the top most areas like nose, lips, and cheekbones. Finally, a wash of Dark Brown was used to pull the colors back together. This is a lighter wash than utilized for the dry brush or washes methods as it isn’t trying to add color but rather to take the edge off the layers.

Wrap Up

You may have noticed one of the things I skipped in this tutorial was the details such as the eyes and mouth. Since I was focusing on the dark skin techniques here I decided to leave them out for now and will come back to them in a future article.

Four different faces using variations of techniques, but in the end they all provide a good looking face for your models.

Painting Black Faces

While they won’t win you trophies, I hope this tutorial can help you get closer to being happy with your own painting and try a few new ways to paint dark skin, or even add some variation to your armies.

If you found this article on painting dark skin useful, could you do me and others a favor? Share this article with a friend or the social network of your choice. I would love to reach more people with these tutorials and hope they will find them helpful as well. You can also check out the tutorial for light skin as well.

Good Reads Week 28

Welcome to another week of Good Reads where I showcase a handful of great blog posts from the last few weeks by other amazing bloggers. Check out the posts, hit up their blogs, and hopefully I can share something you may have missed.

With a newborn at home, this last week has been a bit of a blur so sorry if I haven’t been commenting as normal. I did manage to pull together this week’s Good Reads for your enjoyment. So if you aren’t busy trying to catch all the Pokemon, check out some of these great post.

Inquisitor Lazaros

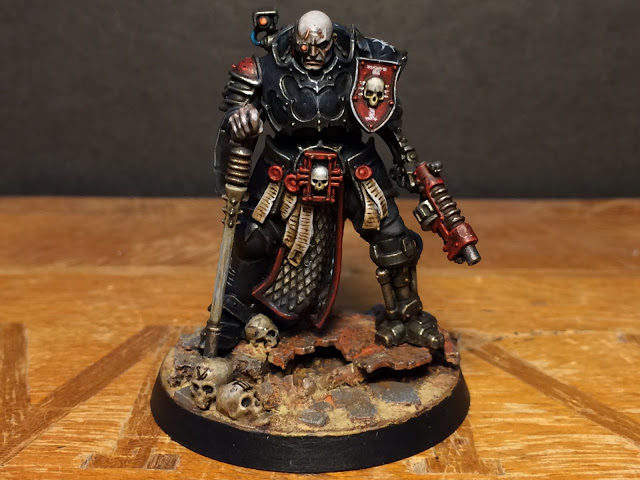
Captain-Inquisitor Lazaros by J.E.

Captain-Inquisitor Lazaros by J.E.

As I get further into the world of Inq28 the more amazing conversions I find. J.E. from the Convertorum is building up a Black Ship crew with the Captain-Inquisitor above as the leader. It’s all the little details like the robotic leg and arm and the questionably chaos chest plate that make this guy so cool looking.

Surviving a Death World

Captain Catachan from Games Workshop

Captain Catachan from Games Workshop

Games Workshop is coming out in a big way on social media and non-standard marketing such as The Regimental Standard. Adding some fluff around the Catachan’s fighting style, a Captain helps a new set of recruits with the rules of the jungle.

Dark Angel Jet Fighter

Dark Angels Jet fighter by Dave Weston

Dark Angels Jetfighter by Dave Weston

The Dark Angel Nephilim Jetfighter is a pretty cool model in its own right, but Dave’s paint job is fantastic. Between the red marble wings, verdigris, and hand painted details.

Carnival of Venom Death

Dark Eldar Carnival Venom by NafNaf

Dark Eldar Carnival Venom by NafNaf

NafNaf has been working on his fantastic Carnival version of the Dark Eldar. His Venom cruiser is just the latest in his crazy cool army. It’s those top hats that really do it 🙂

Aztec Themed Space Marines

Aztec Marines by Rednekkz

Aztec Marines by Rednekkz

I love to find non-traditional Space Marines as they help expand our creative thinking. RednekkBoss decided to go with an Aztec themed marines including jade and terracotta armor and colorful details.

Thanks again for checking out this week’s Good Reads. I hope you found some inspiration and things to try in your own hobby endeavors.

Did I miss a post you think should be included here? I don’t doubt that I did, as I try my best to keep up with all the amazing working being done out there. So if you felt that I missed out, post a link in the comments below!

Painting Guide for the Witches from Mansions of Madness

Painting Witches – Mansions of Madness [May be NSFW]

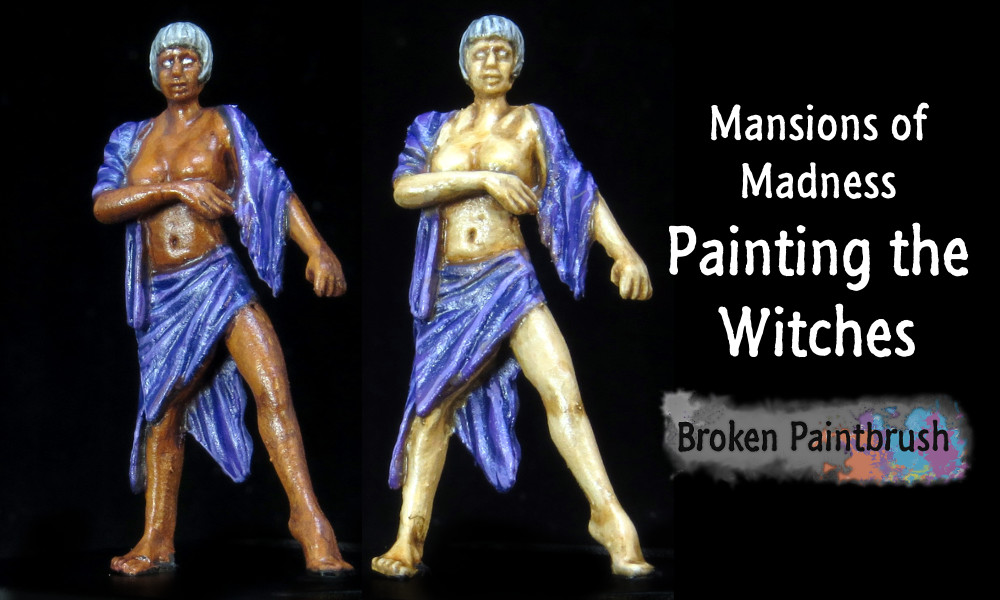
Not all of the enemies in Mansions of Madness are monsters or direct combat combatants. The Witches are more of a horror causing distraction (as hinted at by their, um, clothing choices). I’ve put together a guide to painting witches.

As these have lots of exposed flesh, I focussed on painting the flesh tones. One witch was painted in a dark brown skin and a second in a pale skin. To keep the rest simple, both were painted with the same color robe and hair.

Painting Guide for the Witches from Mansions of Madness

Step 1: Base Colors

As with most of my painting, the first step was to base in all the major colors. I started with the skin tones as they are the ‘lowest’ sections of the model and take up most of the area. The dark skin was based with Mahogany and the light skin with Medium Fleshtone.

The purple ‘clothes’ (as much as there is) were based on Royal Purple. And finally, the hair was based in Stonewall Gray to give them a bit of eeriness.

Painting Witches Basecoats

Colors

  • Dark Skin: Model Color Mahogany
  • Light Skin: Model Color Medium Fleshtone
  • Robe: Game Color Royal Purple
  • Hair: Stonewall Gray

Step 2 Painting Witches Skintones

Next up was to paint the skin colors. You will notice that the final glazes were done after the purple robes were finished. This was so they could add extra definition between the robes and skin layers as well as tone back the highlights.

With both skin tones, I highlighted with two extra layers of much lighter shades before the glazes brings it back to where I wanted it. The highlights were also kept to a cooler color to emphasize their other-worldly nature.

Mansion of Madness Witch painting light skin

The biggest trick is to use plenty of Glaze Medium or Airbrush Medium in each layer to keep it smooth. Add the lighter colors only to the upper areas and allow the glaze to bring it back together.

Colors

  • Model Color Basic Skin tone
  • Model Color Light Flesh
  • Glaze of Medium Fleshtone + touch of Game Color Electric Blue

Mansion of Madness Witch painting dark skin

The same goes with the darker skin. Add lighter browns as you go, but keep them thin. The glaze helps to unify the look, so while the Light Brown layer was a bit blotchy in areas, the final glaze made it look ok.

Colors

  • Game Color Parasite Brown
  • Model Color Light Brown
  • Glaze of Model Color Burnt Umber + touch of Hexed Purple

Step 3 Painting The Purple “Robes”

The robes were painted purple to help accentuated the cool nature. They were painted with simple layers that showed off all the folds and creases.

Painting the Purple Robes for the Witches Painting the Purple Robes for the Witches

Colors

  • Game Color Hexed Lichen
  • Added Game Color Wolf Gray (2:1)

Showcase

The final details were finished up including shading and highlighting the hair and adding a few coats of matte clear.

Painting the witch from Mansions of Madness Painting the witch from Mansions of Madness

I hope you enjoyed the painting witches tutorial and that the skin tones guide may help you with projects.


Watch This: Painting a Power Sword

Watch This is a regular series where I find a YouTube video that shows neat tricks or tips for our hobby. From painting, building, or photography, I will be looking for great videos for you to watch and write up a brief summary of the steps used.

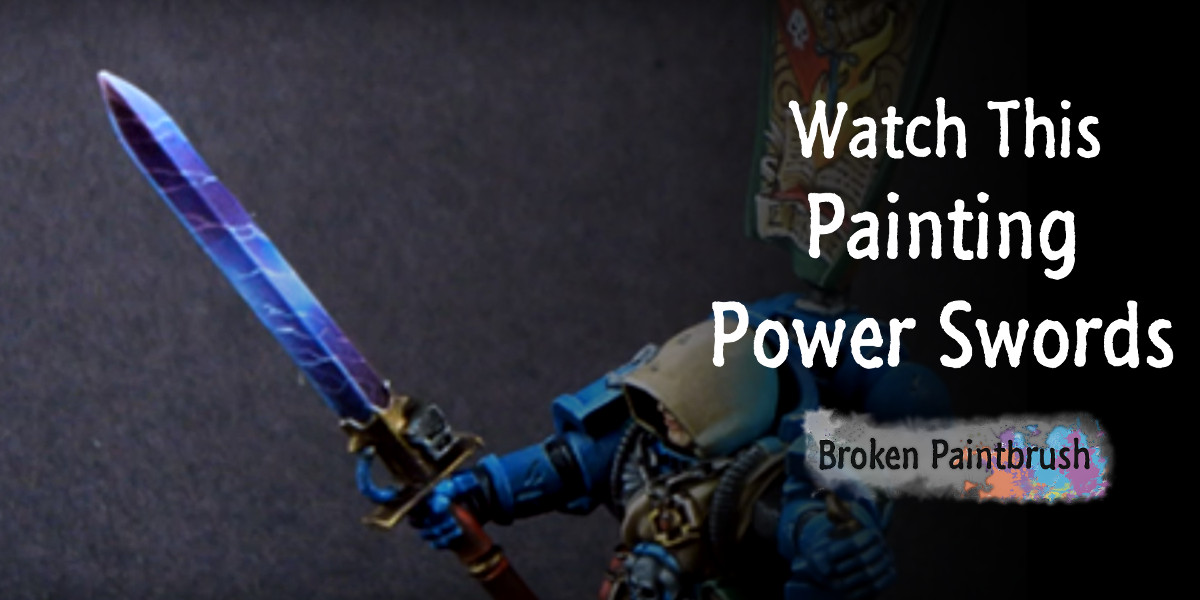
Watch This: Painting Power Swords

This week brings a video from Tabletop Minions with Sam Lenz. He gives a great step-by-step look into how his method of painting power swords. It’s a mix of Non-Metalic Metals with lightning effects and lots of brush licking*.

*There is absolutely nothing wrong with licking your brush 🙂 Well ok, if I could break the habit myself, I would. Some of those paints taste nasty and leave the tip of my tongue tingly

Check out the video here:

Basic Steps

For those who want a run down in text, I’ve put together his steps here on painting power swords:

  1. Create mix of water and Acrylic Retardant
  2. Lay out blue paints on wet pallet, near-white to dark blue (looked to be about 5 blues) include white and black at each end
  3. Paint whole sword with lightest blue and let dry
  4. Paint everything three times (his rule of three)
  5. Add darker tones, alternate on each side of the sword blade and each end
  6. Add thinned white to opposite areas

    Painting Power Sword by Sam Lenz

    Painting Power Swords by Sam Lenz

  7. Add more and more (and more) thin layers to each end, making it darker and lighter as you go
  8. Use white paint to add thin lines across blade for lightning – make it fairly random and split
  9. Cover with Blue Ink (perhaps any blue glaze would do). This brings the blues together a bit more
  10. Add more pure white as dots along the lightning bolts
  11. Add red wash (yep, red) to the dark blue sides to bring them closer to a purple

Wrap Up

While Sam adds way more steps and blends that may be needed for most of my painting, his method seems pretty straight forward. But simple does not imply simple looking. By applying patients and just a few different colors of paints, he was able to create a spectacular effect.

I hope you enjoyed this week’s Watch This on Painting Power Swords and that you may have learned something from it. If you liked Tabletop Minions, check out their channel on YouTube and give them a follow.

Do you have a YouTube video you think I should feature here? Let me know in the comments below. Also, if you want to get more hobby goodness in your inbox, sign up for the Brush Stroke, my weekly newsletter where I send links to some great hobby articles to improve your skills.

Cool Tools: Grammarly

This week I have a Cool Tools post that, while it doesn’t directly relate to our hobby, it is a great tool for us hobby bloggers – or any writing you may do. It’s an online extension named Grammarly, and it has significantly improved my writing.

Grammarly

Spelling has never been my strong point, and grammar has always been a struggle. I have become to rely on Word’s spell checker and doing Google searches just to check spelling.

Why does it matter?

If you spend time writing online, be it a hobby blog or on the forums, using proper spelling and grammar can make a huge difference in your readability and credibility. This may not be as much of an issue with our niche of the internet, being very visual in style, but there have been many posts that I’ve glazed over due to rough writing.

A misspelled word here and there can be glazed over, especially if we are showcasing our latest project or tutorial. But think of bad spelling/grammar as missed mold lines on a model. A few small ones may not be commented on, but they stick out and can derail the entire focus. Something you worked hard on, only to have something so small distract your visitors.

What is Grammarly?

This is why I’ve started using Grammarly. It’s a free tool that has Chrome, Safari, and Firefox extensions as well as native apps for Microsoft Word. So as I type this post in WordPress on Chrome, misspelled words are highlighted and suggestions made as I type.

Editing with Grammarly

Picture from Grammarly

OK, you might be saying, my browser has a built in spell checker, or perhaps you use Word to spell check. I can tell you from experience, that documents that have been “error free” in Word had multiple suggestions from Grammarly. When a company focuses on a particular issue, they often do it much better than those creating broader tools (like a web browser).

Using the tool is as simple as writing out your post, and it highlights words that need fixing. “Advanced” suggestions are tallied as well, and a red (green if it’s all good) circle sits in the bottom corner. Clicking this changes into a different view where Grammarly shows suggestions for changes or better word choices.

Why Go Pro?

This is where I admit that declined a Getting Started box for a year of Grammarly Pro – not only because I am that rough in the English department but also I am actively writing on this and another blog. I also write a good deal for my job between emails documentation and proposals.

Grammarly Pro

So for me, the extra grammar checks and vocabulary enhancements made the upgrade worth it. But don’t let that stop you from trying and using the free version. It’s not even one of those annoying ransomware programs that bug you every five minutes to upgrade, the most you will notice is it will have “advanced” edits available if you upgrade.

Check It Out

So if you spend any amount of time writing and want to have another pair of digital eyes to make sure your words are spelled correctly, check out Grammarly. If you write a lot, or like me, struggle with writing properly, the pro version might be worth the investment.

Realm Gates Tutorial

Good Reads Week 26

Welcome to another week of Good Reads where I showcase a handful of great blog posts from the last few weeks by other amazing bloggers. Check out the posts, hit up their blogs, and hopefully I can share something you may have missed.

Cleaning Resin

Cleaning Resin by the BigGoldFish

Cleaning Resin by the BigGoldFish

I’ve personally only done small accessories in resin, but I’ve seen plenty of problems with building and painting with it. TheBigGoldFish put together a post on cleaning resin kits to make sure that all your hard work stays put.

NovaOpen Grots

Grots By Greg Hess

Grots By Greg Hess

Greg is incredible with his Orks. Between painting them with washes and extreme weather of his walkers, his Orks look incredible. He just finished painting an incredible looking unit of Grots – that’s right, Grots – for NovaOpen.

Painting the Realm Gates

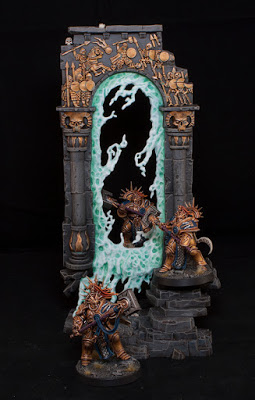
Realm Gates Tutorial

Realm Gates by Tyler M.

The Realm Gates are an iconic part of the new Age of Sigmar and some great looking scenery pieces to fight over. Tyler M. of Mengel Miniatures put together a great tutorial on how he painted his up. It is fairly quick but looks great.

Magnetising the Stormhawk

Stormhawk by Corrm

Stormhawk by Corrm

The new Stormhawk is a fantastic addition to the Space Marine flyers, adding that hard and fast flyer to their fleet. Corrm from St. Andrews Wargaming wrote up how he added magnets to the weapons and how his thoughts on the new flyer with the updated flyer rules.

Using the Gemstone Paints

Painting Gems by Scott Ferguson

Painting Gems by Scott Ferguson

The new Gemstone Paints from Games Workshop are a nice addition to make painting all those gems and soul stones much easier. While their “just paint this over silver” approach look OK, Scott shows that combining the new paints with a few pre-shaded layers, the finished gem looks fantastic.

Thanks again for checking out this week’s Good Reads. I hope you found some inspiration and things to try in your own hobby endeavors.

Did I miss a post you think should be included here? I don’t doubt that I did, as I try my best to keep up with all the amazing working being done out there. So if you felt that I missed out, post a link in the comments below!

Painting Guide Kate Winthrop

Painting Kate Winthrop – Mansions of Madness Investigator

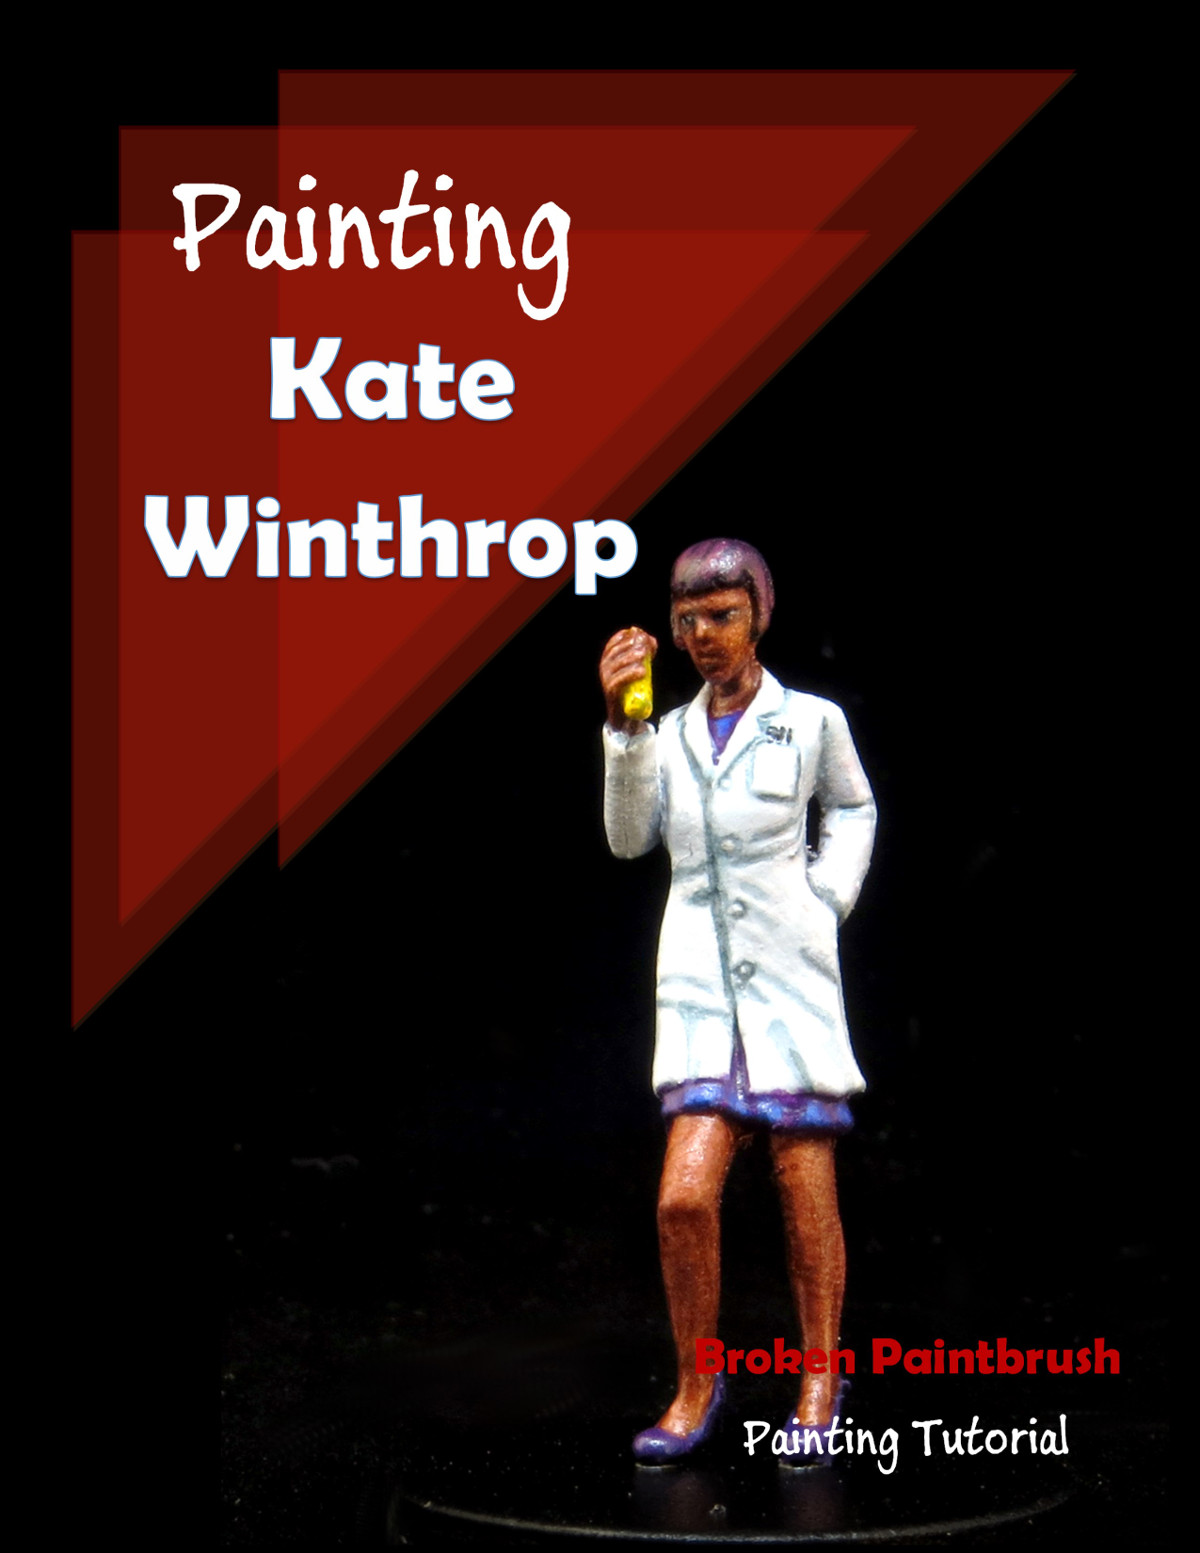
I’m back with another Mansions of Madness painting tutorial, this week with Kate Winthrop. Kate is a supporting investigator, the scientist who makes uncovering clues and solving puzzles much faster for the investigator team.

Painting Guide Kate Winthrop

As I’ve been exploring different skin tone options as well as wanting a diversified investigator team, I decided to paint Kate with a dark skin tone. I also explore some of the shaded basecoat technique where you paint a few layers of highlights before washing it back down.

Step 1 – Base Coats

So the model was prepped by removing the grotesque number of mold lines and attempted to fill in a few seems. She was then primed with white primer spray and let dry.

The main color sections were blocked out. This allows me to get a sense of how she will look in the end and rebalance colors if needed. The skin started with the dark Mahagony brown, the dress a nice deep purple, and of course the lab coat with an off-white base.

Paint Kate Winthrop Lab Coat

Colors

  1. Skin: Model Color Mahagony Brown
  2. Hair: Black
  3. Lab Coat: Game Color Wolf Grey
  4. Dress: Game Color Hexed Lichen
  5. Vial: Game Color Sun Yellow

Step 2 - Dark Skin

The next step was to paint up the skin tones. As I mentioned above, I am working on the shaded basecoat style made famous by James Wappel. So the base color of skin was highlighted twice.

First with Parasite Brown followed up with Brown Rose. You’ll notice that it got fairly pale and wasn’t super smooth. The appeal of the shaded basecoat is that you can paint quickly with light colors and tone it back down with a few washes.

Paint Kate Winthrop Dark Skin

So that’s what I did here with a wash of thined down Dark Fleshtone. You can see it brought the skin to a much darker brown tone and blended the colors back together. Areas between her fingers, hairline, back of her knees, etc. were washed with an additional layer with a bit more black added it.

Colors

  1. Model Color Mahogany Brown
  2. Game Color Parasite Brown
  3. Model Color Brown Rose
  4. Game Color Dark Fleshtone 1:4 w/ Glaze Medium

Step 3 - Lab Coat

As a scientist, Kate Winthrop needs a white lab coat of course! The trick to painting white is to not actually use pure white until the top most layer.

Instead, her coat was based with Wolf Grey, a slightly blue-grey white. The folds, creases, and edges were washed with Blue Grey to add extra emphasis to them. A few areas where re-touched with a bit of black added to the mix to make them stand out even more.

Paint Kate Winthrop Labcoat

Finally, a layer of pure-white was added to the top edges to highlight. By starting with the slightly off-white, the highlight was actually able to stand out and work.

Colors

  1. Game Color Wolf Grey
  2. Game Color Blue Grey (1:2 with Glaze Medium)
  3. Game Color Dead White

Step 4 - Purple Dress

To add a bit of color to Kate, I made the dress under her lab coat purple. It started off much like Jenny Barnes’ blue dress with a base coat of Hexed Lichen and highlight of Ultramarine and Electric Blue. To bring it back to purple, I added a wash of Hexed LIchen with Glaze Medium.

Paint Kate Winthrop Purple Dress

Colors

  1. Game Color Hexed Lichen
  2. Game Color Ultramarine Blue
  3. Game Color Electric Blue
  4. Hexed Lichen 1:4 with Glaze Medium

Step 5 - Hair and Shoes

A scientist crazy enough to explore creepy old mansions would probably be on the hip side. So rather than giving her a basic brown hair and black shoes, They both went purple as well.
I first started with a highlight of Mahagony Brown for the hair to give it some variation and base coating the shoes with Royal Purple. Both were then washed with Hexed Lichen to add the purple hue.

Paint Kate Winthrop Shoes and Hair

Colors

  1. Model Color Mahagony Brown
  2. Game Color Royal Purple
  3. Game Color Hexed Lichen 1:4 with Glaze Medium

Kate Winthrop Showcase

Kate Winthrop from Mansions of Madness Painted

Kate Winthrop from Mansions of Madness Painted  Painted Kate Winthrop with Dark Skin

I hope you enjoyed the painting tutorial for Kate Winthrop, especially my attempts at the shaded basecoat for her skin and dress.

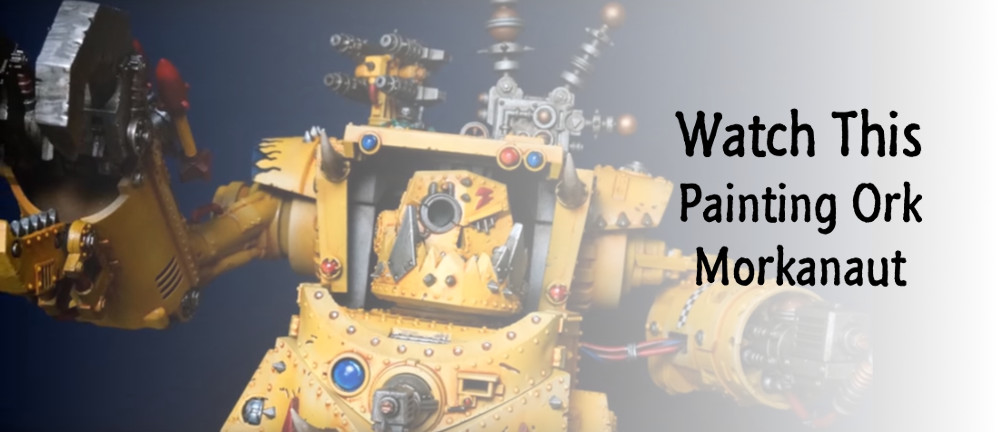
Watch This Painting Ork Morkanaut Banner

Watch This: Painting Ork Morkanaut

Watch This is a regular series where I find a YouTube video that shows neat tricks or tips for our hobby. From painting, building, or photography, I will be looking for great videos for you to watch and write up a brief summary of the steps used.

Watch This Painting Ork Morkanaut Banner

This week I found Doctor Faust’s painting guide to painting an Ork Morkanaut, in this case in Blood Moons colors. I’ve had both a Stompa and Morkanaut sitting on my shelf for way too long, and I’ve been feeling the need to get them back on my table.

Even if you aren’t painting Orks, his video tutorial has some good tips on simple weathering, spraying highlights, painting horns. So Watch This Painting Ork Morkanaut Tutorial:

Basic Steps

For those who don’t want to watch it all the way through or want to have a quick cheat sheet of his steps, I’ve written them down below.

  1. Spray whole model with Hull Red + Armor Brown
  2. Spray with three layers of yellow: Ochre Brown, Gold Yellow, VGC Sun Yellow
  3. Paint metal areas steel
  4. Paint flames with black, highlight with Prussian Blue and Steel Blue
  5. Color the molded chips with Dark Rust and Flat Red, highlight with Sun Yellow and White
  6. Paint interior with Black and Steel mix
  7. Color red details with Black Red and Flat Red
  8. Paint horns with Earth, add Pale Sand towards tips and Black Brown toward the base. Wash with Black and Brown inks
  9. Spray with gloss clear to seal it in and make decals and oils easier
  10. Apply decals
  11. Add AK Interactive Track Wash to interior
  12. Use oil wash for exterior using Raw Sienna, Yellow Ochre, Burnt Sienna. Dry for 1/2 hour then wipe it off with Q-Tips
  13. Add wash to metal areas with Black and Burnt Umber oil thinned down with spirits and then wipe off excess
  14. Paint base
  15. Use penny nails to glue model onto base

Wrap Up

I hope you liked this week’s Watch This with Painting an Ork Morkanaut from Doctor Faust. Check out his YouTube channel and give him a follow.

Do you have a YouTube video you think I should feature here? Let me know in the comments below. Also, if you want to get more hobby goodness in your inbox, sign up for the Brush Stroke, my weekly newsletter where I send links to some great hobby articles to improve your skills.

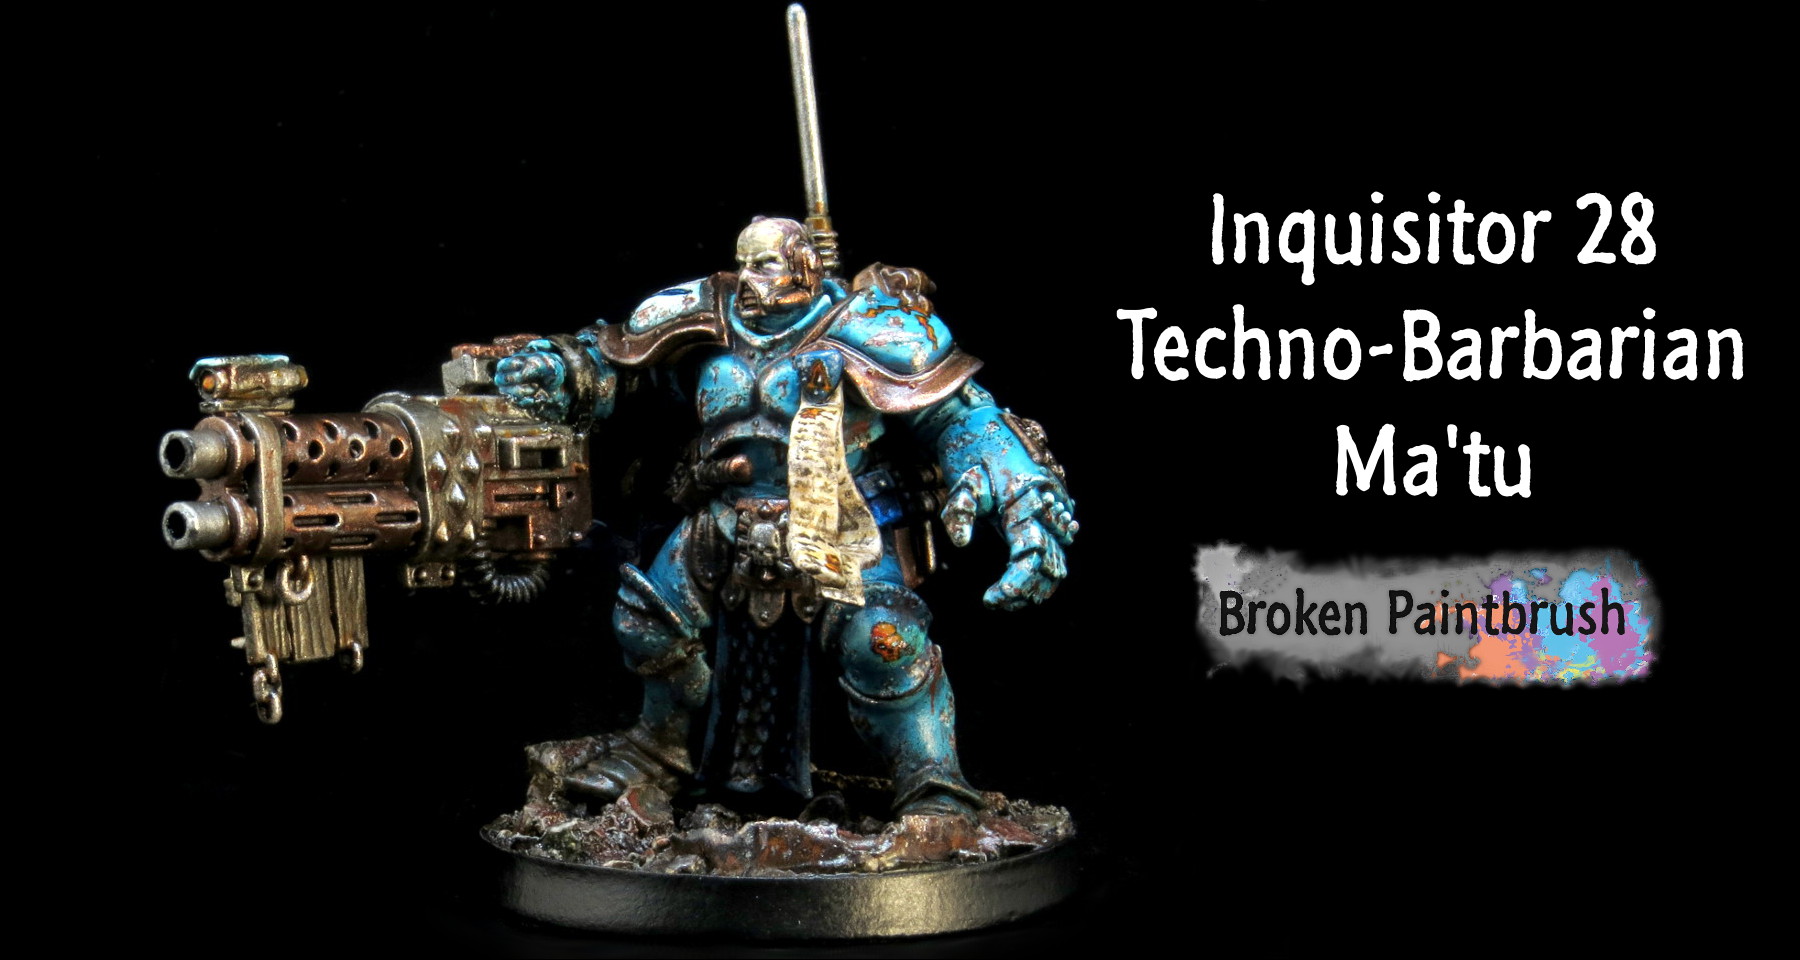
INQ28 Techno-Barbarian Ma’tu

So diving back into the world of 40k today, I have finished up my first Inquisitor 28 model. This INQ28 Techno-Barbarian was born out of a soup of inspirations (and need to step away from Mansions of Madness a bit!).

INQ28 Techno-Barbarian Banner

The biggest prompt to try this guy was Adam of The Golden D6 got me hooked up to do a paint review of WarColors line of paints. They were super generous and sent me a pile of goodies but specifically, seven different turquoise paints to highlight one of their unique selling points (group colors into shades to highlights). I won’t dive into the paints here as I’m saving it for the review.

So armed with seven types of turquoise and three shades of brass, my primary color selection was chosen for me. The problem? I had nothing painted turquoise! But I did have the free Stormcast that came with the White Dwarf a few months back and a pile of bits.

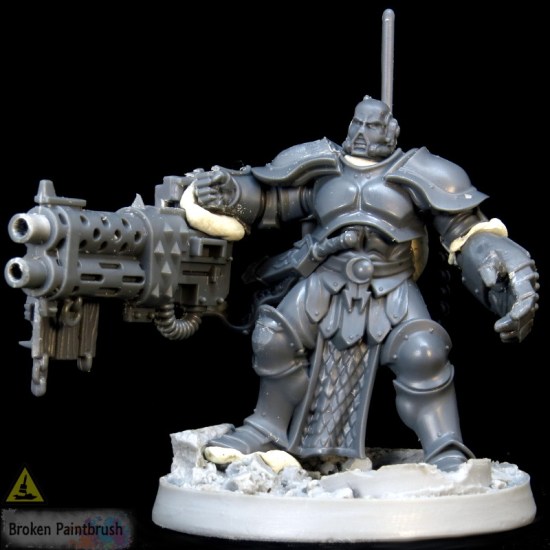
WIP INQ28 Techno-Barbarian Conversion

With his plate armor and stoic pose, I figured a heavy would suit him best. So I fished around and found a big shoota from the Killa Kans and a power fist from the Marines. Using a bit of sticky tack, I started to piece him together.

To cover the Sigmar icon on his belt buckle, I sliced it down and cut up a Marine shoulder pad (for Death Watch I think?). I Tried it down to size and sanded the crud out of it to make it thin enough to fit.

A few extra bits like the heraldry from the Bretonia kit, the sign from the Flagellants, and backpack from a mix of an Ork Big Shoota Boy and a Voxcaster. The only green stuff work I added was to fill in a small gap between the power fist and arm and the straps to hold onto the gun.

The Base Coats

Holy shit! What did I just do?

WIP INQ28 Techno-Barbarian with base colors

Yeah, that’s what I was saying too! The armor was painted with the “One Coat” line of their turquoise paints – a heavy pigment paint that covers well. Unfortunately, the shade matches more with the mid-tone of their turquoise line and looks hideous on him.

But, as I typically do, I blocked out all the colors to get a sense of things. Most of the armor will be the turquoise with copper elements. I chose Dark blue as a good accent color with orange as the spot color (split complementaries). Silver and black make good neutrals areas, so they were used to break up large chunks.

Colors

  • WarColours Black Copper
  • Game Color GunMetal
  • WarColours Turquoise One Coat
  • Model Color Light Flesh
  • Model Color Dark Prussian Blue

The Might Wash

Never go home without buying more brown wash!

WIP INQ28 Techno-Barbarian washed

In this case, it was Vallejo’s Oiled Earth Wash which not only provides a great shade but also creates a definition between different colors. I also went back and covered the garish one-coat with the base color Turquoise 5 (they number from darkest, to lightest).

Colors

  • Vallejo Oiled Earth Wash
  • WarColours Turquoise 5

Adding the Layers

Now I’m starting to get somewhere.

WIP INQ28 Techno-Barbarian with turquoise highlights

Here you can see the different layers of Turquoise paint applied. Without doing any blending, the five levels of the Turquoise color provides an excellent transition from the dark to almost white colors. Some areas ended a bit rough at this stage (his lower left leg for example) but I wasn’t trying too hard either to do any blending – I knew later weathering will end up hiding much of the mistakes.

Colors

  • WarColours Turquoise 4 through 1
  • Game Color Electric Blue (highlight for dark blue areas)

Adding the Details

At this point, he could have been considered done – but I needed to take a step further.

Details finished on WIP INQ28 Techno-Barbarian

With the turquoise armor done, I then finished all the metal areas off with layers of Warcolours Metalic Copper and Game Color Gunmetal. The base from Secrete Weapon and painted in similar hues and powders listed later on.

Decals were applied and then painted over to give him some insignia. Someone on Twitter commented that he had a Thunder Warrior look, so I found a heraldry from them that had an eagle head and lightning. I made one from pieces cut from the Knight Titans sheet. The winged sword on his other shoulder is from the Dark Angles sheet, and a skull on his knee completed the set. I painted over all three after they were varnished to tie them into my colors.

Colors

  • WarColours Metalic Copper
  • Game Color Gunmetal
  • Game Color Hot Orange (decals and lettering)
  • Game Color Wolf Grey (right shoulder pad)
  • Model Color Burnt Umber (lettering)

Beat Up and Finished

To finish the model, I gave him a nice bit of weathering throughout.

INQ28 Techno-Barbarian Ma'tu Top

Following a multi-step weathering process (scaled down from the Watch This video), I started with an old dry brush to stipple on Burnt Umber. This provided a nice, dark contrast to the blues and whites.

Within each chip, I added smaller chips of gunmetal to show the exposed metal underneath. I followed this up with a stippling of powders made from a mix of flow aid, matte medium, and the powder. The WarColours Brick Pigment created a nice rust look while the Fresh Mud and Grey Ash from Forge World added the dirt and soot look.

When happy, I sealed in the layers with Clear Matte spray. For me, I took a big step in my detailing and highlighted the larger chips. I used Turquoise 1 and White to add a small dot or line at the bottom of the bigger chips. It was a painful process, but I am so happy with the result.

Colors

  • Model Colors Burnt Umber
  • WarColours Brick Pigment
  • Forge World Weather Powder Fresh Mud
  • Forge World Weather Powder Grey Ash
  • Game Color Gunmetal

INQ28 Techno-Barbarian Ma'tu Right

I’m still forming the background on this guy but so far have decided he is a techno-barbarian from a high gravity agri-world. As his lord’s champion, Ma’tu prided himself on ending any threat before it could come close enough to spit upon his charge.

As his lord’s champion, Ma’tu prided himself on ending any threat before it could come close enough to spit upon his charge.

In an unfortunate set of timing, Ma’tu had mistaken the advanced of the baron’s new mistress as a threat and splattered her body over a room full of visiting Inquisitors. Embarrassment and fury boiled out of the Barron and ordered Ma’tu immediate dismemberment.

The quick, and lethal response had impressed one of the inquisitors though and had Ma’tu transferred to his keeping instead. There he has stayed as his new lord travels the void in search of heresy.

INQ28 Techno-Barbarian Ma'tu Left

INQ28 Techno-Barbarian Ma'tu BackConverted INQ28 Techno-Barbarian

In the end, I am very happy with my INQ28 Techno-Barbarian and how I pushed my painting boundaries. I know this wasn’t much of a tutorial as some of my other posts have been, but hopefully following the progression was helpful in some way as well.

Want to see my thoughts on the WarColours Paints? Sign up for my newsletter below and I’ll notify you when the Golden D6 issue is out – that and all kinds of other great hobby links (think Good Reads and Throw Back Thursday combined!).

https://eternalhunt.wordpress.com/2016/06/09/etl-v-the-doctor-is-in/

Good Reads Week 24

Welcome to another week of Good Reads where I showcase a handful of great blog posts from the last few weeks by other amazing bloggers. Check out the posts, hit up their blogs, and hopefully I can share something you may have missed.

Making Mud

Muddy Tracks by James Wappel

Muddy Tracks by James Wappel

James Wappel is best known for his ‘shaded basecoat’ technique and painting amazing models super fast. He does some great tutorials around the other aspects of the hobby including this great look at how he made very convincing mud bases for his Bolt Action tanks.

Another Mansions of Madness Painter

C'thonian by Scott Ferguson

C’thonian by Scott Ferguson

I’m still slogging through my miniatures from the Mansions of Madness game and it’s been great to watch Scott as he does a set as well. I’ve definitely stolen some ideas for the pieces I haven’t yet finished.

Removing the Shine from Decals

Emperor's Children by Judging Jester

Emperor’s Children by Judging Jester

Decals are hard enough to set in place to where you need them to, let alone make them look like they fit into the rest of the model.  Judging Jester put together his thoughts on Army Painter’s Anti-shine medium to get his decals to look amazing.

Moritat Conversion

Moritat by Dave Taylor

Moritat by Dave Taylor

Another fantastic painter, hobbyist, and all around great personality in the hobby world, Dave Taylor took the much used Nurgle Lord and created a fantastic Death Guard Moritat. It’s amazing what this model can be used for in the hands of these great hobbyists.

World Eaters Apothecary

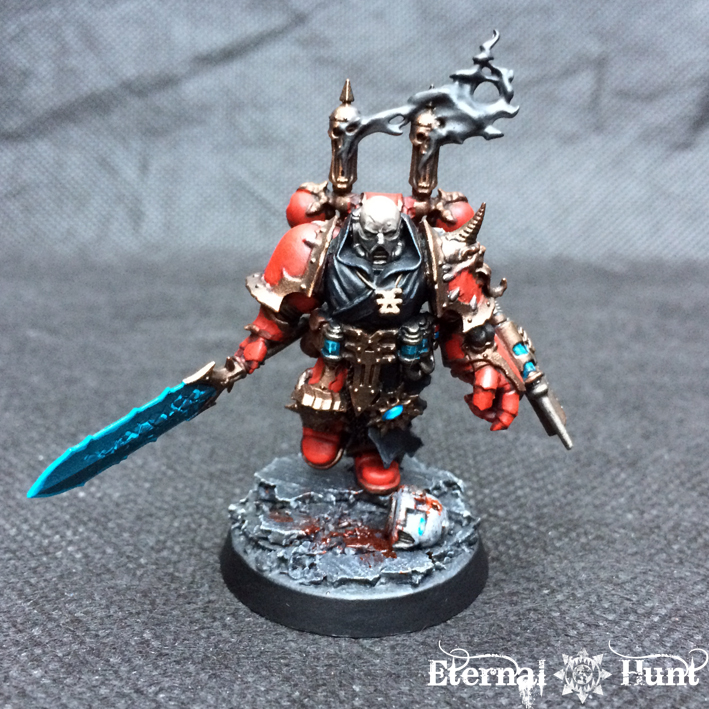
https://eternalhunt.wordpress.com/2016/06/09/etl-v-the-doctor-is-in/

World Eaters Apothocary by krautscientist

I also couldn’t pass by Krautscientist’s fantastic World Eaters Apothecary. Between the pose, the details, and the story, he does an amazing job of giving his hunters a sense of realism (and fear!).

Thanks again for checking out this week’s Good Reads. I hope you found some inspiration and things to try in your own hobby endeavors.

Did I miss a post you think should be included here? I don’t doubt that I did, as I try my best to keep up with all the amazing working being done out there. So if you felt that I missed out, post a link in the comments below!

Painting Tutorial for the Maniacs

Painting the Maniacs from Mansions of Madness

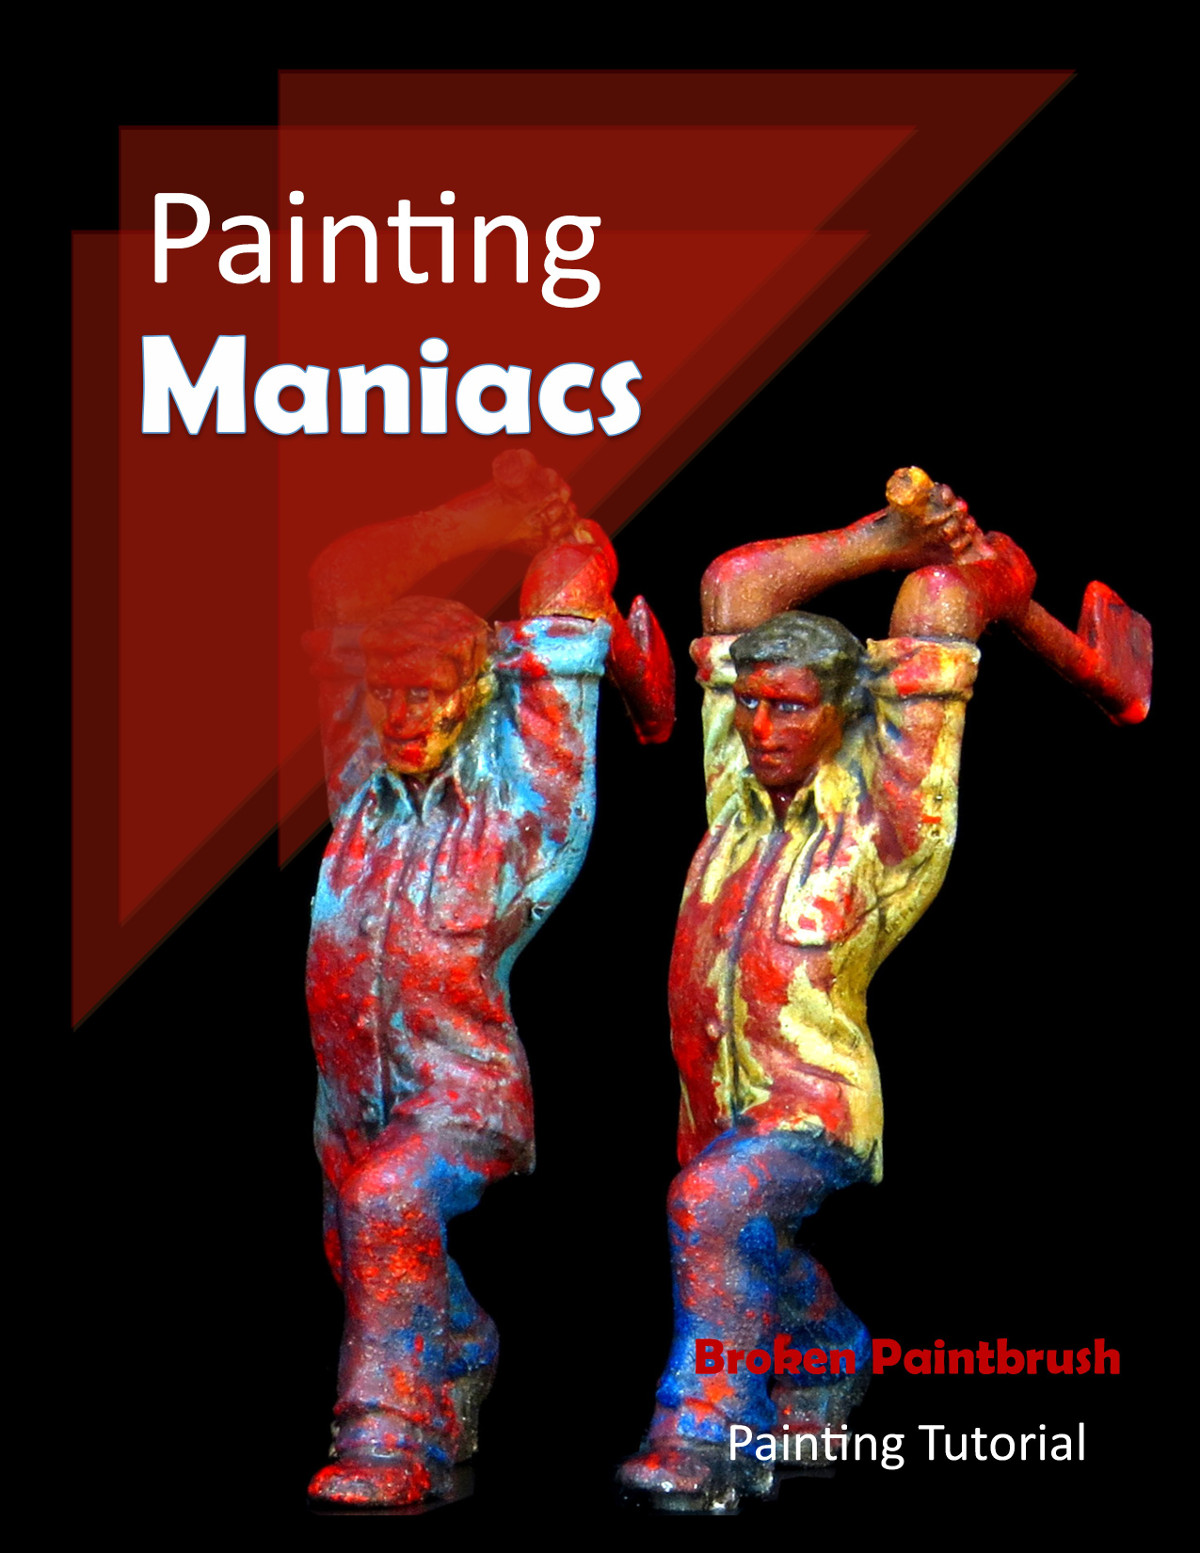
Another painting tutorial for the Mansions of Madness game. This week I have the Maniacs, crazy ax welding office workers who want nothing better than cut you down a few pegs.

Before we start, yes these are rough sculpts and I did miss a few mold lines. But, I hope that this painting guide will help with any of your projects. Each set of models I am trying out a few different techniques, both to push my own bounds but also to provide a variation in the painting guides.

Painting Tutorial for the Maniacs

For the Maniacs, I wanted to see what could be the minimum I do and still have them look good enough for the game. With that said, the main paint is as simple as a solid base coat, dry brush each section and a full-body wash of dark brown. The rest of the model was covered in an obscene amount of blood spatter so it made up for any mistakes along the way as well.

Maniacs Base Coat

Both maniacs got a solid base coat over the white primer. I decided to add some variation with a dark and light skin, each with their own colored shirt. The biggest thing here is to water down the paints a bit and do a second coat where needed.

Maniac base coat paints

Paints

  • Dark Skin: Model Color Mahogany Brown
  • Light Skin: Model Color Medium Skintone
  • Pants: Game Color Imperial Blue
  • Blue Shirt: Game Color Electric Blue
  • Yellow Shirt: Model Color Dark Flesh
  • Ax: Game Color Gunmetal

Painting the Jeans

To get a quick denim look without going through all the layers I did on Ashcan Pete, I only did the single layer of dry brush, adding a bit extra around the knees, pockets, and ankles.

Stage 2: painting the paints on the Maniacs

Paints

  • Game Color Magic Blue

Painting the Shirts

I wanted the shirts to be fairly pale colors, more of a pastel cotton than bright silk. So each was dry brushed with an almost white mix of warm and cool colors. This combination adds more gray to the mix and tones the color back a bit.

Painting the shirts on the Maniacs

Paints

  • Yellow Shirt: Game Color Moon Yellow mixed Game Color Wolf Grey (1:1), added in a tiny bit of Electric Blue to cool it down
  • Blue Shirt: Game Color Electric Blue mixed with Model Light Flesh (1:2)

The Skin Tones

As I wanted these guys to be fairly quick, I did very little for their skin. I started by re-applying the base coats (the dry brushing is messy) before doing the highlight.

Dark and light skin tones for the Maniacs

Paints

  • Light Skin: Model Color Light Fleshtone
  • Dark Skin: Game Color Parasite Brown

The Mighty Brown Wash

Dry brushing is great to get you to fast results, but taking the extra step of applying a wash can magically transform a miniature. It not only creates instant shadows but also tones back the dusty appearance that a dry brush can give.

Typically it is best to do a few, thinner washes by adding clear medium (like airbrush medium) to the mix rather than doing a heavy wash. For the Maniacs, I was ok with a spotty, dirty appearance from the wash.

For one, it added to their crazed look. They are wearing nice clothes, but not have dirt and blood stains all over them. And two, those blood splatters will cover up a bunch of the worst areas.

Painting the Maniacs with brown wash

Paints

  • Vallejo Dark Brown Wash

Painting Blood Splatter

Now for the fun, I mean gory part! OK, perhaps I over did it on the blood, but it does add a bit more thematics to their role in the game. The maniacs aren’t tough opponents, but they are scary if they get close enough to swing.

The blood splatter was done in three steps:

  1. Dark red was thinned down with medium and applied liberally around the model. A second coat was applied over certain areas
  2. Bright red was then added within the dark red areas. Blood dries from the outside in, so the brighter (undried) areas would be in the middle
  3. After the model was sprayed with a clear matte to protect the paint, clear gloss mixed with a bit of red was added over the blood areas to bring back the shine

Adding blood to the maniacs

Paints

  • Model Colors Red
  • Model Colors Vermillion
  • Game Colors Clear Gloss and Vermillion (4:1)

Maniacs Showcase

Light Skin Maniac from Mansions of Madness Dark Skin Maniac from Mansions of Madness

I hope you guys enjoyed this painting guide for the Maniacs and I am always open to comments and criticisms below.

For my 40k readers, don’t worry – I have a post in progress on my Inq28 model that I’ve been painting. If you haven’t seen it yet, check out my social channels and give me a follow!

Watch This: Sculpting Spines

Watch This is a regular series where I find a YouTube video that shows neat tricks or tips for our hobby. From painting, building, or photography, I will be looking for great videos for you to watch and write up a brief summary of the steps used.

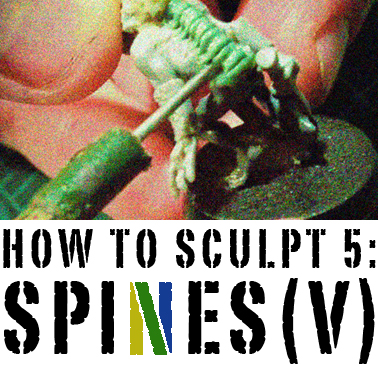
This week’s Watch This is on Sculpting Spines from Mr. Pink. He shows how he adds an external spine to kit-bashed Grotesque. While not something many of us would need to add onto our models, the techniques he shows should be helpful for many sculpting projects.

His Process

  1. Add a dab of lubricant (Nivea lotion in his case) to the back of you left hand, allows for quick dabs as you are working the putty
  2. Add a cylinder of putty along the back and smooth down with a Beale Wax Carving Tool. The idea is to make it smoothed back in with the rest of the model
  3. Use knife tool to cut in the spine sections and separate each collum
  4. Turn the knife tool upside down to poke in the bottom of the intersection to make it look as if it continued underneath
  5. Switch to the silicon shaper to add a ridge along the top of each spine section
  6. Switch to a straight tool (made from filed down nail) and poke the bottom of each section to add divot of where the ridge would curve under
  7. Go back and clean up each section as the tools pushed the putty this way and that.

Wrap Up

I’ve dabbled with sculpting now and then, most notably with my obliterators but also the occasional purity seal or pose adjustment. Watching this video gave me some useful ideas for my work including adding the tab of lotion to the back of the hand.

Check out Mr. Pink’s blog (Modern Synthesist) and give him a follow.