Latest Posts

Painting Basics Banner

Watch This: Painting Basics

In today’s Watch This we are going back to painting basics with NPCChris. This is a great video for anyone just starting out with painting, but also anyone who just wants to review the basics of painting a model.

Painting Basics Banner

With the Watch This series, I look for videos that help with various aspects of our hobby that I want to share with you. I then embed the YouTube video below for you to watch – but don’t miss the notes I put together below the video.

After watching the video myself a few times, I write up the highlights from the video for your reference.

So let’s jump in and watch Chris share painting basics while he paints up his Troll.

Painting Basics Notes

I’ve put the following notes together from Chris’ video. This can help recap what you watched or summarize the different points he brings up.

  • All models have three basic layers of paint: the base coat, highlights, and a shade.
    • Can be done in different orders
    • Single layer (wash) or multiple
  • Prime your miniature
    • Brush, airbrush, or spray
    • Keep it light, but enough for the paint to adhere to
  • Paint the base coat
    • Pick a color
    • Add it to the pallet and water it down (I like Airbrush Medium)
    • Cover all the areas that need it
  • Drybrush the Highlight
    • Pick a lighter color
    • Keep the paint thick – don’t water it down
    • Add paint to the brush
    • Wipe it on a paper towel until most of it is off
    • Run it over the textured surface (like the base)
    • Can add lighter colors to make it even more extreme
  • Shading with a Wash
    • Darker than the basecoat
    • Thin type of paint, or watered down paint
    • Paint the model, it should flow into the crevices without covering the higher edges
    • “Pull up” extra wash with a dry paintbrush to remove extra paint
    • Darkens the shadowed areas to add more depth to the model
    • (You could paint a whole model just with washes too)
  • Bring your own creativity to your models
    • Add any mix of basecoats, wash, and drybrush
    • Multiple layers add even more texture
  • If it has more details, just focus on each area at a time
    • Armor, cloaks, skin etc

Wrap Up

If you are a beginner painter, I hope the video helped illustrate the painting basics that many of us now take for granted. While it is hard to believe, even award winning painters use the same techniques to paint their models – though they may add a few extra techniques like layering, glazing, and airbrush to the mix, the basics are the same.

Know a hobbyist that is just getting started? Share a link to this post using the share buttons floating either to the right or below. Sometimes just watching someone do it helps to get past a hurdle.

Site Updates and Why it is Important to do

If you visited Broken Paintbrush over the last week, you might have noticed a bunch of server errors, dead robots, or broken pictures. The reason is simple: I have been attempting to upgrade my blog services with site updates.

Important Site Updates

For many of you this article will be a bit more boring as you may not care about server performance and what not, but I’ve always tried to be as transparent as possible with Broken Paintbrush and my hobby blogging journey. So below I’m going to share what I changed, why, and what’s still on my to-do list.

Perhaps this is a bit of a self-reflection post, but I hope that you might also glean something off for your blog. At least give you something to think about as you grow.

The Background

Ten months ago I had declared I was making some changes to Broken Paintbrush. In summary: I was focusing on your experience on my site, adding more tutorials, and improving the articles provided to you.

While I have been working on the articles and tutorials and will provide a summary of the accomplishments closer to the end of the year, this week I have been making more changes to the site to improve performance.

What Site Updates I changed

Over this last two weeks, I made four significant changes on the back end, in part because they snowballed on each other. It may not have been the best decision as each change caused my site to go down in one form or another. But at least it was isolated to just a few days, rather than hit and miss for weeks.

Bad Robot

Improved my hosting package

First up, I upgraded my web hosting package. As a WordPress user (and not a WordPress.com customer) I need a hosting company to serve up the blog. For years I have been using a shared server system hosting four of my sites along with who knows how many other customers.

Why?

The biggest reason for upgrading was improving the page loading speed and uptime. Using Google’s Pagespeed Insights tool, my shared server took 2-10 seconds to just provide the HTML and even longer to provide the images, CSS, and Javascript required to make it look like a modern web page.

Considering the attention span of the modern web browser, I figured I lost a bunch of potential visitors. Visitors who may have turned into readers, commenters, and joined in the community of hobby bloggers.

By upgrading, the load time has reduced to ~0.2-0.5 seconds. It still takes some time to load the images and other files (see the CDN and future work below), but at least things start to show up much faster now.

How?

For the last eight years, I’ve been using Dreamhost’s shared server plan. It’s enabled me to grown my blog from its humble beginnings into what it is today as well as three other sites that I host.

Interested in Dreamhost? Clicking through this link will not only save you $25 on the shared server plan, but they will give me a chunk of change too. One save some cash, and I can continue to improve this site!

While they have had Virtual Private Servers (VPS) that are essentially your personal server rack, they were alway more expensive and arduous for what I needed. Instead, Dreamhost released a dedicated server package for WordPress sites called DreamPress.

If I had set up my original blog correctly eight years ago, upgrading would have been as simple as clicking a few buttons, waiting an hour, and Boom! I would have all the power in the world!!!

Instead, my site broke and tried to revert to a previous URL (I had started at 14th.dnyarak.com then moved to bp.dnyarak.com before finally getting the brokenpaintbrush.com URL).

Fortunately, the support team at Dreamhost was able to sort out all the demons and get it back up. Dealing with support was a mixed bag, unfortunately. They were great when they had a task to complete, but were REALLY slow to respond (and have no call-in number). Extra frustrating while the site is down.

Added SSL (https://) Encryption

The next step was to enable SSL encryption on the site. You typically see when sites redirect you to the https:// version (notice the extra s at the end). This allows my server to exchange data with your browser as encrypted messages.

security

Why?

I took the plunge to switch to SSL for two reasons: your trust and Google ranking.

By using SSL, your personal data (like when you enter your name and email in the subscribe form below) is encrypted. Only you and my server get to see it. If I do ever add a marketplace, any financial data you add would also be secured. You can read more about in on Wikipedia or watch this short video on YouTube.

The second reason is that Google has been pushing SSL to be used for all web traffic. Sites that use encryption get a slight boost in search rankings (meaning more visitors from Google searches). But I think more importantly for the long term, is that eventually, I believe that they will penalize sites that don’t use SSL.

How?

So SSL sounds a bit complicated when you consider you need to get a key, have it signed by some third party and tell everyone that your key is OK to use.

Fortunately, DreamHost made this pretty straightforward and many other hosting providers as doing the same. They use a service called Let’s Encrypt that provides free certificates for your site.  With another few clicks of a button, brokenpaintbrush.com had a legitimate certificate and adding https:// in front would encrypt all your data.

The next step was to make sure my WordPress site used the encryption. To do that, it took two different steps. The first was to change the site’s name in Settings->Generall. There are two URL fields to specify where you site lives so that it can automatically general internal links. Adding the ‘s’ to the URL fixed all internal links to use the encrypted version.

The next step was a bit more complicated as it required changing the config.php – a file that lives on the server. I used Filezilla to SFTP onto the server and edit the file, and if all of that didn’t make sense, find someone who can help you do it.

I added the following two lines to the config.php file:

define('FORCE_SSL', true);

define('FORCE_SSL_ADMIN', true);

This forces all traffic to the site to be redirected to the encrypted version, ensuring no one goes to the unencrypted version by mistake.

The last thing that I had to do is re-sync my Disqus comments since it views the encrypted version of the site differently. I won’t go into it here, but they have Migration Tools that fixed the missing comment issue.

Enabled a Content Delivery Network (CDN)

Cool, so now the server runs faster, and all the data is being encrypted. Next up was to re-enable a Content Delivery Network (CDN). This is a set of servers around the globe that host copies the larger portions of a website, like photographs and videos.

mailbox

Why?

The reason comes back to loading time and that our hobby (and thus my site) heavily relies on images. By using a CDN, visitors from Europe download the pictures from a server located in Europe, US visitors from the US, and Asian visitors from Asia. (Sorry Aussies, the Kangaroos still need to carry your pictures in 😉

How?

Setting up the CDN was probably the easiest changes I made as DreamHost, once again, had most of it automated. One of the services they provide is DreamObjects, a cloud-based storage space.

After signing up for the service (it’s only 2.5¢ a GB!) it was only a matter of installing their plugin, DreamSpeed and connecting the two. All 1,286 pictures have been copied over and being served up as fast as each region can load it. All this, and I’m expecting to pay, oh roughly 7¢ for the month!

Setup Automatic Backups

Do you know how easy it is to completely destroy your website? Yeah me either. But I’ve come close a few times (include the server upgrade mentioned above). Just as it’s important to back up your computer, backing up your web site can potentially save you heartache in the future.

While I’ve set up an automatic backup system, manually backing up your site now and then will create snapshots of where it’s been. If your server gets fried, you accidentally delete some random file, or a gremlin gets into the code, you can always load the files back in and start from that save point.

Why?

To be honest, before setting this up, I backed up my site twice. Eight years and I’ve back it up twice. Perhaps I’ve been lucky or now I’m paranoid (seeing a dead robot where your site was can do that do you), but I can’t believe I didn’t do it before.

How?

Ready to guess it? Suprise! It’s another DreamHost service, well actually a different plugin that uses the DreamObject service. The plugin automatically backs up the files and database of WordPress and stores them on the DreamObject cloud storage.

I’ve set it up to backup weekly and store 15 copies of the site. So far each copy is only 2MB (doesn’t save the pictures right now) which can also be downloaded to my local drive (or in my case Onedrive).

Changes Going Forward

Whew, that was a bunch of changes, and between that, having family in town, and the two young sons, the last two weeks have been tough. But they were significant hurdles I need to get over before doing more work on my site.

Oh yeah, I have a pretty big backlog of things I plan to do, but over the short term, I’m going to focus on three site updates: a blog audit, organizing the site, and starting a blog roll.

Blog Audit

hard-work

A blog audit sounds much scarier than it is. The problem is that my blog has gone through many gyrations over the last eight years. Not only has my painting and photography skills improved, but the focus of my site as well.

The idea is to go back through my old posts and make sure they are still relevant and work correctly. Bad pictures updated, multiple small posts combined, and the crud deleted. This work also includes re-organizing all the categories and tags that I’ve used over the years.

The end goal is to have a more streamlined site where it’s easier to find content and potentially dig into even more articles as you go. I want Broken Paintbrush to turn into a site that people stumble into from a Google search or a retweet and stay for hours reading tutorials and editorials.

Better Organize Site Links

That rolls right into creating a better organization to the way the site works. The menu items, internal links, and those “recommended articles” all need to be revamped. Not that it’s bad right now, but so many good articles get lost in time.

So finding ways for readers to locate the content they are looking for or just peruse, both need some structure to the site.

Blogroll

The infamous blogroll. It seems a quirk of our hobby community that the blogroll is still such a big deal. I know people who go to Faeit212 just to catch what’s coming through the blogroll.

I find it odd since I’ve been using feed readers like Feedly for so long. But if that is what the readers use, who am I to fight it? So at some point soon I will be starting the Broken Paintbrush Blogroll – pre-populated with all the feeds I follow.

Your Suggestions?

Well, shit, that was about the longest, boringest post I think I have ever written! Perhaps you just skipped to the end, but for those who read through it all, I applaud you!

In the end, I have been making these updates to better serve you, my readers and my community. With that said, I am always open to your feedback and suggestions for future site updates.

Did the upgrades help or are the bugs still working out of the system annoying you? Do you wish I added (or removed) something from the site? Let me know in the comments below.

If you ended up on this page because you also were looking for how to setup a CDN or SSL but are getting stuck, leave those comments below too. I may not be able to help you, but I might be able to give you pointers from where I got stuck.

Oldhammer – What it is and how to get involved

If you’ve been in the hobby for awhile you know what Warhammer is and probably have an opinion on the company that designs and markets the miniatures and the current state of the game. You may have heard of Oldhammer or seen various references to it on the net, but what exactly is it? This is one person’s opinion, so take it for what it’s worth.

I want to welcome another new author on Broken Paintbrush, Sean Squires from Sean’s Wargamer Corner. While blogging since 2011, his main focus lately is on Oldhammer and igniting the passion in other hobbyists.

This is Oldhammer!

At its core, Oldhammer is a nostalgia for the days when many of its adherents got started in the hobby. We saved our money to buy miniatures, drooled over the battle reports and Eavy Metal painting team’s work. We even occasionally threw dice with reckless abandon and trash talked with our friends while having a great time.

Oldhammer teaser

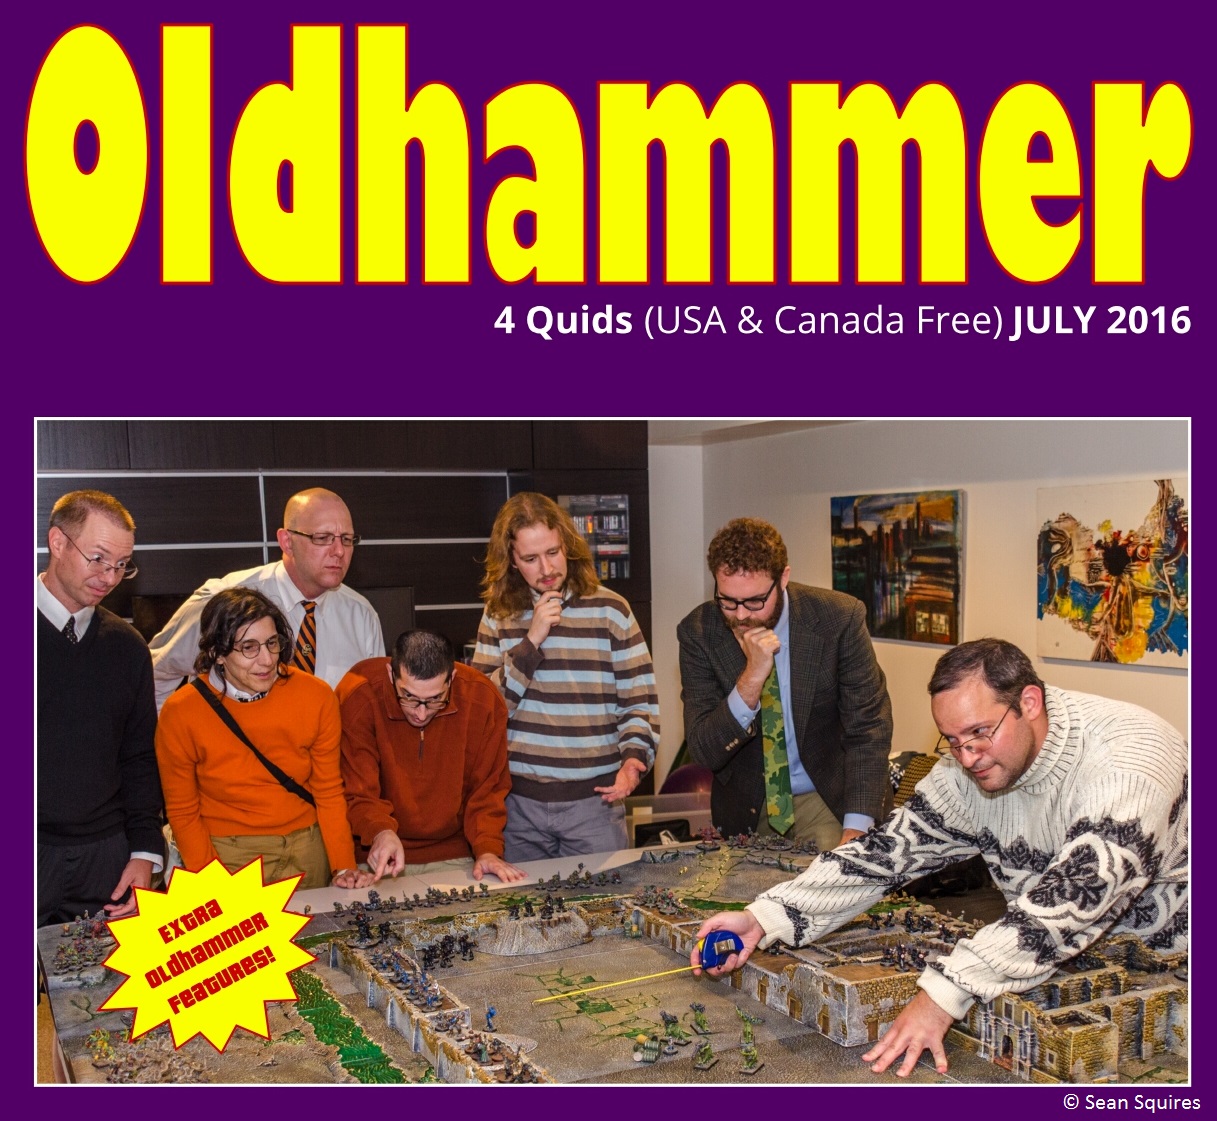
A picture from the last Oldhammer get together. We tried to recreate the cover of Battle magazine from January 1977.

There are almost as many interpretations of Oldhammer as there are Oldhammerers, and while there are arguments about the best version of the rules or the best releases of miniatures, there are a few generalizations that can be made.

Open to Imagination

The first is that most of us seem really like 3rd Edition Warhammer Fantasy Battle. I think the reason for this is that it, and Rogue Trader, offered a wide realm of possibility where the fluff was there to give just enough flavor but not restrict your imagination.

These books also heavily encouraged GM’d games and the primacy of storytelling over wins and losses. I also think that many of us cut our teeth on this version, but perhaps I’m just showing my age.

Broad Range

The next generalization is that Oldhammer is only about GW/Citadel miniatures that were released from 1986 – 1992 ( or whatever grouping of years they’re hung up on). For some, this is true, for others, it is not.

DSC_0154red

The iconic Mother Crushers, painted in late 2014. Purchased around 1990.

With the Oldhammer renaissance, there are new figures being sculpted in the old style. Kev Adams himself is sculpting tons of figures for new ranges in the “Oldhammer” style. But so are many others like Tim Prow, Mark Copplestone etc. In fact, I should probably say that they are just sculpting in their own style similar to what they did back in the 80’s and 90’s.

For myself, I just paint what I like and try to use it in games wherever possible. I’m using metals, plastics, resin. Some period figures and some new. I have many figures from newer companies and Kickstarters as well.

Abdul Composite cort

Eureka Voltaire figure with plastic Cadian trooper weapon hands and servo skull. Backpack by Dragon Forge.

Specialist Games

In addition to WFB and Rogue Trader, many Oldhammerers enjoy playing what GW called Specialist Games. So Blood Bowl, Space Hulk, Man O’War, Mordheim, Necromunda, Dark Future, Epic (I’m new to it so don’t know all the versions) are some of the other games that are also enjoyed by the movement.

Hey Sean, that sounds cool! How do I get involved?

I’m glad you asked. The first thing you need to do is just self-identify as an Oldhammerer. Pretty easy right? But seriously, I sat on the fence for several years before I gave in to the fact that I really was an Oldhammerer. I missed out on all kinds of stuff, including the first Oldhammer USA weekend because of that.

Join the Community

Once that’s out of the way there are a couple of other things you can do. You can join one of the many Oldhammer groups on Google+ or facebook, you can post pictures of your games and figures to those or on a blog and share them with the community. You can also join the

You can join one of the many Oldhammer groups on Google+ or facebook, you can post pictures of your games and figures to those or on a blog and share them with the community.

You can also join the Oldhammer Forum and talk about it with people from all over the world and get yourself listed on the opponent finder, a nifty little map showing roughly where in the world other players are. I’m in Arizona, all by myself 🙁 (but would love to have you to join me!)

Make it to Oldhammer Day

Finally, if you can’t find anybody locally and have October 1st and 2nd open, think about coming to Oldhammer Day USA at Huzzah Hobbies located at 44927 George Washington Blvd, Ashburn, Virginia 20147. There’s an event page on facebook. Open gaming, Space Hulk, Blood Bowl, Necromunda and the Rogue Trader Scenario Battle at the Farm are currently scheduled.

Oldhammer Day Banner

Hope to see you there and if you have any questions you can find me on my blog, facebook (on the Oldhammer in the New World Group) or Google+ (on the Oldhammer Community Plus).

See you across the table,

Sean

Good Reads Week 32

Ready for some more awesome blog posts to fill your hobby desires? This week’s Good Reads includes some crazy Grot Bikers, Oldhammer comic battles, Doom Rider!!!, Angles, and an award-winning Drake.

Good Reads is a bi-weekly post that gathers up some of my favorite posts and shares them with you. There are amazing hobbyists out there showing their amazing work. Click through to their blogs and give them a follow and a comment!

Custom Grot Bikers

Custom Scortcha by Blazmo

Custom Skorcha by Blazmo

Do you have some spare bits that need a model? Blazmo shames us all with his amazing creation of custom Grot skorchas built with scrap. Some awesome crazy mek work there – and hard to tell where some of the pieces come from, and when you do, the creativity required is impressive!

Old Hammer Battle Report

Battle report by Sean

Battle report by Sean

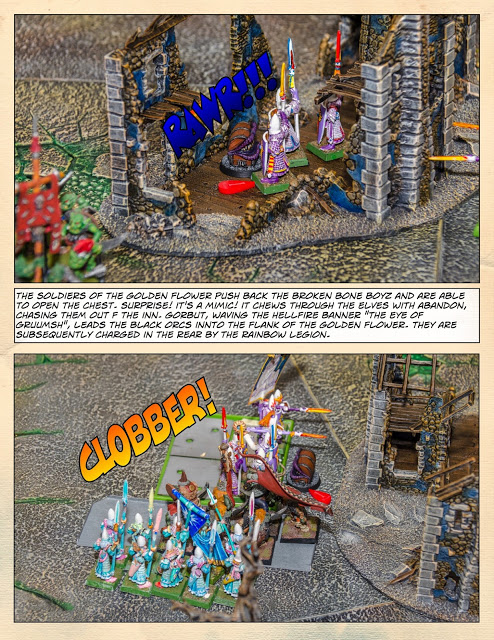
Sean signed up to be a guest writer on Broken Paintbrush (check out his article this Saturday!) which is how I found his blog. Not only is he a hardcore Oldhammer fan, but he does his battle reports in a comic style.  Check the comic reports, and stay for the Oldhammer!

Doom Rider Strikes Again

Doomrider by Rory

Doomrider by Rory

Speaking of Oldhammer, Rory knocked it out of the park custom Doom Rider build. I have a special fondness for 3rd Edition Chaos Space Marines and all their awesome characters, so seeing Rory’s Doomrider makes me so happy!

Dark Blood Drinkers

Angels Encarmine by D Power

Angels Encarmine by D Power

While I’m not a huge Blanche fan (I know half of you just booed me right now!) I do appreciate when hobbyists do fantastic conversions and paint jobs to emulate his style. D Power is one of those artists as exemplified by the Angels Encarmine. Also, check out the converted Skitarii at the bottom of the post!

Nurgle Drake

Nurgle Drake by Miniatures of Tomorrow

Nurgle Drake by Miniatures of Tomorrow

I’ve been following Miniature of Tomorrow’s work on this Drake for weeks, and it is fantastic to see the completed model – a Nurgle Drake Diorama (Imgur gallery). You can check out his build process and other awesome work on his Tumblr as well.

Broodlord

Broodlord by The Fantasy Hammer

Broodlord by The Fantasy Hammer

To emphasize the power your old posts have (and why Thor’s SEO series does help!), The Fantasy Hammer commented on my Broodlord Tutorial from last year saying it helped him paint his own amazing Broodlord from Space Hulk. He clearly took the lesson and turned it up to 11!

That’s it for this week. I hope you found some cool new hobbyists to inspire you or give you nostalgic flashbacks.

Painting guide for the Mi-Go from Mansions of Madness

Painting the Mi-gos from Mansions of Madness

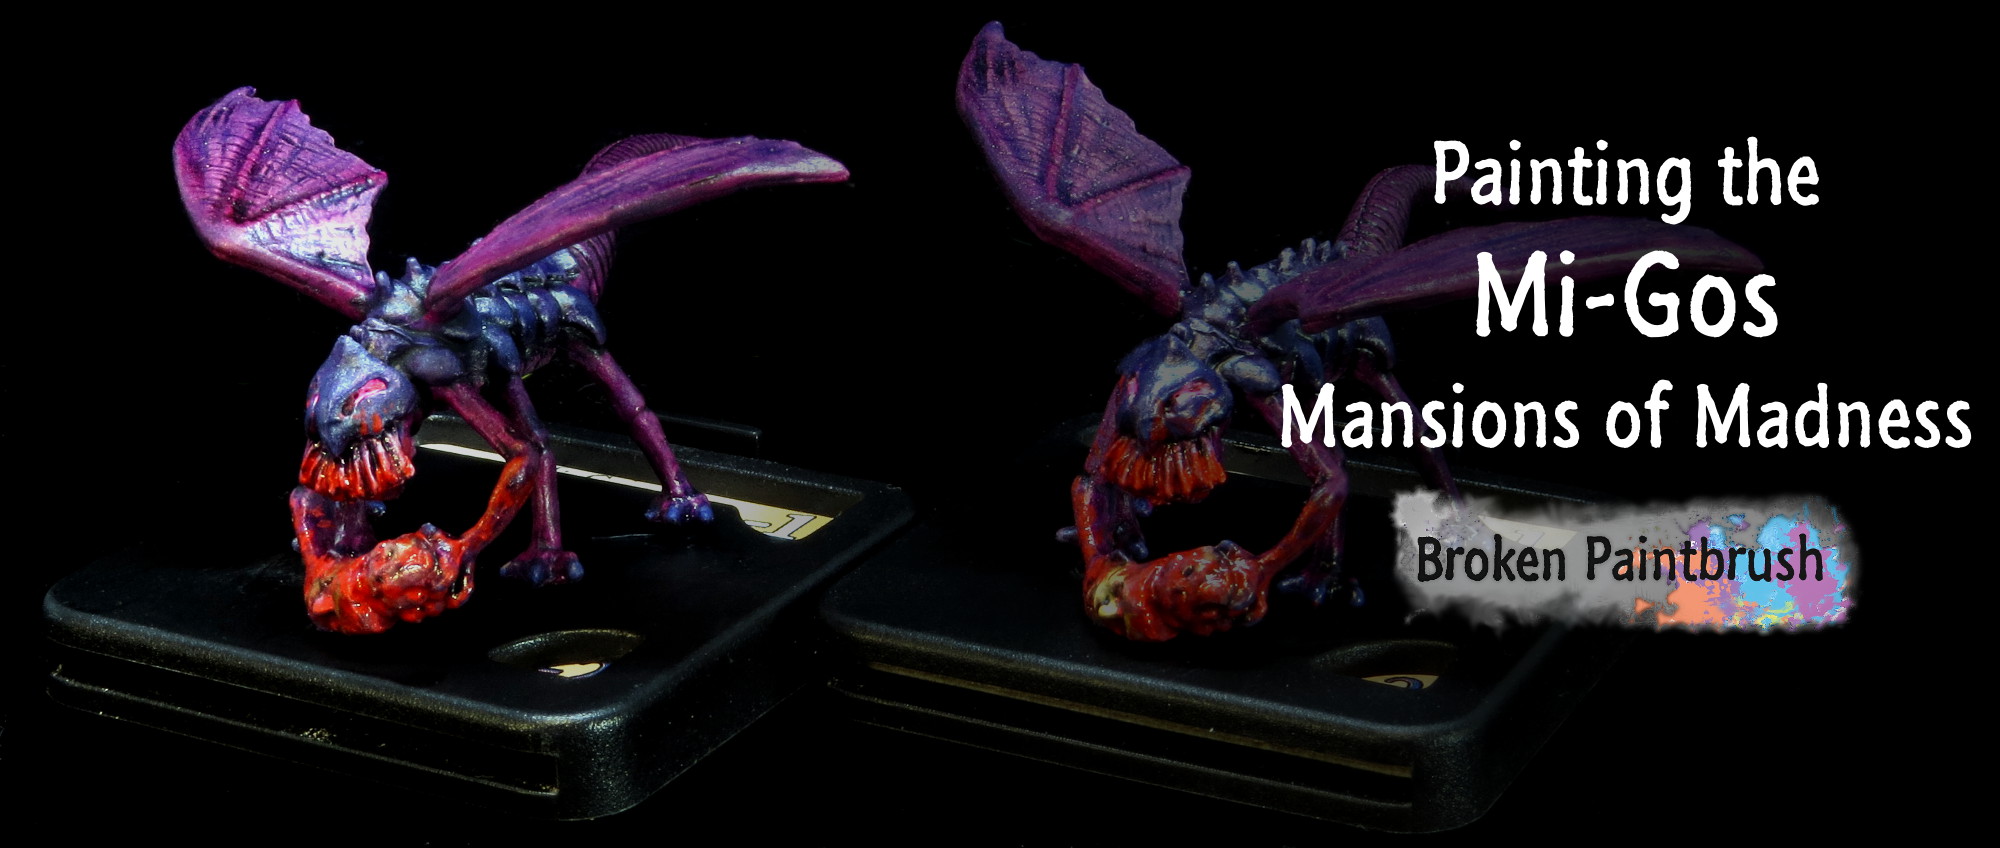
Back to another monster from Mansions of Madness. This week I have the Mi-Go models – odd looking fly/bat/mosquito creatures that like to eat brains. I went for an other-worldly look with pink and purple skin and blue carapace, and of course, blood.

Painting guide for the Mi-Go from Mansions of Madness

I used two main techniques on the Mi-Go: drybrush and wash. This allowed them to be done relatively quickly while still pulling out the details.

Step 1: Base Colors

After a white primer, I painted all the base colors to get a sense of where each would go. This has been particularly hard for the Mi-Go as they were going to be pinks and blues – which can get a bit garish if not balanced well.

Painting the base colors of the Mi-Go

Step 2: Dry Brush Electric Blue

The first layer was doing the carapace. I chose to do dry brush from this model for two reasons: it would be quick, and it has lots of textures that work well with dry brushing. So grabbing my small dry brush, I applied a layer of Electric Blue over all the blue areas. If I got it on the skin, I re-applied some Warlord Purple to clean it up.

Applying some blue to the Mi-Go carapace

Step 3: Dry Brush Pink

Now moving back to the skin, I dry brushed it with Squid Pink. This was the base color of the fleshy wings which helps bring them together rather than looking disjointed.

Here I had to start being careful with the dry brush so it wouldn’t get on the blue. But I wasn’t as concerned with keeping it smooth as the washes would fix many of the errors.

Painting the Mi-Go with Squid pink

Step 4: More Pink, well Flesh

Next was to bring all the highlights together by dry brushing the whole model with Pale Flesh. This seems a bit odd on the blue, but by sharing a highlight it makes the model look more natural (well as natural as an otherworldly being could be).

The dry brush does start to look a bit dusty at this stage but will soon be rectified with the washes.

Dry Brush the Mi-Go with pale flesh

Step 5: Red Wash

Now for the fun parts: adding some washes. I love washes as it does two things: it adds shadows instantly and softens color transitions. This is extra helpful with dry brushing as all the later, dusty looking layers get softened a bit to look more like layers.

I started with a straight red wash, in this case, Baal Red (yeah still using some GW colors :-).

Adding Baal Red wash to the Mi-Go

Step 6: Blue Wash

And then we get crazy. The pink was too much for me, more candy-like and not monster-like enough. So I added a bit of Prussian Blue (very dark shade) to the Baal Red wash to create a dark purple. It ended up being more of a glaze, being a bit thicker than the wash which worked out well. The pinks turned to more of a magenta-purple, and it added a nice cool shade to the veiny wings.

Painting the Mi-Go with a purple wash

Step 7: Blood

And to give them even more monster scary powers (and highlight their snack), I added blood effects. This was the same formula for the Cultists and Maniacs. A base layer of dark red was splotch around with a brighter red layered inside.

I focused the effects on the brain, claws, and mouth/tentacle things. It helps to bring the focus back to the head since most of the model is now purple/blue.

Painting blood on the Mi-Go

Paint List

  • Skin: Game Color Warlord Purple, Squid Pink, Model Color Pale Flesh
  • Carapace: Game Color Hexed Purple, Game Color Electic Blue
  • Wings: Game Color Squid Pink, Model Color Pale Flesh
  • Head: one was done with Model Color Mahogany Brown and the other with Basic Skintone, Pale Flesh
  • Brain: Squid Pink then dry brushed with Game Color Stonewall Gray
  • Wash: Baal Red, Baal Red + Model Color Prussian Blue (~4:1)
  • Blood: Model Color Red, Game Color Bloody Red, Gloss Medium

Mi-Go Showcase

Painted Mi-Go from Mansions of Madness

I know some of you are getting tired of the Mansions of Madness models, but fear not! I am nearing the end of the set and getting ready to build some more 40k models. Or, more likely, I will be mixing it up more.

Mistakes

Hi. I’m Thor. Let’s Chat About Blogging!

Where…where am I? I must have stumbled into the wrong blog.

Hello everyone. I’m Thor. Joe was looking for some guest bloggers, so I told him I’d see what I could do. Let’s see if I can write about something interesting and different from my usual stuff. I know. I’ll write about blogging!

I do want to welcome and thank Thor for writing some articles for Broken Paintbrush. I’m looking forward to his articles on blogging for hobbyists and how it can help us improve our digital works. If you are interested in guest writing as well sign up below or read more about it.

A bit about me first. I run a blog of my own, Creative Twilight. Some of you know me (hi, Greggles and Rory), others of you may not. I’ve been blogging for seven years now, which is a lifetime in the blogging world. I’m an avid Warhammer 40K player who loves Chaos Space Marines, despite the dated codex. Most often I blog about my hobby work and my 40K gaming. I toss in the occasional editorial when the mode strikes as well

Creative Twilight

Professionally I’m a PHP programmer who works for a local web hosting company in Maine, US. So, I live and breathe websites and blogs.

Enough about me, though. It’s really not that interesting.

A Chat About Blogging

What I want to set up here is a series of articles about blogging. Some of you will recall the SEO (search engine optimization) series I did on House of Paincakes. I put a lot of work into that series, sharing my professional knowledge, but it was rather on the technical side of things. For what I intend to do here, I want to step back and focus more on blogging itself.

I’m not a professional blogger. Well, technically I suppose I am since I get the very rare check from Google Adsense, but that barely counts. No. I’m a guy who just enjoys writing and putting it out there for everyone to read. In my seven years of blogging, I have learned a lot.

I’m not going to blow smoke up anyone’s butt and say my blog is amazingly popular, and that I can make you famous by following what I say. However, I have managed to learn a lot from my mistakes. I have applied those lessons to how I blog and slowly built up a reasonable following for Creative Twilight. It’s those lessons I want to share here.

MistakesSpeaking of, don’t be afraid to make mistakes, we all do it. You show me someone who claims to have done it all right the first time, and I will show you a liar. You can find a ton of articles on how to blog. They will give you the Do’s and Don’ts, but most of it isn’t applicable to us.

The articles you find on blogging are almost all geared towards professionals, the people making a living off this hobby we call blogging. That’s not to say that there isn’t some great information to be found, but it’s buried.

Those of you reading this are not the demographic that’s spoken of in these How To Blog articles. We’re all a part of a small niche of wargamers. We want honest articles by honest people and not click-bait crap. We don’t want to be talked down to. A discussion among peers is what I look for, and I’m sure most of you as well.

Those are the things I plan to cover with the series I’ll be doing here at Broken Paintbrush. I’m hoping you find it interesting and insightful. Also, if you have questions you’d like me to answer, please fire me off a comment below. I’m not going to stand on a soapbox and preach, so anything you’re curious about is fair game.

Watch This: Airbrush for Beginners

Complete newbie to using an airbrush? Yeah me too, I’ve used Games Workshop’s sad attempt at making one to base coat some models but dream of doing more with a nice brush. This week’s Watch This returns to Orc Painter Nerd and his great tutorial on using an airbrush for beginners.

Watch This Airbrushing for Beginners

Double bonus for this week! This week’s Watch This is a two part video with the first going over the basics of how to use an airbrush and part two on using it to paint an actual model. So make sure to watch both videos and check out the notes.

Watch This: Airbrush for Beginners by OrcPainterNerd

Part 1: Airbrush Basics

Highlights

Not enough time to watch the full video or just like text notes? I’ve broken down OrcPainterNerd’s tips below for handy reference.

  • Connect everything up before turning the compressor on
  • Turn on compressor and adjust pressure (he is using 20PSI)
  • Use thinned paint, smaller needle = more thinner needed
  • Add airbrush paint to paint holder in airbrush, only a few drops needed
    • Using 0.4mm needle so doesn’t need to thin the Airbrush Colors paints
  • To add air, push down on the lever
  • To add paint, pull back on the lever
  • Practice by spraying different shapes on blank paper
    • Trace lines and shapes to practice coordination
  • Clean airbrush by adding water to paint holder and spray into cleaning pot
  • Add a touch of Airbrush Cleaner and spray through as well
  • When finished
    • pull out the needle and clean with Cleaner on paper towel
    • Use QTips and small brush sets to clean out nozzle and paint pot
    • Resemble
  • Products he uses (note: I have note used most of these but going off his recommendation)

Part 2: Airbrushing a Model

Now that you got the basics of how an airbrush works down, let’s look at how to use it on a model.

Notes for Airbrushing Model for Beginners

  • Break down the model into separate pieces to make it easier to spray
  • Prime model, he uses Vallejo Grey Primer
  • Spray about 4″ away from model
  • If it looks wet, move to different area, too much paint can build up to obscure the details
  • Spray black lines to where shadows would be to ‘pre-shade’ model
    • Panel lines, recesses, overhangs, etc
    • Doesn’t need to be perfect, overspray will be cleaned up
  • ‘Pre-highlight’ by spraying white on the top surfaces
  • Spray main color, keeping it about 4″ away
    • pre-layers should slightly show through
  • Add highlight color
    • Focus on spraying it on upper surfaces
  • Don’t be afraid of overspray when adding browns for tracks as it can look like dust and dirt
  • Switching it up with some dry brushing can help bring out metallic areas or areas with lots of details
  • Break out the brush for details

Wrap Up

I hope this set of airbrush for beginners videos helps show how easy it could be to use an airbrush to paint your models. I know it has inspired me to get my compressor set back up and find a good airbrush.

Do you have any airbrush tips you would like to share? Leave them in the comments below and let us know!

Review of Warcolours Paintbrushes

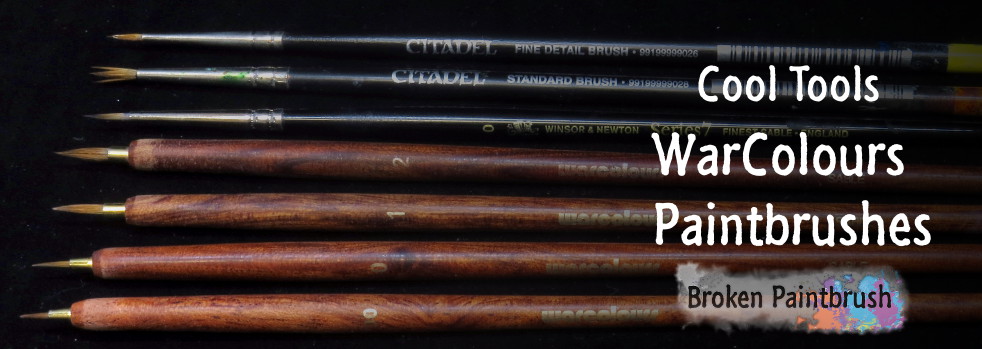
Cool Tools: Warcolours Paintbrushes

As you can image from my blog’s title (Broken Paintbrush), I’m rather hard on brushes. Even when using Brush Soap, my detail brushes seem to split almost as soon as I start the second model. This is why I’m excited to review the Warcolours Paintbrushes here.

Review of Warcolours Paintbrushes

Disclaimer: Warcolours sent me a free set of paints and brushes to review for the Golden D6. The links below do include affiliate links, meaning that if you buy these great brushes, I get a small bonus to help fund this blog. Even though I got these for free, I still only recommend Cool Tools that I actually use and would want you to use too.

Warcolours

I first heard about Warcolours when Adam from the Golden D6 asked if I wanted to review their line. Try out free paints? Of course, I said yes! So Neo from Warcolours was awesome enough to send me a set of not only their paints but brushes and a pot of powder pigment as well.

WarColours Paints and Paintbrushes

I wrote up a full review of the set for the magazine (grab a copy of issue #5 here) and used everything I could to paint my first INQ28 model. And while I touched on my review of the brushes, I wanted to expand on them here.

As a company, Warcolours is located in Cyprus and hand makes all their paints. While the only place I found to buy their paints outside of their site is Amazon, they have very affordable shipping which makes it pretty easy to get worldwide.

Brush Size Options

Currently, WarColour paintbrushes come in 5 sizes: 000, 00, 0, 1, and 2 which would be similar to Games Workshop Artificer, Small and Medium Layer, and Medium Base. They currently don’t offer dry brushes or anything larger than the #2.

Comparison of WarColours Brush Bristles

They are made with red sable hair and wooden handles which put them on par with the Artificer series and Winsor & Newton Series 7 brushes. While not everybody likes the natural hair for bristles, they provide a great combination of keeping a fine tip while being able to hold a good deal of paint.

It’s this fine tip that I have enjoyed about the Warcolours paintbrushes. Since receiving them, I’ve not only painted the Techno-Barbarian but about half of the Mansions of Madness set. Oh, and nearly all of it was done with the #2 brush! I used the #1 on a few small highlights and the #00 for the eyes.

Yet with all that abuse, the brush still has a sharp point and hasn’t once split while painting. (The picture of the tips above is was after all this abuse). I’ve never been able to do this much on a Games Workshop brush, and while I like my W&N, I only have a #1 and only used it for detailing.

Handling

For me, the biggest difference between the WarColours paintbrushes and GW or W&N is the handle and the way it feels to hold it. I know this seems like an odd thing to compare considering it’s the bristles that do the work. But a big part of what separates beginner painters and award-winning artists is brush control.

Meaning, if you can learn to place your brush where you need it to go, it can make a huge difference in your painting ability. Much of this is learned through practice, but I think the WarColour brushes design also helps.

WarColours Paintbrushes

When you compare it to the GW and W&N brushes, the brush end is slightly wider, just enough to make it easier for my larger hands to hold without tiring as much. The ferrule (the metal part that holds the bristles in place) is also much shorter, which allows you to get nearer the model as you paint.

Pricing

So I got you all excited about these cool brushes right? But you are used to W&N or Rosemary brush prices where a new brush costs more than a new model?

Well, as I mentioned in the intro, one of WarColours distinctions is their economical pricing. I’m not sure how their business model works that they can do this, but the five pack of their brushes cost less than a GW Artificer brush at 16.95€ or $18.63 at the time of this post.

Pick up a Set

If I got you interested in picking up a set of WarColours paintbrushes and you want to support Broken Paintbrush, use one of the affiliate links below. You pay the same price as going to the site direct, but I get a small kickback. This helps pay for hosting and incentivise me to do more tutorials (the coffee and beer money are good for that!).

WarColours Paintbrushes set

Directly from WarColours (they ship internationally, check out their paint line too)

On Amazon (not in all countries and a bit more, but if you have a gift card already it may be a good option)

Your Review

If you have a set of WarColours paintbrushes and want to leave your feedback, put it in the comments below. I’ve had a great experience with them, but I would love to have my readers be informed with other’s opinions as well.

Stormcast with NMM

Good Reads Week 30

Looking for some hobby inspiration and modeling tips? This week’s Good Reads has you covered with bad primer,  all your bases, contempt, shiny yellow, and speedy lizards. Read on and explore something new!

Good Reads is where I gather some of my favorite hobby blog posts from other writers and share them with you. Why? Because it can be so darn hard to catch all the incredible things being created and may even introduce you to someone new. So check out the articles below and leave a comment on their blog to give them some love.

Fixing Grainy Primer

Fuzzy Primed Butts by Thor

Fuzzy Primed Butts by Thor

Getting a good layer of primer on your model is an often overlooked step in painting, but provides the critical canvas for your paints to adhere to. If your primer spray ended up being a texture spray from being too cold, too far away, or the moon being in the wrong alignment, check out Thor’s great tip on fixing this annoying problem.

Painting Desert Bases

painting a desert base

Desert Base by Nagroth

So I’ve got a new blog to feature here (well at least for me). Nazroth from Scar Hand Painting put together a great tutorial on painting simple, but great looking desert bases. Bases are something that I haven’t done a whole lot with so its great to see when others put together tutorials on them.

Thousand Sons Contemptor

Contemptor by Mordian

Contemptor by Mordian

Contemptor Dreadnoughts are pretty cool models, much more dynamic than the 40k versions. Combine that with the awesomeness that is Heresy Thousand Sons, and you have Moridan’s great look models.

Painting Non-Metalic Metals

Stormcast with NMM

Stormcast by Darren Latham

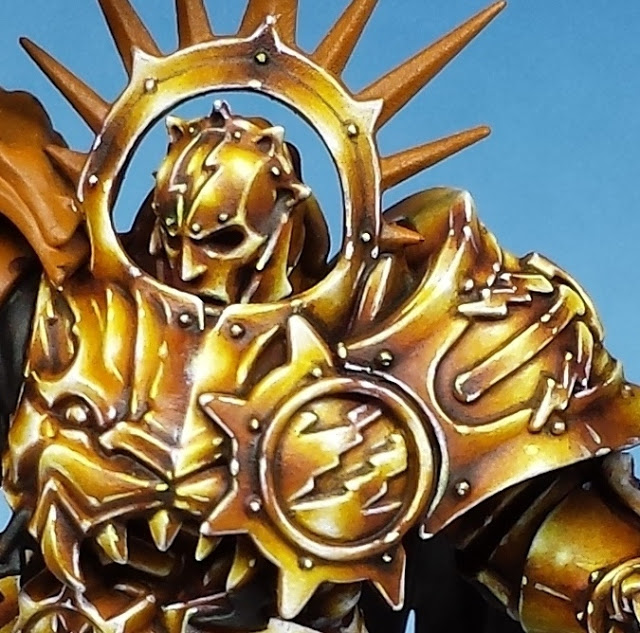
OK so this one is a few weeks old, but I wanted to add it in here. Painting master Darren Latham wrote up how he does non-metallic metals (NMM) including looking where lighting would come from and some amazingly painted miniatures.

Salamander Storm

Landspeeder Storm by Blazmo

Landspeeder Storm by Blazmo

So here is another new addition to my blog feed thanks to Mike’s Better Know a Blogger series. Blazmo shows off his completed Landspeeder Storm for his Salamander army. He traded out a bunch of bits to make them more exciting than the standard scouts.

 Bonus: Orruk Megaboss

Orruk Megaboss by Roman

Orruk Megaboss by Roman

I caught this one at the last minute and couldn’t pass him up. Roman did a fantastic job on the Orruk Megaboss with a few minor tweaks and some epic blue paint. (check out my review of the model here). Taking some ideas for my own.

Wrapping it up

Well, that’s it for this week.

WOAH! you say, YOU FORGOT AWESOME BLOG XYZ! SHAME!

And I agree! There are a bunch of awesome bloggers out there sharing their work and I either miss the post or haven’t yet found them. So drop me a link in the comments below and let me know! I’ll keep them in mind for the next Good Reads or add them to a Brush Stroke newsletter (sign up below!).


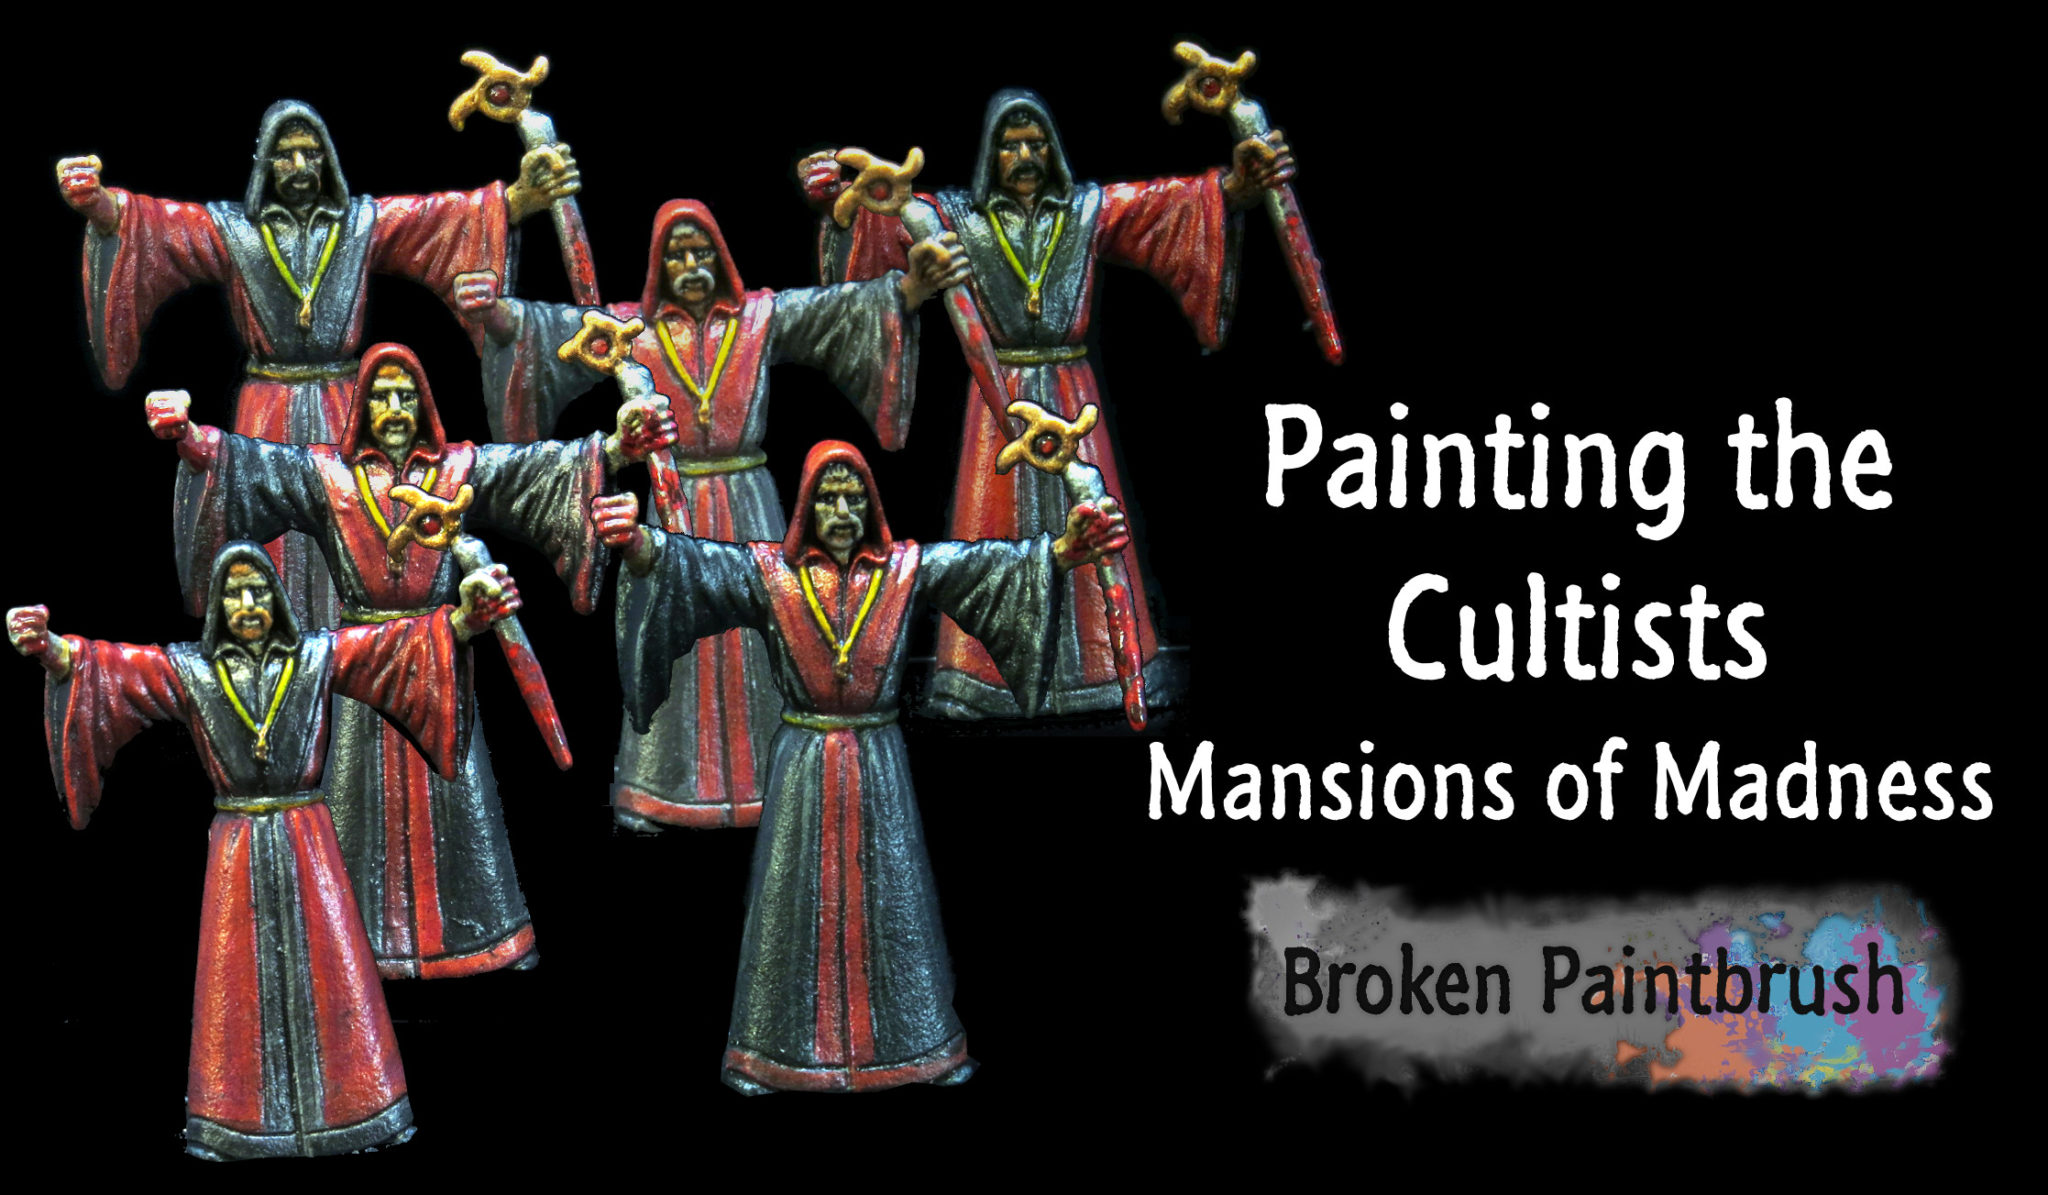
Painting Tutorial for Mansions of Madness Cultists

Cultists – Painting Mansions of Madness

Ready for another Mansions of Madness painting tutorial? This week I have the Cultists adorned in their fancy robes.

Painting Tutorial for Mansions of Madness Cultists

While these guys are nearly worthless by themselves in the game, they have a habit of sacrificing each other to turn into monsters – which is awesome!

Painting the Cultists

When I started painting the cultists, I decided to mix them up a bit. While this messes with the game’s concept of each character having slightly different abilities, it does make them more interesting to look at.

So I split the six cultists models and painted half of the robes black with red trim and half red with black. They were then also divided into three different skin tones: light, ‘yellow’ and dark.

I started with painting all the base colors to block in each area.

Base colors on the cultits

You might notice I wasn’t too concerned about getting a perfect coverage on the robes as I will later add additional layers and washes. This is an excellent example of how to speed up some of your painting. Since I am going for more table top quality than a competition, I knew I could skimp a bit on the layers.

Base Colors:

  • Light Skin: Model Medium Fleshtone
  • Dark Skin: Model Color Mahogany Brown
  • Yellow Skin: Model Color Light Brown
  • Red Robes: Model Color Red
  • Black Robes: Model Air Grey
  • Grey Beard: Game Color Stonewall Grey
  • Brown Beard: Model Color Light Brown
  • Black Beard: Model Color Black
  • Arcane daggers: Game Color Gun Metal and Bight Bronze
  • Robes/belts: Game Color Gold Yellow

Painting the Skin

The three different skin tones were painted first because they were the lowest level of the model. I layered up each color before applying the Dark Brown wash over the whole model.

Dark Skin

Dark Skin Cultists from Mansion of Madness

The dark skin was kept relatively simple with three layers of brown: Mahogany (base coat), Parasite, and Light Brown for the extreme highlights. The Dark Brown Wash helped bring it all back together and darken the skin.

Colors

  • Model Color Mahogany Brown
  • Game Color Parasite Brown
  • Model Color Light Brown
  • Dark Brown Wash

Yellow Skin

Yellow Skin Cultists from Mansion of Madness

The yellow skin tones fall somewhere between the dark and light faces but add a bit more yellow to the shade. Light Brown was used as the base with Medium Fleshtone used as the highlight. This is where the yellow tone gets added in. Basic Skintone was used as the extreme highlight. Finally, the Dark Brown Wash was applied lightly over the skin to shade the recesses.

Colors

  • Model Color Light Brown
  • Model Color Medium Fleshtone
  • Model Color Basic Skintone
  • Dark Brown Wash

Light Skin

Light Skin Cultists from Mansion of Madness

For the light skin, I wanted to make them very pale. So while the first two layers match the top layers of the yellow skin, the addition of the pure white highlight make the skin very light. I had to be extra careful with the Dark Brown wash on this guy as the light skin colors wanted to take the brown. On a few areas, I needed to re-highlight with the Basic Skintone.

Colors

  • Model Color Medium Fleshtone
  • Model Color Basic Skintone
  • Model Color White
  • Dark Brown Wash

Red Robes

Next up, I painted the red and black robes. While I painted the layers before the wash, I figured you wouldn’t mind a bit of jumping around.

Painting the red robes of the cultists

While I wanted the robes to be dark, I was also going for some extreme highlighting in the pre-shade phase. So the clothes went from Model Color Red (a dark red shade) to Hot Orange. The Dark Brown Wash helped tone it back down and create the nice, rich robes I was hoping for.

Colors

  • Model Color Red
  • Model Color Vermillion
  • Game Color Hot Orange
  • Dark Brown Wash

Black Robes

With the black robes, I went with a higher contrast for the pre-highlights. This gets toned back by the extra layer of black wash on the robes.

Painting the black robes of the cultists

I relied on the extreme highlight and two layers of wash to get the look rather than multiple layers. By using Stonewall Grey as the highlight, it made for an almost awful looking model (middle picture above). After the whole-model Dark Brown Wash, it wasn’t toned down enough, so I hit all the black robes with a second layer of Black Wash which got it to where I wanted it.

Colors

  • Model Air Grey
  • Game Color Stonewall Grey
  • Dark Brown Wash
  • Black Wash

Bloody Blades

Now to give them a bit of gore to make them scary. I gave each a dash of blood to the blade and clenched fist as if they had just ripped the latest sacrifice’s heart. Or something epic like that as long as it summons a shoggoth.

Adding Blood to the Cultist Bloody Blades

The big trick to getting blood effects is two things: use different shades of red and use it sparingly. While on the Maniacs I went a bit overboard with the gore effects, I kept it limited on the Cultists to the blade and fist. Even then, I didn’t cover them, but rather added splotches of paint that still left areas of the original exposed.

The clear gloss adds that extra special touch at the end that makes the blood still look wet (see the showcase pictures at the bottom).

Colors

  • Model Color Red
  • Game Color Bloody Red
  • Matte clear to protect the model
  • Clear gloss over bloody areas

Showcase

Finished Cultists Painted

With these guys done, I’m nearing the end – especially regarding model count. Let me know you think and if this tutorial was helpful in getting your own models completed.

Be a Guest Writer on Broken Paintbrush

Guest Post on Broken Paintbrush

So I’ve got to a point I want to add guest writers on Broken Paintbrush. In part, this is because I realize that I can’t keep up with everything else going on in my life, but I want to turn this site into something special for all my readers.

Guest Post on Broken Paintbrush

Why Guest Post?

So why would you want to guest post here? I put some common reasons to guest post below, so if you are wondering why you would even bother to write on somebody else’s blog (like mine), check them out and perhaps I can convince you to give it a try.

1. You don’t have a blog of your own

For those who don’t have your own blog, guest posting is the easiest way to try it out. You can skip trying to build a site and audience and just write something cool.

2. Want to reach a bigger audience

For new bloggers, it can be hard to get noticed, even with the great communities we have in our hobby. One way to do this is guest posting here which can get other people to know you and want to see more of your work

3. Boost SEO

For those who are web needs, guest posting can help increase your site’s ranking in search engines. By providing a few links to your site in the article, Google gives your site credit.

4. Revive an old post

Do you have a killer tutorial, editorial, or literature that you wish got more attention? Either guest post it here or write a new article that links back to it to give it new life.

Get the full scoop

So I wrote up a longer page for guest posting including some basic guidelines to follow on the Guest Posting page. The gist of it is, sign up to the form below if you are interested. I will send you details on how to get started.

Once your article is ready I will edit it and schedule to post!

Watch This: Painting White

If you struggle painting white on your models, check out this week’s Watch This video. Here we have Dave G. from Wargaming Tradecraft showing you his method of painting this notoriously difficult color.

So without further ado, check out Dave’s video but check out my notes below.

Painting White Using Layers

Steps for Painting White

After watching the video myself I’ve put together my set of notes on his technique. I hope this cheat sheet can be useful as a handy reference to his video.

First Dave gives a fantastic set of tips for watering down paints:

  1. Add a blob of paint to your brush
  2. Dip only the tip of the brush (covered in the blob) into some water
  3. Mix them together on your palette

This provides a nice mix without added too much water to the layers, something I often struggle with. He has some great pictures showing this as well so catch his full article.

Moving into the layering white:

  1. (first few steps not shown in video)
  2. Spray white primer over the model
  3. Wash the whole model with black
  4. Add thin layer of Ceramite White, only to higher and flat layers
  5. Shouldn’t be streaking, if so, thin it down a bit more
  6. To make areas brighter, wait for the first layer to dry and add a second (or third) layer

The Wrap Up

I hope this video helps show how easy it can be to paint this notoriously difficult color. Dave does a great job of  making it simple. Make sure you give Dave a follow on YouTube for more of his great videos.