Latest Posts

Guest post by Thor on how to keep the attention of your readers

How to Create Articles that Keep Readers’ Attention

So, you’ve created an eye-catching title that will drive visitors to your article, and hopefully, search engines, but now you have to keep the reader there to absorb your content, right?

I would have to say that of all the things I’m hoping to cover in this series, this one may be the most important one of them all.

Guest post by Thor on how to keep the attention of your readers

Thor from Creative Twilight here again, back with another tool for your blogging arsenal.

Use that First Paragraph to Grab the Reader

A lot of people will determine if they want to read your article based on your opening – that first paragraph. I’m sure many of you did it with this article. So, it should come as no surprise that you need to grab the reader’s attention from the start.

Get Their Attention

Images work very well to grab attention as well 🙂

How you go about that is entirely up to you, and there’s no wrong way to do it. A common technique will be to tell the reader what the article is about. Basically, summarize what you’re about to talk about.

Another common method is to interest them with vagueness, or a question you feel they would like the answer to. That’s what I did at the start of this article. If you’re reading this far then I’d say it worked 😉

I wish I had tried-and-true methods to give you beyond those two examples, but it’s a very subjective topic. Ultimately what I try to do is open with something I know I would find interesting, and would peak my curiosity. I feel if you go that route then you can’t go wrong.

It’s All About that Heading, ’bout that Heading, No Wall of Text

When I talk about headings I am referring to the H1, H2, H3, etc., tags that are used in an article, such as the big text you see above this. If you use WordPress then it’s referred to as Heading 1, Heading 2, and so forth. It’s been a while since I’ve used Blogger, but I seem to recall it shown in a similar way.

This is very important because it’s technically different than if you just bolded and/or underlined text to create a heading. Actual headings will have value to search engines. More on that below.

On with the show!

All About that Heading
Break it Up

Breaking up your article with headings serves a few purposes. The big thing headings do is break your content up into digestible chunks. Ever gone to an article, seen a huge wall of text, and then just bail on it? I have.

Nobody wants to get a reader to their article to only have them leave as soon as they see it. A big wall of text is intimidating to look at. Imagine reading a book that has no chapters. Ug!

Now, if someone is really interested in your article then odds are they will read it anyway. However, if someone has a passing interest, or was curious, then you might lose them right away. It’s the latter we’re after here because you can convert them into regular readers.

Point of Reference

Relating to this, headings give readers easy to reference sections of your article, like chapters in a book – to run with that analogy. This is very important in long articles that cover various subjects. That way a reader can come back to your article, and know right where to go to find something specific you wrote about. That’s not easy to do if your article is 1,500 words with no headings.

Draw the Eye with Interesting Headings

Another thing that headings do is they give you the chance to draw interest. Headings are large and bold, so the eye is drawn to them. Use that to your advantage to create interesting headings. That will let a reader quickly scan your article and gauge it at a glance. If you create funny, or generally intriguing headlines, then you’re increasing the chances that the reader will hang around to see what you have to say.

Search Engine Optimization

SEOThe last thing headings do is gives your article more SEO (search engine optimization) value. The SEO value of headings is minimal when compared against other factors, but it has value none-the-less.

If you’re writing an article about Chaos Space Marines, and you have a heading in the article that also uses the term “Chaos Space Marines”, then you’ve improved the SEO value of your article for “Chaos Space Marines”.

The thing to be careful of here is overusing a term for SEO. Overuse of a term can get you penalized. Instead of ranking better for it, you rank lower.

What I like to use headings for, in regards to SEO, is to capture the related things people will be looking for.

Going with the example above, I might have a heading in this Chaos Space Marines article for “Strategy & Tactics”, or “My Review of the Codex”. These are terms that are often paired together with “Chaos Space Marines” in searches. By putting those in headings within the article I have told search engines that I have those sections in my article, and I can draw in those related searches.

How to Use Headings Properly

The title of your article will be a heading 1. It has the most value. This is done by default in blogging platforms, so you won’t have to do anything to set that up.

There should only be one H1 (heading 1) in your article. So, as you create headings in your article, you will be using H2, H3, and so forth.

Heading TagsIf you scroll up you will see that the heading “It’s All About that Heading, ’bout that Heading, No Wall of Text” is an H2. Underneath that, the headings you’ve seen following it are H3. Those are H3 because they are a part of the section I defined with the H2 prior. Basically, I’m breaking down further the content within the H2, so I use an H3. If I were to further break something down within an H3 then I would use an H4. Make sense?

Now, when I’m done with this “It’s All About that Heading, ’bout that Heading, No Wall of Text” H2 I setup, I will create another section, and that section will be an H2. That section may contain H3 headings. Repeat and rinse.

Speaking of…

Short Paragraphs are King

Bam! New section, so we have a new H2 😉

This one is a quick and easy subject.

Relating to the wall of text, really long paragraphs can also be a turnoff for readers. If you have no headings, and you have very long paragraphs, then there’s a good chance you are losing readers.

Shorter paragraphs have become the standard in writing. Keeping the attention of your reader is crucial, and it’s been shown that using shorter paragraphs helps with that. I’m sure there’s some psychological reason for it, but it’s something you should be doing regardless.

Pictures are Pretty!

Another short section for you all.

Just like headers, images are a way to break up your article. Even if you’re following the use of headers, and shorter paragraphs, a long article is still long. Images will help visually break up the monotony of text that is an article.

Quite simply, use a few images on your article, especially the long ones.

Oh, images can also give you SEO value as well if used correctly.

Pretty Kitty

Obligatory kitten picture to make this an awesome article.

I Hope You’ve Learned Something

Hopefully, you’ve made it through this monster of an article, which I realize isn’t terribly exciting, and learned a thing or two.

Remember, getting someone to your blog is just the first step, keeping them there is the next, and arguably most important.

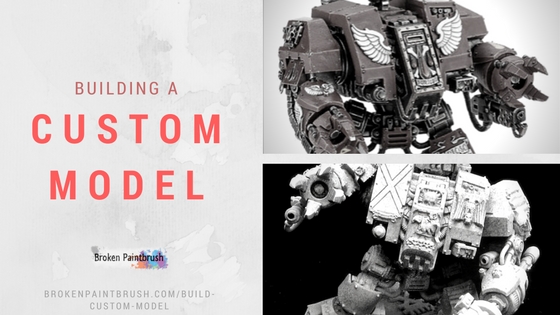
Tutorial on building a custom model with bit bashing and scuplting

How to Build a Custom Model Through Kitbashing

Sometimes you are going for a unique look, other times you want to add new dynamism to a model. Either way, learning how to build a custom model through kitbashing is an excellent way to make something truly yours.

Tutorial on building a custom model with bit bashing and scuplting

For my examples, I use a Space Marine Dreadnought. They are boxy, unwieldy beasts of a model that are cool, but static looking. I want to fix that problem and show you how I took a Blood Angels Furioso Dreadnought and turned it into a charging Ironclad for my Mentor Legion.

Making a Plan

As with any project, it’s important to have at least a rough idea of where you are going. It can change, reform, and flow as your build the model and get further inspiration.

Blood Angel Furioso Dreadnought

Model by Games Workshop (used without permission)

For this dreadnought, I had a Furioso model sitting in my bits box from the Baal campaign box set (really got it for the Tyranid models). I needed something to build and paint to create these tutorials for Dreadtober and thought it would fit the bill nicely.

That and it looked like it would be a fun model to hack.

So my plan was simple: take the main components of the Furioso and create an Iron Clad for my Mentors. This required a few modifications to the base model: removing any Blood Angel iconography, repose the model in a more heroic manner, and sculpt/bits bash new icons for my Mentors.

For your model, think about what you are trying to create. Maybe do some quick sketches or find some inspiration from the web.

The plan will help you figure out if you need to buy more supplies like green stuff, bits, or whole new models.

Find the Bits

Now it’s time to rummage through your bits box. Open up those kits in the closet of doom. Or maybe hop on one of the bits order sites and find the pieces you need to build your modified model.

And don’t be afraid to take parts of bits and use them for completely different parts of a model. Just look at some of the crazy-awesome models that appear in the Inq28 circles (D Powers, KS, Wiehlem).

Add bits you think you may use in a piece of tupperware

When I’m starting a new project a grab a Tupperware bin and just start piling any bit or doodad that might be interesting. If I don’t use it, I later add it to the bits bins. But as I’m building each piece, I don’t have to go back through them again and again.

Rough It Out

Here is where sticky tack becomes your best friend. You can use it to hold pieces together, fill in some gaps, or even repose arms by adding a bigger blob. Before making a single cut or a drop of glue you can get a feel for how it could look.

Using Sticky Tack to hold Custom Model Together

If you are brave and going to be doing more sculpting work, rough out the armature with wire. You can then add the bits onto the wire and see how it looks.

Removing Details and Modifying Pose

First off, don’t cry. Take your hobby knife and start cutting those lovely little bits.

Often the only way to get the desired custom look is to remove incredible details so carefully worked into the model. My Furioso Dreadnought here has some amazing details for Blood Angles – but not so helpful for my Mentors.

So let’s remove some of them.

Removing details

Bits Bashing Tools for Custom Miniatures

I have few primary tools for removing features:

The biggest key to removing details, or indeed any hacking at the plastic, is to remove small bits at a time. Not only are you more likely to cut yourself by trying to cut too much, but it is much easier to cut too much off the model.

Using a Hobby Knife to Scrape Away the Details

So instead, whittle away at the detail until it is mostly gone. Then use the files and side of the blade to smooth it out.

To get the interior details, I switch to the #16 or #17 blades and chisel away at the detail. The half-blade of the #16 works well to get into the nooks and crannies on interior details.

Finally, you can hide any remaining imperfections with added bits, or as I show later, purity seals and other parchments.

Using Pins to Adjust the Pose

The Dreadnought is a cool looking model, but the arms are pretty much stuck in an up or down motion. Not much room for a dynamic charge right?

Well with a bit of drilling and minor sculpting, more range of motion becomes possible.

Pinning originally was used to hold the heavy, impossible to glue, metal models together. After a few blisters and broken bits, a hole was drilled in each piece and a cut paper clip glue in place.

The idea is similar here, except rather than just using the pin to hold to pieces together, I’m using it to keep them slightly apart.

1. Get the Supplies

Pin you models with nails using a hand drill

There are two things you will need: micro-dill bits with a hand vice and a pin. I like pins meant for sewing as they come it long and short lengths and are stiff. Alternatively, a paper clip can work.

2. Drill the Hole

Find the bit that is the same size as your pin and drill both sides of the model. Attempt to get as close to center as possible, but since we creating a bend anyway it’s not super important.

For the dreadnought here, there was already a too-large hole from the old peg. You can fix this by adding extra plastic or sprue to the back side of the hole and then drill, fill it will green stuff, or (what I did) find plastic rods that fit and  narrow down to the pin size.

I used plastic tubes to fill in too large of a hole to pin

3. Make the Pin

I start with cutting the pin about twice the length I expect to need as it’s easier to work with. It can later be cut back down to size. Next, add a small bend to the pin so that it changes the angle between the two pieces

4. Test Fit

Using a bent pin to adjust the pose of a plastic model

Now push the pin into each side of the model and make sure it fits well. You may need to use a bit of sticky tack to keep it in place. The important part here is to ensure the pin isn’t too long (or short) and bent to the right angle.

5. Glue in Place

Once you are happy with the pin and placement, add a touch of super glue to one end of the pin and place into the hole. Allow it to set for a bit before adding the second pin. Many times I didn’t let the first side set correctly and pushed the pin right into the hollow model!

If the plastic areas of the model press against each other (such as the top of the dreadnought shoulder here) add a touch of plastic glue as well. The second glue joint will actually help to provide a strong joint.

6. Fill the Gap

You now have a newly positioned arm/tentacle/something! But you may also have a gigantic gap in the model. Not cool right?

To rectify this problem you can cover it up (which is easy for Space Marine arms) or fill it in with green stuff – which I cover in the next section.

Plastic Bender

For some pose adjustment, it may require slight abuse to the plastic so that it bends a different direction.

Bending Plastic Bits to Adjust the Pose

For my dreadnought, I wanted him striding forward. Some of this required cutting the legs apart and moving the joints. But others, such as the foot wouldn’t be as easy.

For small modifications that aren’t possible with cutting and re-gluing, I find it best just to bend the plastic. I start by adding small cuts to the backside of the bend (only if needed, the feet didn’t) to force the bend line. I then slowly turn the piece the direction I want.

The key is only to bend a little at a time, readjust and bend again. This prevents the plastic from snapping, but if you bend it slowly, it will stretch a bit.

For harder to bend pieces, and to set the change in place, you can add a bit of plastic glue. By melting the plastic a bit, it will soften and become easier to bend. Once the glue dries, the plastic sets into the new position.

Filling Gaps

Even with building kits straight from the box we are sometimes left with gaps between pieces. As you start adding bits from other kits or modifying the pose, those gaps will get bigger and more complex.

So let’s look at how to fill them.

Small Gaps with Plastic Glue

For small gaps between plastic pieces, the easiest way is to re-melt the edges.

Plastic glue can be used to fill small gaps in models

It works best on flat areas such as armor panels here on my Dreadnought (1). Add dots of glue along the seam (2) and let sit for a minute. Using your finger or maybe a tissue, rub the glue and partly melted plastic around a bit (3).

After it dries, you can take your hobby knife and files to smooth it back out.

Hiding Gaps and Holes

For small gaps and holes that aren’t important or easy to see, don’t spend too much time on them. Add some green stuff into the hole, smooth it out, and let it dry. Do a bit of clean up if needed but as long as it won’t cause a distraction, don’t worry about it.

Alternatively, just cover them up with purity seals (see below).

Ribbed ‘Soft’ Armor

For those large gaps between armor plates, adding ribbed or ‘soft’ armor fills the need nicely. For non-robotic/marine models you could switch this out for clothing or even sculpted muscles (for the hardcore!).

Note: while I use the term Green Stuff, really I mean two-part, air hardening putty. In my case here, I am using Milliput’s Black.

Start with pressing some green stuff into the gap and build it up until it is flush with hard armor edges. Use a silicon shaper to smooth it out and allow to dry for a few minutes. I found this causes it to be less sticky.

Using putty to fill in large gap by creating soft ribbed amor

Then taking a sculpting knife, add a line to the middle of the largest section of the gap. Follow up with second lines on either side of the center. This breaks it up into four parallel ribs, add more or less depending on what you need.

Drag the middle line around the diameter, keeping to the middle of the gap. Then do each side which may force the lines close together where the armor panels meet – which is eactly what we are going for. Think of an accordion stretching one way.

You can then go back over each cut and make them deeper and smooth out the tops with the silicon shaper.

Purity Seals and Parchment

Imperial armies for the 41st Millenium like their blue ribbons – and they can be a kit bashers best friend. Have a goofy seam or odd matchup between pieces? Try to hide it with a well-placed purity seal.

The same idea and techniques work for parchments as well for any army. That’s what I did on one of my Leman Russ Demolishers that had a terrible accident with its sponsons.

Cutting small strips of paper for custom purity seals

The first step is to cut the paper itself. I’ve used standard printer paper which works well for stiffer parchments but found receipt paper works well for purity seals.

The first step is to cut a piece that is about twice as long as you want the two pieces to be, mine were about 15mm. Then cut thin strips ~1mm wide, trying to be as straight as possible. Now either fold a piece in half or cut in half to create equal sized strips for the purity seal.

Place a small dot of super glue where you want the seal to be placed (tip: use a toothpick to put the dot to keep it from running). Place both strips onto the glue, keeping each at slightly different angles. At this point, you only want the place where the seal will be to have glue on it.

Once it dries, coat both pieces in either more super glue or white glue. Super glue will be harder and dry quicker – which means you have to work fast. White glue gives you a bit more time to shape the papers. But either way, when the papers are wet with glue, try to push and pull them around the model so that they hang with gravity or sway with motion. Add some interesting wrinkles to them.

 Creating custom purity seals with green stuff

After drying, you should have a pair of papers that look nice but are oddly attached to the model. Time to fix that with the wax seal!

Make a super small ball of green stuff (or black stuff here). Cut it in half to make it even smaller. Maybe even cut it again. You need a tiny, little ball of the putty for these.

Place a small dot of glue on the papers with a toothpick and add the ball of putty. Using the flat bottom of your hobby knife or similar, gently press the ball flat.

To make an emblem in the wax, use the toothpick to push just inside the rim all around the seal. Add a few more shapes to the center circle. Deform the out circle. Add some small interest to the seal to make it look more than a clean circle.

Once the clay hardens you have a nice looking purity seal that flows around your newly built model.

Wrap Up

Bringing all that together, I present to you my completed Mentor Legion Ironclad Dreadnought built from a Furioso kit.

Customized Dreadnought for the Mentor Legion

The legs were a combination of cutting and bending to achieve the striding look. Both arms were repinned and ribbed armor sculpted in the gap. Details were scraped away and new ones placed. The force weapon was replaced with a chain blade (with the flamer tucked in there), and a couple of purity seals to finish him up. The base will be a follow-up post.

I hope this extra long tutorial has helped inspire you to build a custom model for your army and start to play with the poses.

Your Tips

Have some awesome tips you want to share and add? Leave them in the comments below and we can start a conversation!

Dreadtober Challenge 2: Build Your Model

Build Your Model a Dreadtober Challenge

This is it. We are starting to actual begin working on your Dreadtober model! The challenge this week is to build your model. Glue, knives, and magic may all be required.

Dreadtober Challenge 2: Build Your Model

Well, hopefully between your fellow Dreadtober participants and the helpful tutorials below we can skip on the magic part. But I do hope that as part of this challenge you are trying new things to push your hobby skills a bit further.

As a reminder, these weekly challenges are only meant to be guidance and milestone markers to provide encouragement along the build. If your model is already built or you prefer to paint on the sprue, don’t let me stop you from your hobby style!

Challenge: Build Your Model

This week’s challenge is pretty straightforward: create your Dreadtober model! It doesn’t matter if your model is still in its box or already partially assembled, the goal is to have it fully assembled by next Saturday.

For those who like to paint the model in sub-assemblies, magnetize the crap out of the model, or have some other reason to start painting without being fully assembled, that’s fine. Just get yourself to that point!

Result: A Built Model

The primary purpose of this goal is to be ready to paint starting next weekend. If it’s fully glued, sub-assemblies, or magnets holding it together, doesn’t matter.

Sometimes just building the model is an accomplishment in of itself. I know when I was digging through my closet of doom to find my contribution, I found so many kits on sprues, partially assembled models, and projects that were going to be awesome. Alas, they linger in the bits box.

But not this day! Today we build! Today we create! Today we start the path to glory!

So get out there and cut those bits of the sprue, clean those pesky mold lines, and get glue where it belongs! Forward!

Helpful Tutorials

And to help you towards that path of ultimate building victory, I have pulled together a couple of useful articles that you might enjoy this week.

Building Models

For assembling models 101, Dave put together an excellent tutorial on the different types of glue, posing, accessorizing, and adding green stuff. It’s a great place to start for anyone who is getting started or needs a few tips on reposing models.

Removing Mold Lines

One of the most annoying aspects of building our models is removing the mold lines. These are the lines that are formed between the different mold plates used by the manufacturer and some amount of the plastic seeps into them.

Removing them can be tedious and rather difficult in some parts of the model. Both Dave Garbe of Wargaming Tradecraft and Nazroth of Scar Hand Painting put together their tips with the right tools and methods to remove these imperfections.

Plastic Glue

The right glue can make a huge difference in how well your model sticks together. While super glue works on pretty much anything, for plastic models I prefer to use glue specially made for it. It melts the plastic on each side and melds them together.

I wrote up an article on my favorite glue, Testors Model Masters that has a fine, metal tip. It is super handy for assembling small bits and holds well.

Kit Bashing vs. Scratch Building

If you are going for a new look for your model, there are two paths: kitbashing vs. scratch building. Ron has a classic post that speaks to his self-realization (and one I share) that kit bashing is not scratch building.

On the other hand, if you are up for building your own model from nothing but plastic strips and rods, Klaus is probably the master as seen by his Ork walker (and many more).

There is zero expectation to kit bash or scratch build anything for Dreadtober, but in case you are feeling ambitious, check them out.

Need Something else?

If you are stuck in your build and need tips, critiques, or opinions, you have three very good options to get help from the community:

  1. Leave a comment below. Myself or one of the other great participants can respond right there and create a discussion. You can even upload pictures right into the comments!
  2. Send me an email. If you want the feedback more directed or don’t want people to know you need help on something. You can always shoot me an email, and I can try to help you out.
  3. Post it to your social network of choice with the hashtag #dreadtober. Twitter is one of the more active places for conversation, but I’ll be keeping an eye out on the others as well.

Build the Canvas

Dreadtober has begun and with this week’s challenge you are to attempt to complete the assembly of your pledge. As everyone builds and paints differently, do not worry if you fall behind with a complex build or are suddenly ahead with a simple one. Adjust these challenges to your own needs and project plans set in the first challenge.

Now, forward my fellow Meks, Techmarines, Hive Minds, or what ever you may be! Forward to building victory!

Dreadtober Painting Challenge

Dreadtober: The Participants

The Dreadtober build and paint event is officially started! Last week, I posted a pre-event challenge to have the participants plan what they will accomplish for the month.

Dreadtober Painting Challenge

Photo/Drawing/Logo by Todd @ Sincain40k

The idea was to organize and prepare for the month. I challenged each of them to make goals for not only the finished model but what steps they would need to accomplish along the way. As the challenges progress, the Saturday Showcase will highlight their progress.

For this first week, it’s more of a meet the participants and have them share what their plan’s are. So check out their blogs, give their social feeds a follow, and cheer them on.

The Participants

Listed in no particular order are the Dreadtober 2016 participants. (ok, it does relate roughly to when they sent me their info!)

If you missed the initial launch and still want to join, just fill in the form below and I will email you all the details. As there isn’t a competition but rather a fun thing to do together during October, there isn’t a penalty for joining a bit late.

AJ

Project: a Furioso Dreadnought. I am going to be honing in on pre-shading and battle damage. Also, I will be doing a little magnetizing.

Facebook: vigilanteminiatures

Ashely

I’m doing Murderfang. I’ve not got anything too exciting planned for Murderfang. I just want to get some paint on him finally. I’m matching him to the rest of my Space Wolves army, which are painted in the Heresy style: light grey with red accents.

Twitter: chickhammer  | Blog: chickhammer.com

Skyfyre

I’m planning to paint up my first Killa kan. Have had it built for 2 years now. The  gun arm is magnetized, so i’ll paint up both options i have assembled.

Twitter: Nayr00

DandyPandy

I have an Ironclad Dreadnought that I will be painting for my Ultramarines 2nd Company. No special conversions planned, but I’m still trying to decide how I’m going to paint it. My two standard dreadnoughts are painted in a style that I don’t think quite fits with the rest of my army, so I’m debating if I should paint this one to better fit the army, or stay in line with the other two. I’m leaning toward fitting the rest of the army.

Instagram: daniel_givens

Glenn

Project: 2x Contemptor Pattern Dreadnoughts.

Challenge: Re-posing conversion and brass etch additions.

Facebook: NarrativeGuys

Grenn Dal

This dreadtober I am going to make a sydonian dragoon. I am also going to make it so I can swap out the driver and make a ironstrider.

Twitter: grenndal  | Blog: xenoftw.blogspot.com

Jason

Working on a donated deathwatch dreadnought.

Special thing,?? Try and finish it this time 🙂

Twitter: jtuvminis

Joe B.

Besides trying to stay on top of these posts, I’ve been converting a Furioso Dreadnought into an Iron Clad for my Mentor Legion. Besides the conversion, I’m also writing up in-depth tutorials on each stage.

Twitter: brknpaintbrush  | Facebook: brokenpaintbrush | Instagram: brknpaintbrush

Joey

Night Lords Contemptor dreadnought. Going to try and make green stuff flayed skin.

Facebook: BedingfieldPainting | Instagram: BedingfieldPainting

Kyle Haydon

Model: Alpha Legion Contemptor

Special Notes: I’ll be giving it a customized base to fit the Hjobby Vices campaign, converted ‘hydra talon’ claws, and additional decorative marks. Not much one can add to the already spectacular piece Forgeworld created after all!

Twitter: KyleHaydon  | Instagram: kyle.haydon | Blog: hobbyvices.com

Marc

I am planning a Dark Angels Techmarine Deathwatch Dreadnought, to pay homage to my Deathwatch RPG character who was eaten (…perhaps not completely) by a Scythed Heirodule. It will be armed with a Conversion Beamer, Seismic Hammer and two servo arms, incorporating a plasma burner and mechanical claw. I am going to bash so much kit.

For the full story, visit: http://oldschoolg4m1ng.blogspot.com.au/

Blog: oldschoolg4m1ng.blogspot.com.au

NafNaf

Moved house this weekend so there is much disruption to pretty much everything, and hobby has taken a backseat while we unpack and try to sort everything out. Hopefully by next week I should be able to start and give you an update 🙂

Twitter: NafNaff81  | Blog: objectivesecured.blogspot.com

Norm

Ork Dreadnought

I call him da Screama Killa, he has four drill arms, and his pose makes him look like a very old carnifex. On the base, he is stepping on a dead(?) Raven Guard. My friend has an awesome RG dread conversion stepping on an ork. Since we’re playing Kastorel-Novem, I thought I should return the favor. If I finish early, I also have several Kans I plan to work on, to try and finish a dread mob.

Twitter: normnondo

Karl Hungis

I’ve decided to make a contemptor dread for the Crimson fists with two kheres autocannons.

I put a post on Facebook with the #dreadtober.

The Mad Mek

I plan on restoring a Deff Dread that I picked up in a trade a while back.

I will need to find weapons and bits to compensate for the broken parts but I have a deep bits box. I will be posting my progress on my blog.

Blog: madmekworkshop.blogspot.com

Jack Shrapnel

Planning on finishing the Khorgorath from Age of Sigmar (same size as the hellbrute).

Seriously have no idea what I’m going to do with it, just going to start painting and see where it leads me (that’s how I normally go about things) as I have NO models painted for this army, so the Khorgorath is going to pretty much dictate the scheme for everything else!

Blog: creativetwilight.com

Mihalis “”Cadaver”” Skalkos

I plan to finish a Forgeworld Contemptor Dreadnought for my 30K Death Guard army.

As you may probably have already seen from the pics, I tried to keep it as simple and original as possible. The model itself is a beauty and I dont want to spoil it with too many conversions. That said, I added some Death Guard photo ethced iconography that I had laying around, adding to the model fluff and flavor. The model is based on a resin base from modelsandminis.com.

For the painting part, I am planning to keep it as close as possible with my other Death Guard models, extremely weathered and battle torn.

Blog: homeofcadaver.blogspot.com

Lonely Kitbasher

Right, here we go; I’m going to be scratch building what I think will be called an “Amphis’ bane” pattern Dreadnought.  Mind the spelling.  The special thing about it is that I’ll be building it from everything barring dreadnought parts.  It’ll be a stretch, but I’m confident.

Blog: imalonewithadream.blogspot.co.nz | G+: D Powers

Tibbs

I will be painting three converted Sydonian Dragoons for my Skitarii.

The legs, hips, waist and riders have all been reposed to add variety to the unit. They’ll be painted based on the dusty blue, brass and copper colors of my custom forge world, Kal’koplos, and weathered for fun. The models were purchased 2nd-hand so they were a bit rough but I’m making do.

Blog: tibbsforge.com

Eric

Project: Contemptor Dreadnoughts 2 plastic 1 Resin.

Adding lots of detail to the 2 plastic ones, 1 will have books and scrolls the other bodies, and hand sculpted chaos details. I go over the game plan in my 1st blog post.

Blog: plasticresinmetal.com | Instagram: eleive1

Anthony aka MasakiSayz

For this month, I plan on completing (my first) Killa Kan! I’m going to try and capture the ramshackle feel of Orks with plenty of freehand markings and heavy weathering, both of which I have very little experience with. But how hopes are high, and Waaaugh!! energy flows through my brush!

G+: AnthonyPaoliMasakiSays

Rory

Not only is he doing his own project, but talked eight other friends into it. Due to family and kids, many already started their various projects. Check out their latest update: gamestepping.blogspot.ie/2016/10/dreadtober-2016-part-1.html

Twitter: macantsagart  | Blog: gamestepping.blogspot.ie

Zork

My plans is to do a Space Wolf dreadnought. I’m planning on trying to add weathering to it. But my big plan is to see if I can magnetize the front piece so I can use it as Bjorne, a venerable, and murder claw.

Doug Kus

Dark Vengeance Helbrute with conversion to match the Trap Jaw character of ‘Masters of the Universe’ fame (one of Skeletor’s henchmen).

Blog: barehandfishing.com

Greggles

The original Dreadman himself! This year Greg decided to go and get himself married and thus will be out on his honeymoon for the first two weeks.

Twitter: 3dgreg  | Blog: feedyournerd.com/greggles-tabletop

Adam Abramowicz

I’m just getting settled after the move. Working on getting my studio operational next week.

Blog: beyondthebrushstudios.com | Facebook: beyondthebrushstudios | Instagram: beyondthebrushstudios

TheRhino

Pledge: Plastic Raven Guard Venerable Dread with magnetized arms.

Blog: thinyourpaint.blogspot.com

Black Shield

The model I’ve chosen for Dreadtober is a deathwatch lamenters dreadnought. As for conversion work; a grot now squirms in the clutches of the blood talon, I’ve made a different lascannon, and included a banner. I plan to go to town with freehanding all the chapter icons.

Twitter: squizzato_eric

Arkhanist

Frag cannon armed blood angels furioso (fragioso!)

This will be my first painted vehicle for 15 years or so – I never liked tank brush drybrushing results! I was mostly a WHFB guy, so this wasn’t a big problem. I’ve done some zenithal airbrushing on infantry this last year, but this will be my first attempt on something bigger, with a new colour scheme to boot; oh, and an LED vision slit. Go big or go home, etc.

Blog: theguildhouse.net | Twitter: arkhanist

Dan D.

Goal is to paint my 4th edition metal flying hive tyrant conversion

I am a bit ahead of the game in that my model is partially assembled. That being said, I haven’t painted any ‘nids for 10+ years, so my goal is to work on getting back in the groove of blending / fading of skins and carapace. I won’t play without the model assembled, so I need to finish the painting so I can put the model on the table by the end of the challenge.

Niklas D.

Dan D.’s son Niklas is 10 and just getting into painting. His goal is to paint the Hellbrute from Dark Vengeance and get 4 or 5 colors on the model and work on getting a steady hand and general painting techniques down.

Dave S

Project: Domitar-Lamina Battle Automata

I’m going to convert the standard FW Domitar to fit with the design for my Dark Mechanicus guys, The Cult Stochastic. Basically a cult that has started to worship an AI as a manifestation of the Omnissiah and is in the process of becoming corrupted. She’s going to get new arms, a new head, changes to armor weight and some extra cables and cloth. I’m also going to try out hairspray chipping for the first time, and a freehand Cult logo. The base will be kind of a forge/cathedral mashup and will hopefully be 3D printed, time permitting.

Blog: plasticresinmetal.com | Instagram: thepolysmith

BruceT

A Blood Angels Furioso Dreadnought, as Flesh Tearers with some minor conversion to remove the Blood Angels icons and supplant it with Flesh Tearer saws.

Facebook: Forged in the Warp

Jimmy

Involves a Betrayal at Calth Contemptor. I’ve nothing special planned for this model, more a case of using Dreadtober as a way of getting out of bad habits and getting something finished by a deadline. More updates on his post.

Twitter: sonofultramar | Blog: jamesworkshop.net

Mike

This week I got my two Assault on Black Reach dreads out of storage. I plan on building them for my on going Deathwing project. The goal for me is to make some progress each week as way plate is pretty full between family, work and school.

Instagram: bunkermonkey9

Culial

Main Goal – To prove that my new job still allows for hobby time, to be demonstrated by completing the first model of what will become a new Lamenters army, Furioso Dreadnought Flavus.

How To Get There – I’ve had the Shield of Baal: Deathstorm box gathering dust from a few Christmases back, I’ll be using this Furioso Dreadnought sprue and a few scavenged Ironclad & Venerable components for the build, followed by putting my Lamenters test paint scheme into practice to complete the Dreadtober Challenge.

Blog: Dakka Dakka

Darren Bogus

Project: Chaos Helbrute (from Dark Vengeance).

Going to paint it in Iron Warriors colors. I’ve wanted to collect a force for some time. Otherwise, I plan to keep it stock, with no changes. Going to clean and assemble it this weekend. Or at least try to.

Twitter: darrenbogus

Warhammer39999

What model you plan to finish for Dreadtober: A Contemptor pattern dreadnought for my Ultramarines chapter. Though if I get particularly giddy, I do have six other dreads that could use a coat of paint on them as well…

Anything special you are going to do with it (conversion, paint, new technique): Nothing terribly special. I’ll be magnetizing the arms (of course) and will most likely be painting him up as a veteran of the first company.

Blog: warhammer39999.com

Mike

For my first Dreadtober, I’m going to do the Helbrute from the Dark Vengeance boxset. The model’s been on my shelf for a few years now and looks like it will be fun to paint. I’m hoping to do a few minor conversions to make it a bit more “Khorne-y”; Khorne logos, scrape off some of the eyes, and add some bits. This will be the first model I attempt some battle damage as well (as demonstrated recently by Duncan on WarhammerTV).

Twitter: Mike_Schreiner  | Blog: mikeschreiner.com

WestRider

I’ve got a Helbrute kit and an Ironclad kit, and I’m going to be mixing up parts from them to make a pair of Ironclads for my Iron Warriors, who I’m playing as Counts As Imperial Fists.

Blog: cascadiangrimdark.blogspot.com

Dean Kelly

My aim is to complete a group of three Killa Kans and a Rogue Trader era Ork Dreadnought.

I’ve recently started work on my Orks who have been living in boxes for years. I get a lot of junk from eBay and these are all rebuild/repaint jobs that someone else started and which I will completely repaint. They are the first non-infantry Ork models I’ve painted so I’m breaking new ground. I’m not yet sure what I’m going to do with the legacy dreadnought model – it’s too small and lightly armed to be a modern Deff Dread so it’ll probably count as a fourth Kan.

Full plan is on his blog post.

Blog: wargames-wasteland.blogspot.co.uk

Robert

I plan on painting a contemptor dreadnaught from the Betrayal at Calth set for my World Eaters legion.

Since the pose is a bit static and the details somewhat generic, I plan to do some conversion work on it. First I plan to reposition the limbs to give it some movement. Second, I’ll be adding some chains, skulls, iconography, etc. just to make him look a bit meaner and slightly less sane.

Blog: 30khobbyblog

Mordian7th

Project: Deathwatch Venerable Dreadnought Brother Nihilus – a dual goal for both Dreadtober and Armies on Parade!

Experimenting with a marble/stone pattern on the shoulder pads, but otherwise a pretty straightforward project. The challenge for me is all the edge line highlighting for the Deathwatch which has never been my forte. Practice makes perfect though, right?

Blog: mordian7th.blogspot.com

Jamie Searle

Project: Honoured-Ancient Brother Thanatos – Deathwatch Veteran Dreadnought

Whilst I’ve used them before I’ve still not fully finished a model with LED’s in, I’ll also be trying some greenstuffing.

Twitter: DrakePoldragon  | Blog: timandjayplay.blogspot.no

Wudugast

Slaaneshi sonic dreadnought.

A fairly comprehensive conversion to turn a broken Crimson Fists dreadnought into something more pleasing to the Dark Prince. As it stands it’s just a heap of bits and grand aspirations but hopefully by the end of the week it’ll looking a lot nicer.

With info on his post of dreadnoughts he has known.

Blog: convertordie.wordpress.com

Thomas

Project: Betrayal at Calth Contemptor

My goal is to convert the BaC Contemptor into a Khornate Contemptor Helbrute. I’ve explained the goals more precisely on the blog.

Blog: hightimesontheeasternfringe.wordpress.com

Andrew

Painting up a VII Legion, Imperial Fists Contemptor. Always scared of painting yellow, gonna try some new techniques and my usual magnet magic to make this a centerpiece for my new force. Paired with Kyle’s build, these dreads will be a part of our narrative campaign we’re constantly waging.

Blog: Hobbyvices.com | Instagram: hobbyvices

Chris

I’ll be building is a death company dread 😀

Twitter: sprout0010

CJ

I’m planning to work on something completely new for me, a Castellax from FW’s Mechanicum range. I think this model will be at the core of my (eventually upcoming) Zone Mortalis Mechanicum force.

Blog: grimdarkvoid.blogspot.com

Harry Wagstaff

A Tau Crisis Team

I’ve only recently started collecting 40K miniatures, and am trying to work my way through a Start Collecting Tau box. I’d like to paint the suits with a chunky urban camo pattern, and also magnetize the weapons to keep things flexible.

G+: HarryWagstaff

Mark

I will be making an Ultramarines leviathan dreadnought and magnetizing the weapons.

Twitter: ultima_ant

Wolfsherz

I’m trying to finish a forge world Dimacheron for my growing tyranids army. Anything special? Unfortunately not . Just the same paint scheme and technique than the rest of the army. I’m not sure I´ll finish it inside the time frame but I´ll try my best!

Twitter: Wolfsherz  | Blog: wolfsherz.wordpress.com | Instagram: wolfsherz._

Dan from The Narrative Guys

Facebook: NarrativeGuys 

David Raghanti

Twitter: OPwizardBeard

Reuben

YouTube: War Report

Rob aka Voracious Gamer

Twitter: Vorgames  | Blog: voraciousgamer.wordpress.com

Paul

Facebook: paul.graddon.5

Ruleslawyer

Twitter: Ruleslawyer01 

Andrew Taylor

Twitter: yorkwargamer 

PopCultureCube

Twitter: popculturecube | Instagram: popculture_cube

Gothmog

Blog: sepulchreofheroes.blogspot.com

Xach

Twitter: Xacheriel | Blog: objectivesecured.blogspot.co.uk

JF Dubeau

Twitter: jfdubeau | Blog: jfdubeau.com/miniatures

#2501

Blog: musingsofametalmind.blogspot.com

The Drill Abbot

Twitter: DrillAbbot

Makkeru

Twitter: makkeru | Blog: wip-piw.blogspot.com

Matt

G+: MattFussell

Rob @ iToysoldiers

I’m working on a World Eater’s Contemptor Dreadnaught (from the Battle of Calth set too, like the other Robert). Not sure that I’m going to be doing very much conversion on it (’cause I kind of suck at it) but I will be replacing the TL bolter with a melta gun. As there’s progress it’ll be on my site.

Twitter: iToysoldiers  | Blog: itoysoldiers.com | Instagram: iToysoldiers

Dave Mary

Building a Death Watch Dreadnought fully magnetised.

Blog: 262krieg.blogspot.com

Greg Zeitlin

J.R.

Doing the dreadnought from the Betrayal of Calth box set and magnetize the arms

Sav

text

Twitter: sav10g 

Matt K.

Project: a Tau Riptide battlesuit

I’ve wanted to both own a Riptide and make a Tau army that resembles the veritech fighters from Robotech for a while now. Perhaps now is the time.

Twitter: crabsarescary | Blog: crabsarescary.com

James

Ryan

Tarron

Will


Did I miss yours?

At the time of writing this, there are 91 people signed up Dreadtober. Which is both awesome and a bit overwhelming! So if I didn’t get your pledge posted above (or got it messed up), sorry and just let me know! Look for an email like “Dreadtober Challenge #1: Call for Showcase” and hit reply, or leave a comment below.

Coming Up Next

This wrapped up the first challenge of Dreadtober, The Plan.

Tomorrow I will post the second challenge of the event where we start building our Dreadnoughts. Remember, if you want to get emails about the challenge throughout the week, sign up below and I will send you all the details.

Next week’s showcase will be a whole lot more interesting as it should include pictures of everyone’s progress!

‘Er We Go!

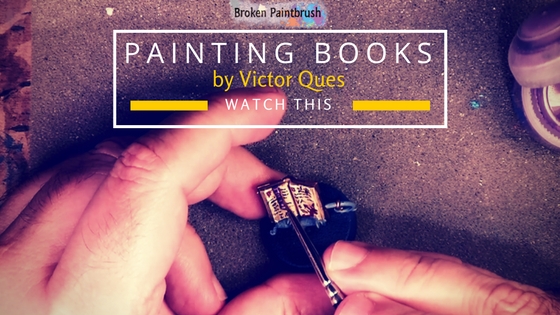
Watch how to paint books and freehand text

Watch This: Painting Books

The Silver Tower came with a lot of books, but they are a common addition to Librarians, Grey Knights, Wizards, and all sorts of book lovers. Some seem some amazingly done books and parchments done by awards winning painters. For the rest of us getting started with it, Victor Ques made a nice video on painting books.

Watch how to paint books and freehand text

This how-to guide to painting books doesn’t get fancy or use an airbrush. In fact, Victor only uses a few colors to achieve a fantastic result. Check out his video and then some more of my notes below.

(note: there is a section in the middle where he almosts moves off screen, but just for a moment)

Painting Books by Victor

Notes

Pretty simple right? Basically, paint the main colors, wash to provide depth and wear, and then a bit of fine brushwork – probably the hardest part. But with anything in our hobby, after a bit of practice, it becomes easier to do.

Let’s go back through his steps:

Base Colors

  • Paint book cover Mornfang Brown
  • Paint pages Screaming Skull
  • Paint cover details with Retributor Armor
    • Usie the side of your brush
  • Wash the pages with Gryphone Sepia
    • Focus on the recesses, page edges, and tears
  • Add Agrax Earthshade to the cover and deepest recesses

Freehand Details

  • Tip: don’t use black for the writing, it’s too harsh
    • Rhinox Hide works really well instead
  • Start with the page ‘illustrations’ like Chaos stars or symbols
    • He uses Khorne Red for adding some Chaos stars
    • Fills in the pages with something interesting
  • Using Rhinox Hide, start adding text
    • create small lines/dots/squiggles to emulate text
    • don’t keep it uniform, but create straight lines across the page
  • Add squares, large letters, or other symbols to mix it up
  • Using Pallid Wych Flesh, highlight the page edges, tears, and holes

I hope this Watch This: Painting Books with Victor was helpful and inspires you do get a bit more creative with your own models. Add something special to the next page, parchment, or even purity seal you paint.

Also, make sure you subscribe to Victor’s channel for some other great tutorials, including more of the Silver Tower set.

How to plan your hobby projects

Planning Your Hobby Project

Between piles of gray sprues, dozens on unfinished models, and perhaps a few pieces of terrain, you might be feeling a bit overwhelmed by what is supposed to be your hobby. I’m hoping that my notes below will help you with planning your hobby projects and get some of them done.

How to plan your hobby projects

Unfortunately, too many people think of planning and organizing from school days. It was a chore, something that was graded.

Instead, the planning process I’m talking about here is how I organize my hobby projects and blog posts. It brings enough order to my chaotic life so that I am able keep from getting overwhelmed.

Why Plan

business-idea-1240834_640

For me, there are three big reasons to plan:

1. Create Mile Stones

Buy, build, and paint a whole new army is a ton of work. For most of us, this is an overwhelming about of work before it’s done.

But break that down into buy, build, and paint a new unit or character – and that becomes a whole lot more manageable. It’s no longer this big beast that will never get done, but steps that seem doable.

2. Set expectations

Plans also allow you to spell out exactly you are trying to accomplish. An ambitious goal of “paint an awesome model” or “build the best, most crushing army ever” are hard to accomplish. Because what does an awesome model look like to you?

So writing up a plan and specifying what it is you are trying to accomplish make the goal tangible, and realizable.

3. Accomplishments provide incentive

Creating an achievable plan and it’s incremental milestones gives you a dopamine hit every time you accomplish a task. These small wins push you to keep finishing more steps, and eventually, the whole project has been completed.

Getting Started

If you are to this point, you are ready to get on with it and help you in planning your hobby project. As you read through this, don’t be surprised if it seems like obvious steps. We all know what to do, sometimes we just need someone to remind us and write it down. So, here it goes.

Step 1: Write Down Your Objective

Grab a sheet of paper, a Word document, or whatever you want to take some quick notes one. At the very top, in large letters, write down exactly what you want to finish.

I want to build, paint, and finish my Dreadnought by October 31st.

In the business world, they like the term SMART goals:

  • Specific = details and exactly what you will do (paint my dreadnought)
  • Measurable = can you determine success (it’s built and painted)
  • Achievable = is it actually possible to do (I’ve built and paint them before)
  • Rewarding = is it even worth doing (I enjoy painting and want to finish more)
  • Time bound = provide a deadline (October 31st)

If your goal meets the five criteria it increases your chance of actually finishing it. If not, then rework the wording until you have something that works for you.

Step 2: Write Down the Major Milestones

Now it’s time to break that goal down into manageable steps. Under your main goal, write down the big steps it will take to get there. Leave some space between each task to add in the details.

  1. Assembly the Model
  2. Paint the base colors
  3. Paint the details
  4. Weathering
  5. The base
  6. Photograph it
  7. Post it to the blog

Each step should help get you toward the end goal and in a way, SMART. They don’t have to be equal in time and effort through. In my example above, painting the base may only take an hour, while the details and weathering could take weeks. If you need to, break down some of the big steps into smaller blocks.

Step 3: Break Milestones Down into Tasks

For some, this may be getting to details and prescriptive, so if you are happy with the milestones, skip this step. For others, especially for those who love to cross things off, it can be helpful to break down the milestones into smaller, detailed tasks.

So for 1. Assemble the Model, may break down into:  Clip bits from the sprue, assemble the legs and body, adjust the pose, assemble the arms, attach the details.

Each task should be what you could accomplish in a hobby session. So if you are able to get half an hour in each morning, then what can you do during that time. The small, incremental tasks give you a more focused look at what to do next and what you have left to do.

Step 4: Set Deadlines for Milestones

For each of the major milestones, set a deadline for completing it. This is why challenges like Dreadtober are so popular. The deadline provides an incentive to put in a few extra hours and just finish the step.

The deadline creates an urgency but also helps make it more manageable. If you have a big project to finish (like completing an army before an event) you can break each milestone down into individual deadlines. This unit will be completed this day, that unit the next week. It gives you a sense of how far along you are and if you really are falling behind or way ahead.

Organizing

Awesome, at this point, I hopefully have convinced you of the importance of goals, planning, and all those amazing milestones.

But how do you keep track of it all?

A lot of that depends on how you work and if you like digital or old-school pen and paper. For the digital people, I have two suggestions that I have used. Both are free and aim at two different styles of organizing tasks and projects.

1. Trello

Trello is the tool that I use every day at work and for this blog. You can think of it as a digital note card holder where each card is organized into little piles. I wrote up how I use Trello to organize in another post that is well worth the read.

Who it’s for: I like Trello because it’s more big picture and you visible move cards around. You could add checkboxes but I found they aren’t helpful for my work style. If you use sticky notes on your desk/wall or coloring in Excel documents with progress, then check out this tool.

2. Asana

I tried Asana, and found it to be easy to create projects and break them down into milestones and tasks. While the style didn’t work for me, I know many people love it for getting things done.

Who it’s for: anybody who likes lists, crossing of checkboxes, and tracking priorities will like Asana.

3. Pen and Paper

Not everybody likes fancy apps, I know some of you like the analog way of doing things. To be honest, when I’m not using Trello for keeping track of things, I am a heavy notebook user.

My favorite method of tracking projects in a notebook is the Bullet Journal. A creation of Ryder Carroll that keeps the process simple so you can focus on getting the task done rather than using the journal. Simple bullet points done for today’s tasks and reviewing previously unfinished tasks.

The Process

No matter which tool you decide to use, break down your milestones and tasks into it.

For Trello I create a column for “Waiting, Built, Painting, Finished, Photographed, Posted.” Each project gets a card (like Mentor Legion Dreadnought) that moves from column to column as I progress. You could even break it down further for larger projects and create cards for the base coat, highlights, weathering, decals, etc.

In Asana or the notebook, create a checkbox for each milestone and add subtasks to each. Break it down as detailed as you want without getting overwhelmed with the process.

The idea of using these tools is to help track progress and see what needs to happen next. If it is getting in your way, do something different. Try a different tool or don’t go as detailed. Think of it just as you would a paintbrush, make it work for you or try a different brand, but don’t let it hold back your painting.

Accountability

A plan is great, it keeps you on track and allows you the satisfaction of checking off boxes.

But a plan without action is only a fancy plan. To help you accomplish your goal, find others to keep you accountable.

This is why challenges and blogging are so popular in our hobby. It brings the community together to encourage each other and provide that gentle nudge when we don’t do something we pledged to do.

So if you are having trouble making progress, share your goal on social media, your blog, a Facebook group, where ever you hang out to play games. Get some other people to check in on you and keep you going.

Keeping it Going

Finally, just do the work. You can make glorious plans, get all your friends following your progress, but you now need to do the work. A plan sets the direction, accountability keeps wind in the sails. And perseverance gets you to the other shore.

So in wrapping it up, planning your hobby project comes down to the following:

  • Set small, incremental milestones
  • Keep at it every day
  • Don’t be afraid to try something new
  • Have fun

Dreadtober Challenge: Planning Your Hobby Project

Here it is! Dreadtober begins today! Well at least the first challenge: planning your hobby project.

Dreadtober Challenge: Planning Your Hobby Challenge

I think I just hear about a third of you grown about having to plan. “I’m an artist, not a cube-man!” “It’s just a hobby, planning is for work.” Or something along those lines.

But the truth is, projects (even artistic, hobby ones) have a much better shot at being accomplished if you put together a simple plan. Notice, it doesn’t have to be a giant Gantt chart, 90-page operating plan, or even anything formal.

Instead, the point of this challenge is to prepare so that the project goes smoother, and you can spend more time building, painting, and interacting than worrying about what color to paint it.

The Challenge: Plan your Dreadtober Project

One of the best pieces of advice for planning is: write down what you want to achieve. Start with the end in mind and we will work back from there. Do you have a Space Wolf Dreadnought missing out on battle honor by sitting in your bits box? Always wanted to build the new stealth Tau suit? Or even have a brand new technique you have been dying to try.

No matter what it is, write down what you main goal of Dreadtober will be.

How to get there

A marker has been planted, now it’s time to figure out how to get there.

The first is pretty easy: what model(s) do you need, and do you already have them? If you don’t, now is probably a good time to swing by your local store, order them online or barter with your friends.

Next, what do you need to pull off any of the conversions, paint schemes, or techniques you want to try? Make sure you have all the supplies ready to go, or again, pick up what you need. I found putting everything in a single container really helps to ensure nothing gets misplaced.

Result: Make the declaration

It’s now time to make the declaration of what you will accomplish during Dreadtober. Just as putting a plan together helps it get done, sharing that plan with others has also been proven to significantly ensure that you follow through.

So share it on Twitter and Facebook (using #dreadtober so we can see it!), write it in a blog post, and if you are on the participant email list, send it to me to add to the Showcase this Saturday. Not on the email list? Sign up below and I will send you a reminder email on Friday to submit your work.

Helpful Tutorials

Every week I will be sharing some helpful tutorials to help you accomplish this week’s project.
This week’s select veers out of our hobby niche as I wasn’t able to find any actually talking about how to plan. So, instead, you get to experience a bunch of new sites 🙂

Making Time

The biggest obstacle we all face when it comes to getting our hobby time, is squeezing it in. I do my best to wake up extra early so I can get some done before my sons wake up and I head off to work, but it can be demanding. This is why I liked an article I found by Kristine on making time for hobbies. I especially like her point on setting up a painting area for your kids to join you in the hobby.

Using Trello for Hobbies

I personally use Trello to keep track of all my projects. From painting projects, blog posts, all these Dreadtober posts, to work tasks. I wrote up how I organize my hobby using Trello. It’s free and easy to use so it might be a good way to organize your progress.

Bullet Journal

If you are more of paper and pencil person, then check out the Bullet Journal. While you can buy special notebooks to do it, I use the method he describes with a blank Moleskin. With very low overhead, you can write down tasks that need to be completed, and notes to keep track of.

Get Ready!

Dreadtober 2016 officially starts next Saturday, October 1st. With your brand new plan in hand, I have no doubt that you will be ready to go!

Have some more tutorials on planning and organizing your hobby project? Hit them up in the notes below so we can check them out.

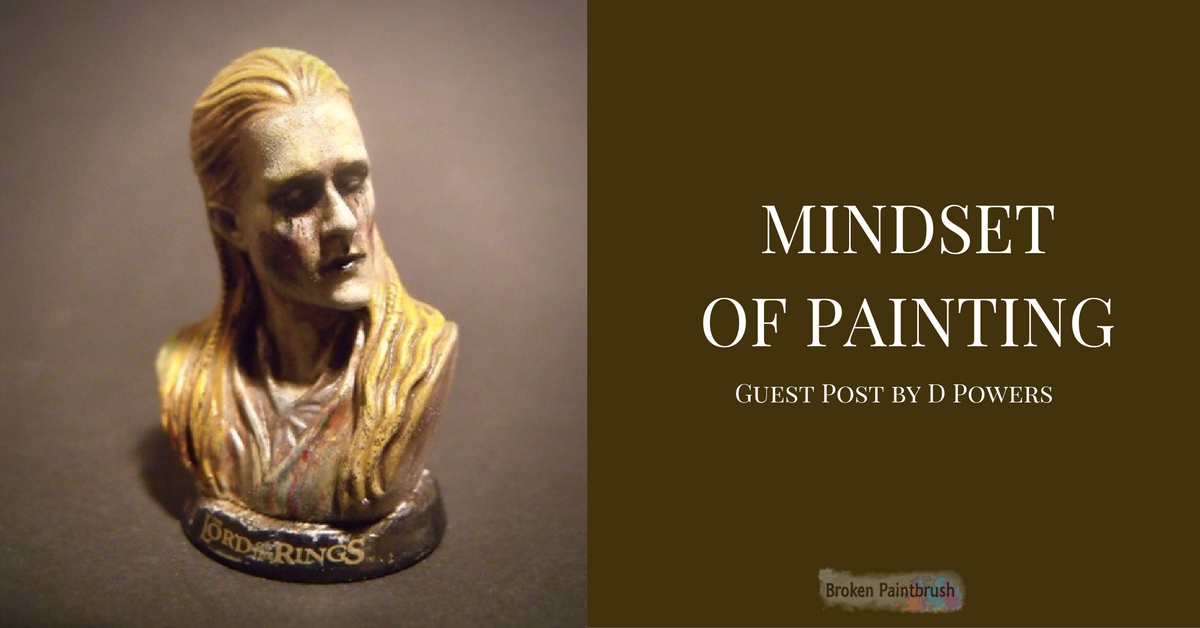
Guest Author D Powers on the Mindset of Painting

Guest Post: The mindset of painting

Hallo!  D Power from I’m Alone with a Dream here.  In this guest post, I’d like to ramble on a bit about a favored hobby horse; the mindset behind PAINTING.

Guest Author D Powers on the Mindset of Painting

I’ve known of people starting out collecting and painting wargaming miniatures with high hopes and great excitement. Later they become frustrated with what, in truth, is their own style of painting that’s trying to develop– while they repress it with images of what they think is “correct.” Something like what the ‘Eavy Metal studio has produced.

While you get neither points nor bad marks for imitating someone’s work you admire, you should not be discouraged from being yourself.

Nobody is Norman Rockwell

A veteran illustrator friend of mine told me of a time when Norman Rockwell was so popular that everyone tried to imitate him, putting others down for not copying the “proper” style.  While this peer pressure isn’t quite so present in the wargaming community, some people tend to think it is, and that’s sad really.

Norman Rockwell's Art Critic

Art Critic, Norman Rockwell 1955. Fair Use

Time passed, and because nobody was Norman Rockwell, nobody could copy him perfectly– but having spent their days practicing the way another person painted, they had no place in their minds for any style of their own, which I think is even sadder.

The truth is, there isn’t any perfect artist, and there is no “wrong” way to paint.  Whatever you choose to paint– it doesn’t even have to be little grey men– this is your hobby and you, the consumer, should be allowed do as you wish.  I, for one, play 40K very little, but I love the lore, and I kitbash and paint as a form of expression, like an ordinary artist would through his canvas.

Many people have noted a likeness in my work to that of the legendary John Blanche– which I won’t deny– I love his work to bits and have been greatly inspired by him; actually, it was his work that drew me into the worlds of Warhammer.

Sister of Battle by John Blanche

Sister of Battle by John Blanche – Used without permission

A Bit of Backstory

Let me now expound on a bit of my backstory in the hobby.

The first time I was introduced to the Blanchitsu style (I believe) was in Codex: Witch Hunters.

I was a small, easily-influenced boy at the time and after being highly disturbed by the cover, I saw John’s Sister of Battle painting and was completely blown away.  Up until now I had only seen– and was now a little unimpressed by– the clean, crisp lines of the studio miniatures on the backs of the boxes and such a gritty, lore-rich image grabbed me immediately.

I also fell in love with the sister superior, all of twelve years old I was, but it was the Imperial rabble in the background that amazed me so. Hooded cultists and white-haired mendicants. It had such a powerful, dark, medieval air to it– and the fact that they seemed to be fighting on a GRAVE WORLD.

I decided then and there to become the next John Blanche, or at least the New Zealand equivalent, and when I finally bought my first space marines four years later, I set about to just that– but that’s when I realized I didn’t now a thing about painting.

I looked up tutorials and bought model painting guides and was completely overwhelmed by what was the “proper” way.  Wet palette?  14 different brush sizes?  Thinning agents?  Whatever was an airbrush?

Everyone had their “correct” way and no matter what I tried,  I was never comfortable, never happy, and my sprig of hope quickly seeded into despair.  Unaware that most of the tutorials were written by veterans of the hobby I expected to achieve what they did and these “correct” images only made me feel worse about my attempts.

Correcting the Mindset of Painting

You need to stand back and look at the bigger picture.

Realize you HAVEN’T been painting for 10+ years. Realize you don’t NEED to copy what they’ve done. And while painting guides are useful for technique– believe me, I’m not saying they’re at all wrong, but nothing can teach you your own style except yourself, and that’s the most important thing to remember.

Also, you need to be aware of the fact that– provided you practice at it– your style WILL improve and change as time passes.  Observe the next two images, pretty much how my style has developed over five years, starting from the left:

The first three years of D Power's Space Marines

The first three years

Create Your Style

When I began creating the Sagodur Fjorlag Chapter, I chose yellow and black for their colours. One because the first ever image of an Astartes I saw was an Imperial Fist, so yellow was always the “proper” colour in my mind– and here I go slipping into this rut I preach against!– and second, John always used a lot of yellow in his artwork, and I felt Averland Sunset evoked his saintly name well.

First and foremost I didn’t know how to achieve anything the guides mentioned.  I mixed a base with a layer because I was told mixing was “the done thing.” Ouch.

Time passed, and I began to discard their advice– and with my own experimentation came exciting discoveries. Such as the fact that Citadel paints are water-based!  More, thinner coats and washes made me feel like a pro.  I continued to practice, getting more and more carried away with different coloured washes and weathering, and I realized that I had strayed from the style I thought was “right.”

The next two years

The next two years

The chap on the far left was where I decided to start over in my quest to become the next Blanche, but despite my practicing, I still couldn’t match John’s level of grittiness and colour.  I started to despair again– why was I not “improving”?  What was I doing wrong?

Then I looked back and saw I had done nothing “wrong.”  I had been inspired to paint a certain way, and I took that seed of inspiration and grown it into my own rust-caked flower of artistic ability.  I could never be John Blanche.

But I could be the Lonely Kitbasher.

legolas_-_lonely_kitbasher

What you discover can be applied to so much more.

My sentimental ramblings have gone on too long!

To summarize then– be inspired, find an artist, or artists you like, and practice, practice practice.  You don’t NEED to copy them; the only “wrong” thing to do is suppress your own style’s development.

If you let it show through what you paint then the result will be exciting, satisfying– maybe even surprising– and all those other nice words that go with being truly happy in your hobby.

Remember that.

Bye bye for now.

D

If you haven’t seen D’s work, make sure you check out his blog Alone with a Dream. It is a fantastic collection on inspired conversions and, as he mentions here, he own take at the Blanchistu style. – Joe

Hobby Blog Collection Good Reads #36

Good Reads 36

Good Reads is all about sharing some awesome content from fellow hobby bloggers. Every day you guys are building, painting, and writing some amazing things. I try to gather some of my favorites here to share with all of my readers.

Hobby Blog Collection Good Reads #36

Necron Triarch

Necron Triarch Praetorian with green and blue

Necron by Grenn Dal

Necrons have always been one of those armies that I have wanted to do (killer robots are irresistible after all!). I also love blue, so when I saw Grenn’s Necron Triarch Praetorian, I had to share him here. It’s a fantastic metallic blue and green that adds interest to the metal warrior.

Red Hunters

Red Hunters from Deathwatch

Red Hunters by Gothmog

I hadn’t heard of the Red Hunters until Gothmog’s post on them, but I really like how he used the Death Watch set to build them. It’s a great use of all those inquisitor bits for this specialty chapter and yet not painting more black and silver.

Concrete Walls

Painting Concrete Walls

Concrete Walls by Scar Hand Painting

Line of sight blocking terrain is important for any gaming system and concrete walls are the simplest ways to do this. Scar Hand Painting wrote up a tutorial on how he painted the Micro Art Studio wall set. Fairly simple, but very striking.

Sons of Horus Levithan Dreadnought

Leviathan Dreadnought by Red Scorps

Leviathan Dreadnought by Red Scorps

It’s not Dreadtober yet, but Red Scorps painted up this beautiful Leviathan Dreadnought for his Sons of Horus. I love the little details like the ruined Tarantula under his feet and the battle damage. To see the fully, army, he also posted a few shots of the beauties.

Glowing Malifaux

Malifaux Metal Gamin with Glowing Metal

Malifaux Metal Gamin by Cameron

Malifaux is an interesting looking game full of diverse creatures and characters. Cameron added two Metal Gamin for his Arcanist crew to summon. He did a great job of contrasting the muted grey bodies with the glowing, red weapons.

Wrap Up

That’s it for this week. I hope you enjoyed this selection of posts from your fellow hobby bloggers and you left them a comment and follow.

Dreadtober Painting Challenge

A want to leave a quick note here about #dreadtober. If you haven’t signed up yet, go to that page and sign the form there (it’s a different email list than the Brush Stroke newsletter). Not a Dread fan?

Not a Dread fan? Have no fear, Good Reads and Watch This will continue to be posted and will be Dread-free. I will also have tutorials, that while are themed for Dreadtober, should still being helpful tips to your other hobby projects.

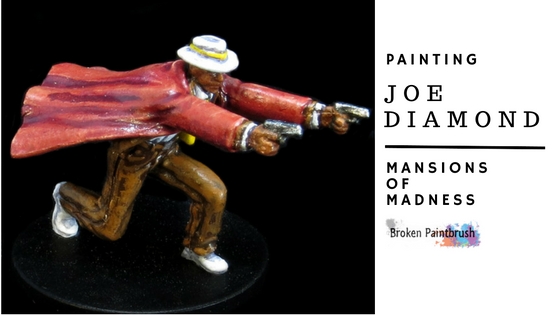
How to Paint Joe Diamond from Mansions of Madness

Painting Joe Diamond a Mansions of Madness Tutorial

Mansions of Madness provides a great mix characters to investigate the mysteries. Some are the intellectuals to solve riddles, and others are like Joe Diamond. A classic Noir PI, he has his duster flapping and pistols ready.

How to Paint Joe Diamond from Mansions of Madness

Unlike Noir, I wanted Joe to have some color – makes the game more fun in a way. So a red duster, yellow tie, and bright white hat and shirt fit the bill. All the paints used were from the Vallejo range. You can grab all the colors with either the Game Color Set or the Skintones Set.

Shirt, Shoes, Hat

  • Game Color Wolf Grey
  • Game Color Sombre Grey
  • Game Color Dead White

Jacket, Pants

  • Game Color Charred Brown
  • Game Color Beastly Brown

Duster

  • Model Color Scarlett Red
  • Game Color Tan
  • Game Color Khaki
  • Game Color Red Wash

Tie, Hatband

  • Game Color Gold Yellow
  • Game Color Sun Yellow

Skin

  • Model Color Mahogany Brown
  • Game Color Parasite Brown
  • Game Color Brown Rose
  • Model Color Dark Brown Wash

Base Coats

The first step was to paint all the base colors throughout the model. This helps to block out where each color will go and make sure I have everything balanced.

Painting Tutorial for Joe Diamond

First I must apologize as most of the pictures from the actual base coat step were lost in a digital mixup. So the pictures above have the white and skin already done. For the skin, he followed the steps in my Painting Dark Skin tutorial.

Starting with the inside and working out:

  • Skin: Mahogany Brown
  • Shirt, hat, shoes: Wolf Gray
  • Jacket and Pants: Charred Brown
  • Duster: Scarlett Red
  • Tie: Gold Yellow

Shirt and Tie

As noted above, I lost a few pictures on Joe Diamond here, so I had already finished the skin here as well as missing a few in between steps. But the hat and shirt were painted first since they were on the inside.

Painting the shirt and tie of Joe Diamond

I used Sombre Grey to carefully wash the recesses of the shirt and hat. It provides a nice shadow without being as harsh as black. I then went back and highlighted with Dead White.

The tie and hat band were done in a similar manner.

Red Cape

As Joe’s red duster is the main thing you see, it was the area I wanted to focus on. To this extent, I went with an extreme highlight followed by a glaze.

Mansions of Madness Joe Diamond

The base coat of Scarlett Red provided a rich base color. This was followed by highlights of Tan and then Khaki. By themselves, they look really rough against the red – very stark. That’s ok as I then went back and provided a couple of layers of Red Wash (using it as a glaze here though).

The brown in the highlights provided a great base for the glaze to hang on to while providing nice highlighting.

Joe Diamond Showcase

After a few more details like painting his pistols GunMetal and a highlight to the pants with Beastly Brown he was finished.

Mansions of Madness Joe Diamond painted

All finished up and ready to protect his fellow investigators and take out a few cultists along the way.

Status 6 Weeks into having Guest Authors

Guest Post Status – Six Weeks In

About two months ago I put a call out for guest writers on Broken Paintbrush. I wanted to add some diversity of thought to the site, new perspectives on the hobby, and give others a chance to write.

Status 6 Weeks into having Guest Authors

We are now six weeks in and I wanted to share the guest post status and do another call out for anyone interested.

To date, I’ve had four guest writers and five posts (Thor has gone twice already!).  I’ve received emails and ideas from five more writers who I hope to post soon as well. My hope is that after showing you what other guest writers have done, it will get you to think about writing as well!

Thor Talks about Blogging

How to Write an Effectivev Article Title

The first guest I had, and now twice, is Thor from Creative Twilight. He started a series where he will discuss how to improve our blogs, tailored specifically to us hobbyists. His second post dived into the importance of writing a strong title for your article.

While Thor has his own awesome blog, he decided to write on Broken Paintbrush to talk about blogging – a subject that was a little off-topic on his main site. As I have talked about hobby blogging before, he thought it would be a great addition to add here.

Sean Shares Oldhammer

Oldhammer teaser

My second guest author was Sean from Wargaming Corner where he shared with us why he enjoys the sub-genre of Oldhammer. This post was really well received, I think because so many people have nostalgic feeling towards the ‘good old days.’

Sean decided to guest post on Broken Paintbrush to help spread the word about Oldhammer and reach a different audience than his blog normally reaches. A cool win-win!

Andrew’s Light Up Tanks

Adding LEDs to 40k Tanks

While previously written on his blog, Andrew shared how he uses LED lighting on his tanks. It was a fun post for me to re-share as I’ve been toying with the idea for years. And Andrew made it seem so simple!

This was a great example of re-posting, taking his original post and refreshing/editing it before posting it here. Andrew had felt that his blog had been neglected and that this tutorial should have new life breathed into it. While I don’t want to do this method often, it is a great way to unearth some of your old posts.

Interview with Adam Jones

Adam Jones and the Golden D6

The last guest post was an interview with Adam Jones of the Golden D6. Adam is a busy man trying to build his media empire. So rather than have him write out a whole post, we did it as an email interview.

For my readers, I hoped this interview was enlightening on what goes on behind a hobby magazine ‘company’ and for Adam, it was a nice piece of exposure to potentially new readers. I’m not into promotions for promotion sake, but Adam is constantly giving back to the hobby community and the interview helped show that.

You Could Be Next

If you want to write for Broken Paintbrush, even if it is just one post, let me know! I put together a rough guideline on guest writing if you want to check it out. Or just sign up in the form below to get more info or shoot me an email at joe@brokenpaintbrush.com. I would love to have you add your voice.

How to Paint Eyes with Kuro Cleanbrush Minis

Watch This: How to Paint Eyes with Kuro Cleanbrush Minis

They say eyes are the window to the soul, but probably only if you paint them straight. So learning how to paint eyes help make your faces look more believable and add character. With today’s Watch This, we have Kuro Cleanbrush Minis who shows off some nice tips.

How to Paint Eyes with Kuro Cleanbrush Minis

Sometimes it can be easier to watch someone show off a technique through a video than through pictures. So check out the video below and then I’ve got a cheat sheet underneath.

How to Paint Eyes

If you weren’t able to watch the video, I’ve summarized the main points below. The biggest takeaway: use the brush tip and clean your brush as the paint dries.

General Tips

  • Don’t use pure white for the eye, instead, choose an off-white
  • Keep the paints thin so it doesn’t add texture to the eyes (use something like airbrush medium)
  • Painting the eyes or the skin first is a matter of choice and how easy it would be to do one way or the other
  • Don’t use a tiny brush (he used a Raphael 0, I like WarColours) so it doesn’t dry too quickly

Paint the main eye

  • Fill eye socket with dark brown or dark blue to allow the eye to pop
  • Use the tip to paint Leather White
  • Flip and move the model around to get the right angle

Paint the Iris

Painting the Iris with a small line

  • Paint a small line in black to get a sense of where they should go
  • Add more black paint to fill in the full iris
  • Flip the miniature to paint the other eye
  • By painting them slightly to one side of center, it adds some interest to the face
  • ‘Fake’ the iris by adding a small dot to the center (I’m thinking it works best on large-eyed models)
  • Just need to sell the effect on, doesn’t need to be perfect circles
  • Add a small dot of pure white in the corner to make it shine

Wrap Up

Painting eyes can be difficult to get right. But with a few tricks that I hoped you learned from the video, I hope it will become easier for you. Make sure you give Kuro Cleanbrush Minis a follow for more video tutorials.